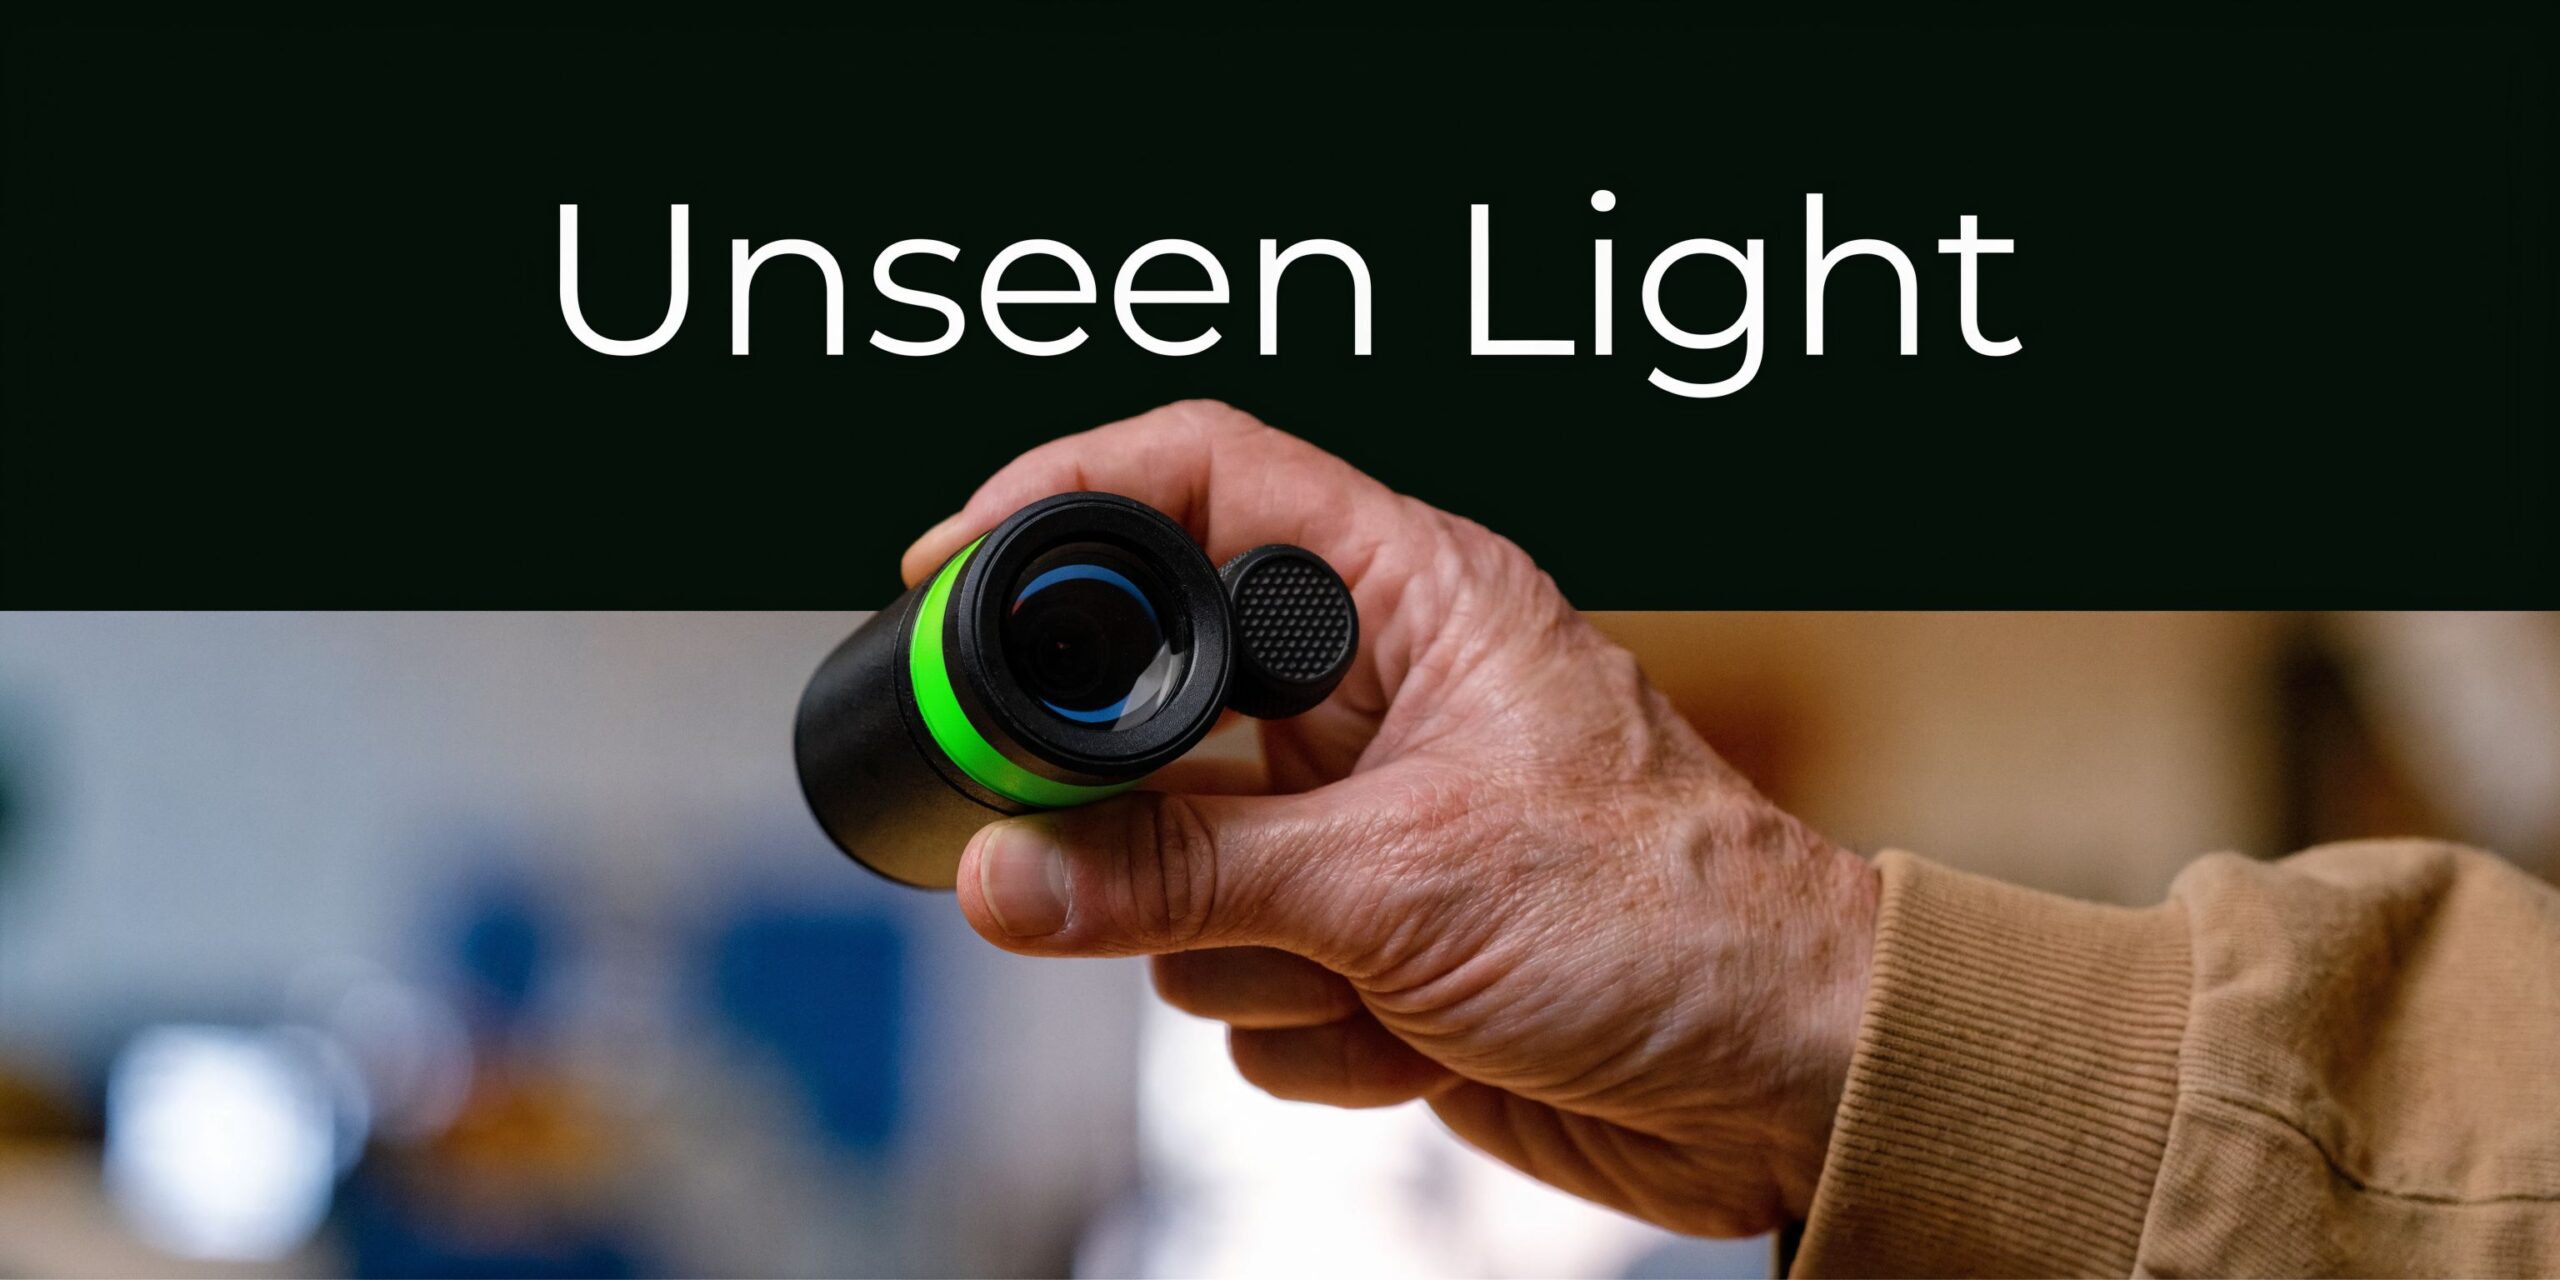
How to See IR Light: A Tactical Guide for 2026
A lot of people land on this problem the same way. You unbox an IR illuminator, mount an IR laser, or start troubleshooting a security camera that claims to have night vision, and then realize you cannot confirm any of it with your naked eye. The gear may be working perfectly, or it may be dead, misaligned, or set up wrong. In the dark, that uncertainty costs time. In the field, it can cost a lot more than time.
Infrared light surrounds modern low-light work. Hunters use it to support night vision. Officers and security teams rely on it for observation, aiming, and surveillance. Home and commercial camera systems use it every night. But learning how to see ir light means understanding one hard truth first. You are not training your eyes to see the invisible. You are using sensors and tools that can detect it for you.
Your Introduction to the Unseen World of Infrared Light
A common field problem goes like this. The IR laser is mounted, the illuminator is powered up, and the area in front of you still looks dead black to the naked eye. At that point, the question is not whether infrared exists. The question is which kind of infrared you are trying to verify, and which tool can confirm it.
The distinction is important because not all IR is the same, and not all gear detects the same part of it. A phone camera can reveal many near-infrared emitters. A thermal optic reads heat signatures from a different band of the spectrum. Confuse those categories and it becomes easy to misread a working setup as a failed one, or trust a setup that still is not ready for use.
Infrared sits just beyond visible red light. That basic placement matters more than the history lesson, because it explains why a digital sensor may pick it up while your eye never will. If you want a quick refresher on where IR fits relative to visible light, this overview of the spectrum of light gives the right baseline.
For hunters, night vision users, and tactical professionals, the practical questions are usually straightforward:
- Is the IR source emitting at all
- Is the IR laser close enough to alignment for further zeroing
- Am I looking at near-IR illumination through a sensor, or heat through a thermal device
Those are separate tasks with different tools.
The TV remote test is useful because it teaches the first principle fast. A camera sensor can often show you near-infrared light that your eye cannot detect. What it does not tell you is whether your laser is properly zeroed, whether your illuminator has enough throw for your environment, or whether your optic is reading reflected IR versus heat.
Use the simplest tool that gives a reliable answer, then step up when the job demands more.
For a quick function check, a phone or digital camera is often enough. For aiming, positive identification, and real low-light work, use the night vision or thermal device built for that role. That matters for performance, and it matters for safety. Never stare into an IR laser because you cannot see the beam with the naked eye. Invisible light can still injure your eyes, and the higher your output and the tighter your beam, the less room there is for sloppy handling.
Field takeaway: A glow on a camera screen usually confirms that an IR emitter is producing energy. It does not confirm a proper zero, precise alignment, or field-worthy range.
Using Your Smartphone to Detect Near-Infrared Light
A phone camera is still the fastest way to answer the first question that matters in the field. Is your IR source emitting at all?

The TV remote test proves the concept. Point the remote at your phone camera, press a button, and watch the screen. If that camera sensor is sensitive to near infrared, the LED usually appears as a pale white, purple, or magenta flash. Many remotes use IR light around 940 nm, which your eye cannot see but many digital sensors can still pick up.
For tactical users, that same principle is useful for a quick confirmation on an IR laser, illuminator, helmet light, or camera-based IR setup. It is a function check, not a performance test.
A better phone method for tactical checks
Use the phone like a diagnostic tool, not a party trick.
- Test both cameras. The rear camera often has stronger image quality, but the front camera on some phones sees IR better because its filtering is weaker.
- Kill ambient light. A dark room, shaded garage, or after-dark setup makes weak emitters much easier to spot.
- Aim at a safe backstop. For lasers, use the same discipline you would use with visible aiming devices. Never point an IR laser at people, animals, vehicles, or reflective surfaces during a check.
- Watch live view. The screen shows pulse behavior, intermittent output, and intensity changes faster than reviewing still photos.
- Keep expectations realistic. A phone can confirm output and help with rough alignment. Final zero belongs under night vision.
Some users place exposed 35mm film over the lens to cut visible light and make IR stand out more clearly. It can help, but results vary by phone, by filter quality, and by how aggressive the camera's IR-cut filter is. For anyone setting up surveillance or observation gear, this also overlaps with practical infrared lighting for cameras considerations.
What the phone method does well
A smartphone is useful for a few specific jobs:
- Basic emission checks. Confirm the unit is turning on.
- Troubleshooting setup problems. Weak batteries, bad tailcaps, loose mounts, and faulty switches show up fast.
- Rough pre-alignment. Good enough to see whether an IR aiming device is in the ballpark before finer work.
- Checking camera-mounted IR LEDs. Handy for trail cams, security gear, and vehicle-mounted observation setups.
It is far less useful for judging beam quality, usable range, or exact point of aim. A bright splash on a phone screen can look convincing while telling you very little about how that illuminator will perform through night vision at distance.
Common failure points
False negatives are common. One phone may show an IR source clearly while another shows almost nothing.
That usually comes down to sensor design and built-in filtering, not dead gear. If a known-good remote appears on your screen but your illuminator does not, the issue might be the device. If neither source appears, the phone is the first suspect.
A few field habits improve the odds:
- Step back a little. Too much intensity at close range can wash out the emitter and hide the hotspot.
- Reduce reflective clutter. White walls, mirrors, windows, and glossy paint can create bloom and false impressions of beam shape.
- Compare brightness settings. Some illuminators are hard to detect on lower output in partial light.
- Keep laser exposure brief. A quick check is enough. Parking a strong IR beam on a phone sensor is unnecessary and careless.
Practical tip: If you see any glow on the screen, you have evidence of near-IR emission. You do not yet have proof of a clean zero, field-worthy throw, or safe setup for live use.
How to Verify IR with Digital and Security Cameras
Phones are convenient, but they are not the only option. A standard digital camera can be a stronger diagnostic tool because the larger body is easier to stabilize, the lens may give you a cleaner view, and live view on a bigger screen makes faint emitters easier to spot.
A DSLR or mirrorless camera in live view often reveals near-IR output the same way a phone does. If you are trying to check a helmet-mounted illuminator, an aiming laser, or an off-rifle flood light, a tripod-mounted camera gives you a steadier reference than a handheld phone.
Using digital cameras for confirmation
The process is straightforward:
- Set the camera to live view
- Dim the room or wait until dark
- Aim the suspected IR source toward a safe backstop
- Observe the emitter and hotspot through the screen
- Compare multiple brightness settings if the device has them
The main limitation is the same one that affects phones. Some cameras have strong IR-cut filtration and will not show much.
If your digital camera sees nothing, do not jump straight to “gear failure.” Test the same source with a second device, preferably one known to show IR.
Checking security cameras the practical way
Security cameras solve a different problem. Here, you are usually asking whether the camera’s built-in night illumination is engaging when light drops.
In many systems, the IR LED ring around the lens shows a faint dull red glow in darkness. That is often your first sign that the night mode is active. If there is no visible activity, start basic:
- Power and settings: Confirm the unit has power and night mode is enabled.
- Obstruction: Dirt, tape, covers, and spider webs can block the emitters.
- Day-night switching: Some cameras get stuck in daytime mode if the sensor or menu setting is off.
- Distance expectations: Even when IR is on, it may not illuminate the whole scene the way users expect.
If you are building or troubleshooting a surveillance setup, this guide to infrared lighting for cameras gives useful context on how camera-side IR support works.
A useful mindset for troubleshooting
Think in layers. First confirm the emitter. Then confirm the camera can detect it. Then confirm the scene is being illuminated well enough for identification.
Those are separate checks. Too many users skip to the last one and miss a simple hardware or settings issue at the first step.
Infrared Night Vision vs Thermal Imaging Explained
Here, many people get crossed up. In tactical use, “seeing infrared” can mean two very different things.
Night vision works with reflected light in the near-infrared range. Thermal imaging detects emitted heat in the long-wave infrared range. Both operate in darkness. They do not solve the same problem.
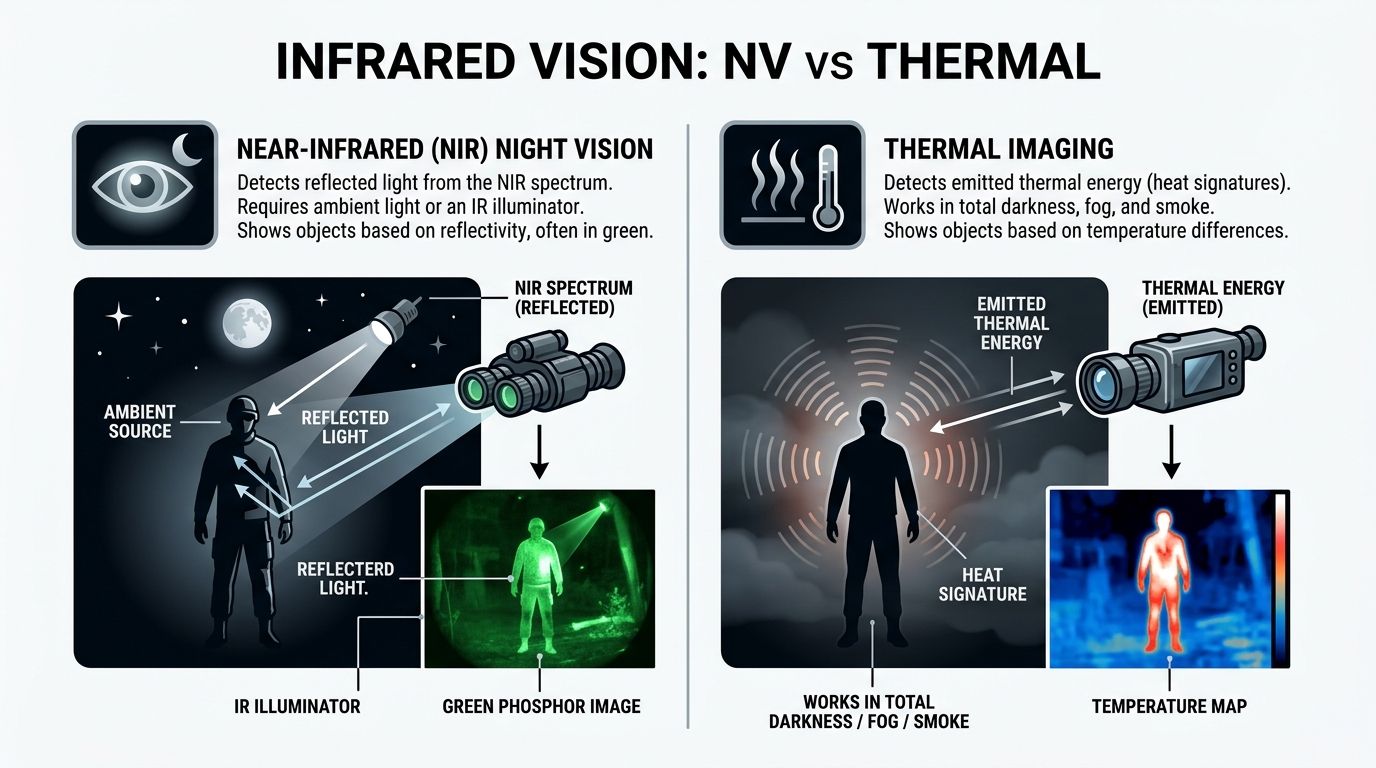
Near-infrared night vision
A device like a PVS-14 does not see heat. It amplifies available light and reflected IR. That is why an IR illuminator acts like an invisible flashlight for night vision users. The device sees the light bouncing off terrain, vegetation, structures, and targets.
This gives you a familiar image. You can read shapes, movement, spacing, and terrain detail in a way that feels closer to normal sight.
The trade-off is simple. If there is no usable ambient light and no illuminator, performance drops hard.
Thermal imaging
Thermal optics do not need reflected light. They detect differences in emitted heat. That makes them excellent for spotting people, animals, engines, and recently disturbed ground against cooler surroundings.
Microbolometer-based uncooled LWIR thermal cameras operate in the 7.5-14 μm wavelength range and can detect a human-sized target at over 1 kilometer in total darkness based on their heat signature alone, boasting a Noise Equivalent Temperature Difference of less than 50 mK (FindLight on infrared sensors).
That capability changes how you search. Thermal is often the faster detection tool. It is not always the better identification tool.
Night Vision vs. Thermal Imaging at a Glance
| Attribute | NIR Night Vision (e.g., PVS-14) | LWIR Thermal Imaging |
|---|---|---|
| What it detects | Reflected near-IR and ambient light | Emitted heat signatures |
| Needs an illuminator | Often, in very dark conditions | No |
| Best at | Navigation, terrain reading, scene detail | Detection of warm targets |
| Image style | Detailed image based on reflected light | Contrast image based on temperature difference |
| Common problem | Struggles in total darkness without support | Can hide fine visual detail |
| Typical use | Movement, aiming, observation | Search, detection, scanning |
Which one answers your actual question
If your question is, “Is my IR laser working,” thermal is the wrong tool.
If your question is, “Where is the person in the tree line,” thermal may answer it faster.
If your question is, “Can I move through this terrain without breaking an ankle,” night vision often gives the more usable image.
Key distinction: Night vision shows you reflected light. Thermal shows you emitted heat. Treating them as interchangeable is one of the fastest ways to buy the wrong device or misread what you are seeing.
Professional Use of Night Vision and IR Illuminators
A hog steps out at the tree line, your laser is on, and nothing looks right through the tube. That is usually not a gear failure. It is usually a setup problem. Professional IR use comes down to confirming output, aligning the device correctly, and controlling spill so the image stays usable.

The phone check and the TV remote trick are fine for basic confirmation. Field use asks more of the system. Hunters and night vision users need to know whether an IR laser is emitting, whether the beam tracks with the optic, and whether the illuminator is helping or washing out the scene. A basic background reference like this guide to infrared illuminator night vision helps, but setup discipline matters more than reading specs.
A practical boresighting sequence
Start in daylight or under white light. Confirm the mount is tight, the rail slot is correct, and the unit is not shifting under recoil. A loose mount can waste a lot of time and make you chase a zero that never stays put.
Then confirm IR output with a phone or digital camera. That does not replace zeroing. It gives a fast answer to a simple question. Is the laser or illuminator turning on?
After that, aim at a safe target with a solid backstop and get a rough reference before looking through night vision. I prefer to do the coarse work first, then fine-tune under NODs at the distance that matches the job. That keeps the process cleaner and cuts down on repeated adjustments under tubes.
A simple sequence works well:
- Confirm visible optic zero first.
- Verify the IR laser or illuminator is emitting with a camera-based device.
- Set a safe target with a non-reflective surface and clear backstop.
- Make rough alignment corrections before going under night vision.
- Refine the aiming point under your night vision device at the intended distance.
Managing the illuminator, not just the laser
A lot of users focus on the laser and ignore the illuminator. In practice, the illuminator often determines whether the image is clean enough to identify what you are seeing.
Use a wider flood for movement, close searches, and terrain reading. Tighten the beam when you need more reach or better detail on a specific area. The trade-off is straightforward. Wider beams give awareness. Tighter beams give concentration and distance.
Too much IR creates its own problems. Wet ground, road signs, glass, pale walls, and light-colored vehicles can kick back enough energy to bloom the image and hide detail. More power is not automatically better. Match the beam shape and output to the surface and the distance.
Safety rules experienced users follow every time
IR lasers still demand the same respect as visible lasers. You just lose the obvious visual warning.
- Do not look into the emitter.
- Do not point IR lasers at people during testing.
- Do not treat invisible light as harmless.
- Do not use a phone check as your final confirmation of zero.
That last point matters. A camera can confirm that the unit works. It cannot tell you the rifle, optic, laser, and mount are all tracking correctly under real use. Final alignment belongs under the device you will run.
Field rule: Use the phone to confirm emission. Use your night vision to confirm performance.
Conclusion Your Next Steps in Low-Light Mastery
Low-light work gets easier once you sort the job by sensor. A phone or digital camera can confirm that an IR source is emitting. Night vision shows reflected near-IR in the way tactical users employ lasers and illuminators. Thermal shows heat signatures, which answers a different question in the field.
That distinction matters for anyone setting up a rifle, checking a helmet-mounted device, or troubleshooting an illuminator before a night hunt. The old TV remote test is still useful because it proves the basic concept. It is also where many users stop too early. A quick camera check tells you the emitter is alive. It does not tell you beam quality, zero, spill, splash off surfaces, or how the unit performs through the optic you will run.
Research is pushing IR detection further. Work highlighted in this EU research summary points to new approaches that could lead to room-temperature IR detectors in the future. For working users, the practical answer stays the same right now. Match the tool to the task.
Use a phone for a fast confirmation check. Use dedicated night vision to verify an IR laser or illuminator the way it will be used. Use thermal when the mission is heat detection, not near-IR aiming or illumination.
Keep it simple. Confirm emission. Confirm performance. Handle every IR source like it can still hurt you, because it can.
Frequently Asked Questions
Why can one phone camera see IR when another cannot
Different phones use different IR-cut filters. Some rear cameras block IR aggressively to improve normal image quality. Some front-facing cameras or older phones let more near-IR through, which makes them better for quick checks.
Can a phone replace a real IR viewer
No. A phone is a verification tool, not a professional aiming or observation solution. It can help confirm output and assist with rough boresighting, but it does not replace dedicated night vision or thermal optics.
Can I use the TV remote test on tactical gear
Yes, with caution. The remote test proves the concept. Tactical emitters may appear differently depending on wavelength, power, and your camera’s filter stack. A dark room and a simple visible-light-blocking filter improve your odds.
Is thermal the best way to see all IR light
No. Thermal does not solve every IR task. It is excellent for heat detection, but it will not answer the same questions as a near-IR capable camera or a night vision device.
Is it safe to stare into an IR source because I cannot see it
No. Invisible does not mean safe. Treat IR lasers seriously, avoid direct eye exposure, and use controlled targets and backstops when testing.
Superior Tactical LLC offers night vision, thermal optics, lasers, mounts, and low-light accessories for professionals and serious end users who need dependable gear, clear guidance, and fast support. If you are building a night setup, replacing a failed component, or upgrading from a basic IR check to mission-ready equipment, browse the catalog at Superior Tactical LLC.