A Guide to the Modern Target Laser Pointer
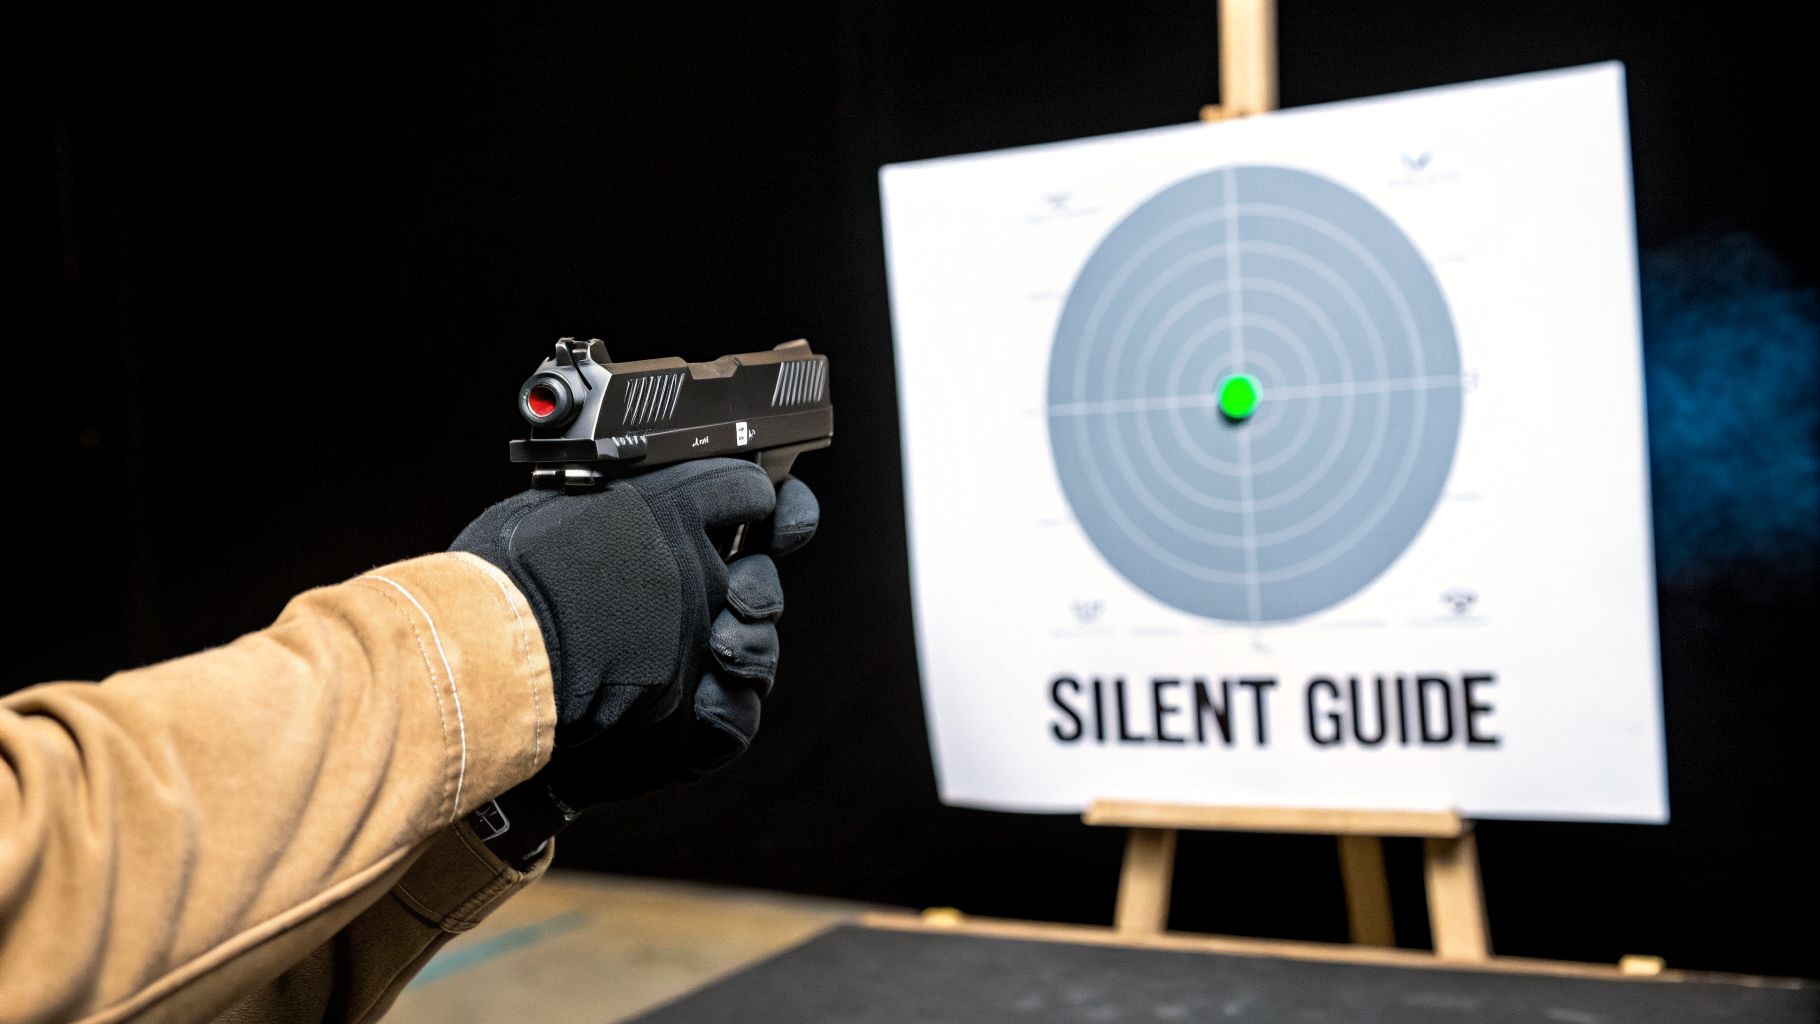
At its core, a target laser pointer is a tool that projects a single, bright dot of light onto your target. For anyone who operates in law enforcement, the military, or even serious hunting circles, it’s much more than that. It's an instant aiming solution that can mean the difference between a fast, precise shot and a fumbled attempt in the dark.
What Makes a Target Laser Pointer Essential Gear
Ever tried to get a perfect sight picture in a pitch-black room? It's a slow, frustrating exercise that puts you at a serious tactical disadvantage. This is precisely the problem a target laser solves, giving you the ability to aim accurately and decisively when light is scarce.
Think of it this way: a laser acts as a direct line from your barrel to the target, showing you the exact point of impact. You no longer have to waste critical seconds aligning your eye with the front and rear sights. This frees you up to keep your head up and your eyes focused on the threat and the environment around it, dramatically boosting your situational awareness. For professionals, that translates to quicker reactions and more confident shots when the pressure is on.
Core Applications and Types
The real magic of a target laser is that it gives you an undeniable aiming point, completely independent of your traditional sights. It’s a game-changer in chaotic situations where getting a textbook sight picture just isn’t going to happen.
They generally fall into two distinct camps, each built for a different world:
- Visible Lasers: These are your red or green dot lasers, visible to the naked eye. They're perfect for low-light training, home defense, and hunting at dusk or dawn—any situation where you need fast, intuitive aiming.
- Infrared (IR) Lasers: These are the covert operators. The dot they project is completely invisible to the naked eye and can only be seen with night vision gear. This makes them the go-to choice for military and law enforcement units conducting operations in the dark.
A target laser fundamentally changes how you engage a target in low light. It bypasses the complex mental process of aligning sights and allows for an instinctual, "point-and-shoot" capability that is both faster and more intuitive.
The industry's growth tells the story of just how critical this tech has become. The global market, which includes these targeting models, was valued at USD 2.99 billion in 2026 and is on track to hit USD 4.47 billion by 2032. As you can see in the market projections, that surge is largely driven by defense contracts, proving the tactical edge these devices provide.
The Advantage in Critical Moments
When seconds are the difference between success and failure, a target laser offers a powerful advantage. By radically simplifying the act of aiming, it frees up your brainpower to focus on what really matters: assessing the threat, moving, and communicating. Whether you're an officer clearing a building or a hunter tracking game in fading light, this tool delivers a clear, dependable aiming point that elevates both your performance and your safety.
Choosing Your Spectrum: Visible vs. Infrared Lasers
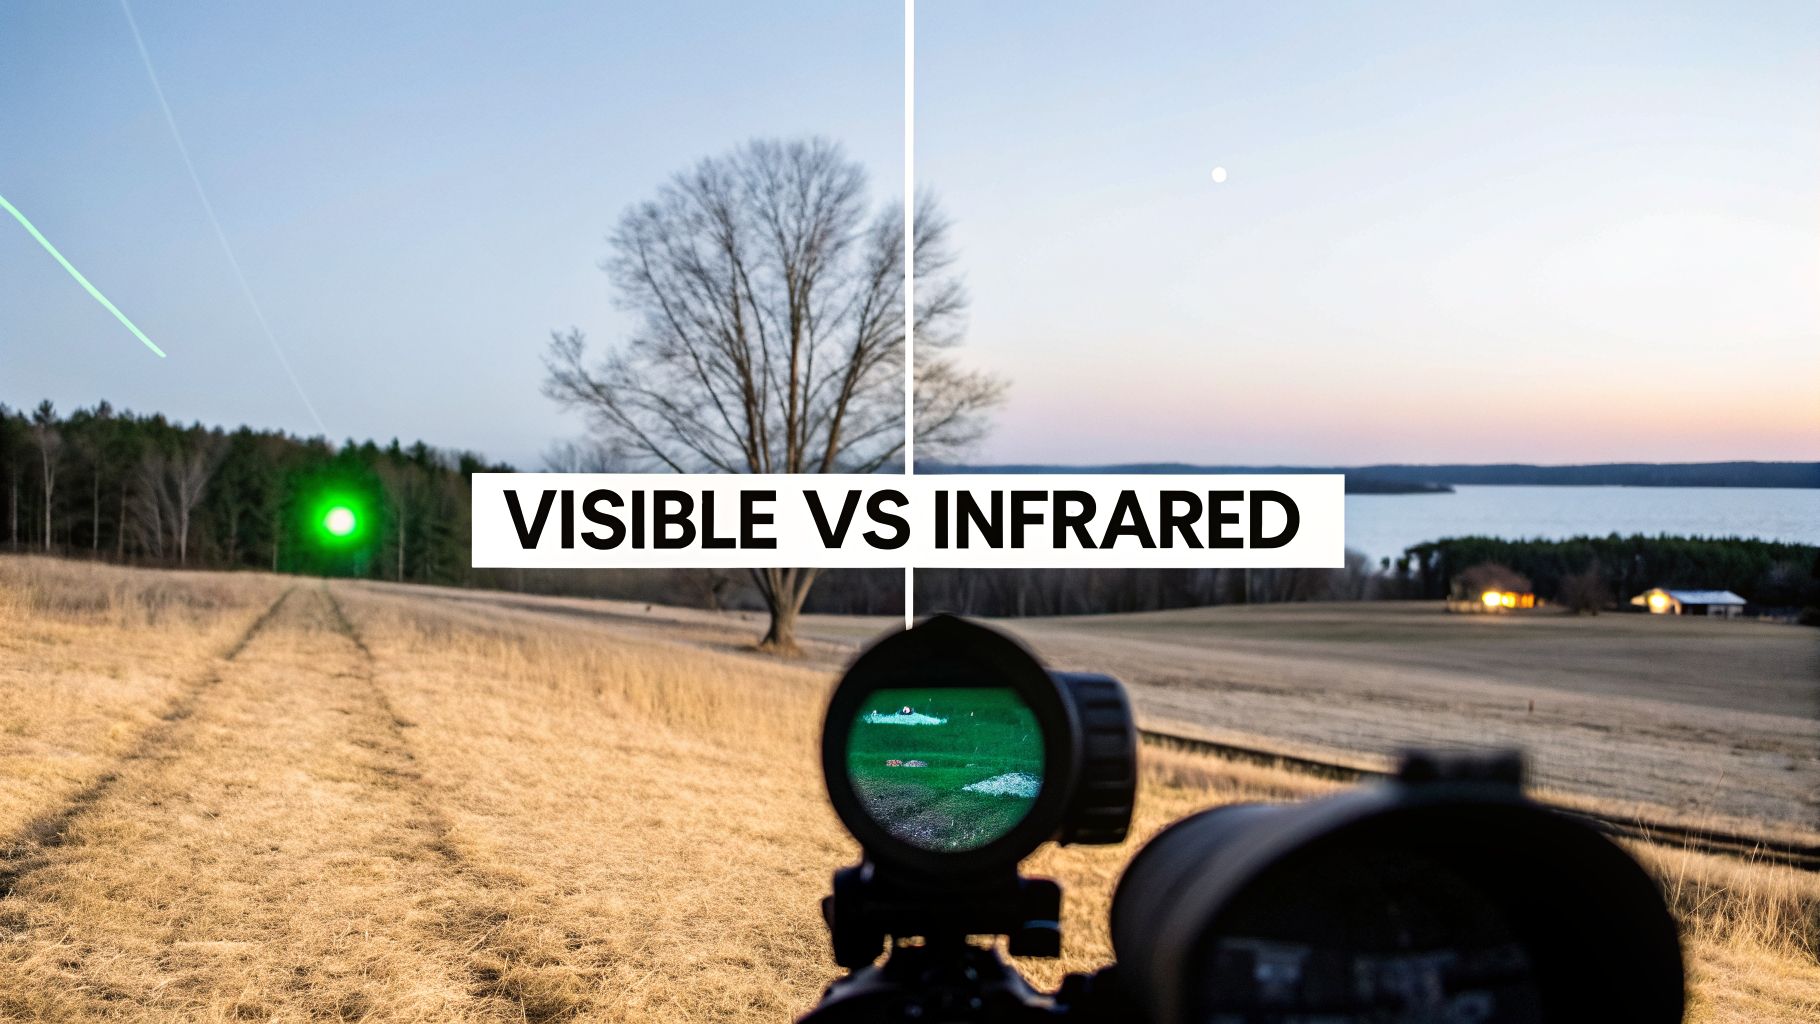
The first and most important decision you'll make when picking a target laser is the spectrum it operates in. Are you going with a visible laser that anyone can see, or an infrared (IR) laser that’s completely invisible without night vision? This choice fundamentally changes how, when, and where you can use the device.
It’s a bit like choosing between a bright, obvious flashlight beam and a coded signal only your team can read. A visible laser is that flashlight—it’s direct, intuitive, and everyone around knows exactly where you’re pointing. An IR laser is the secret signal, completely hidden in plain sight unless you’re wearing the right gear to decode it.
The Overt Advantage of Visible Lasers
Visible lasers, which you’ll find in red or green, are fantastic tools for getting on target fast when stealth isn't your top concern. That bright, crisp dot lets you aim quickly and instinctively without worrying about aligning your iron sights, making them a solid choice for many civilian and law enforcement scenarios.
Red lasers are the classic, budget-friendly workhorses of the industry. They perform just fine in low-light and indoor settings, giving you a reliable aiming point for home defense or close-quarters training. Their biggest drawback is daylight performance; that red dot tends to get washed out and becomes tough to spot under a bright sun.
Green lasers, on the other hand, are a different beast entirely, especially for daytime or twilight use. The human eye is simply far more sensitive to the green light spectrum. This means a green dot looks dramatically brighter and clearer than a red dot of the exact same power output.
This superior visibility has cemented green lasers as a top pick for tactical applications. The numbers back it up: the green laser market was valued at USD 320 million in 2025 and is expected to hit USD 520 million by 2034. Their 532nm wavelength can appear up to 10x brighter than red in daylight, which is why they show up in an estimated 60% of tactical contracts. You can dig into the numbers yourself in this laser pointer market analysis.
The Covert Power of Infrared Lasers
When your mission depends on absolute secrecy, the infrared laser is king. Operating at a wavelength above 780nm, an IR beam is totally invisible to the naked eye. This makes it an indispensable force multiplier for military and law enforcement units working in the dark.
An IR laser changes the entire dynamic of night operations. It lets a whole team, all equipped with night vision, silently identify and designate targets with pinpoint precision. You maintain the element of surprise, which is often the key to a successful mission.
Because it can't be seen without specialized gear, an IR laser lets you "paint" a target without tipping them off. This capability is critical for coordinated team movements, covert surveillance, and engaging threats in no-light situations where giving away your position could be a fatal mistake. If you're leaning toward this advanced capability, our dedicated guide on IR laser pointers is a great next step.
To help you decide which spectrum is the right fit for your needs, we’ve broken down the key differences in this table.
Visible vs. Infrared Target Laser Comparison
This table compares the fundamental traits of visible and IR lasers, highlighting their strengths and weaknesses to guide your selection.
| Feature | Visible Laser (Red/Green) | Infrared (IR) Laser |
|---|---|---|
| Visibility | Overt; seen by the naked eye. | Covert; requires night vision. |
| Primary Use | Fast aiming in low-light; training. | Night operations; covert targeting. |
| Daylight Use | Green is highly effective; red is poor. | Not applicable; invisible. |
| Position Risk | Can reveal your position to threats. | Does not reveal position to the naked eye. |
| Best For | Home defense, hunters, training. | Law enforcement, military, tactical pros. |
Ultimately, the choice comes down to your mission profile. For rapid, intuitive aiming in most conditions, a visible laser (especially green) is a powerful tool. For true tactical dominance in the dark, nothing beats the silent advantage of an IR laser.
Understanding Laser Classes and Safety
The dot your laser projects isn't just a simple aiming point; it's a beam of concentrated light, and its power carries some serious responsibilities. Just like firearms have different calibers for different jobs, lasers are organized into classes based on their power output. Knowing the difference is absolutely critical for using your equipment safely and legally.
These classes, established by bodies like the FDA here in the States, are really just a simple risk scale. They tell you exactly how careful you need to be to avoid permanent eye damage.
Decoding the Power Levels
For most of us, the lasers we can buy over the counter are restricted to Class 3R. This class is powerful enough to be useful but is considered safe from accidental, momentary exposure. Think of it as the "look away immediately" category—a quick, unintentional sweep across your vision won't cause instant damage, but you should never, ever stare into the beam.
Here’s a quick look at the classes you'll most likely run into:
- Class 1: These are the safest lasers out there. They're either extremely low-power or so well-enclosed (like the one inside a Blu-ray player) that they pose no danger under normal use.
- Class 3R: This is the standard for most civilian-legal laser sights. With a power output capped at 5 milliwatts (mW), they provide a bright aiming point in low-light conditions while still having a built-in safety buffer against accidental exposure.
- Class 3B: Now we're in restricted territory. These lasers are powerful enough to cause immediate and permanent eye damage from a direct hit. You'll find them on military and law enforcement devices, particularly the more powerful infrared (IR) models, and they are not for public sale.
The gap between a civilian Class 3R laser and a full-power Class 3B unit is huge. One is designed with a margin for error, while the other is a professional tool that demands strict training and accountability. For a look at what the pros use, you can browse a full lineup of laser aiming modules available to qualified agencies and individuals.
The Non-Negotiable Safety Rules
No matter the class, you need to operate your laser with discipline. That beam doesn't just stop at your target; it keeps going for miles until it hits something solid enough to stop it.
Treat your laser with the same respect you give your firearm's muzzle. Never point it at anything you are not willing to destroy or injure. That is the first and last rule of laser safety.
Follow these core principles every single time you power up your device. There are no exceptions.
- Never Point a Laser at an Aircraft: This isn't a friendly suggestion—it's a federal crime. Hitting a cockpit with a laser can blind and disorient a pilot, risking the lives of everyone on board. The FAA investigates thousands of these incidents a year, and they don't take it lightly.
- Watch for Reflections: That beam will bounce. Be constantly aware of windows, mirrors, puddles, or even the side of a glossy vehicle. A reflected beam is just as dangerous as a direct one and can travel in completely unexpected directions.
- Know What's Behind Your Target: Always be certain of your backstop. Your laser beam can travel much farther than you think, potentially endangering people or property well beyond your immediate area of focus.
- Use Proper Eye Pro: If you're ever in a position to train with or service higher-powered Class 3B or above lasers, wearing the correct safety goggles is mandatory. Standard shooting glasses won't cut it; you need eyewear specifically rated to block the exact wavelength of that laser.
How Power and Beam Divergence Affect Performance
When you're trying to figure out how a laser will actually perform in the field, it all boils down to two specs: power output and beam divergence. Getting a handle on these isn't just academic; it's the key to knowing whether a laser will be a crisp, useful aiming point or a fuzzy, useless blob when you need it most.
Think of it as the difference between a tool and a toy.
What Power Output Really Means for You
Power, which you'll see measured in milliwatts (mW), is the raw horsepower of your laser. It's the single biggest factor in determining how bright the dot is and, by extension, how far away you can see it.
For lasers available to the general public, the power is legally capped at <5mW. In the dead of night, that’s plenty. A standard 5mW green laser will throw a brilliant, sharp dot out to 50 yards and beyond. Even on a dark, overcast day, you might get a usable dot at 15-20 yards.
But introduce bright sunlight, and everything changes. That same 5mW dot will practically vanish, even at arm's length. This is where you see the clear advantage of the higher-power, restricted lasers used by military and law enforcement units. Their increased milliwatt rating allows the beam to punch through bright ambient light and stay visible at much greater distances.
The rule of thumb is simple: more power equals more potential range. But raw power isn't the whole story. The quality of that power is just as important, and that's where beam divergence comes into play.
The demand for gear that works as advertised has never been higher, especially in professional circles. In some parts of the Asia-Pacific market, for instance, we're seeing 8-10% annual growth in the import of tactical optics, as detailed in this global laser market report. It just goes to show that people worldwide need reliable equipment, and understanding these specs is the first step to finding it.
The Critical Role of Beam Divergence
If power is the engine, beam divergence is the quality of the barrel. It’s a measurement of how much the laser beam spreads out as it travels, usually written in milliradians (mrad). The lower the mrad number, the tighter and cleaner the beam stays over distance.
A good way to think about it is comparing a sniper rifle to a shotgun. A laser with low divergence is like a rifle, sending a precise, concentrated point of energy exactly where you aim. A laser with high divergence acts like a shotgun, with the energy spreading out quickly, becoming a wide, imprecise pattern that’s useless for aiming.
Here's how that translates to the real world:
- Low Divergence (e.g., 0.5 mrad): At 100 yards, the dot is still small and crisp—maybe just a few inches across. It's a perfect, surgical aiming point for making precise shots, especially when paired with night vision.
- High Divergence (e.g., 1.5 mrad): At that same 100 yards, the dot has bloomed into a massive, fuzzy splash of light that could be over a foot wide. It's completely useless for anything resembling accuracy.
This is why quality matters. Reputable manufacturers use better laser diodes and precision-ground optics to keep divergence as low as possible. For a device meant for aiming, a tight beam isn't a luxury; it’s a necessity. When you're looking at a spec sheet, a low mrad value should be one of your top priorities.
A Practical Guide to Mounting and Zeroing Your Laser
Let's get one thing straight: an un-zeroed laser is just an expensive, tactical flashlight. To turn that laser pointer into a true precision aiming tool, it needs a rock-solid mount and a proper zero. This whole process is about making sure your laser dot and your bullet's point of impact line up reliably, giving you the confidence to make fast, accurate shots when it counts.
The foundation of any accurate laser is its mount. While almost every modern laser you'll find attaches to a standard Picatinny rail, where you put it makes a world of difference. You've got three main options, and each one comes with its own set of pros and cons.
Choosing Your Mounting Position
Where you clamp your laser module down isn't just about what looks cool—it directly impacts ergonomics, how you access the controls, and most importantly, your holdovers. The gap between the center of your rifle barrel and the center of your laser lens is what we call mechanical offset or height-over-bore. This offset is the entire reason your laser dot doesn't hit the exact same spot as your bullet at every single distance.
Here’s a breakdown of the common mounting spots:
- Top Mount (12 o'clock): Slapping the laser on the top rail aligns it directly with your main optic. This gives you a simple up-and-down offset, which is often much easier to account for in your head. The downside? It can crowd your sight picture, sometimes creating a noticeable "shadow" when you look through your scope or red dot.
- Side Mount (3 or 9 o'clock): Mounting the laser on the side keeps your primary optic's view completely clear. The trade-off is that you now have both a vertical and a horizontal offset to deal with, making on-the-fly holdover math a bit more complex. It's a popular compromise for shooters who demand an uncluttered sight picture.
- Bottom Mount (6 o'clock): While this spot keeps the top rail free, it’s generally the least popular choice for a reason. A laser mounted here is far more likely to get banged up on barricades or even just setting the rifle down. It can also get in the way of a bipod or a comfortable grip.
The image below shows another critical factor in zeroing: beam divergence. This determines how big your laser's dot gets over distance.
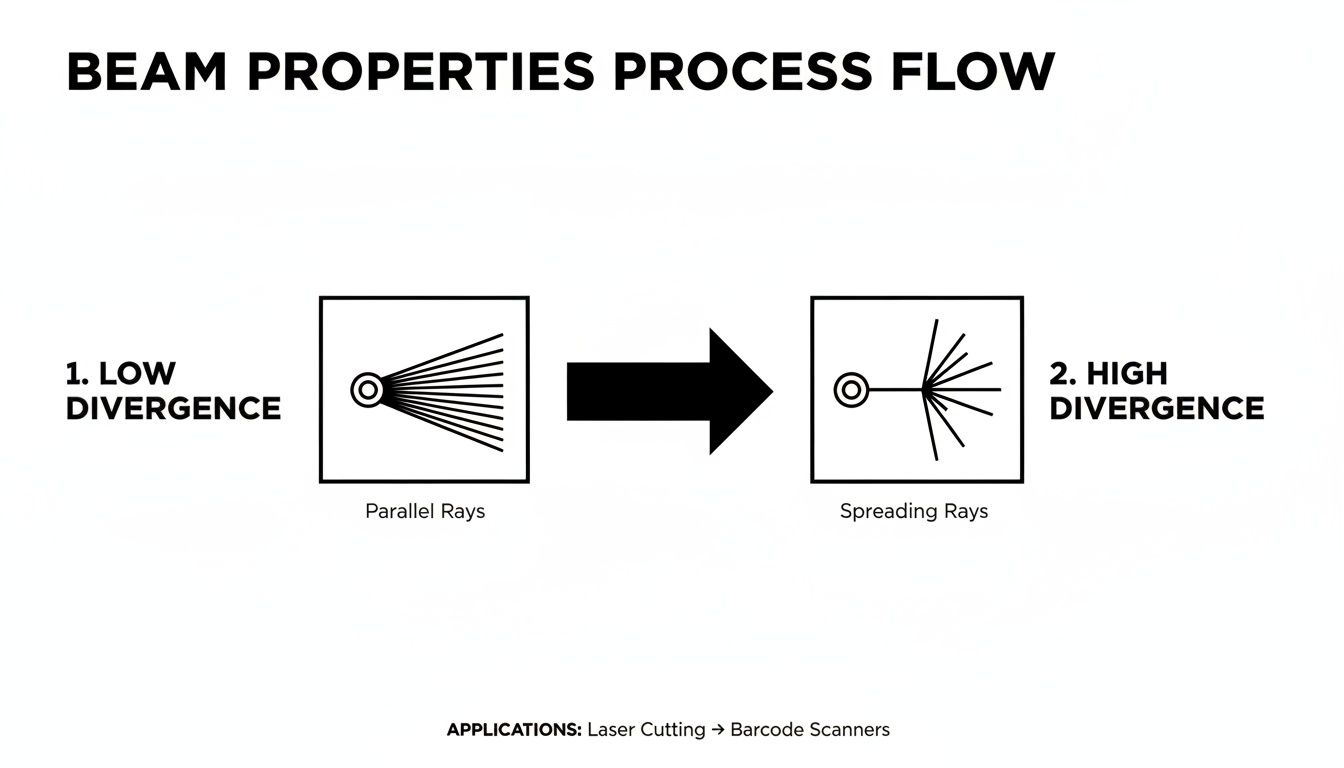
A laser with low divergence keeps that dot tight and crisp, which is exactly what you want for precise aiming and zeroing at range.
The Parallel Zeroing Method
Once your laser is mounted securely, it's time to zero it. By far, the most practical and effective method is the parallel zero. This technique aligns your laser beam to run parallel to your rifle's bore, which gives you a consistent, predictable offset no matter the distance.
The beauty of a parallel zero is its consistency. At any range, your laser dot will always be a fixed distance from your point of impact—say, always 2 inches high and 1.5 inches to the right. This is infinitely more reliable than trying to make the laser and bullet intersect at one specific yard line.
Follow these simple steps to get a solid parallel zero, which is best done at a range between 25 to 50 yards:
- Get Stable: Lock your firearm into a solid shooting rest or use a bipod on a stable surface. The idea is to remove as much human wobble as you can.
- Zero Your Optic First: Before you even think about the laser, make absolutely sure your primary optic (red dot or scope) is perfectly zeroed for your preferred distance. This confirmed point of aim is your reference.
- Aim at the Target: Using your perfectly zeroed optic, aim dead center on your target. Keep the firearm perfectly still.
- Adjust the Laser: Now, switch on your laser. Find the windage and elevation adjustment turrets on the laser housing and carefully dial them until the laser dot sits directly on top of your optic's reticle.
That's it. Your laser is now co-witnessed with your primary optic and set with a predictable parallel zero. For a deeper dive into mounting hardware, our guide on lasers for Picatinny rails has you covered. Always, always confirm your zero by firing a few shots and make any tiny final adjustments needed.
Your Checklist for Choosing the Right Target Laser
Picking the right target laser can feel like you're drowning in specs and model numbers. The best way to cut through the confusion is to start with your mission first. Figure out exactly what you need the laser to do, and the right choice will become much clearer.
This isn't just about buying another piece of gear; it’s an investment in a critical tool that has to perform flawlessly when lives are on the line. The right laser feels like a natural extension of your weapon. The wrong one is a liability waiting to happen.
Thinking Through Your Environment
First things first: where and when will you be using this laser? Your operational environment is the single biggest factor that will dictate what works and what doesn't.
What are your typical engagement distances? A laser for home defense inside 15 yards has completely different needs than one for a hunter marking a target at 100 yards. Greater distances demand a laser with lower beam divergence, which keeps the dot tight and precise instead of turning into a useless, fuzzy blob.
Will you be in daylight, low light, or total darkness? For daytime use, a high-visibility green laser is really your only practical option. If you're working strictly indoors or at night without NVGs, a classic red laser is still a reliable and budget-friendly choice.
These devices were born from the need for speed and accuracy in tough situations. The U.S. military first saw this potential in the 1990s when they fielded the AN/PEQ-2, which cut engagement times by up to 40% in field trials. You can see more on the technology's impact in this market overview on ResearchAndMarkets.com.
Matching the Laser to Your Role and Gear
Next, let's look at your existing setup and professional duties. A laser has to work with the tools you already have and comply with the rules you operate under.
Will you use night vision? If the answer is yes, an infrared (IR) laser isn't just a feature—it's a mandatory requirement. An IR laser is invisible to the naked eye, making it the foundation for any covert nighttime operation.
What are the legal restrictions in your area? For civilians, lasers are restricted to Class 3R (<5mW). Law enforcement and military personnel might have access to more powerful Class 3B units, but it is entirely your responsibility to know and follow all federal, state, and local laws.
Answering these questions turns a confusing shopping list into a clear, mission-driven selection process. The table below breaks these factors down for different types of users.
Target Laser Selection Checklist by User
Use this checklist to identify the key features you need based on your primary application, ensuring you select the best laser for your mission.
| Consideration | Law Enforcement | Hunter | Tactical Professional |
|---|---|---|---|
| Primary Spectrum | IR for covert ops; Green for high visibility during the day. | Green for dawn/dusk visibility. | IR is mandatory; may have a secondary visible laser. |
| Power Needs | Often requires higher-power, restricted models for range. | Standard civilian-power green is usually sufficient. | Requires full-power, restricted IR and illuminator. |
| Durability | Must be extremely rugged and waterproof. | Water-resistant and shockproof is important. | Must meet military-grade durability standards. |
| Night Vision Use | Critical for SWAT, narcotics, and patrol night shifts. | Less common, but growing in popularity for hog/coyote hunting. | Essential for all night operations. |
| Budget | Department-funded; focus is on performance and reliability. | Varies; often seeks the best value for performance. | Mission-critical; performance outweighs cost. |
By walking through these considerations—environment, gear, and role—you can filter out the noise and zero in on a laser that will genuinely enhance your capabilities, rather than just adding weight to your rifle.
Frequently Asked Questions About Target Lasers
Once you start working with target lasers, you'll find a few questions come up again and again. It's totally normal. Let's clear the air and get you some straight answers to the most common ones so you can use your gear with confidence.
What Is the Legal Power Limit for a Civilian Laser?
For civilian use in the United States, the law is pretty clear. Any aiming laser sold to the public is capped at Class 3R, which means a maximum power output of 5 milliwatts (mW).
This isn't an arbitrary number. It's a deliberate safety measure, designed to be strong enough for effective aiming in low light while still giving you a crucial safety buffer. A momentary, accidental sweep across the eyes is unlikely to cause permanent damage. Military and law enforcement units, on the other hand, operate under different rules and often use more powerful Class 3B lasers that can cause instant and permanent eye injury without proper protocols.
Can You See an Infrared Laser With the Naked Eye?
Absolutely not. An infrared (IR) laser is completely invisible to the human eye because it operates on a light spectrum we simply can't perceive.
The only way to see an IR beam is by looking through night vision goggles (NVGs) or certain types of digital cameras. This "invisibility" is exactly what makes IR lasers such a game-changer for tactical situations, letting you designate a target without broadcasting your position to everyone else.
The tactical advantage offered by covert laser systems is well-documented. During Operation Enduring Freedom, U.S. forces used over 100,000 target lasers, which correlated with a 35% reduction in close-quarters battle casualties. Explore more data on the impact of laser technology in defense sectors.
How Often Should You Check Your Laser's Zero?
The short answer? Often. Think of your laser's zero just like your rifle optic's zero—it’s not something you just set once and forget about forever. You need to confirm it regularly.
Here’s a good rule of thumb for when to double-check:
- Before any critical use. Heading out for a hunt, a mission, or just staging your home defense firearm? Verify your zero first.
- After any hard knocks. If you drop your weapon or bang it against a door frame, take a moment to confirm zero. It doesn't take much to shift things.
- With big temperature swings. Going from a warm truck to the freezing cold can cause materials to contract, potentially creating a small but meaningful shift.
- Periodically at the range. Making a quick zero check part of your regular training regimen helps build confidence and spot problems before they matter.
Give your laser's zero the same respect you give your primary optic. That's how you ensure it's a reliable tool, not a liability, when you need it.
At Superior Tactical LLC, we provide the mission-ready gear that professionals and enthusiasts depend on. Explore our curated selection of high-performance laser aiming solutions and night vision optics at https://superiortac.com.