A Pro’s Guide to Mounting an EOTech for Peak Performance
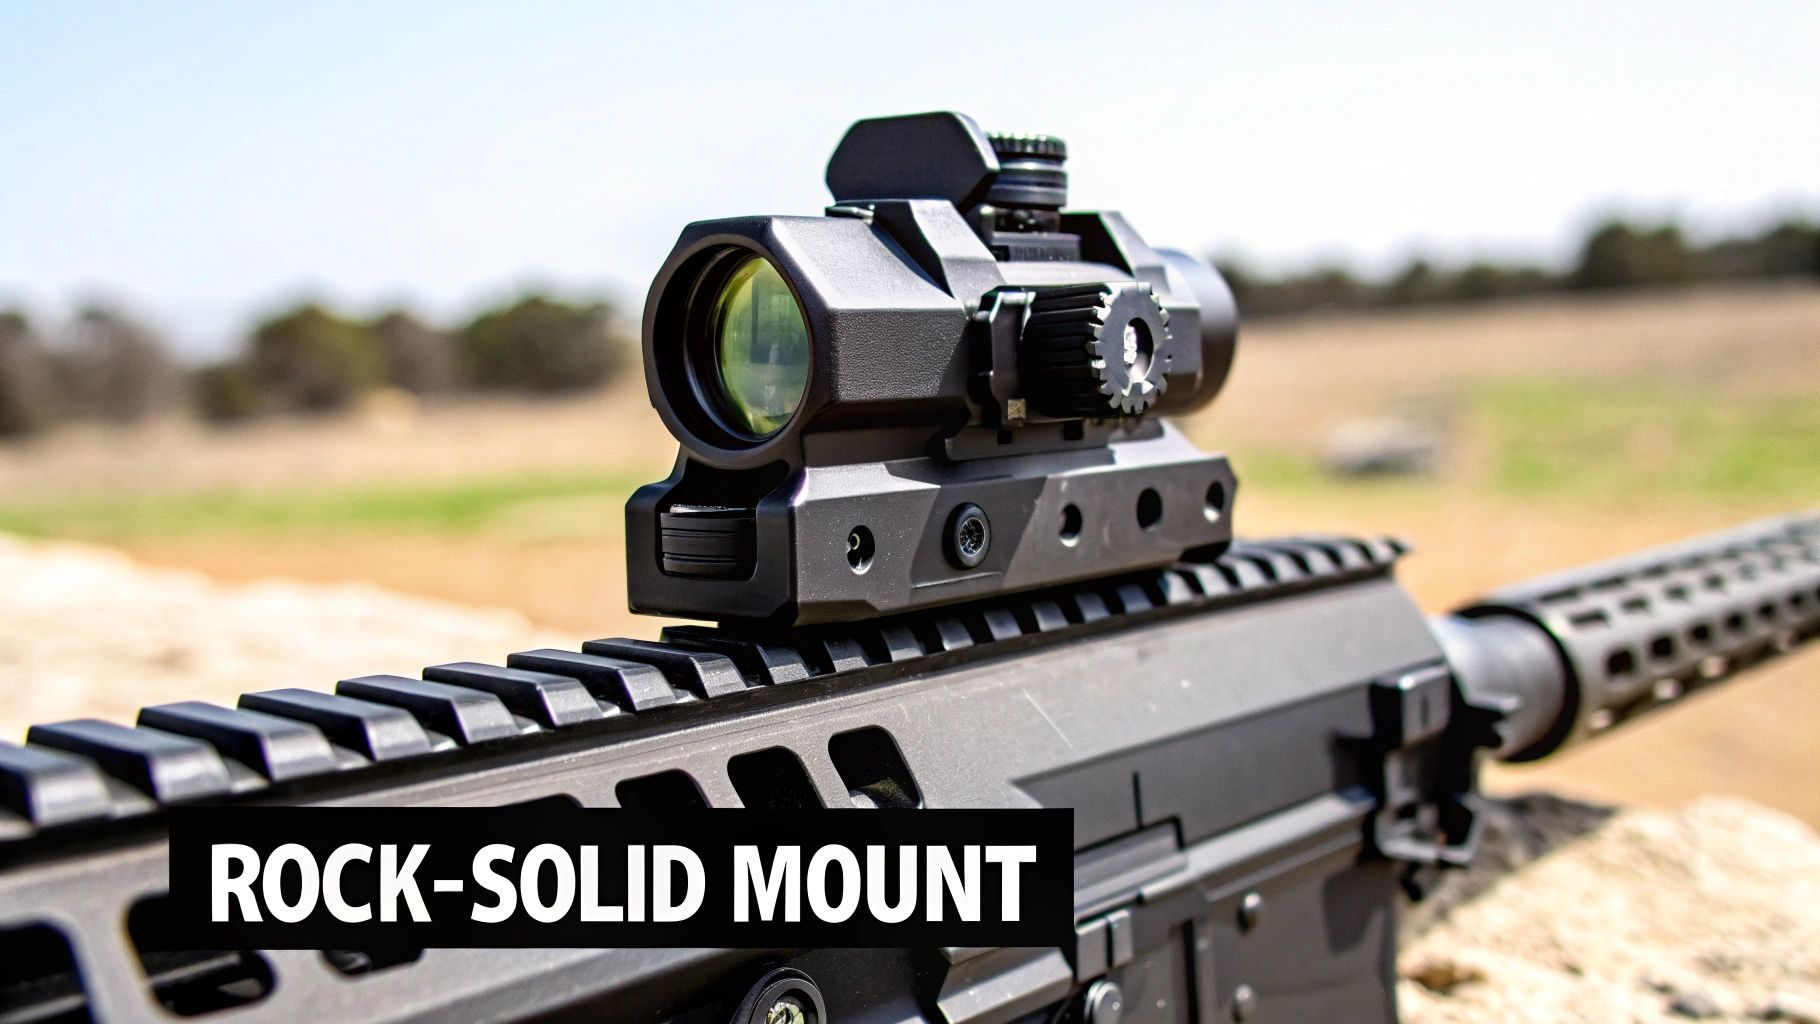
Getting your EOTech mounted correctly is more than just clamping it onto the rail. The secret sauce is in the details: making sure it’s secured to the upper receiver (never, ever the handguard), applying a little bit of forward pressure against the rail slot as you tighten it down, and hitting the right torque spec. This is how you get that rock-solid fit that won't lose zero, no matter what you put it through.
Why a Perfect Mount Is Non-Negotiable
Let's be blunt: the way you mount your EOTech is the foundation of your entire aiming system. If you rush it or get it wrong, you're setting yourself up for a wandering zero, poor accuracy, and a ton of frustration at the range. This guide isn't just a rehash of the manual; it's packed with the kind of hard-won lessons that make the difference between a functional setup and a truly professional-grade one.
Think of the mount as the critical handshake between your high-tech optic and your firearm. If that connection is weak, all the advanced holographic technology inside your EOTech is basically useless. Things that beginners often blow past are the very details seasoned shooters obsess over:
- Rail Integrity: Is your Picatinny rail actually clean? Are there any dings, burrs, or leftover gunk that could throw things off?
- Precise Torque: You need just the right amount of clamping force—not too little, not too much—to lock it down without stripping screws or damaging the rail.
- Optic Placement: Where the sight sits on the receiver dramatically affects your eye relief, field of view, and overall awareness.
Getting these little things right is what separates an amateur build from a rifle you'd bet your life on.
The Foundation of Accuracy
The connection between your optic and rifle has to be absolute. Even a microscopic wobble or shift in the mount will translate to a huge point-of-impact change downrange. A proper installation isn't just a nice-to-have; it's a mandatory step to unlock the precision your EOTech was built for. I've seen a loose mount turn a tack-driving, sub-MOA rifle into a 5-MOA mess in an instant.
The market backs this up. The red dot and holographic sight market was valued at an estimated $2.24 billion in 2024 and is on track to hit over $4 billion by 2035. This explosion in popularity shows that as optics get better, the demand for high-quality, reliable mounting systems becomes non-negotiable for serious shooters. You can dig into more data on red dot sight market trends to see just how fast this space is growing.
A world-class optic on a budget mount is like putting economy tires on a performance sports car. You'll never get the performance you paid for because the connection to the road—or in this case, the rifle—is compromised from the start.
Standard Screws vs. Quick-Detach Levers
The hardware you choose matters, too. Standard cross-bolt mounts, the kind you tighten with a screw, give you a semi-permanent and incredibly durable connection. They're my go-to for a "set it and forget it" build where that optic is going to live on that rifle.
On the other hand, quick-detach (QD) levers offer incredible flexibility. They let you pop the optic off and on in seconds without any tools, which is perfect if you need to switch to backup irons, use different optics for different situations, or just break down your rifle for cleaning. A high-quality QD mount will return to zero every time, but only if you've adjusted the tension correctly. We'll dive into which one is right for you later in the guide.
Getting Your Gear Ready for a Perfect Mount
Before your EOTech even gets near your rifle's rail, a little prep work goes a long way. The difference between a rock-solid mount that holds zero forever and one that constantly shifts under recoil often comes down to having the right tools on hand from the start.
Trying to wing it with whatever's in your toolbox is a recipe for stripped screws and a damaged rail. Think of this as your pre-flight checklist. Taking a few minutes to get organized separates a frustrating amateur job from a reliable, professional-grade setup.
The EOTech Mounting Toolkit Checklist
Putting together the right kit is straightforward. You probably have most of this already, but there's one piece of gear that is absolutely non-negotiable: a good torque driver. This is the single most important tool for mounting any optic, ensuring you get the exact clamping force required without breaking anything.
Here's a quick rundown of what you should have on your bench before you begin.
| Tool/Material | Purpose | Pro Tip |
|---|---|---|
| Calibrated Torque Driver | Applies precise inch-pounds of force to mounting bolts. | Prevents under-tightening (zero shift) and over-tightening (stripped screws). Look for one that covers the 15-65 in-lbs range. |
| Degreaser | Removes oils and grime from the rail and mount surfaces. | 91% isopropyl alcohol on a patch is cheap and effective. A clean surface provides maximum friction. |
| Medium-Strength Thread Locker | Prevents mounting bolts from vibrating loose under recoil. | Loctite 243 (Blue) is the industry standard. It's non-permanent, so you can still remove the optic later. |
| Clean, Lint-Free Rags | Used for applying degreaser and cleaning up excess thread locker. | Microfiber cloths or gun cleaning patches work perfectly. Avoid paper towels that can leave behind lint. |
| Leveling Kit (Optional) | Helps visually confirm the optic is not canted on the rail. | While not as critical for a non-magnified optic, it's still good practice to ensure a perfectly level installation. |
Having these items laid out and ready turns what could be a headache into a smooth, precise job. The whole point is to do it right the first time so you never have to second-guess your equipment.
Give That Rail a Once-Over
Before you grab any tools, take a hard look at the Picatinny rail on your firearm. You need a clean, undamaged foundation for your optic to sit on. This is especially important on a brand-new rifle or a rail that's seen a lot of different accessories mounted over the years.
Run your finger along the top and sides of the rail slots where you plan to install the EOTech. You're checking for any dings, burrs, or bits of raised metal that could stop the mount from sitting perfectly flat against the rail. Even a tiny imperfection can introduce a slight cant or create an unstable base.
A pristine mounting surface is non-negotiable. Even the slightest amount of oil, debris, or a tiny metal burr on a single rail slot can compromise the entire installation, leading to a frustrating and inconsistent zero.
If you find any gunk, that's what the isopropyl alcohol is for. Just a quick wipe-down gives the clamping surfaces the clean, dry contact they need for maximum grip.
And if you're looking to take your setup to the next level, a specialized mount can make a huge difference. For shooters who prefer a more "heads-up" posture, it's worth checking out the Unity Tactical FAST Optic Riser, which is built to work perfectly with EOTech XPS and EXPS models. Proper prep ensures your high-performance optic has a flawless foundation to do its job.
The EOTech Mounting Process from Start to Finish
You've got your tools and a clean rail—now for the fun part. This is where we bring it all together and turn a good mount into a rock-solid one. It doesn't matter if you're putting this on a duty AR-15, a competition PCC, or your go-to shotgun; the core principles for a bomb-proof installation are exactly the same.
The whole process boils down to three key things: putting the optic in the right spot, using the right technique to lock it down, and then verifying your work. Nail these, and your EOTech will run exactly like it was designed to.
Finding the Sweet Spot on Your Rail
Your first decision is also the most critical: where on the rail does this thing go? There's one hard-and-fast rule here that you simply can't ignore.
The EOTech must be mounted entirely on the upper receiver. I’ll say it again—never, ever bridge the gap between the receiver and the handguard.
Even on high-end rifles with free-float handguards, the handguard can flex or shift ever so slightly. If your optic is mounted to it, your zero is gone the second you rest the rifle on a barricade or use a sling for support. The upper receiver is the only stable foundation directly tied to your barrel, so that's where the optic lives. Period.
So, where on the receiver?
- Go Forward: The best practice is to mount the EOTech as far forward on the upper receiver as you can without it actually touching the handguard.
- Why It Works: Pushing the optic forward maximizes your peripheral vision and situational awareness. It feels less like you’re looking through a scope and more like the reticle is just floating out there in the world.
- Plan Ahead for Magnifiers: If you think you might ever add a magnifier like an EOTech G33 or G45, make sure you leave enough rail space behind the optic. Set the EOTech far enough forward so the magnifier can comfortably fit on the receiver behind it.
Before you tighten a single screw, place the optic on the rail and shoulder your firearm. Get a feel for your head position and sight picture. If it doesn't feel natural, move it until it does.
This visual guide shows the simple, essential steps for a secure mount once you’ve found that perfect spot.
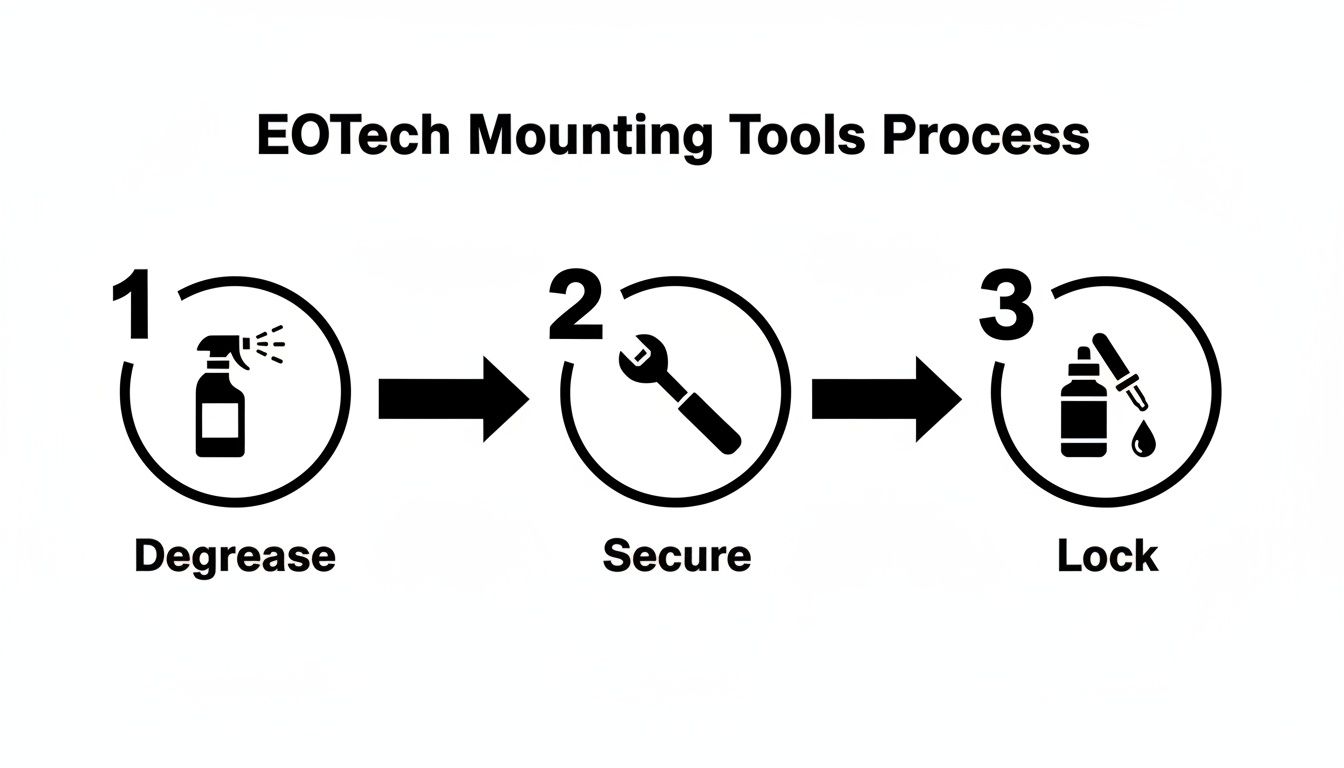
This sequence—degrease, torque, and threadlock—is the key to making sure your optic never budges, no matter how much recoil you throw at it.
The Mechanics of a Recoil-Proof Mount
Once you've picked the location, it's time to get physical. This isn't just about making a screw tight; it's about creating an immovable bond between the optic and the rifle that can handle thousands of rounds of abuse.
Here’s a little trick that professional armorers swear by: as you tighten the mounting bolt, apply slight forward pressure to the optic. Set the EOTech on the rail and press it forward so the cross-bolt is pushed up against the front face of the Picatinny rail slot. While holding that forward pressure, start tightening.
Pro Tip: Pushing the optic forward against the rail slot pre-loads it against recoil. Since recoil forces also push the optic forward, it has nowhere to go. If you tighten it against the rear of the slot, the first shot will slam it forward, instantly shifting your zero.
This one tiny step is what separates a pro job from an amateur one. It costs you nothing and adds about two seconds to the process, but the stability it provides is huge.
Achieving Proper Torque and Tension
With forward pressure applied, let's lock it down. The exact method depends on whether you have a standard cross-bolt model (like an XPS) or a quick-detach (QD) lever model (like an EXPS).
For Cross-Bolt Models:
- Put a small drop of a medium-strength thread locker, like Loctite 243, on the clean bolt threads.
- Using your calibrated torque driver, tighten the bolt to 15 to 20 inch-pounds (in-lbs). This is the accepted industry standard.
- Don't go crazy here. Overtightening can strip the screw, damage the mount, or even warp the rail on your receiver.
For Quick-Detach (QD) Lever Models:
QD mounts are a little different since they rely on tension, not a specific torque value.
- Close the lever. You should feel firm resistance, but you shouldn't need a hammer to get it shut.
- If it's too loose, open the lever and give the adjustment nut on the other side a quarter-turn to tighten it.
- If you can't close it, back the nut off a little. The goal is a snug, secure fit that you can still operate by hand.
The obsession with precise mounting procedures makes sense when you see how much the industry has grown. The global market for riflescopes and red dot sights was valued at USD 59.5 billion in 2024 and is projected to hit USD 102.3 billion by 2033. That explosive growth shows just how much shooters rely on their optics, where a secure mount is everything. You can read more about the strategic importance of the optics market.
Final Checks and Witness Marks
Your EOTech is mounted. You're almost done. The last step is a simple one that gives you peace of mind: witness marks.
Grab a paint pen or a silver Sharpie and draw a clean, straight line from the head of the mounting bolt across to the body of the optic's mount. This little line is your visual confirmation. If you ever glance down and see that the line is broken or misaligned, you know instantly that your bolt has started to back out and needs to be re-torqued.
It's a field-expedient trick used by armorers everywhere. It lets you check your gear in seconds before hitting the range or heading out on duty, so you can be confident your zero is right where you left it. Once your mark is on, give the optic one last firm wiggle. It shouldn't move at all.
Choosing Your Optic Height and Co-Witness Setup
Once your EOTech is locked down on the rail, you've got a big decision to make about its height. This isn't just about looks—it completely changes how you shoulder your rifle, find your target, and interact with the weapon system. The height you choose dictates your head position, how fast you can get on target, and whether your iron sights are even usable as a backup.
Think of it as a balance between speed, comfort, and having a plan B. It’s a personal call that really depends on your gear, your shooting style, and what you’re building your rifle to do.
The Classic: Absolute Co-Witness
An absolute co-witness is the old-school, tried-and-true setup. Here, your iron sights and the EOTech’s reticle line up perfectly on the same horizontal plane. When you look through the optic, the glowing reticle seems to sit right on top of your front sight post.
The major benefit here is redundancy. If your optic goes down for any reason—dead battery, damage, whatever—your iron sights are already aligned and ready to go through the same window. You don't have to shift your cheek weld or re-learn a sight picture; you just focus on the irons instead of the reticle.
But there's a tradeoff. Your front and rear sights are always in your field of view, making for a somewhat cluttered sight picture. For shooters who demand a completely clean, unobstructed view of the target, this can be a deal-breaker.
The Popular Choice: Lower 1/3 Co-Witness
A lower 1/3 co-witness uses a slightly taller mount or a built-in riser to push the EOTech a bit higher. With this setup, your iron sights sit in the bottom third of the optic's window, leaving the reticle floating freely above them.
This has become the go-to for most shooters today, and for good reason:
- Unobstructed View: Your primary sight picture is wide open. The reticle hangs in space without the distraction of the front sight post, letting you focus completely on the target.
- Backup Sights on Standby: Your irons are still there if you need them. You just dip your head down slightly to bring them into alignment.
- Better Situational Awareness: With less clutter in the window, you get a clearer view of what's happening around your target.
This configuration is a fantastic compromise, giving you a fast, open sight picture while keeping your backup plan in play. It’s a solid choice for just about any general-purpose rifle. This setup also plays very nicely with magnifiers. If you're thinking about adding one, check out our complete guide on choosing the right red dot magnifier.
Pro Tip: For most shooters, a lower 1/3 co-witness provides the best of both worlds. It delivers a fast, uncluttered sight picture for rapid engagement while keeping your backup iron sights accessible with a minor shift in head position.
Modern Heads-Up Mounting with Risers
Lately, an even taller mounting trend has taken hold, especially among professional and competition shooters. This "heads-up" posture uses risers from companies like Unity Tactical to lift the optic significantly higher than a standard lower 1/3 mount.
This whole idea came from operators running gear like night vision, gas masks, and bulky comms headsets. Taller mounts let them get a sight picture without having to mash their face into the stock, which is slow, uncomfortable, and fatiguing.
But you don't need all that gear to feel the benefits. A heads-up posture promotes a more natural, upright head position. This can lead to faster sight acquisition and a lot less neck strain during a long day at the range. Of course, this setup means your standard-height iron sights are no longer co-witnessed through the optic window—the focus here is purely on speed and ergonomics.
This trend toward more ergonomic setups is a big reason the global holographic sights market was valued at approximately $2.37 billion in 2024. Shooters are investing in the rapid, parallax-free performance of EOTechs, and they want mounting systems that maximize that advantage.
EOTech Co-Witness and Mount Height Comparison
Deciding on your optic height can be tough, as each setup has its own advantages based on your specific needs and shooting style. This table breaks down the key differences to help you make an informed choice.
| Mount Height | Primary Advantage | Best Use Case | Considerations |
|---|---|---|---|
| Absolute Co-Witness | Seamless transition to iron sights if optic fails. | Duty rifles, home defense, shooters who prioritize backup sights. | The sight picture can feel cluttered with the front and rear sights always in view. |
| Lower 1/3 Co-Witness | Unobstructed view with an accessible backup. | General purpose, competition, tactical applications. | Requires a slight, but trainable, shift in head position to use iron sights. This is the most popular all-around setup. |
| Riser Mount (Heads-Up) | Promotes a natural head position for maximum speed. | Shooters using night vision, gas masks, or competition. | Standard-height iron sights are no longer usable through the optic. Focus is entirely on the primary optic. |
Ultimately, the best way to figure out what works for you is to get behind the gun. Try out different heights if you can. Your body mechanics and personal comfort will be the final judge.
Zeroing Your EOTech and Proving Your Mount is Rock-Solid
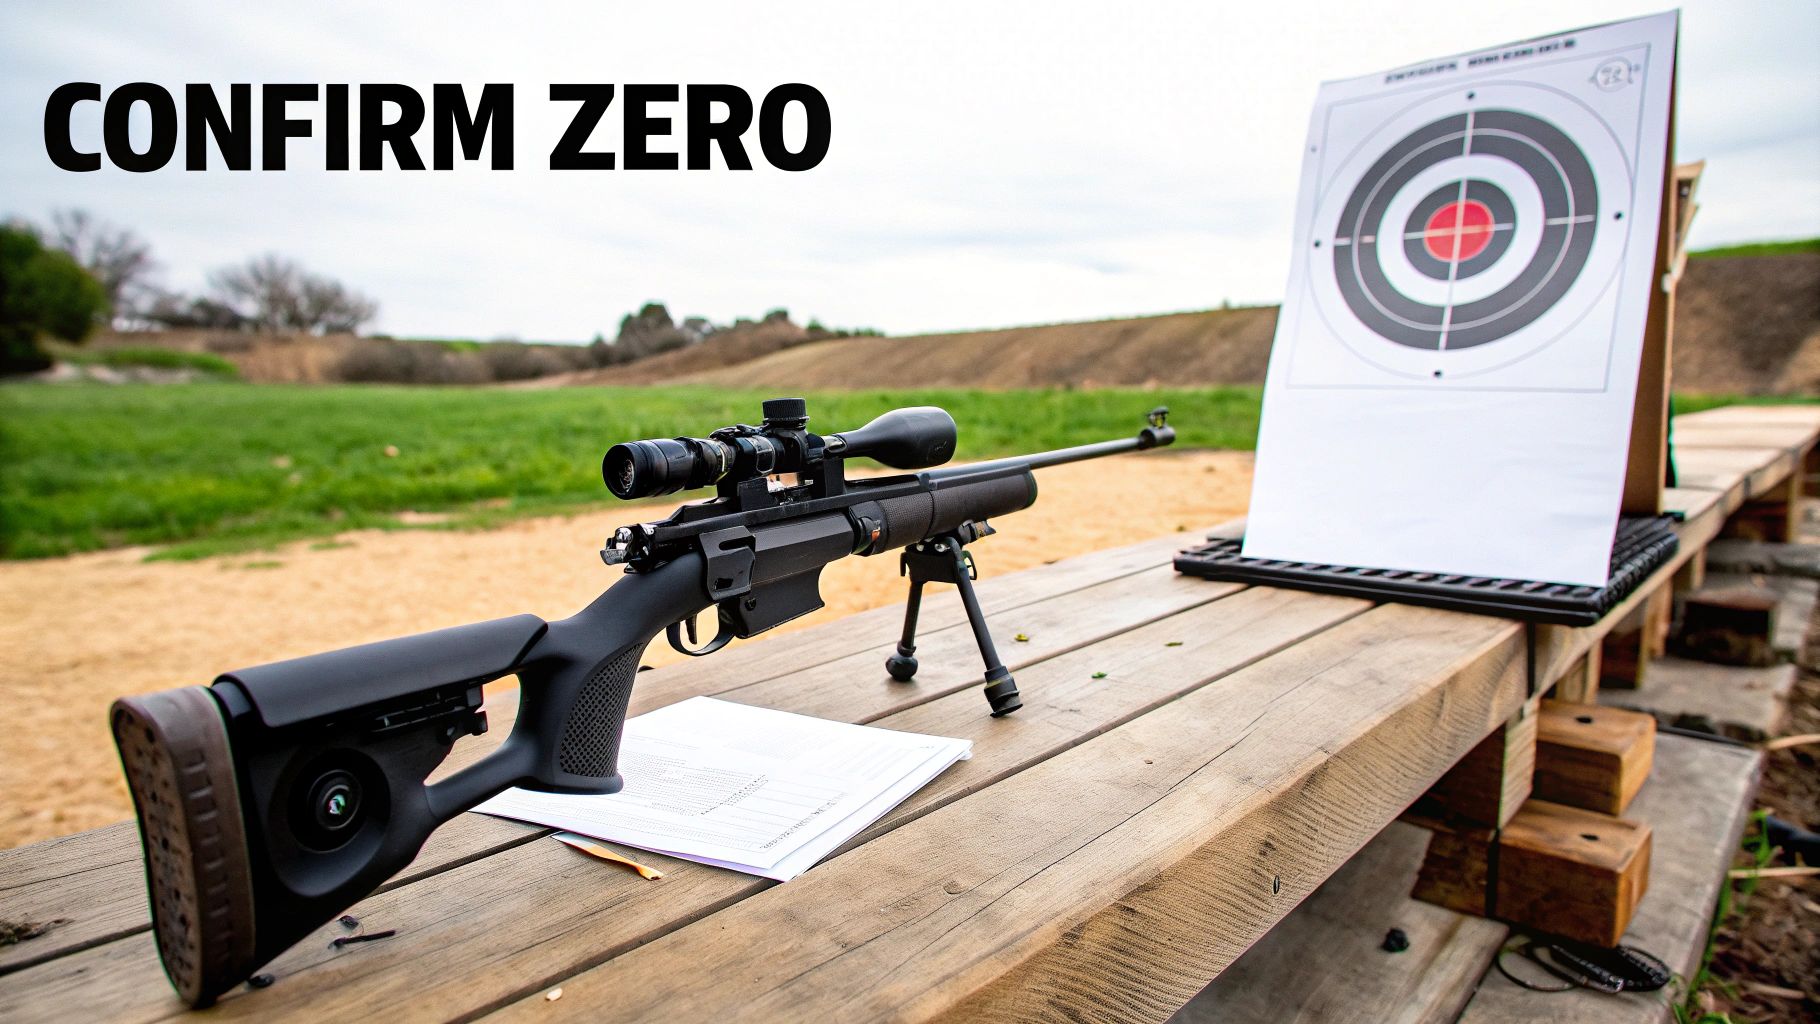
All that careful work mounting and torquing your EOTech means nothing until you get it on paper and confirm your zero. This isn't just about sighting in your rifle; it's the ultimate test of your installation. This is where you prove the whole system is stable, reliable, and ready for whatever you throw at it.
Think of your first trip to the range after mounting as the final quality control check. Any looseness in the mount, a rail that’s slightly out of spec, or even improper placement will become painfully obvious once you start sending rounds downrange. Let's get it dialed in.
Getting on Paper: Your First Zero
For most shooters using an AR-15, the 50/200 yard zero is the gold standard. It’s incredibly practical, giving you a straightforward "point-and-shoot" solution for targets out to about 250 yards with very little thought about holdovers.
To start, get your rifle as stable as humanly possible. Use a bipod, sandbags, a lead sled—whatever it takes to remove yourself from the equation. The steadier the rifle, the quicker and more precise your zero will be.
- Know Your Clicks: EOTech windage and elevation turrets adjust the point of impact. Each click is typically 0.5 Minute of Angle (MOA). That works out to about a quarter-inch at 50 yards or a half-inch at 100 yards. Simple.
- Fire a Group: From a stable 50-yard position, take your time and fire a tight three to five-shot group. Aim for the exact center of the bullseye every single time.
- Measure and Adjust: Now, measure the distance from the center of your shot group to your aiming point. Let's say your group is 2 inches high and 1 inch to the right. At 50 yards, you’ll need to come 8 clicks down (2" / 0.25" per click) and 4 clicks left (1" / 0.25" per click).
- Confirm It: Fire another group to see if your adjustments put you on target. Tweak it if you need to, but you should be right on the money.
This initial 50-yard zero is a fantastic foundation. If you're running a magnifier, it's worth exploring how to get the most out of it. You can learn more about mastering the dual-functionality of an EOTech HHS setup to really unlock its potential.
A stable zero is a direct reflection of a stable mount. If your groups are inconsistent or your adjustments don't seem to track correctly, stop shooting and re-check your hardware. The problem is almost always mechanical, not the optic itself.
Troubleshooting on the Range
If things aren't going smoothly, don't waste ammo chasing a wandering zero. The problem is usually one of a few common, easy-to-fix issues. Running through a quick diagnostic checklist will save you a world of frustration.
If your zero seems to shift between range sessions or even during a single string of fire, your mount is the first place to look.
Common Culprits for a Wandering Zero:
- Bad Torque: This is the #1 offender. A mounting bolt that has backed out even slightly will wreak havoc on your accuracy. Check your witness marks and re-torque if they’ve moved.
- Bridging the Gap: If any part of the optic's mount is on the handguard instead of the receiver, it will lose zero. The handguard flexes independently of the barrel and receiver. The optic must be 100% on the upper receiver.
- Out-of-Spec Rail: A damaged or poorly machined Picatinny rail can keep the mount from getting a solid bite. Look for dings, burrs, or uneven wear marks on the rail slots right where the EOTech clamps down.
- Loose QD Lever: On EXPS models, the Quick-Detach lever needs proper tension. If it's too loose, it can feel secure but will allow for tiny movements under recoil. You should feel firm, positive resistance when you close that lever.
One other gremlin you might encounter is a flickering reticle. This is almost always a battery issue. Check for weak batteries, or try cleaning the contacts with a simple pencil eraser. By methodically checking these points, you can solve just about any problem you'll run into after mounting your EOTech.
Common Questions on Mounting an EOTech
Even after you've read a guide, you'll inevitably run into those specific, practical questions once you have the sight in your hands. Getting these details right is what separates a reliable, "bet-your-life-on-it" setup from one that’s going to cause you problems at the worst possible moment.
Here are the most common questions I hear from shooters, answered with clear, no-nonsense advice drawn from years of experience in the field. Think of this as the final check-in before you hit the range.
Where’s the Best Spot to Mount My EOTech on an AR-15?
Simple. All the way forward on the upper receiver, but not touching the handguard. This is non-negotiable for a duty-ready rifle.
Putting the optic as far forward on the receiver does two things. First, it opens up your field of view, which is critical for situational awareness. Second, and most importantly, it guarantees your zero won't shift. The upper receiver is a solid, stable platform directly connected to your barrel; your handguard, by contrast, can flex or move slightly, throwing your point of impact off.
If you think you might add a magnifier later, just be sure to leave a few empty rail slots behind the EOTech. It’s much easier to plan for it now than to re-zero everything later.
What’s the Right Torque Spec for the EOTech Cross-Bolt?
EOTech doesn't print a specific number in their manuals, but the unwritten industry standard for this kind of Picatinny mount is between 15 and 20 inch-pounds (in-lbs). You absolutely need a proper torque driver, like a Fix It Sticks or Wheeler F.A.T. Wrench, to get this right.
This isn’t a "good-and-tight" situation. Too much torque, and you can strip the screw or damage your rail. Too little, and the optic will shift under recoil, causing your zero to wander.
Pro Tip: Before you tighten anything, put a drop of non-permanent thread locker (like Blue Loctite 243) on the bolt threads. This stops recoil vibration from loosening the bolt over time. Note that this doesn't apply to QD models—their tension is set by the lever, not a torque wrench.
Can I Mount an EOTech on a Shotgun or a Heavy-Recoil Rifle?
Yes, absolutely. EOTechs are built like tanks for a reason. They were designed to handle the abuse of military service, so the recoil from a 12-gauge slug or a .308 battle rifle is well within their capabilities.
The key isn't the optic, but the mount job. For heavy-recoiling platforms, your process needs to be perfect:
- Start with a high-quality, professionally installed Picatinny rail. Don't cheap out here.
- Degrease everything—the rail slots and the mounting bolt—with a good solvent. This ensures a clean, high-friction connection.
- Use Blue Loctite on the bolt and torque it down to spec.
Do these three things, and that EOTech will stay locked in place and hold zero, no matter how much kick your firearm has.
Do I Really Need to Use Loctite?
Yes. Don't skip this step. For any serious-use firearm, applying a medium-strength thread locker like Loctite 243 (Blue) to the mounting bolt is mandatory.
Every time you fire, you're sending vibrations through the entire system. Over time, those vibrations will work screws loose. A single drop of Blue Loctite acts as an insurance policy against your mount backing out when you can't afford it to. It keeps the bolt secure but is still easily broken free with a hand tool if you need to remove the optic later.
A Quick Guide to Loctite:
- Always Use Blue (243): It's the standard for optics because it's strong but removable.
- Never Use Red (262/271): Red Loctite is basically a permanent weld. You'll need a torch to get it off, which will likely destroy your optic and damage your firearm's finish.
- Less is More: You just need a small drop on the threads. Slathering it on won't make it work any better.
Follow this advice, and you can be confident that your EOTech is securely mounted, properly zeroed, and ready for anything.
At Superior Tactical LLC, we provide the mission-critical gear you need, from EOTech optics to the high-quality mounts and risers that ensure flawless performance. Explore our curated selection of tactical accessories and get the expert support you need to build a system you can trust. Visit us today at https://superiortac.com.