A Practical Guide to Finding the Best Night Vision Gear
When you're trying to figure out the best night vision for your needs, everything boils down to one simple question: do you need to see what’s out there, or do you just need to know something is there?
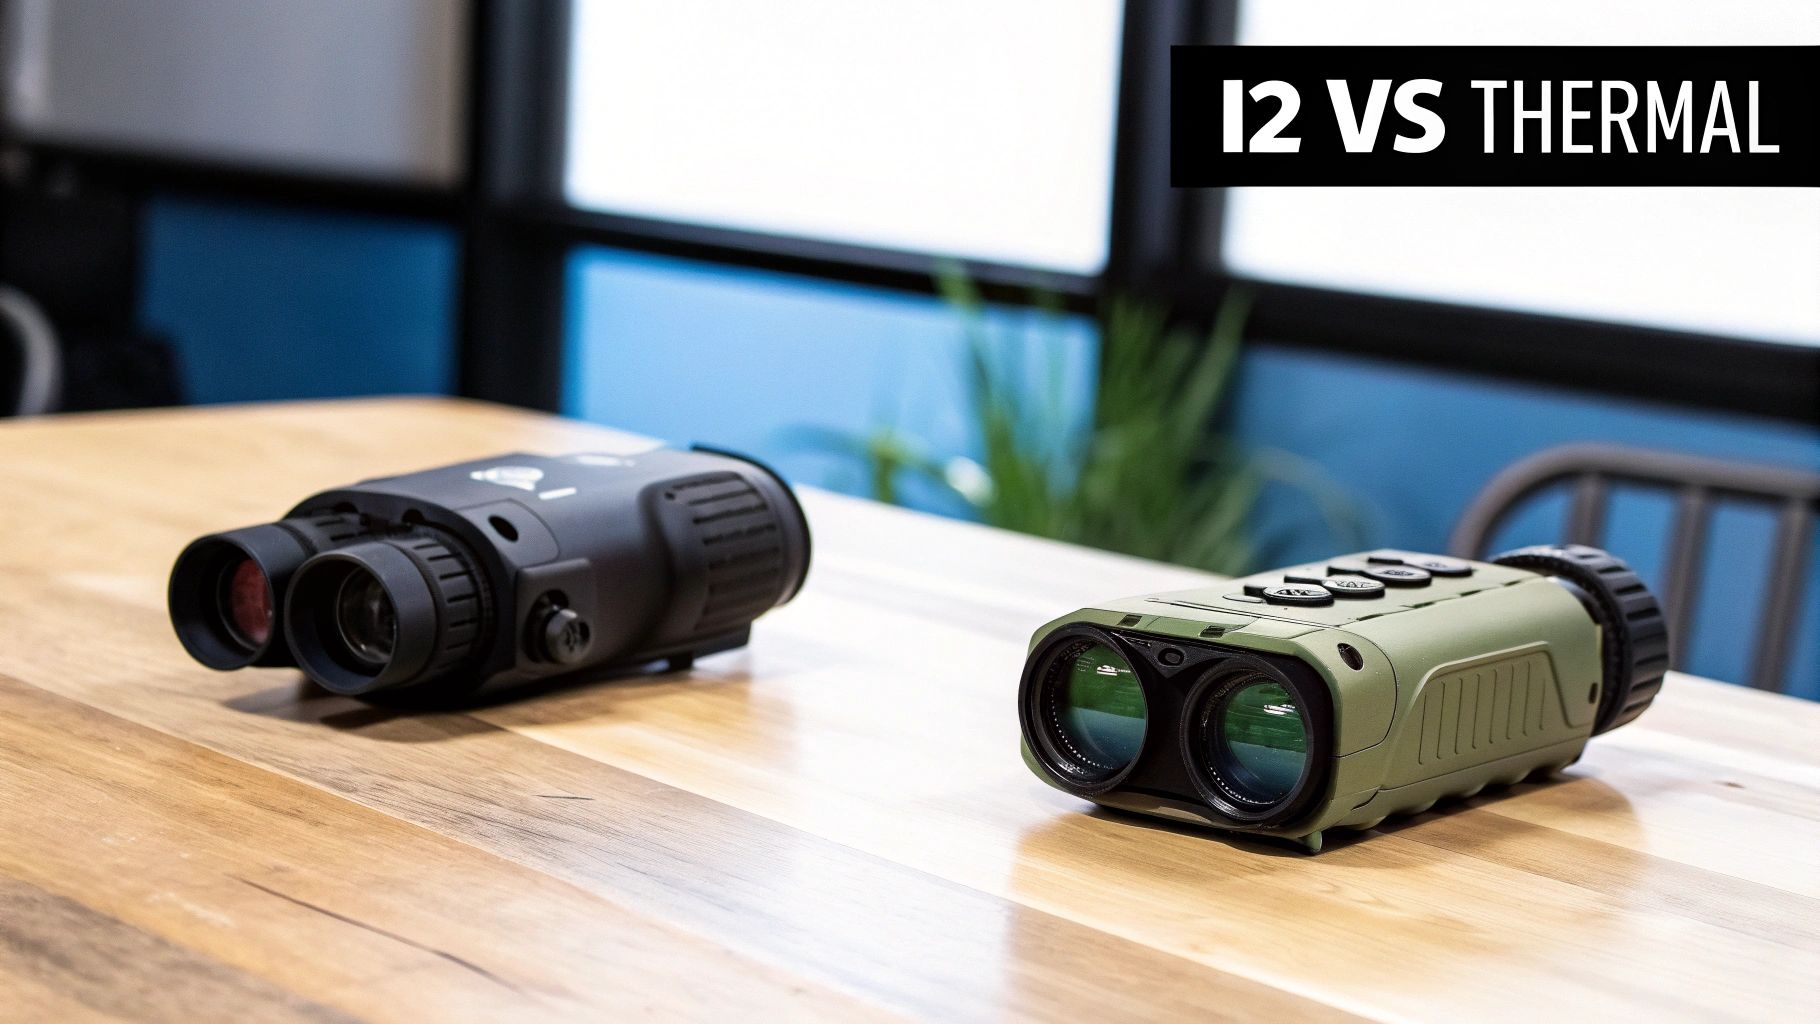
The answer isn't about picking a specific brand or model right away. It's about understanding the two fundamental technologies that let us own the night: image intensification for clear identification, and thermal imaging for pure, undeniable detection.
Image Intensification vs. Thermal Imaging
Before we get into the weeds on generations, specs, or mounting options, you have to get this one concept straight. These two technologies don't just work differently; they give you completely different information about your surroundings. Mixing them up is easily the biggest and most costly mistake newcomers make.
Think of it this way: Image Intensification (I²) is like giving your eyes a superpower. It grabs the faintest traces of ambient light—from the moon, stars, or even distant city glow—and multiplies it thousands of times. The result is a crisp, recognizable image where you can see faces, trees, and obstacles.
Thermal imaging, on the other hand, is more like developing a predator’s sixth sense for heat. It doesn’t see light at all. Instead, it sees the heat energy that every single object radiates. A thermal device turns these heat signatures into a picture, making warm bodies pop against a cooler background.
When to Choose Image Intensification
Image intensification is what most people imagine when they hear "night vision," with its classic green or modern white phosphor glow. Its strength lies in delivering a detailed, true-to-life picture, which is absolutely vital for moving around and knowing exactly what you're looking at.
You'll want to go with I² technology when your mission demands:
- Positive Identification: You have to be 100% sure of your target. Is that a coyote or the neighbor's dog? Can you read that street sign? I² gives you that certainty.
- Navigating Terrain: Moving safely on foot or in a vehicle means seeing the dips, rocks, and branches in your path. I² provides the depth perception and environmental detail you need to do it without breaking an ankle.
- Total Situational Awareness: You get a complete picture of your environment, not just the hot spots.
When to Choose Thermal Imaging
Thermal is the undisputed king of detection. It couldn't care less about visible light, so it works in pitch-black darkness where an I² device would be completely blind without an infrared (IR) illuminator. Camouflage, fog, and smoke are useless against it—nothing can hide a heat signature.
Thermal is the clear winner for:
- Pure Detection: Nothing beats thermal for spotting a warm body hiding in thick brush or peering through fog. It’s almost unfair how easily a target stands out.
- Search and Rescue: Finding a lost person or animal becomes much easier when their body heat lights up on your screen, especially across wide-open spaces.
- Tracking and Recovery: You can follow a blood trail from a hundred yards away or spot game from distances where you’d be completely invisible.
To make this even clearer, here’s a quick breakdown of how these two technologies stack up.
Image Intensification (I²) vs. Thermal Imaging at a Glance
This table offers a quick comparison of the two core night vision technologies to help you decide which is right for your application.
| Feature | Image Intensification (I²) | Thermal Imaging |
|---|---|---|
| Primary Use | Identification & Navigation | Detection & Tracking |
| How It Works | Amplifies ambient light | Detects heat signatures (infrared) |
| Sees Through… | Glass, water | Smoke, fog, light foliage |
| Needs Light? | Yes, a tiny amount (starlight, etc.) | No, works in total darkness |
| Image Detail | High detail, shows texture | Less detail, shows heat contrast |
| Best For… | Recognizing faces, reading signs, moving | Finding hidden targets, recovery |
| Limitations | Ineffective in zero light (caves) | Can't see through glass |
Ultimately, your choice depends entirely on your primary goal.
The core decision is simple: I² lets you see what something is, while thermal tells you that something is there. The ultimate setup often involves using both, but understanding this distinction is the critical first step to making a smart purchase.
This decision tree gives you a great visual for making that first big choice.
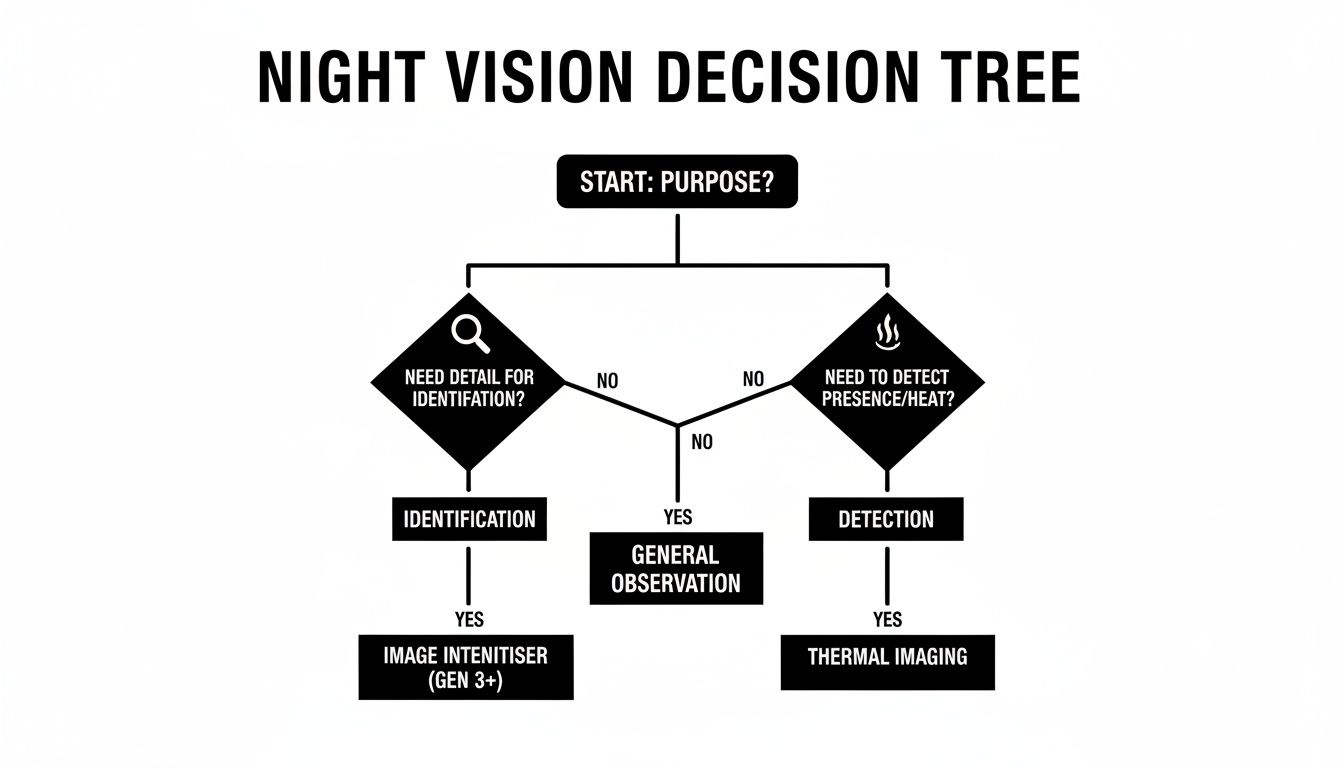
As the chart shows, your purpose points you down the right path. If you need to recognize specific details, you’re heading toward image intensification. If all you need to do is find a heat source, thermal is your answer. To get a better handle on the nuances, you can explore the different types of night vision in our more detailed guide.
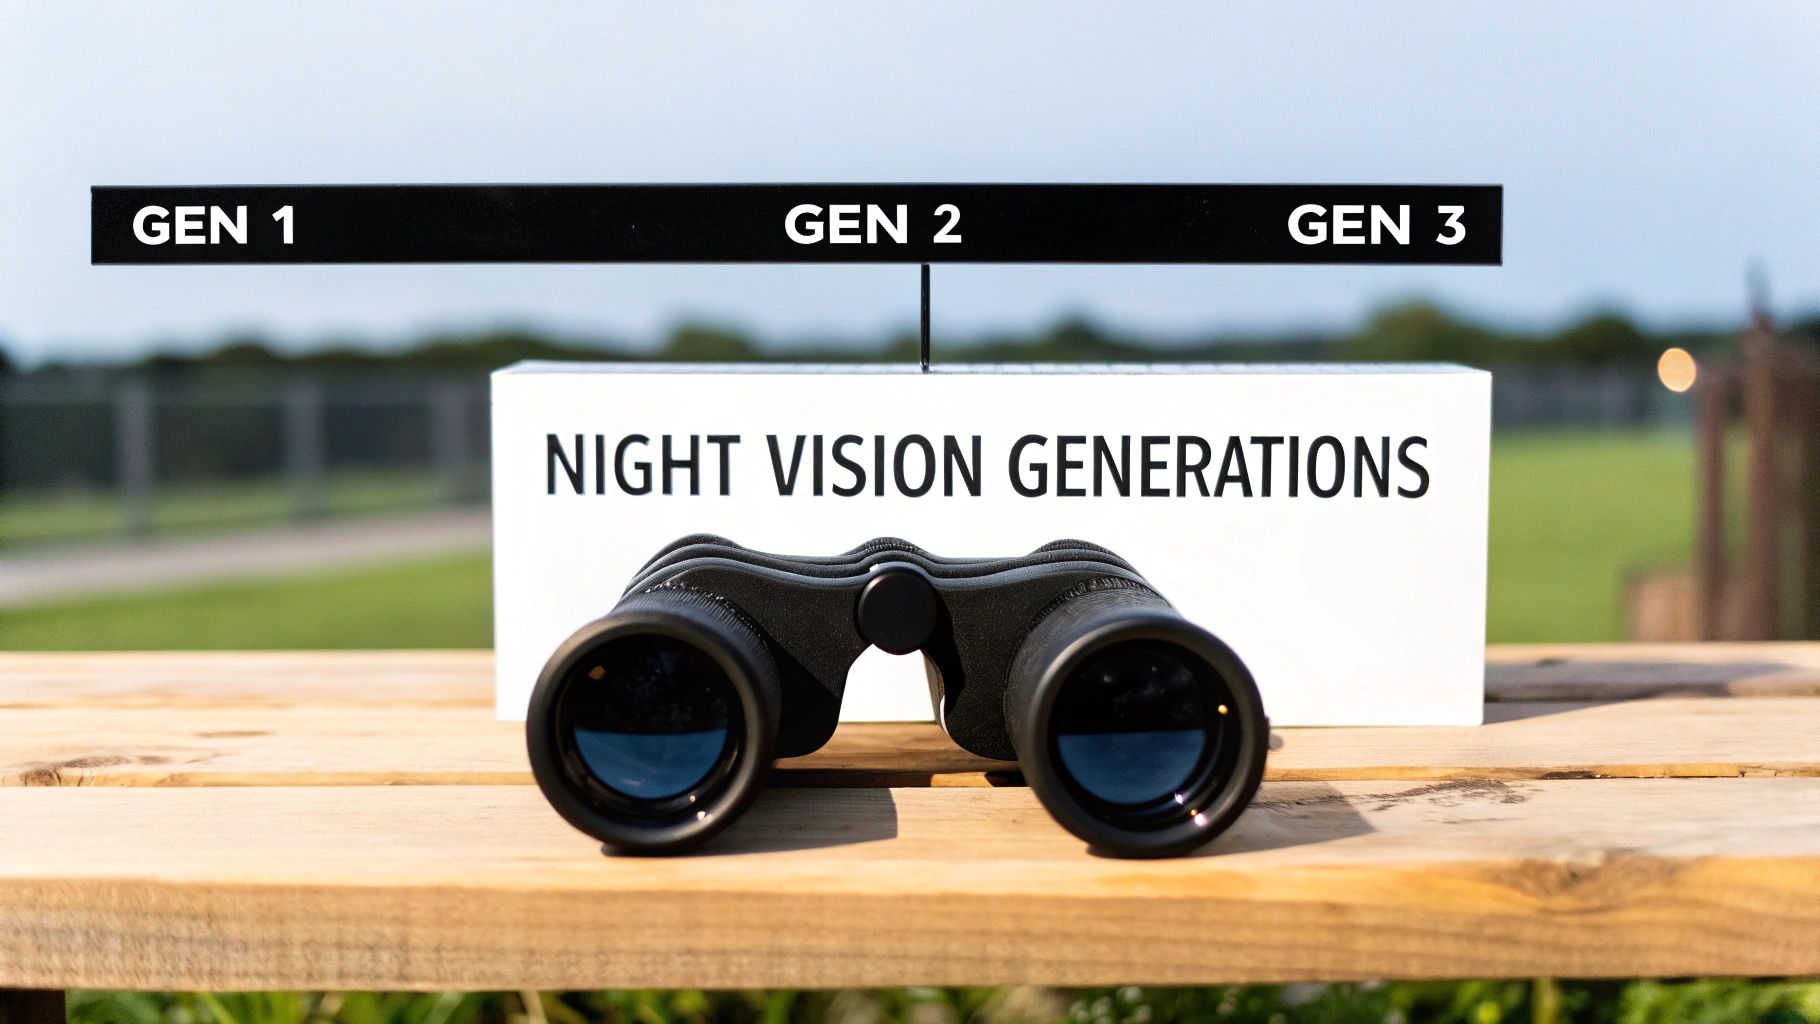
A Crash Course in Night Vision Generations
When you start digging into night vision, you'll hear the term "generation" thrown around a lot. This isn't just marketing fluff; it's the single most important factor determining a device's performance and price. Each generation represents a massive technological leap, a story of solving the problems that plagued the one before it.
Think of it as the evolution of the engine. You wouldn't expect a Model T to keep up with a modern V8, and the same principle applies here. We’re going to walk through this evolution, from the bulky, fuzzy origins to the crystal-clear systems used by the pros today.
Gen 1: The Grandfather of Night Vision
First-generation (Gen 1) gear, which came on the scene back in the 1960s, was the original trailblazer. For the first time, you could see in the dark. But it wasn't pretty. These units needed a lot of ambient light—think a bright, full moon—to work well.
The image was often warped around the edges, creating a "fish-eye" effect that could be disorienting. It was also grainy, and a sudden bright light could cause the entire image to "bloom" or wash out completely. It worked, but just barely by today's standards.
Gen 2: The MCP Revolution
The 1970s brought us Generation 2, and it was a monumental improvement. The secret sauce was the Micro-Channel Plate (MCP). Imagine a tiny glass disc drilled with millions of microscopic channels. As electrons from the faint light passed through, they'd bounce off the walls, multiplying exponentially.
This innovation created a much brighter, sharper, and cleaner image. Suddenly, you could operate effectively on a moonless, starlit night. The annoying fish-eye distortion was gone, making Gen 2 the first truly practical and serious night vision technology.
Gen 3: The Gold Standard
Generation 3 is where things got serious. Introduced in the 1980s, this technology became, and remains, the professional standard for military and law enforcement units across the globe. The breakthrough was a new photocathode material: Gallium Arsenide (GaAs).
This material is incredibly efficient at converting photons into electrons, especially in the near-infrared spectrum. The result is a crisp, high-contrast image that amplifies available light by an astonishing 50,000 to 70,000 times. The advantage was so significant that during Operation Desert Storm, one general credited U.S. night vision superiority as a key reason for their success.
Key Takeaway: The jump from one generation to the next isn't a small step. It’s a complete overhaul of the core technology, leading to exponential gains in performance, clarity, and the ability to see in near-total darkness.
Modern Gen 3 tubes have only gotten better, incorporating features designed to solve real-world problems.
- Autogating: This is a must-have for dynamic environments. It rapidly cycles the tube's power when exposed to bright light, like muzzle flashes or streetlights. This protects the tube from damage and, more importantly, prevents the user from being temporarily blinded.
- Phosphor Type: The classic "green screen" look comes from green phosphor. Many high-end modern units, however, use white phosphor, which produces a grayscale image. A lot of users find this black-and-white view more natural and less fatiguing to look at for long periods.
Choosing the right night vision comes down to understanding what you're paying for. A Gen 3 unit isn't just a little better than a Gen 1; they are in completely different leagues. Each advancement gives you a clearer picture in darker conditions, which is the name of the game. For a deeper dive, check out our complete guide on night vision generations.
How to Read a Night Vision Spec Sheet
Cracking open a night vision spec sheet for the first time feels like being handed a page of hieroglyphics. It's a jumble of acronyms and numbers that can be seriously intimidating. But once you know what to look for, those numbers tell you everything about a device's performance before you even lay hands on it.
These specs aren't just marketing fluff—they're the vital stats of the image intensifier tube inside. They tell you exactly how well you'll be able to see in the dark, how much detail you can make out from a distance, and what kind of image quality you can expect.
Decoding the Core Metrics
Let's cut through the noise and focus on the numbers that really matter. If you can get a handle on the "big three," you'll have about 80% of the picture you need to make a solid purchase.
Resolution (lp/mm)
Resolution, measured in line pairs per millimeter (lp/mm), is the most straightforward spec on the sheet. It's a direct measure of how much detail the tube can resolve.
Think of it like the difference between an old tube TV and a modern 4K screen. The 4K TV packs in more pixels, giving you a razor-sharp picture where you can see every blade of grass. The old TV, on the other hand, is a blurry mess up close. Higher lp/mm in a night vision device means a crisper, clearer image, which is the difference between identifying a threat and just seeing a vague blob. For modern Gen 3 tubes, you generally want to see at least 64 lp/mm, while top-tier units can push past 72 lp/mm.
Signal-to-Noise Ratio (SNR)
This is the single most important number for judging low-light performance. Period. Signal-to-Noise Ratio tells you how much clean image (the signal) you're getting compared to the electronic static, or "scintillation," you see in the dark (the noise).
The best analogy is listening to a radio in your car. When you’re right next to the broadcast tower, the music (signal) is perfectly clear. Drive out into the middle of nowhere, and the signal fades into a mess of static (noise). A high SNR means you get a clean, sharp image even when there’s almost no ambient light. For a good Gen 3 unit, look for an SNR of 25 or higher. Elite-level tubes will boast an SNR of 35+, and the difference in near-total darkness is staggering.
Putting It All Together with FOM
So, how do you get a quick, apples-to-apples comparison of different tubes? That's where Figure of Merit, or FOM, comes into play. It’s a simple formula that gives you one number to judge a tube’s overall performance potential.
FOM = Resolution (lp/mm) x Signal-to-Noise Ratio (SNR)
This single number is your go-to for a quick performance check. While it isn’t the only thing that matters (tube blemishes and other factors play a role), a higher FOM almost always equals a better tube. It's the same metric the U.S. government uses to classify devices for export, which tells you how much weight it carries.
For instance, a tube with 64 lp/mm and a 30 SNR gives you a FOM of 1920. Another with 72 lp/mm and a 35 SNR has a FOM of 2520—a massive leap in performance that you will absolutely see through the eyepiece.
To help you get a better feel for these numbers, here's a quick reference table.
Night Vision Spec Sheet Performance Tiers
Understanding what 'good' looks like is half the battle. Use this table to evaluate the key performance metrics of any night vision device you're considering.
| Specification | Minimum/Acceptable | Good/Professional Grade | Excellent/Elite Tier |
|---|---|---|---|
| Resolution (lp/mm) | 64 | 68-72 | 72+ |
| SNR | 24-28 | 28-34 | 35+ |
| FOM | 1600-1800 | 1800-2300 | 2300+ |
| EBI (Max) | < 2.5 | < 1.0 | < 0.7 |
| Halo (Max) | < 1.25 | < 1.0 | < 0.7 |
With this knowledge, you're no longer just a buyer; you're an informed user who can look past the hype. You can now analyze the real engine of any night vision system and find the best night vision that truly fits your needs and budget.
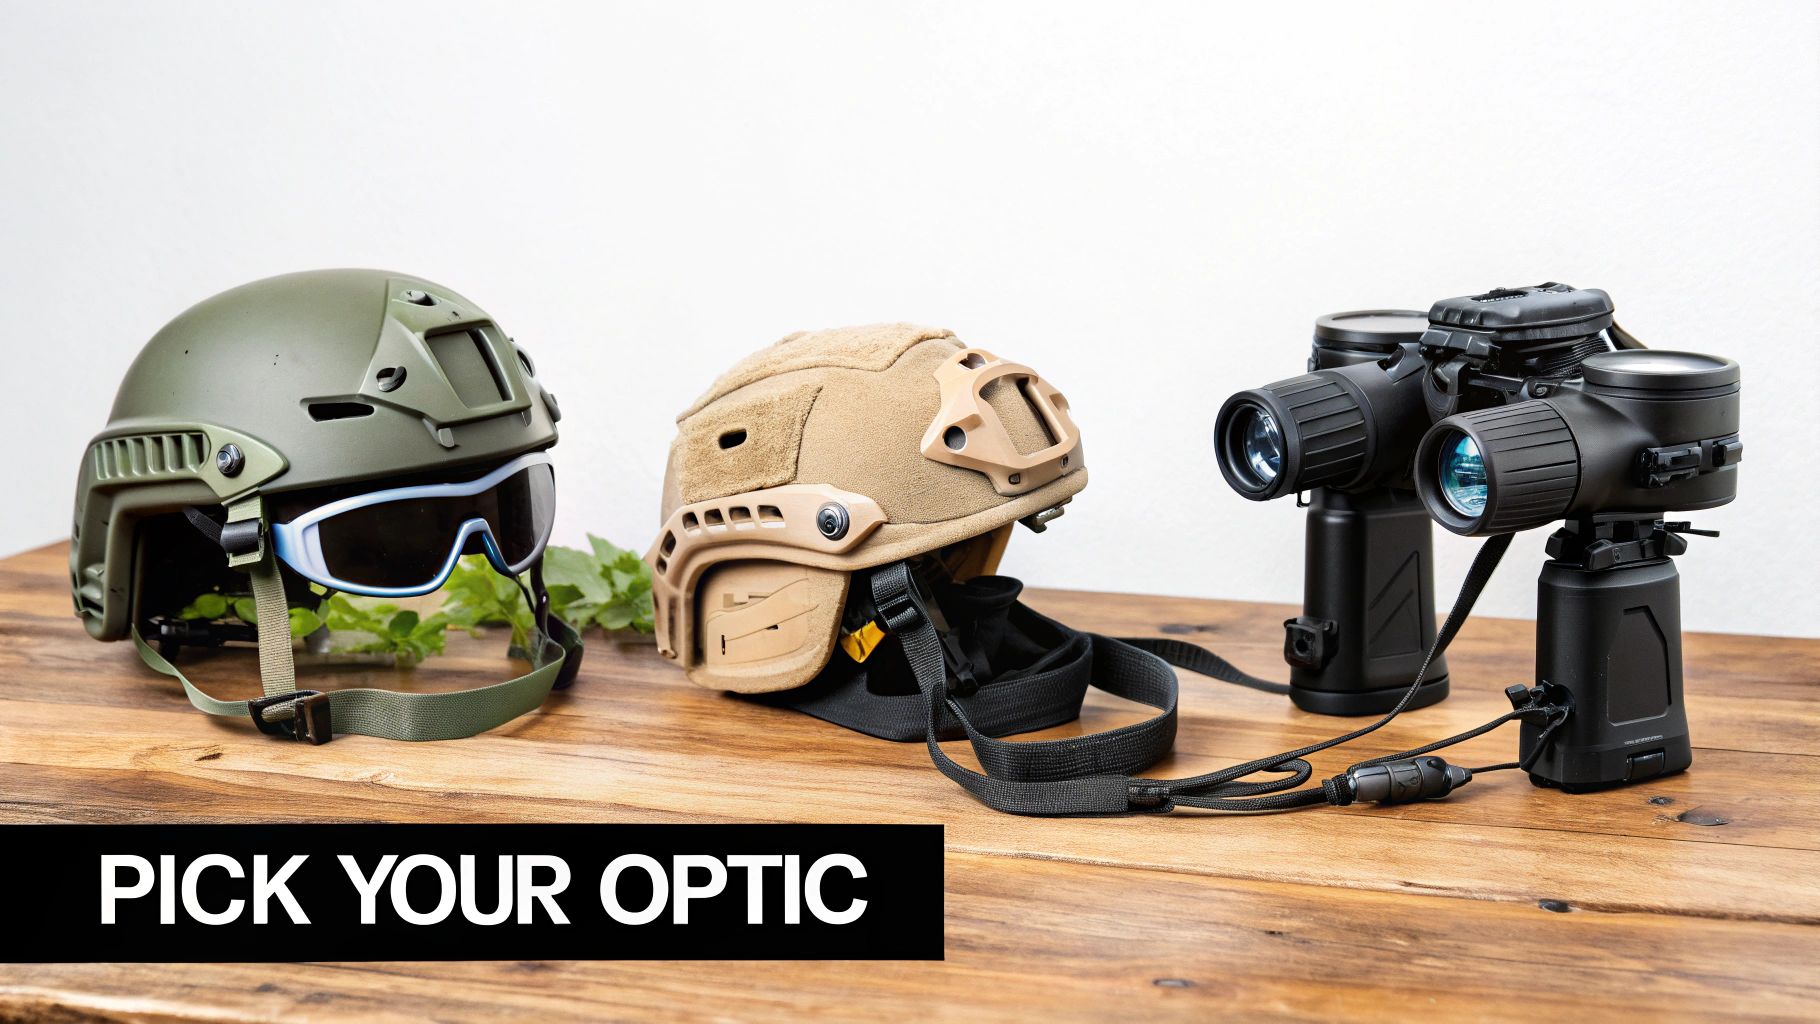
Choosing the Right Optic for Your Mission
Okay, you've got the generations and the spec sheet lingo down. Now the fun part begins: turning all that technical knowledge into a real-world advantage. We can finally move past the numbers and talk about what they actually mean when you're out in the dark.
The "best" night vision device isn't the one with the highest FOM score on paper. It's the one that feels like a natural extension of your own senses for the job at hand. A tool that's perfect for one situation can be a heavy, awkward liability in another.
Let's break down how to pick the right gear by looking at the three most common applications: law enforcement, hunting, and tactical preparedness. Each of these missions calls for a different approach to equipment.
For Law Enforcement Professionals
When your job involves clearing buildings or responding to high-risk calls in the middle of the night, your gear simply cannot fail. Durability and absolute reliability aren't just nice features; they're the bedrock of officer safety.
This is why a feature like autogating is a must-have, not a luxury. An autogated tube instantly reacts to sudden, bright lights—think street lamps, headlights, or even a muzzle flash. It prevents the image from washing out and protects the tube from damage, which is crucial for keeping your eyes on a threat during a chaotic moment.
- Dual-Tube Systems: There's a reason professionals almost universally run binos. Having a tube for each eye gives you true depth perception, which is critical for moving confidently through tight spaces, accurately judging distances, and even driving. A monocular is lighter, sure, but the immersion and reduced eye fatigue from a dual-tube setup pay dividends over a long shift.
- High FOM and SNR: In police work, positive identification is everything. A high-spec tube with a super clean image (high SNR) and crisp resolution is what allows an officer to tell the difference between a firearm and a cell phone from across a dark parking lot. Those details matter.
- Ruggedized Housings: The body of the device needs to be just as tough as the tube inside it. You'll want to look for systems with a proven track record for taking a beating in the real world.
For the Dedicated Hunter
The hunter's world is different. The focus shifts from close-quarters navigation to long-range detection and identification. The game is simple: spot your quarry from a distance, make a positive ID, and do it all without giving away your position.
Here, weight and efficiency are huge factors. A lightweight monocular, like the classic PVS-14, is often the perfect tool for the job. You can mount it on a helmet for hands-free scanning while you're on the move, then pop it off in a second to use as a handheld spotter. That kind of versatility keeps your kit light and helps you stay out longer without getting worn down.
One of the slickest advantages of using a monocular for hunting is that you keep your unaided eye dark-adapted. This lets you switch between the intensified view and your natural night vision in an instant, giving you a much better feel for your total surroundings.
Crystal-clear image quality isn't just for bragging rights; it's an ethical requirement. A good tube with high resolution and SNR ensures you can tell a coyote from a stray dog at several hundred yards. It’s about being a responsible hunter.
For the Tactical Enthusiast
The prepared citizen or tactical enthusiast is often looking for that sweet spot between professional-grade capability and a realistic budget. The goal is to build a reliable, adaptable system that can handle anything from a home defense scenario to low-light training courses.
Modularity is the name of the game here. A quality monocular is usually the best place to start because it's a true jack-of-all-trades. You can mount it on a helmet, run it behind a red dot on your rifle, or just use it as a handheld scanner. You get maximum bang for your buck.
While everyone wants elite-tier specs, a solid Gen 3 unit with good, clean performance often delivers 90% of the capability of a top-dollar device for a fraction of the cost. The focus should be on getting a quality system you can afford to train with constantly. At the end of the day, knowing how to use your gear is just as important as the gear itself.
Building Your Complete Night Vision System
Your night vision device is the heart of your low-light capability, but it’s only one piece of a much larger puzzle. To truly own the dark, you have to think bigger. A complete, functional system built around the optic is what separates the pros from the amateurs.
This means investing in the support gear that makes your NVD stable, effective, and protected.
Think of it this way: you can have the most powerful engine in the world, but it’s useless without a solid chassis, good suspension, and reliable tires to put that power to the ground. The same exact principle applies here. The best image intensifier tube is severely handicapped by a poor setup.
The Non-Negotiable Foundation: Helmet and Mount
Let's get one thing straight: for any serious use, going handheld isn't a viable long-term strategy. You need your hands free. That’s why a high-quality helmet and a rock-solid mount are absolutely non-negotiable. They create a stable platform, allowing you to move, navigate, and handle your other equipment without fumbling in the dark.
A wobbly, unstable mount is more than just an annoyance—it's a critical failure waiting to happen. It causes image shake, which leads to eye strain, and can easily knock your very expensive device out of alignment at the worst possible moment. This is precisely why professionals trust proven mounting systems.
- Dovetail Mounts: These are the modern standard for a reason. Their tough, trapezoidal shape locks in tight, giving you a secure connection with minimal wobble. Your optic stays exactly where you put it.
- Bayonet Mounts: You might still see these "horn" style mounts around, but they're an older design. They just aren't as stable as dovetail systems and are steadily being phased out for the more secure interface.
The connection between your helmet and your night vision is the most critical link in your entire setup. Skimping here is like putting budget tires on a race car—it undermines the performance of the entire system.
Essential Accessories for Peak Performance
Beyond the helmet and mount, a few key accessories solve common problems and will dramatically improve your experience. These aren't just flashy add-ons; they are force multipliers that enhance your capability and protect your investment.
An infrared (IR) illuminator is one of the most important tools you can own. Think of it as a flashlight that only your night vision can see. When you find yourself in zero-light conditions—like inside a windowless building or on a moonless, overcast night—an IR illuminator provides the light your device needs to function. It lets you "paint" an area with invisible light, turning pitch blackness into broad daylight through your tube.
On top of that, a few other small but vital pieces of kit will protect your gear from the elements and accidental damage.
- Sacrificial Lenses: These are cheap, clear covers that screw onto your objective lens. They take the hit from dirt, debris, or a nasty bump, protecting the expensive, coated lens underneath.
- Demist Shields: Ever had your glasses fog up? In humid environments, the temperature difference between your eye and the eyepiece lens can do the same thing, instantly blinding you. A demist shield creates a small air gap that prevents this condensation, keeping your view clear.
By carefully choosing these components, you transform a standalone device into a fully integrated system. This complete approach is what unlocks the full potential of the best night vision technology.
Keeping Your Night Vision Gear in Fighting Shape
Dropping a few thousand dollars on a quality night vision device is a serious commitment. Protecting that investment is about more than just tossing it in a padded case—it’s about smart maintenance and knowing who to call when things go sideways. Get this right, and your gear will serve you reliably for years.
The basics go a long way. Think of it like weapon maintenance. Keep your lenses clean with a dedicated microfiber cloth and the right cleaning solution to protect the delicate coatings. And please, keep your fingers off the glass; the oils from your skin are a slow-acting poison to those coatings.
Battery discipline is another non-negotiable. Stick with high-quality lithium batteries, and always pull them out before putting the unit into long-term storage. This simple step prevents the nightmare of a corroded battery compartment. When you're not using it, your device should live in a cool, dry place, ideally inside its hard-sided case.
Warranties and Professional Service
Even the toughest gear can have issues. That’s when you’ll be glad you paid attention to the warranty and the company’s service reputation. A solid warranty isn't just a piece of paper; it’s the manufacturer's promise to stand behind their product. Always know what's covered before you buy.
Night vision has come a long way since Dutch scientists first converted infrared to a visible image back in 1934. Today's top-tier Gen 3 devices are incredibly sophisticated, and the best retailers, like us at Superior Tactical, back them with 10-year warranties and handle repairs in-house. This ensures that the experts who know the gear best are the ones working on it. Want to see just how far the tech has come? You can explore the history of night vision development to appreciate the journey.
Pro Tip: Choosing a vendor with in-house repair services is a huge advantage. It means quicker turnaround times and technicians who are intimately familiar with your specific unit. For professional users who can't afford downtime, this is absolutely critical.
If you're running into problems, it's worth understanding common night vision gear issues and how repairs can help.
Upgrades and DIY Builds
Part of protecting your investment is keeping it relevant. The night vision world is incredibly modular, so you're not stuck with the setup you bought on day one.
You can often perform simple but effective upgrades yourself. Swapping to a lighter housing or installing better lens assemblies can completely change the feel and performance of your device. For the more adventurous, DIY build kits offer the ultimate in customization, letting you assemble a unit from scratch that perfectly matches your mission needs and preferences.
Common Questions We Hear All the Time
Even after you've done your homework, pulling the trigger on a serious night vision setup can feel like a huge step. A few last-minute questions always seem to pop up. Getting those answered is the key to buying with confidence, so let's tackle the things people ask us most often.
Think of this as clearing the air on some of the persistent myths and confusing points, so you know exactly what you're getting into.
Is White Phosphor Really Better Than Green?
This is probably the most common debate out there, but the honest answer is that it's almost entirely about user preference, not a major leap in performance. Green is the classic for a reason—our eyes are naturally most sensitive to shades of green, which can make long nights a little easier on the brain. Anyone who's spent time in the military likely trained on green and feels right at home with it.
White phosphor (W/P), on the other hand, produces a black-and-white image that many people find more intuitive. The feedback we often get is that the grayscale view offers better contrast, making it easier to pick out details and textures in the shadows. While W/P is often priced as a premium option, remember that the real performance drivers are the tube's core specs, like its SNR and resolution, not the color it glows.
Can I Use My Night Vision During the Day?
No. Just… no. Firing up a traditional image intensifier tube in daylight, or even a brightly lit room, is a fast way to cause permanent, catastrophic damage. That little pinhole day cap isn't just for looks—it has to stay on the lens unless you are truly in the dark.
Even with advanced features like autogating, which helps protect the tube from sudden flashes like muzzle blast, these devices are absolutely not made for daytime use. If you need something that works around the clock, you’ll want to look at digital night vision systems or thermal imagers, which aren't affected by bright light.
A Critical Warning: Exposing an active I² night vision device to daylight, even for a split second without the cap, can permanently burn the tube. Treat it like the sensitive instrument it is, and it will last you a lifetime.
Monocular vs. Binoculars: What's the Real Difference?
Choosing between a single-tube monocular and a dual-tube binocular setup is all about balancing cost, versatility, and how you plan to use it.
Monocular (like a PVS-14): This is the jack-of-all-trades. A single-tube unit is lighter, more affordable, and incredibly versatile. You can mount it on a helmet, use it as a handheld spotter, or even adapt it behind a weapon sight. One of its biggest advantages is leaving your other eye un-aided, preserving its natural night adaptation, which is great for situational awareness.
Binoculars (Dual Tubes): Having a tube for each eye gives you true depth perception. This isn't just a luxury; it's absolutely critical for moving confidently over rough terrain, driving a vehicle, or operating up close. The immersive, stereoscopic view is also far more comfortable and less fatiguing over long hours. The trade-off? More weight and a significantly higher price tag.
For most general-purpose use, a monocular will get the job done. But for serious navigation and professional tactical use, dual tubes are the standard for a reason.
Do I Need a Special License to Buy Night Vision?
Good question, and the answer involves some important rules. High-performance Gen 3 night vision is controlled by the U.S. Department of State under ITAR (International Traffic in Arms Regulations). This means it's considered a defense article and cannot be legally taken or shipped outside of the United States without specific government approval.
As a U.S. citizen buying from a U.S. company for use inside the country, you don't need any special license. The transaction is straightforward. However, the legal responsibility falls on you to ensure the device never leaves the country. We strictly adhere to these federal regulations to make sure this technology stays in the right hands.
At Superior Tactical LLC, we do more than just sell gear—we provide complete solutions backed by real-world expertise and a 10-year warranty. Check out our curated selection of professional-grade optics and let us help you build the right system today at https://superiortac.com.