Picatinny Rail Scope Mounting A Tactical and Hunting Guide
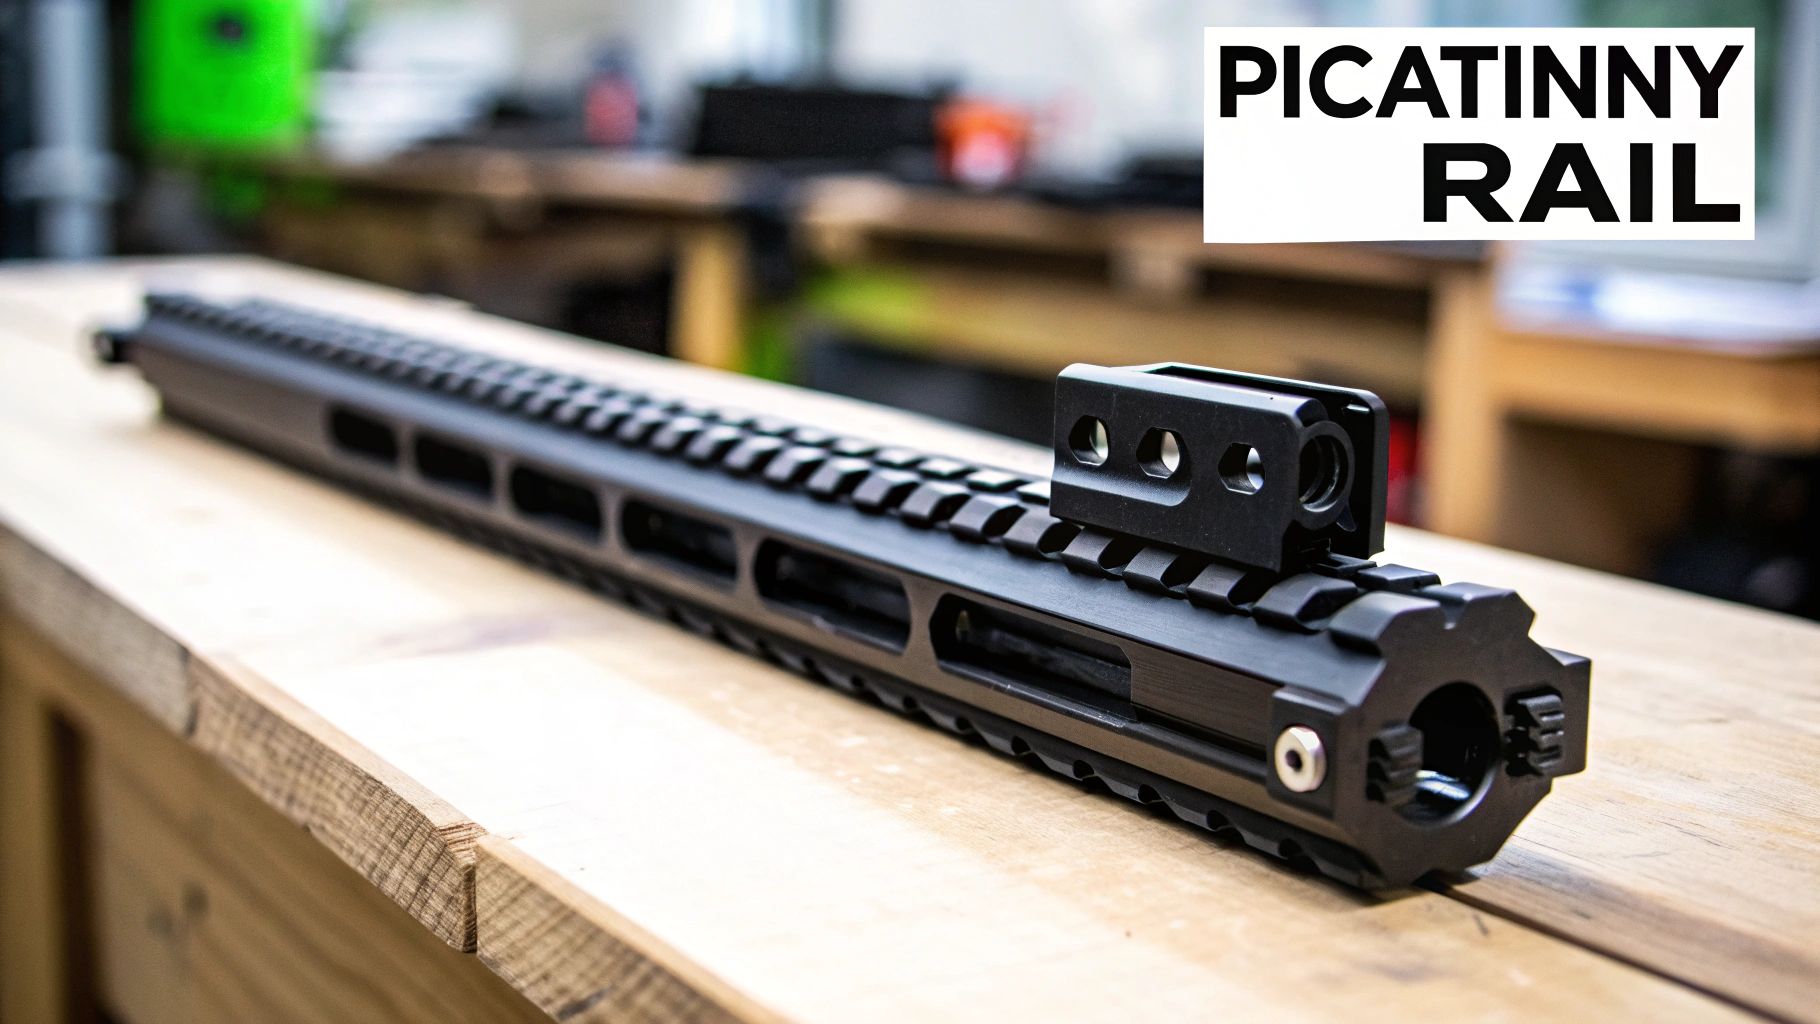
First things first, let's clear something up. A "Picatinny rail scope" isn't a unique type of optic. It's simply any scope or red dot sight built to attach to a Picatinny rail—the universal mounting system you see on most modern rifles.
This rail system is the unsung hero of firearm modularity. It’s a standardized platform, officially known as MIL-STD-1913, that ensures your scope, laser, or flashlight will clamp on securely and predictably every single time.
Understanding The Picatinny Rail Scope System
Before you even think about mounting a new scope, it helps to understand why the Picatinny system became the industry benchmark. Think of it like the USB port on your computer. It’s a common interface that lets accessories from hundreds of different brands all play nicely together on one firearm.
This incredible compatibility isn't a happy accident. The Picatinny rail was developed to meet a military demand for a rugged and perfectly repeatable mounting surface. Every single dimension, from the width of the rail to the exact spacing and shape of the recoil slots, is meticulously defined by that military specification.
The Foundation of Stability and Versatility
This rigid standardization is what gives shooters who demand peak performance a massive edge. The real-world benefits all come down to its physical design, which is what ultimately impacts your accuracy and confidence in the field.
- Unmatched Cross-Compatibility: Because the dimensions are universal, a scope mount from Company A will fit flawlessly on a rail from Company B. No guesswork, no hassle.
- Superior Return-to-Zero: The square-bottomed recoil slots act like locking lugs, preventing the scope from creeping forward under recoil. This means you can remove your optic for cleaning or transport and reinstall it without losing your zero—a non-negotiable feature for serious use.
- Rock-Solid Mounting: The design gives your scope mount multiple points of contact, creating an incredibly secure connection that won't budge, whether you're in a tactical scenario or deep in the backcountry.
The real genius of the Picatinny rail is its simplicity and strength. It solves the complex problem of optic stability with an elegant, standardized design that has proven itself in the most demanding environments imaginable.
At the end of the day, opting for a picatinny rail scope setup is an investment in a system known for its unshakable reliability. It's that confidence that makes it the go-to choice for military operators, law enforcement officers, and discerning civilian shooters everywhere.
Picatinny Vs. Weaver Rails: Decoding The Differences
At a quick glance, Picatinny and Weaver rails look almost identical. This visual similarity is a common trap that leads even seasoned shooters down a path of frustrating incompatibility. While both systems give you a place to mount your scope, their subtle design differences create a critical one-way street when it comes to what fits what.
Think of it this way: Picatinny is the universal standard, while Weaver is the older, less-defined predecessor. It’s a bit like trying to plug a three-prong electrical cord into a two-prong outlet—it just won’t work without the right adapter.
The real devil is in the details, specifically the dimensions of the recoil slots. These are the cross-cuts that your scope mount’s locking lugs grab onto to keep your optic from sliding under recoil.
The Critical Dimensions
Picatinny rails are built to a strict military specification known as MIL-STD-1913. This standard dictates that the recoil slots must be wider and squared-off, measuring precisely 0.206 inches (5.23 mm) across. Weaver slots, by contrast, are narrower, typically measuring around 0.180 inches (4.57 mm).
That tiny difference—less than the thickness of a dime—has massive implications for a secure mount. A true Picatinny-spec mount has a beefy recoil lug designed for that wider 0.206-inch slot. Try to force it into a narrower Weaver slot, and you risk damaging both the rail and your expensive mount. It simply won't fit.
The One-Way Compatibility Rule
Here’s the golden rule to remember: Weaver-style accessories will generally fit on a Picatinny rail, but Picatinny-specific mounts will not fit on a Weaver rail. This is the source of countless headaches for shooters who assume they're interchangeable.
A common mistake is buying a Picatinny-spec mount for a Weaver rail. The mount's recoil lug is too big to seat properly in the narrower slot. This creates a wobbly, unstable platform for your optic, guaranteeing you'll never hold zero.
Another huge difference is the slot spacing. On a true Picatinny rail, the slots are spaced uniformly from center-to-center at 0.394 inches (10.01 mm). This consistent, predictable pattern is what allows for true modularity, letting you place multiple accessories exactly where you need them—like lining up a magnifier perfectly behind a red dot sight.
Weaver rails have no such standard. The spacing between slots is often inconsistent and varies from one manufacturer to the next. This can make it a real pain to mount longer optics or accessory combinations that need to lock into specific slots. If you're getting into more advanced setups, like pairing night vision with a day scope, knowing these limitations is absolutely critical. For a deeper dive on that topic, check out our guide on dovetail mounts for night vision goggles.
Why The Standard Matters
This strict standardization is the secret behind the Picatinny rail’s legendary "return-to-zero" capability. The precise, repeatable fit means that when you remove an optic and reinstall it, it locks back into the exact same spot. Your point of impact stays the same.
For law enforcement, military, or serious hunters who might need to swap optics in the field, this is a non-negotiable feature. You can't afford to waste time and ammo re-sighting your rifle every time you change your setup.
To make it crystal clear, here’s a side-by-side breakdown of the key differences.
Picatinny Vs Weaver Rail Specifications
| Specification | Picatinny Rail (MIL-STD-1913) | Weaver Rail |
|---|---|---|
| Slot Width | 0.206 inches (5.23 mm) | ~0.180 inches (4.57 mm) |
| Slot Spacing | Standardized (0.394 inches) | Non-standardized (variable) |
| Slot Bottom | Squared | Rounded or squared |
| Compatibility | Accepts Weaver accessories | Does NOT accept Picatinny accessories |
Ultimately, knowing which rail you have is the first step to building a reliable and accurate rifle. Always double-check your rail type and your accessory specs before you buy—it will save you a world of trouble down the line.
How To Choose The Right Picatinny Rail Scope
Picking the right scope for your Picatinny rail isn’t just about getting the biggest magnification or the fanciest reticle. It’s about finding the perfect match for what you’re actually doing with the rifle. Your Picatinny rail scope should feel like a natural extension of your goal, whether you’re operating in a fast-paced environment or waiting for that one perfect shot in the field.
Think of it like choosing tires for a truck. You wouldn't throw racing slicks on a 4×4 destined for muddy trails, and you wouldn’t put knobby off-road tires on a sports car for a track day. The same logic holds true for optics—the scope has to fit the job to get the best performance.
Aligning Optic Type With Your Mission
The first, most critical step is to honestly define your primary use case. The scope that’s perfect for a law enforcement patrol rifle is going to be wildly different from one built for long-range precision shooting.
Let's break down a few common scenarios and the optics that shine in them.
-
Tactical and Close-Quarters: For any dynamic situation inside 300 yards, a Low Power Variable Optic (LPVO) is the undisputed king. Scopes like a 1-6x or 1-8x give you a true 1x setting, which functions just like a red dot for lightning-fast aiming with both eyes open. When a target is further out, a quick twist of the dial gives you the magnification needed for positive ID and a precise shot.
-
Hunting: Here, your environment dictates everything. If you're hunting in thick woods or brush, a lower-power scope (think 2-7x or 3-9x) offers a wide field of view, which is crucial for finding and tracking game. For wide-open plains or mountain hunting where shots can stretch past 400 yards, you’ll want more magnification. Something like a 4-16x or 5-25x provides the clarity you need to make an ethical, long-range shot.
The image below shows the critical differences between Picatinny and Weaver rails. Getting this right is the foundation of a solid mounting system.
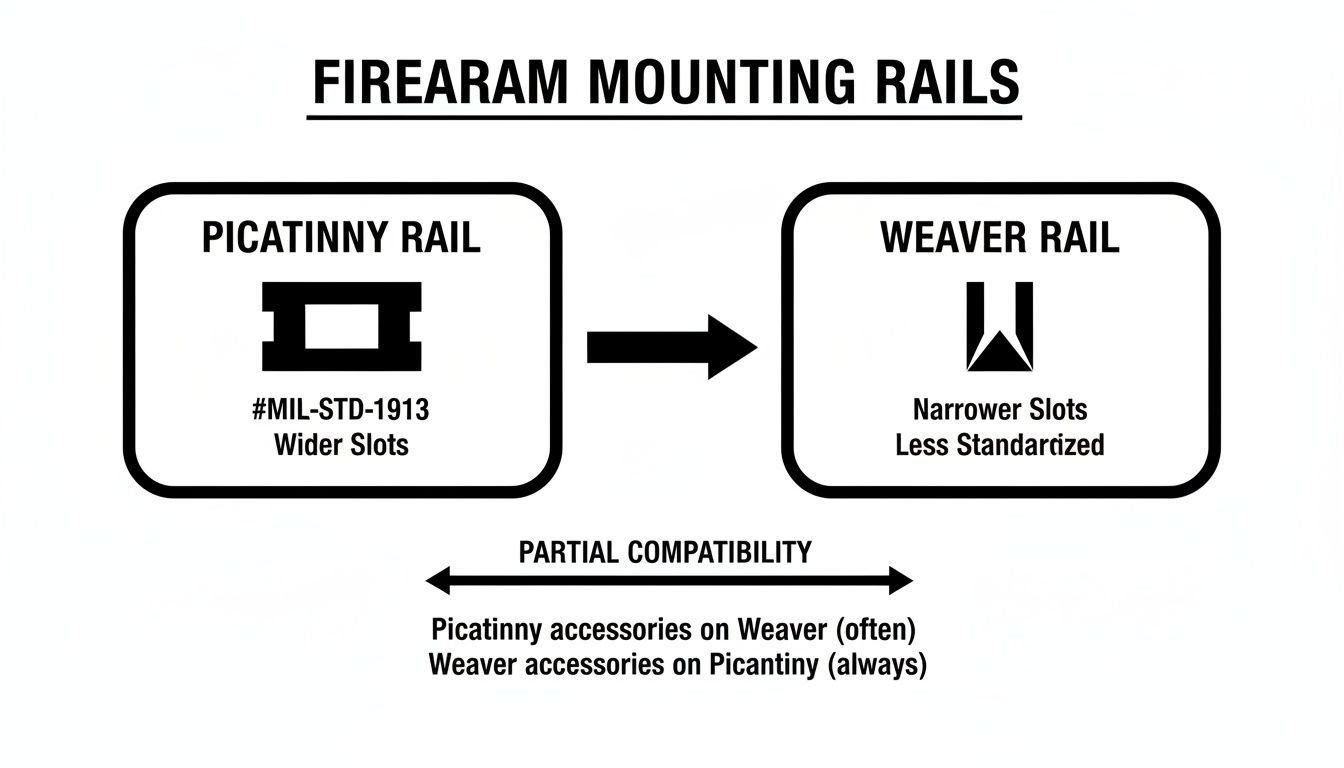
As you can see, a true Picatinny mount has a wider recoil lug that simply won't fit into a narrower Weaver slot. This small detail is why checking for compatibility is so important.
Decoding Reticles And Lens Coatings
Once you've got the right type of optic in mind, it's time to dig into the details of the reticle and lens quality. These two features have a huge impact on how you actually see and engage your target through the scope.
The reticle is just the aiming point you see when you look through the glass. The options can feel endless, but they generally fall into a few main camps:
- Simple Duplex: This is the classic crosshair. It’s perfect for an uncluttered view and is a fantastic choice for general-purpose hunting.
- Bullet Drop Compensator (BDC): These reticles have extra markings that line up with your bullet's trajectory at different distances. They're great for shooting quickly at various ranges without having to fiddle with your turrets.
- MOA/MRAD Grids: Often called "Christmas tree" reticles, these use Minute of Angle (MOA) or Milliradian (MRAD) hash marks for making precise holds for both elevation and wind. They’re the go-to for precision shooters who need a data-rich display for maximum accuracy.
Lens coatings are just as important, especially when the light starts to fade. Good, multi-coated lenses are designed to maximize light transmission, cut down on glare, and keep colors true. This can mean the difference between seeing your target clearly at dawn or dusk and just seeing a fuzzy, washed-out silhouette.
The quality of the glass and its coatings is what you're really paying for in a premium scope. Superior light transmission and clarity aren't luxuries; they are fundamental to performance when conditions are less than perfect.
The market for these scopes is huge and growing. The global rifle scope market was valued at USD 5.827 billion in 2025 and is projected to keep climbing. Telescopic scopes—the kind we’re talking about for Picatinny rails—held a massive 70.80% revenue share in 2024, showing just how popular and essential they are. You can discover more insights about these market trends and what they mean for shooters.
Ultimately, choosing the right Picatinny rail scope is a process of self-assessment. Figure out exactly what you need it to do, understand how the key features help you do it, and you’ll end up with an optic that will serve you well for years.
A Step-By-Step Guide To Mounting Your Scope
You can have the best Picatinny rail scope money can buy, but it’s completely worthless if it isn't mounted with care. Getting the installation right is the absolute foundation of accuracy. It’s what ensures your optic holds zero and performs exactly as it should, shot after shot. This guide will walk you through the process, step-by-step, to take out the guesswork and help you avoid common—and costly—mistakes.
Think of it like building the foundation for a house. If that foundation isn't perfectly level and secure, everything you build on top of it will be off. It’s the same exact principle here; a rock-solid mount is non-negotiable if you want consistent performance from your rifle.
Preparing Your Gear
First things first: get your tools together and degrease everything. Even a tiny bit of oil from your fingers or factory residue on the rail or rings can cause the scope to slip under recoil. That slippage, no matter how small, will lead to a frustrating loss of zero. All it takes is a quick wipe-down with some isopropyl alcohol on a clean cloth.
Now, go ahead and loosely attach your scope rings or cantilever mount to the Picatinny rail. I like to set the rear ring as far back as it can go without getting in the way of the charging handle or other controls. Then, I place the front ring as far forward as possible, making sure the scope's main tube will still sit evenly between them. This wide stance provides a much more stable platform for the optic.
The Mounting and Leveling Process
With the rings loosely on the rail, it's time to get the scope itself secured and perfectly aligned. This is where paying close attention to the small details really pays off.
- Set The Scope: Carefully place your scope into the bottom halves of the rings and put the top halves on. Snug the screws down just enough so the scope can still slide back and forth and rotate, but with a bit of resistance. You don't want it flopping around.
- Establish Eye Relief: Get into your natural shooting position and shoulder the rifle, but keep your eyes closed. When you open them, you should instantly see a full, crisp sight picture from edge to edge. If you see a black ring or a fuzzy shadow (often called "scope shadow"), you need to slide the scope forward or backward until that view is perfect. Do this a few times to be absolutely sure you’ve found the sweet spot.
- Level The Reticle: This is absolutely critical, especially for long-range accuracy. If your reticle is even slightly canted, your shots will drift left or right as the distance increases. The easiest way to get this right is with a set of bubble levels—one on the Picatinny rail and another on top of the scope’s elevation turret. Gently rotate the scope until both bubbles are dead center.
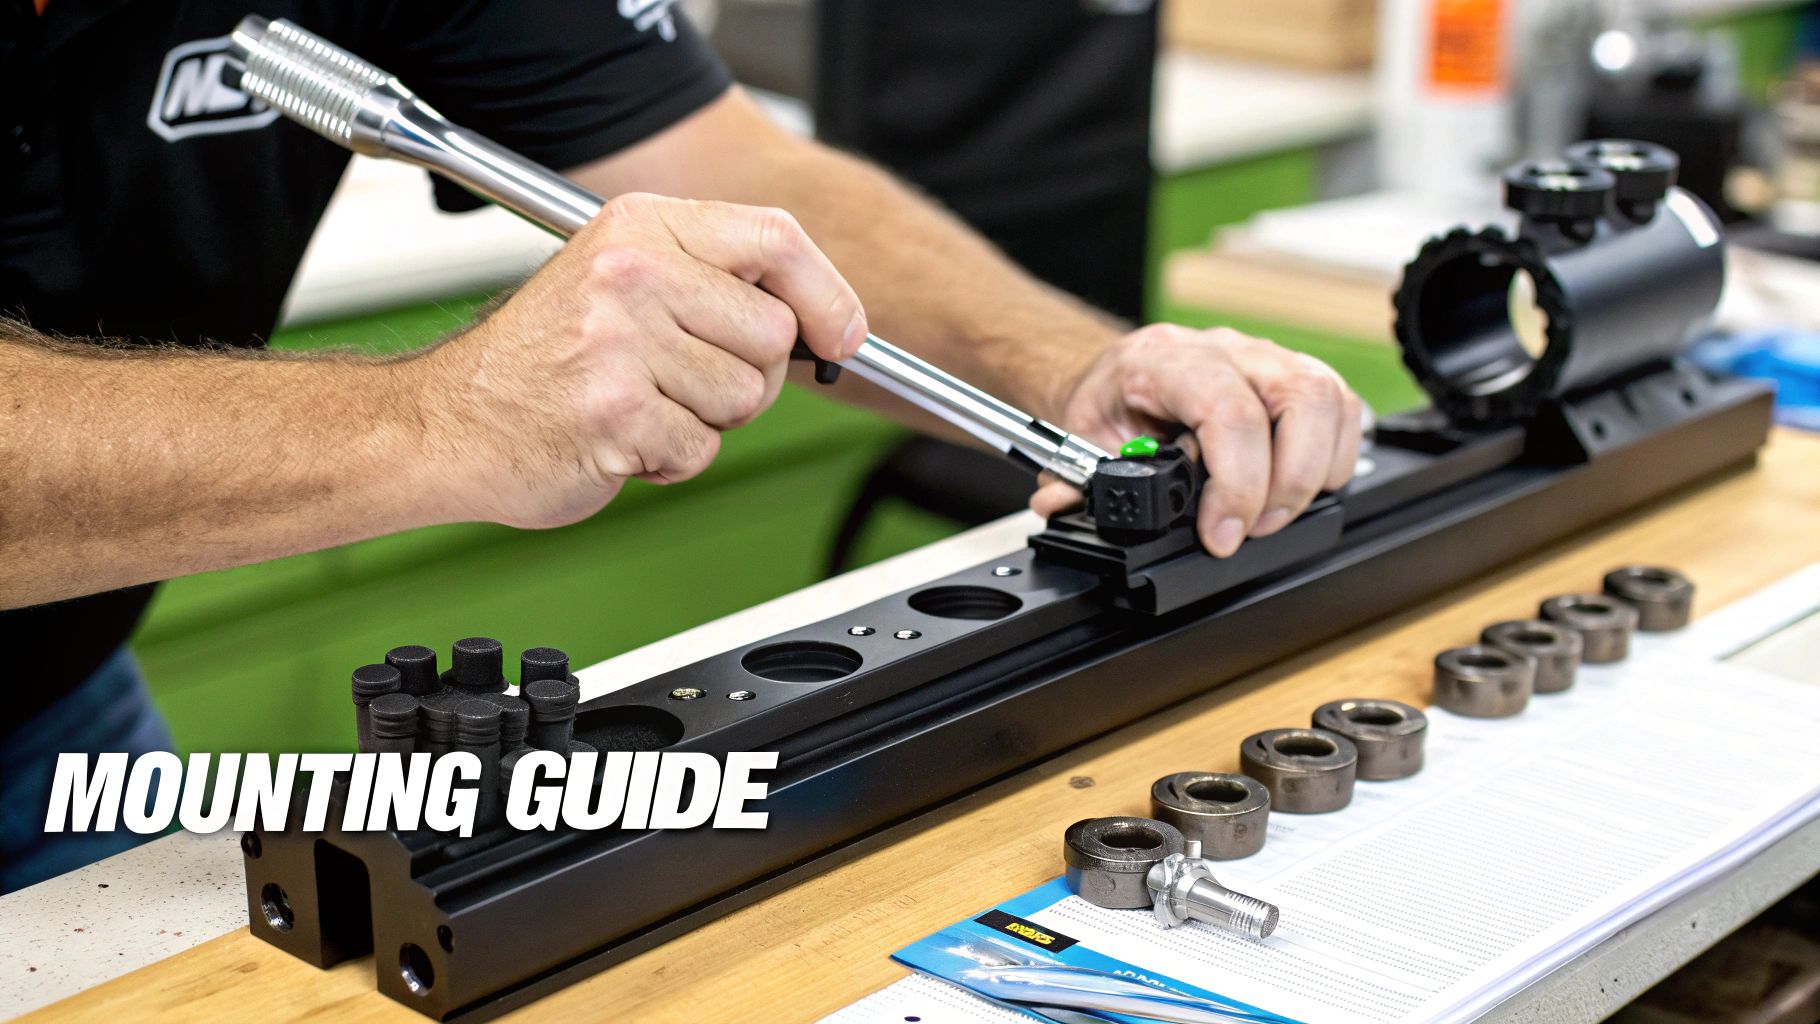
- Torque To Spec: Using a proper torque wrench isn't a suggestion; it's a requirement. If you overtighten the screws, you can literally crush the scope tube and wreck the internal mechanics. If they're too loose, the scope will shift. Always follow the manufacturer’s specs, which are typically between 15-25 in-lbs for the ring screws and 45-65 in-lbs for the base clamps that attach to the rail.
Pro Tip: When tightening the ring screws, use a crisscross or star pattern, just like you would when tightening the lug nuts on a car wheel. This ensures you're applying even pressure all the way around the scope tube, which prevents creating stress points that can damage the optic or throw off your accuracy.
By taking your time and following these steps, you’re creating a mechanically sound system. A proper installation is the vital link between your high-quality gear and your ability to put shots exactly where you want them, every single time.
Integrating Night Vision and Thermal Optics
This is where the Picatinny rail truly shows its genius. It’s not just for holding a scope; it’s a platform that transforms a standard rifle into a tool that owns the entire 24-hour cycle. For tactical operators and dedicated hunters, the ability to seamlessly integrate night vision and thermal devices is non-negotiable, and the Picatinny system makes it happen.
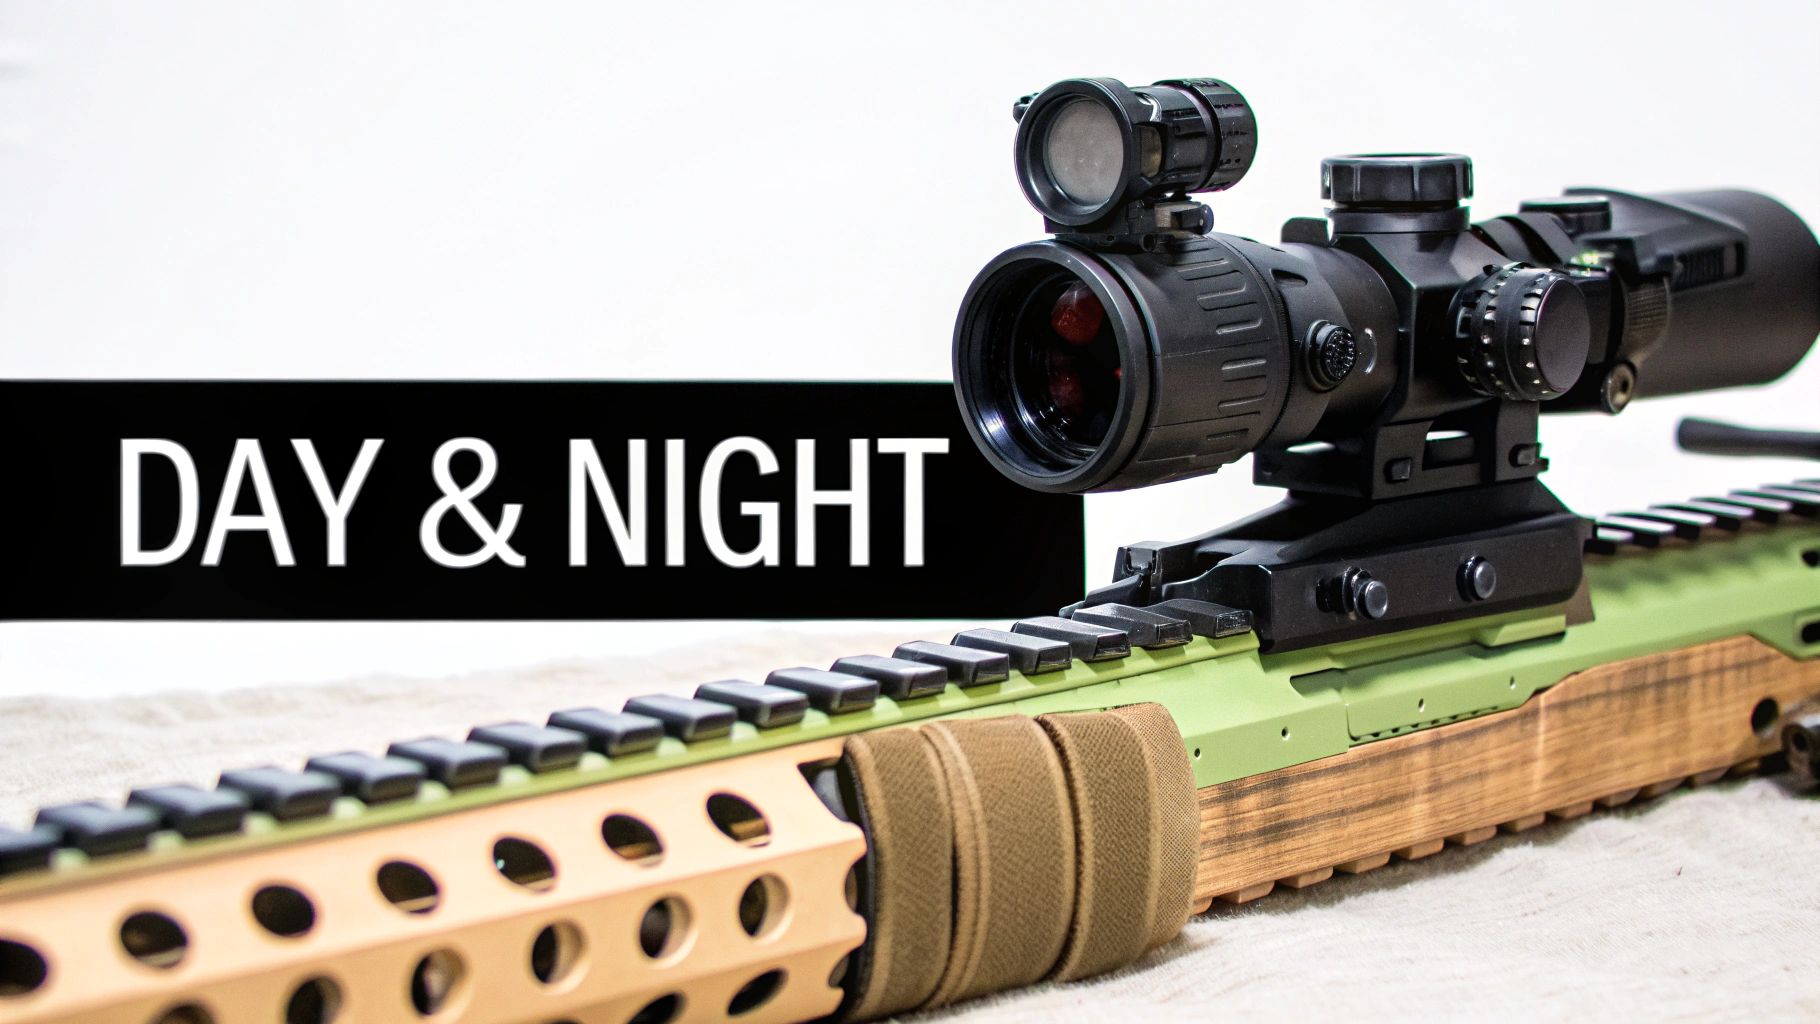
The most common way to do this is with a clip-on device. These units mount directly to the Picatinny rail in front of your primary daytime picatinny rail scope. Think of it as adding a new set of eyes to your existing setup. You look through your familiar scope, use your trusted reticle, but now you’re seeing the world in thermal or infrared.
This "in-line" approach is fantastic because it lets you keep your established cheek weld and eye relief. There’s no re-learning your shooting position. The catch? Alignment has to be perfect. Even a tiny bit of cant between the clip-on and your main scope can throw your point-of-impact off, and that’s a miss you can’t afford.
Mastering Co-Witness and Magnifiers
If you’re running a red dot sight, the Picatinny rail is your best friend for setting up a co-witness with your iron sights. This is all about redundancy—creating a reliable backup aiming system in case your battery dies or the optic gets damaged.
You’ll generally see two styles of co-witness:
- Absolute Co-Witness: The iron sights line up exactly in the center of the red dot. It’s a clean, single-plane sight picture, though some find it a bit cluttered.
- Lower 1/3 Co-Witness: The iron sights appear in the bottom third of the optic's window. This is the crowd favorite because it keeps the irons out of the way, giving you a wide-open, unobstructed view through your red dot.
Magnifiers are another game-changer, often sitting on a flip-to-side mount right behind a red dot. The standardized slots of the Picatinny rail ensure the magnifier and the optic line up perfectly. With a flick of the wrist, you can switch from no-magnification for close-quarters work to a 3x or 5x view for identifying targets at a distance.
The consistent slot spacing of a MIL-STD-1913 rail is what makes these complex multi-optic setups possible. It guarantees that a magnifier, red dot, and night vision clip-on can all be mounted with the precise alignment needed for peak performance.
The demand for these advanced setups is exploding. The firearm sight market was already valued at USD 1.4 billion in 2024 and is expected to climb to USD 1.95 billion by 2032. That growth is being fueled by shooters who want more capability from their platforms. You can read more about the firearm sight market's impressive growth.
As you start adding more gear, "rail estate" management becomes a real skill. You have to prioritize your primary optic for eye relief, then fit everything else around it without blocking controls. For a deeper dive into this world, take a look at our guide on choosing the best night vision optics for hunting.
Maintenance Tips and Essential Accessories
Getting your Picatinny rail scope mounted correctly is a great first step, but keeping it in prime condition is what guarantees performance year after year. Luckily, long-term care is straightforward.
Always start with the glass. A clean lens is a happy lens, so regularly use a dedicated lens pen or a soft microfiber cloth to wipe away any dust, fingerprints, or smudges. This simple habit keeps your sight picture sharp and clear.
Next up, check your screws. The repeated shock of recoil can slowly work mounting hardware loose, and even temperature shifts can have an effect. If your zero starts wandering, loose screws are often the culprit. Before you head out, give them a quick check with a torque wrench—it’s the best way to prevent a headache at the range.
Elevating Your Setup With Key Accessories
Once the fundamentals are covered, you can start looking at accessories that truly expand your rifle's capabilities. The beauty of the Picatinny system is how easily these add-ons integrate.
- Quick-Detach (QD) Mounts: These are game-changers. They let you pop your optic off and put it back on in seconds, all while holding a reliable zero. Perfect for switching between a magnified scope and a red dot, or for accessing your iron sights in an emergency.
- Bubble Levels: It’s a tiny addition that makes a huge difference. A small level attached to your scope or rail is the simplest way to eliminate rifle cant—a subtle tilt that can throw your shots way off at longer distances.
- Offset Sights or Red Dots: For a do-it-all rifle, nothing beats an offset red dot. Mounted at a 45-degree angle, it gives you a lightning-fast sighting solution for anything that pops up close, without ever needing to touch your main scope’s magnification.
The sheer popularity of these modular setups is reflected in the market numbers. Valued at USD 63.85 billion in 2024, the global market for riflescopes and red dot sights is booming. Projections show it rocketing to USD 117.60 billion by 2034, largely thanks to the versatility of platforms like the Picatinny rail. Learn more about the riflescope market's expansion.
Another fantastic upgrade is pairing a magnifier with your red dot sight to stretch its effective range. If that sounds like something you'd be interested in, check out our deep dive on the benefits of red dot magnifiers in our guide.
Answering Your Top Questions
Getting into the weeds of a rifle build always brings up a few specific questions. Let's tackle some of the most common ones that pop up when you're getting your optics dialed in.
Can I Put A Picatinny Mount On A Weaver Rail?
This is a classic "no-go" that trips up a lot of people. Think of it like trying to fit a square peg in a round—or at least, a much smaller—hole.
A true Picatinny mount has a wide, squared-off recoil lug built to lock into the 0.206-inch slots of a MIL-STD-1913 rail. That lug is just too beefy to fit into the narrower slots on a Weaver rail. You can, however, usually go the other way around; a Weaver-style ring or mount will typically fit onto a Picatinny rail, though it won't be as snug or repeatable.
What Does "Return To Zero" Actually Mean?
Return-to-zero is the holy grail for anyone who needs to swap optics on the fly. It’s the ability of a scope and mount to maintain the rifle’s original point of impact after you’ve taken it off and put it back on.
This is where the Picatinny system really shines. Its tight, standardized tolerances were designed from the ground up to make this possible.
When your setup has a reliable return-to-zero, you gain the confidence to adapt your rifle to any mission, knowing your zero is still locked in when you clamp that optic back on.
How Do I Pick The Right Scope Ring Height?
Choosing the right ring height is all about one thing: clearance. You need to mount your scope as low as you can possibly get it without the objective bell (the front part of the scope) smacking into the barrel or handguard.
A lower mount generally helps with a more natural cheek weld and better shooting form. But if you're running a scope with a massive objective lens, like a 50mm or 56mm model for low-light performance, you'll absolutely need taller rings just to create enough space.
Whether you're putting together a brand-new build or giving a trusted rifle a serious upgrade, Superior Tactical LLC has the rock-solid mounts, optics, and gear you need. Check out our hand-picked selection of tactical equipment at https://superiortac.com and find the right components for your next mission.