Wilderness Survival Gear List: Essential Tools for Off-Grid Readiness
A proper wilderness survival gear list isn’t just a random pile of cool stuff; it's a carefully assembled system where every piece has a job. True readiness isn’t about having the most gear—it's about understanding why each item is there, especially when everything goes sideways. This guide is your framework for building a kit that gives you control when you need it most.
Building Your Mission-Ready Survival System

First, ditch the simple checklist mindset. The most effective way to prepare for the unexpected is to think in terms of interlocking systems. Each piece of equipment must serve a critical function and support the others in your pack.
A powerful mental model I’ve relied on for years is the "Ten Cs of Survivability." It's a proven framework that forces you to prioritize gear based on what will actually keep you alive. Instead of just "having stuff," this system makes you think about fundamental capabilities needed to control your environment and get home safely.
The Ten Cs Framework
Let's break down the core components of this system:
- Cutting Tool: Your primary tool. A reliable fixed-blade knife is the heart of any kit, handling everything from making feather sticks for a fire to processing game.
- Combustion Device: Fire is life. You need redundant ways to make it, like a ferro rod and waterproof matches. This is non-negotiable for warmth, signaling, and purifying water.
- Cover: Exposure is a silent killer. A simple tarp or an emergency bivy is your shield against the elements, protecting you from wind, rain, and cold.
- Container: Hydration is key. A single-walled metal bottle is a must-have for both carrying and boiling water, which is the most reliable purification method.
- Cordage: The ultimate problem-solver. Strong rope or paracord has a thousand uses, from rigging a shelter to repairing gear on the fly.
- Candling Device: When the sun goes down, your world shrinks to the beam of your light. A high-output headlamp or flashlight is essential for safety and getting things done in the dark.
- Cotton Bandana: Don't underestimate this one. A simple bandana is a versatile tool for pre-filtering water, serving as a bandage, or protecting your neck from the sun.
- Compass: Electronics fail. A quality, declination-adjustable magnetic compass is a lifeline that never runs out of batteries.
- Cargo Tape: Often called "100-mile-an-hour tape" for a reason. Good old duct tape is the universal fix-it solution for patching gear and countless other improvisations.
- Canvas Needle: A small but mighty tool. A heavy-duty needle lets you repair torn clothing, a backpack, or even a tent, preventing small problems from becoming big ones.
Building your kit around these core principles ensures you have a functional, adaptable system rather than just a bag full of gadgets. This mindset shifts your focus from merely acquiring items to mastering essential survival capabilities.
More and more people are recognizing the importance of being prepared. The global survival tools market, which covers gear like multi-tools and fire starters, was valued at $1.4 billion in 2023. It’s projected to more than double to $2.8 billion by 2033. That surge shows just how seriously folks are taking self-reliance. You can dig into more data on the survival tools market growth from Allied Market Research.
While the "Ten Cs" give you a rock-solid foundation, your specific mission always dictates the final loadout. For instance, the gear you'd pack for a multi-day hunt is very different from what you'd take on a simple day hike. You can see an example of a specialized loadout in our essential hunting gear checklist.
To give you a quick overview before we dive deep, here's a look at the essential gear categories.
Essential Wilderness Survival Gear Categories at a Glance
This table breaks down the core functions of a survival kit. Think of it as your high-level blueprint for building a comprehensive and reliable system.
| Gear Category | Primary Function | Top Priority Items |
|---|---|---|
| Shelter | Protection from exposure (cold, heat, wind, rain) | Tarp, emergency bivy/blanket, cordage |
| Water | Hydration and purification | Metal container, water filter/purifier tablets |
| Fire | Warmth, signaling, water purification, cooking | Ferro rod, lighter, waterproof matches, tinder |
| Navigation | Orientation and finding your way | Map, compass, GPS/satellite messenger |
| First Aid | Treating injuries and medical emergencies | Trauma kit (tourniquet, dressing), blister care, meds |
| Signaling | Attracting attention for rescue | Whistle, signal mirror, personal locator beacon (PLB) |
| Tools & Lighting | Task completion, repair, and visibility in darkness | Fixed-blade knife, multi-tool, headlamp/flashlight |
| Clothing | Insulation and protection via a layering system | Moisture-wicking base layer, insulating mid-layer, waterproof outer shell |
This is the 30,000-foot view. In the following sections, we’ll break down each of these categories, explaining the "why" behind every gear choice to help you build a kit that's truly ready for anything.
The Big Three: Shelter, Water, and Fire
While frameworks like the Ten C’s are great for comprehensive planning, a real-world survival situation almost always boils down to three immediate priorities: shelter, water, and fire. Get these right, and you've just solved the problems that kill people fastest—hypothermia, dehydration, and exposure.
Think of them as the pillars of survival. They allow you to control your core temperature, stay hydrated, and create a base of operations. Without a solid plan for these three, the rest of your expensive gear is just dead weight. Let’s get into the nitty-gritty of what you need for each.
Shelter: Your Personal Climate Control System
Your shelter is your primary defense against whatever the environment throws at you. Forget the bulky camping tent for a minute. In a survival scenario, you need something lightweight, adaptable, and fast to set up. It’s all about layers and versatility.
Here's what a smart, packable shelter system looks like:
- Emergency Bivvy: This isn't just a shiny sleeping bag. A good one is made from material that reflects up to 90% of your body heat right back at you. It’s a game-changer for preventing hypothermia, weighs next to nothing, and should be in every pack you own.
- A Solid Tarp: An 8'x10' tarp with plenty of reinforced tie-outs is one of the most versatile pieces of gear you can carry. You can rig it up as a simple lean-to against the wind, an A-frame to shed torrential rain, and a dozen other configurations.
- Thermal Blanket: Often called a "space blanket," this simple item does double duty. Its main job is trapping your body’s radiant heat, but its reflective surface makes it a fantastic signaling tool. You can even rig it behind you to bounce heat from your fire back into your shelter, creating a surprisingly warm microclimate.
Picture this: a sudden downpour hits. You can quickly pitch your tarp in a lean-to against a rock outcropping. With a fire a few feet in front and a thermal blanket lining the rock wall behind you, you've just built a radiant heat "oven" that will keep you warm and dry while the storm passes.
Water: Securing and Purifying Your Lifeline
You can go weeks without food, but you’ll only last a few days without water. Dehydration tanks your judgment, kills your strength, and makes you far more susceptible to hypothermia. Your kit needs to cover both carrying water and making it safe to drink.
Never assume water from a stream or lake is clean. Microscopic bugs like Giardia and Cryptosporidium are waiting to wreck your day and can completely incapacitate you. Purification is not optional.
Redundancy is the name of the game here. You need a primary method you can count on and a backup that’s absolutely foolproof.
| Purification Method | Its Main Strength | The Catch |
|---|---|---|
| Filters (Hollow Fiber) | Works instantly to remove bacteria & protozoa. | Can freeze and crack in the cold, making it useless. |
| Chemical Tablets | Ultralight, compact, and kills viruses. | Takes time to work (30 mins to 4 hours) and can alter the taste. |
| UV Purifiers | Extremely fast (zaps a liter in ~90 seconds). | Needs batteries and struggles with murky water. |
A great strategy is to use a filter as your go-to for quick hydration on the move, with chemical tablets tucked away as a no-fail backup. And don't forget, a single-walled stainless steel bottle is your ultimate failsafe—boiling is the one method that kills absolutely everything.
Fire: The Cornerstone of Survival
Fire is so much more than just warmth. It’s a signal for help, a way to purify water, a tool to cook food, and a massive morale booster. Your ability to make a fire when it’s cold, wet, and you're under stress is a defining survival skill. It all comes down to having the right tools.
The growing interest in this area is undeniable. In fact, North America dominates the survival tools market, holding a massive 45% of the global market share. That market is fueled by a 7-8% annual increase in activities like hunting and camping. You can discover more insights about the expanding survival tools market and its drivers.
Forget relying on a single cheap lighter. Your fire kit needs multiple, reliable ignition sources:
- Ferrocerium Rod: This is your workhorse. It throws a shower of incredibly hot sparks (over 5,000°F) and works flawlessly even if it's been soaking in a puddle. It takes some practice, but a ferro rod will never let you down.
- Stormproof Lighter: A good windproof butane lighter with a torch-like flame is a huge asset for getting a fire lit quickly, especially when the wind is howling.
- Waterproof Matches: Simple, effective, and a great backup. Keep them in a dedicated waterproof case or find the kind that are already coated in wax.
Equally important is your tinder. Always carry a small supply of guaranteed-to-burn tinder—think cotton balls smeared with petroleum jelly, commercial fire plugs, or even just a baggie of dryer lint. Trying to find dry natural tinder in the middle of a rainstorm is a recipe for failure. Having your own dry tinder can mean the difference between a miserable night and a controlled, life-saving fire.
Dominating Terrain with Navigation and Signaling
If you don't know where you are—and nobody knows where to find you—the rest of your gear is just delaying the inevitable. Effective navigation and signaling are the two skills that bridge the gap between being lost and being found. These abilities are non-negotiable, especially when darkness falls and your entire world shrinks to the beam of your flashlight.
A solid wilderness survival gear list has to treat navigation and signaling with the same life-or-death seriousness as shelter or fire. This is about taking command of your position, whether that means finding your own way out or bringing rescue right to your doorstep. It starts with the timeless, battery-free tools and extends to modern tech that gives you a decisive advantage.
This concept map breaks down how the core pillars of survival work together, forming a stable foundation for true readiness.
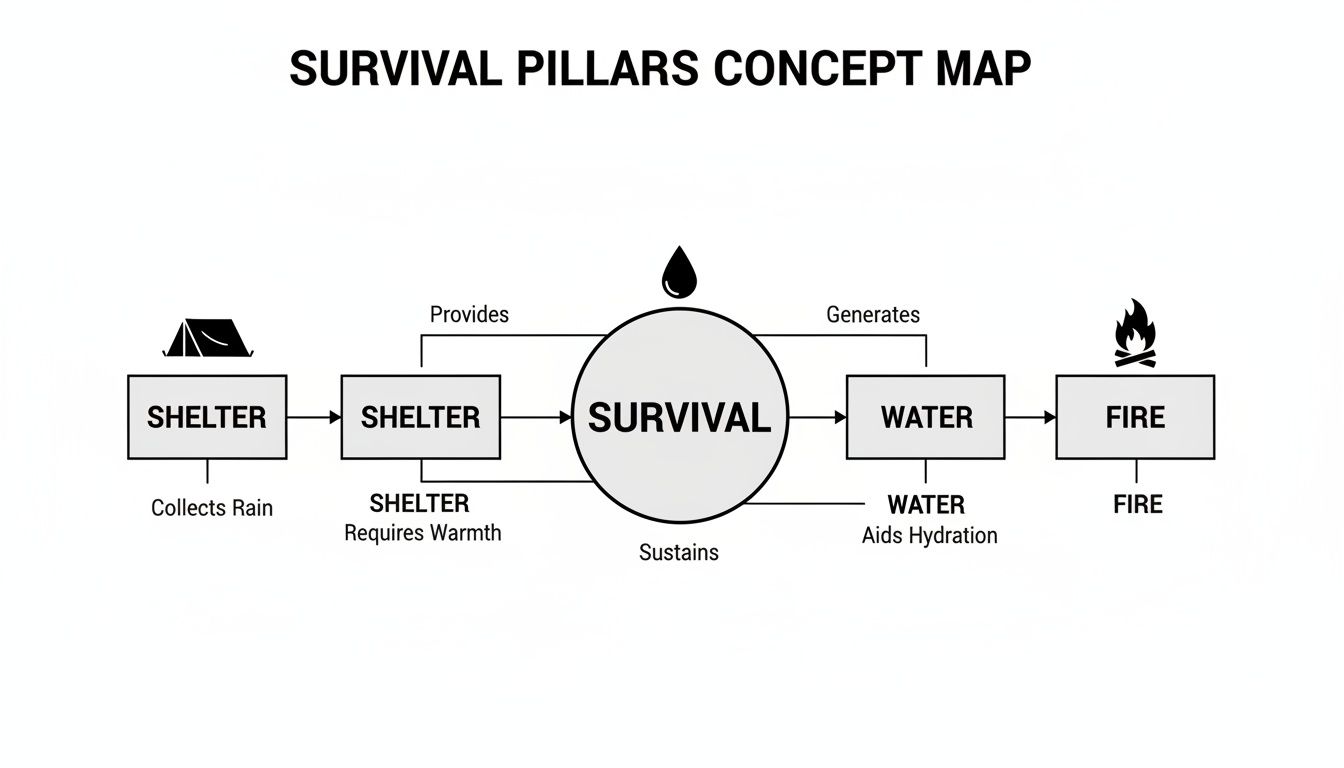
As you can see, shelter, water, and fire are all about immediate physical survival. They create the platform from which you can effectively navigate your terrain and signal for help when you need it.
Mastering Land Navigation
Before you even think about reaching for an electronic device, you must be dialed in with the analog basics. A map and compass are the bedrock of reliable navigation. Why? Because they're completely immune to dead batteries, shattered screens, and lost satellite signals.
- Topographic Map: A "topo" map is far more than a simple drawing of roads. Its contour lines show you the actual shape of the land—every hill, valley, and ridge. Learning to read these lines lets you visualize the terrain around you, a critical skill we call terrain association.
- Declination-Adjustable Compass: A quality, liquid-filled baseplate compass isn't just nice to have; it's a must-own piece of kit. It lets you orient your map to magnetic north and take precise bearings, empowering you to travel a straight line or pinpoint your exact location on the map.
While these tools are fundamental, modern technology offers some powerful backup. A handheld GPS can give you your exact coordinates in seconds. But it must always be treated as a supplement to, not a replacement for, your map and compass. If you bring electronics, you must bring backup power like a portable battery bank.
The harsh reality is that technology fails. Your primary navigation system has to be the one that can't run out of power. Mastering a map and compass is what separates a prepared individual from a potential statistic.
Signaling: Making Yourself Seen and Heard
Once you've locked down your position, you might need to call for help. The entire goal of signaling is to create a high-contrast disturbance that screams "I'm here!" to anyone on the ground or in the air. You want to stand out from the natural background.
Your signaling kit needs layers and redundancy, giving you both auditory and visual options.
- Signal Mirror: A proper glass signal mirror is one of the most effective daytime tools you can possibly carry. On a clear day, its flash can be seen for miles—far beyond the range of your own voice.
- High-Decibel Whistle: A pea-less plastic whistle is an absolute lifesaver. Three sharp blasts is the universal signal for distress. A whistle's sound carries much farther than yelling and uses a fraction of the energy.
- Personal Locator Beacon (PLB): For any serious backcountry travel, a PLB is a non-negotiable piece of gear. When you activate it, it fires a distress signal with your GPS location to a global satellite network, alerting search and rescue teams directly.
Low-Light Force Multipliers
This is where your gear list elevates from basic preparedness to genuine tactical capability. Darkness is both a threat and an opportunity. The right tools turn it into a massive advantage for you.
A high-output flashlight is more than just a light source; its powerful strobe function is a potent signaling tool at night. But to truly own the dark, you need to see what others can't.
- Night Vision Monocular: A device like a PVS-14 lets you move confidently and covertly through tough terrain in near-total darkness. It works by amplifying ambient light, turning a moonless night into a navigable environment.
- Thermal Imager: Thermal optics don't need any light. They detect heat signatures. This lets you spot a person, an animal, or even a recent campfire from a huge distance, giving you unparalleled situational awareness.
Choosing the right tool for navigating in the dark depends entirely on the mission. GPS is great for open country, but a good compass and night vision are essential for moving through dense, complex terrain without giving away your position.
Low-Light Navigation Tool Comparison
| Tool | Best For | Power Dependency | Key Advantage |
|---|---|---|---|
| GPS | Pinpointing exact location; open terrain | High (Batteries required) | Unmatched precision and speed in good conditions. |
| Map & Compass | All conditions, especially as a primary or backup | None | 100% reliable; immune to electronic failure. |
| Night Vision | Covert movement; terrain identification | High (Batteries required) | Allows for natural navigation using ambient light. |
| Thermal Imager | Detecting heat signatures (people, animals) | High (Batteries required) | Can see through smoke, fog, and camouflage. |
Ultimately, a layered approach is best. Rely on your map and compass, but enhance your capabilities with the right electronic tools for the specific conditions you anticipate.
The demand for these advanced tools is exploding. Navigation and safety devices are seeing a projected CAGR of 7.18% through 2030, a clear signal of a massive shift toward proactive risk management. With the U.S. National Park Service reporting over 3,000 search-and-rescue missions every year, and a staggering 78% of those involving hikers with improper gear, the value of a well-thought-out kit is undeniable. Learn more about the market trends driving survival gear innovation and see why these tools are no longer just for professionals—they're becoming essential for anyone serious about off-grid readiness.
Essential Tools, First-Aid, and Protective Clothing
Once you’ve got your shelter, water, and fire systems dialed in, it's time to focus on the next critical layer of gear. We're talking about the tools that let you work, the medical supplies to fix what's broken, and the clothing that serves as your first and last line of defense against the elements.
This isn't about just tossing a pocket knife and some band-aids in your pack. It's about deliberately choosing hard-use tools for tough jobs, carrying trauma gear that actually saves lives, and understanding that your clothing is a technical system, not just an outfit. These items are your direct interface with the wild, empowering you to build, repair, and protect your most valuable asset: yourself.
The Right Tools for the Job
Your ability to shape your surroundings, to build a fire or a shelter, often boils down to the quality of the tools in your hand. You can’t carry a whole workshop, but a few well-chosen items can give you incredible capability.
The absolute cornerstone is a robust, full-tang fixed-blade knife. Look, a folding knife is great for everyday carry, but in a survival situation, it's what some of us call a "strategically broken fixed blade." That pivot is an inherent weak point just waiting to fail under stress. A full-tang knife, where one solid piece of steel runs from the tip to the butt of the handle, is exponentially stronger. It can handle the real work, like batoning wood for a fire or carving notches for a shelter, without breaking a sweat.
But a knife can't do it all. That's where a quality multi-tool proves its worth. The pliers, wire cutters, and screwdrivers are invaluable for gear repair—fixing a busted pack strap, adjusting a rifle optic, or getting another piece of critical equipment working again. The debate should never be knife versus multi-tool; a prepared person carries both, knowing they serve distinct, complementary roles.
To round out your toolkit, add these force multipliers:
- Strong Cordage: At least 50 feet of 550 paracord or, my personal preference, tarred bank line. Its uses are practically infinite, from rigging tarps and securing gear to making field-expedient repairs. Don't leave home without it.
- Duct Tape: The universal problem-solver. To save space, just wrap a few yards around your water bottle or a flat piece of plastic. It’s perfect for patching a torn jacket, sealing a leaky shelter, or even serving as a makeshift bandage in a pinch.
- Compact Folding Saw: While your knife can handle smaller sticks, a folding saw makes quick work of larger limbs needed for a serious fire or shelter frame. This saves you an incredible amount of time and, more importantly, calories.
Rethinking First-Aid: From Boo-Boos to Trauma
First things first: throw out that cheap, pre-packaged first-aid kit. The one filled with a hundred tiny, useless bandages and alcohol wipes. A serious survival scenario demands a complete mental shift from treating minor scrapes to stopping life-threatening injuries. Your medical kit needs to be an IFAK (Individual First Aid Kit), built with one primary goal: stopping massive bleeding.
The hard reality of a remote injury is that you are the first responder. Your IFAK isn’t for comfort; it’s for keeping you alive until help can arrive. You have to focus on gear that addresses the major causes of preventable death in the field.
A proper trauma kit must contain these non-negotiable items:
- Tourniquet: A commercial, windlass-style tourniquet like a CAT or SOF-T is essential for stopping catastrophic bleeding from an arm or leg. More importantly, you need to know how to apply it to yourself, under stress, in seconds.
- Pressure Dressing: Also known as an "Israeli bandage," this is a brilliant all-in-one device for applying firm, direct pressure to a severe wound.
- Chest Seals: If you have a penetrating injury to the torso, a chest seal is critical. It prevents air from being sucked into the chest cavity, which can quickly lead to a collapsed lung.
- Hemostatic Gauze: This isn't your average gauze. It's impregnated with an agent that helps blood clot far faster than it would on its own, designed to be packed into a deep wound.
Once you have these trauma essentials covered, then you can add items for more common issues like blister care, painkillers, and any personal medications you need.
Protective Clothing: A Wearable Shelter System
Your clothing is the most intimate and vital part of your shelter system. The wrong fabrics can accelerate hypothermia, even in surprisingly mild weather. The key is to think in layers, creating a versatile system you can adjust on the fly to match your activity level and the changing conditions.
The one absolute, unbreakable rule is this: avoid cotton at all costs. When cotton gets wet—from sweat or rain—it loses all insulating properties and actively sucks heat from your body. It's a genuine liability in the backcountry.
Instead, build your system around these three functional layers:
- Base Layer: This is what's next to your skin. Its only job is to pull moisture away from your body to keep you dry. Look for merino wool or high-quality synthetics.
- Mid-Layer: This is your insulation. Its job is to trap your body heat and keep you warm. Fleece, down, and wool are all excellent choices. This is the layer you’ll add or remove most often to regulate your temperature. For low-light operations, our guide on the best night vision flashlights for hiking and camping can help you pair your gear for optimal performance.
- Shell Layer: Think of this as your personal armor against the elements. A waterproof and windproof jacket and pants protect your insulating layers from getting wet and stop the wind from stripping away your warmth.
By combining the right tools, a trauma-focused medical kit, and a smart, technical clothing system, you build a protective bubble around yourself that dramatically increases your resilience and effectiveness when things go sideways.
How to Pack Your Gear for Rapid Deployment
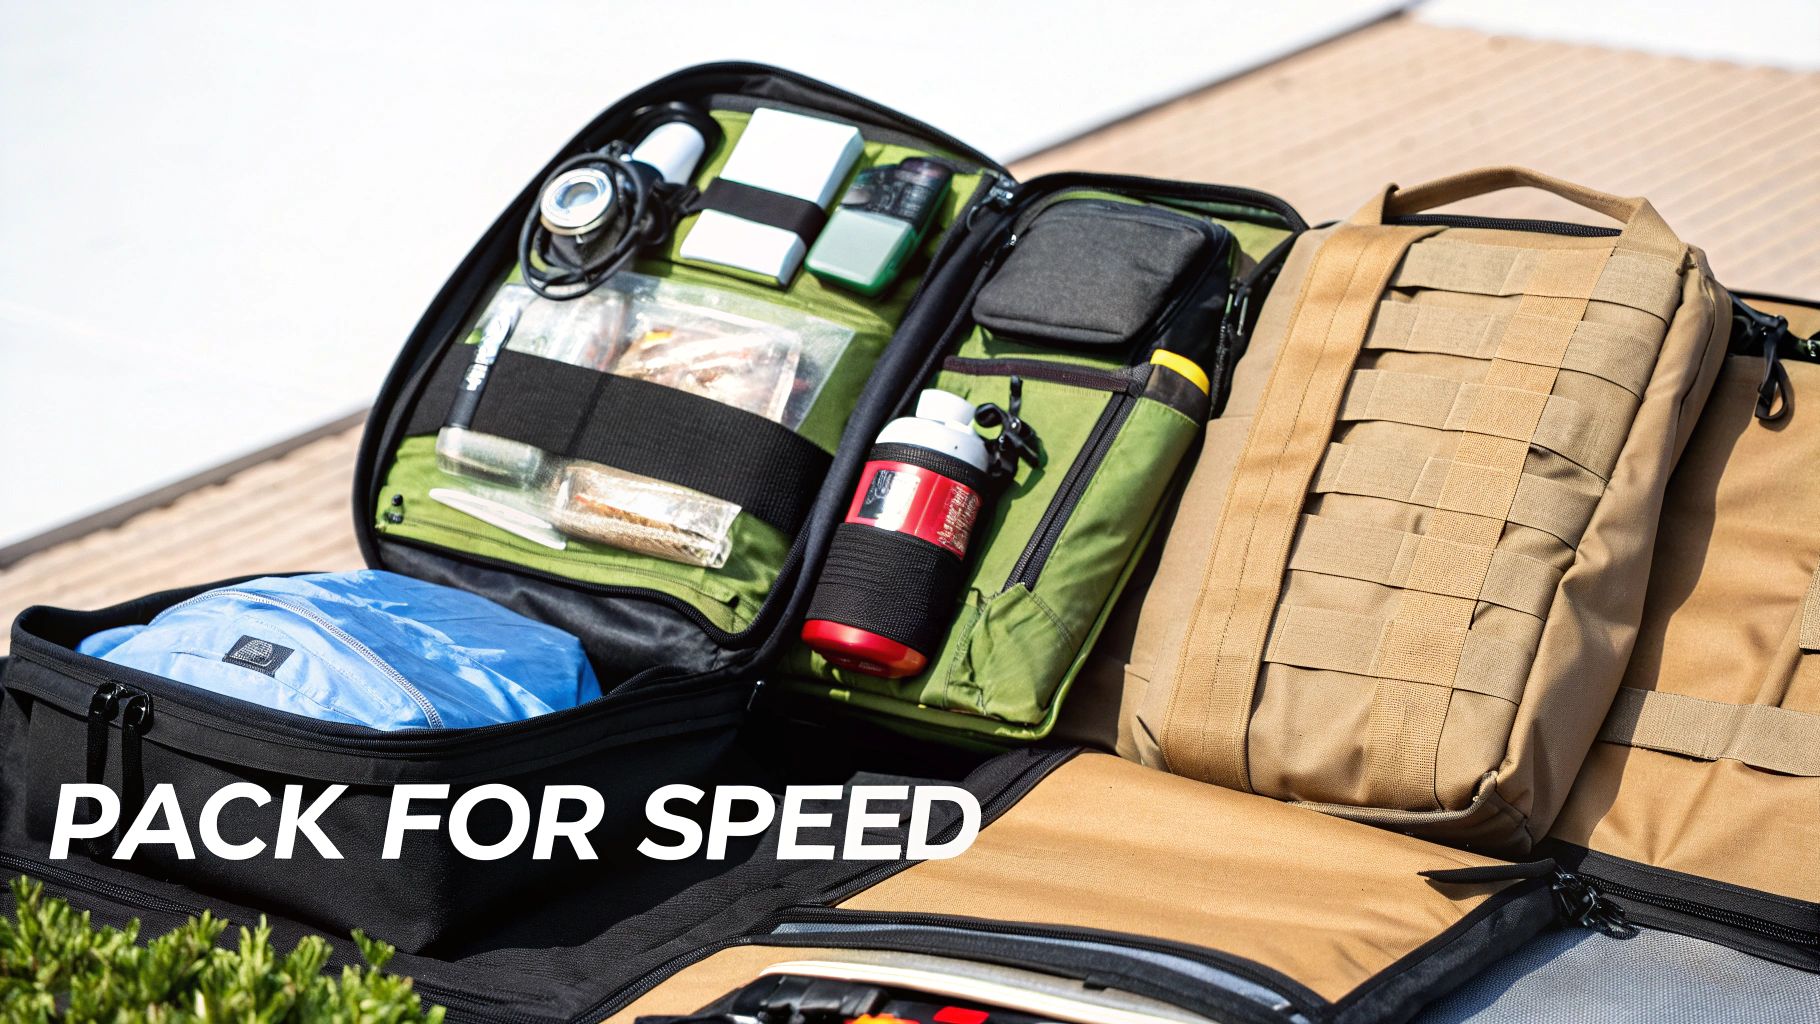
Owning all the right gear is one thing; being able to get to it when things go sideways is another entirely. When a crisis hits, you won’t have the luxury of time to rummage through a jumbled mess for a tourniquet or a fire starter. Your pack needs to be organized for immediate, almost instinctual, access, even when you're under extreme stress.
The best way I've found to do this is through modular packing. Don't think of your pack as just one big bag. Think of it as a system of smaller, dedicated kits that live inside it.
This simple shift in mindset turns your pack from a random jumble of gear into an organized arsenal. Need to make fire? Grab the fire kit. Need to figure out where you are? Pull out the navigation pouch. Simple, fast, and efficient.
Building Your Modular Kit
First things first, start grouping your gear into dedicated pouches. I’m a big fan of using brightly colored, waterproof dry bags for this. They keep everything organized, protected from the elements, and easy to spot.
Here’s a common-sense way to break it down:
- Fire Kit: A small, truly waterproof bag holding your ferro rod, a stormproof lighter, waterproof matches, and a good amount of dry tinder.
- First-Aid/Trauma Kit: This needs to be in a clearly marked pouch, usually red. It should hold your IFAK essentials—tourniquet, pressure dressing, chest seals, hemostatic gauze. This kit always needs to be the easiest one to get your hands on. No exceptions.
- Navigation Kit: A tough pouch for your map, compass, GPS unit, and spare batteries.
- Shelter Kit: A slightly larger bag for your tarp or emergency bivy, along with at least 50 feet of good cordage.
This system isn't just about finding things quickly. It lets you scale your gear up or down for different trips. Heading out for a short hike? Just grab a few essential modules. Going for a multi-day trek? Add the rest.
Layering Your Pack for Accessibility
Once you have your modules sorted, you need to pack the bag itself with a plan. The whole game comes down to accessibility, weight distribution, and redundancy. Think of your pack in three layers, just like you would with your clothing.
The single biggest mistake you can make is burying life-saving gear at the bottom of your pack. Anything you might need in a sudden emergency has to be reachable in seconds, not minutes. This is what rapid deployment is all about.
Here's how to structure your pack so it works for you, not against you:
- Bottom Layer (The "Camp" Zone): This is where you put the stuff you won't need until you stop for the night. Your main shelter, sleeping bag, extra clothes, and bulk food can go here. Putting these heavier, less urgent items low helps create a stable center of gravity, which makes hiking a lot more comfortable.
- Middle Layer (The "Core" Zone): This is the heart of your pack. Position your heaviest gear here and keep it close to your spine to maintain your balance. This is the perfect spot for your water bladder or bottles, cook kit, fire kit, and tool kit.
- Top Layer & Exterior Pockets (The "Action" Zone): This is the prime real estate. Your trauma kit, rain jacket, navigation tools, headlamp, and trail snacks belong here. Basically, anything you need to grab on the move without dropping your pack should live in this zone.
By layering your pack this way, your most critical tools are always right where you need them. You’ve just turned a simple bag of gear into a true life-support system, ready for whatever the backcountry decides to throw at you.
Keeping Your Gear Mission-Ready
Your survival kit is a lifeline, but gear is only as good as the shape it's in. Buying the right stuff is just step one; the real work lies in a constant cycle of use, inspection, and maintenance. This is the discipline that separates the prepared from the unprepared.
Don't just toss your pack in the closet and forget about it. Treat every piece of equipment like you would a trusted firearm—it needs regular attention to perform when the stakes are highest. A dull blade, a dead headlamp battery, or an old, brittle tourniquet can turn a manageable situation into a catastrophic one.
The Post-Mission Upkeep Routine
Get into the habit of a simple, repeatable maintenance check. After every single trip out, or at the very least once a season, give your kit a thorough once-over.
- Blades and Tools: Wipe down every knife and multi-tool. Look for any signs of rust or nicks in the blade, sharpen them until they’re razor-sharp, and finish with a light coat of protective oil.
- Electronics and Lighting: Fire up every light, GPS, and comms device. Swap out the batteries. Even if they still work, it’s smart to replace them at least once a year. For high-drain devices, you can learn more about choosing the right batteries for high-output flashlights to squeeze out every bit of performance.
- Waterproof Seals: Check the rubber gaskets and seals on everything meant to keep water out—dry bags, water filter housings, Pelican cases. A tiny crack can destroy expensive electronics in a flash flood.
- Medical Supplies: This is non-negotiable. Check the expiration dates on every single item in your first-aid kit, from painkillers to clotting agents. Anything that's expired or has damaged packaging gets replaced immediately.
The reliability of your gear is a direct reflection of your own discipline. A well-maintained kit is proof that you’re serious about survival and ready to act at a moment's notice.
And don’t forget your high-value gear. Night vision and thermal optics demand special care. Keep those lenses spotless and store the units somewhere dry with stable temperatures to protect the sensitive internal components. When the lights go out, the last thing you want is for your gear to fail you.
Wilderness Survival Gear FAQs
As you get serious about putting together your kit, a few questions always seem to surface. We've heard them all over the years. Getting straight answers is the fastest way to make smart choices, so let's cut through the noise and tackle the most common ones.
What Are The Top Five Must-Have Survival Items?
If you had to boil it all down to the absolute essentials, what would they be? We're talking about the gear that addresses the most immediate threats to your life. These five items should be the bedrock of any kit you build, whether it's for a quick day hike or a full-blown bug-out bag.
- A Reliable Fixed-Blade Knife: This is your number one tool. You'll use it for everything from processing firewood and making feather sticks to building a shelter and preparing food.
- A Dependable Fire Starter: A good ferrocerium rod is your best bet. It works when wet, it’s tough as nails, and it can light thousands of fires long after a lighter has run out of fuel.
- A Durable Water Filter: You can go for weeks without food, but only about three days without water. A quality filter makes questionable water sources safe to drink, taking one of the biggest dangers off the table almost instantly.
- An Emergency Shelter: A simple, lightweight tarp or a compact emergency bivy is non-negotiable. It provides critical protection from the elements—wind, rain, and cold—which can kill you faster than anything else.
- A Powerful Signaling Device: You need a way to be found. A high-decibel whistle and a signal mirror are simple, lightweight, and incredibly effective tools for alerting rescuers to your location.
How Much Should I Budget for a Quality Survival Kit?
This is the classic "it depends" question, but I can give you a solid framework. The cost of a good kit varies wildly depending on what you plan to do with it and the quality of the gear you choose. There’s no magic number, but think about it in tiers.
You can put together a solid, no-nonsense beginner's kit for a few hundred dollars. The key is to focus on reliable, workhorse gear from trusted brands and skip the flashy, unproven gadgets. You're building a foundation of dependability to master the basics.
On the other end of the spectrum, an advanced or tactical kit is a serious investment. Once you start adding specialized electronics like a personal locator beacon (PLB), a satellite messenger, or night vision optics, the cost climbs fast. This kind of gear gives you a massive capability boost and can easily push your budget into the thousands.
Your budget should directly reflect your mission and the environments you expect to face. Start with a high-quality foundation of the core tools, and then expand your system as your skills and needs grow.
Is Night Vision Really Necessary for a Survival Kit?
Look, most traditional survival lists you'll find online will skip right over this. But for anyone serious about modern preparedness, night vision is a genuine game-changer. This isn't just for military special operations anymore; it's a tool that provides a decisive advantage when the sun goes down.
Owning the dark fundamentally changes what you’re capable of. You can navigate rough terrain safely at night, avoiding a twisted ankle or a nasty fall. It gives you unparalleled situational awareness, letting you spot resources, identify potential threats, or simply move without giving away your position with a flashlight. For the tactical user or the serious outdoorsman, night vision is quickly becoming a modern essential.
Equip yourself with the tools to dominate the darkness. At Superior Tactical LLC, we provide mission-ready night vision and thermal optics that deliver a critical advantage when you need it most. Explore our curated selection of gear and take control of your environment at https://superiortac.com.