Night Prowl: Master thermal vision for hunting and tracking
Picture this: you're looking out into a field at dusk, but instead of seeing shapes and shadows, you're seeing a living map of heat. That's the power of thermal vision for hunting. It’s a technology that lets you cut through darkness, fog, and even dense brush to spot game by its own body heat. You gain an almost unfair advantage, seeing what's completely hidden to the naked eye.
Seeing Heat Instead of Light
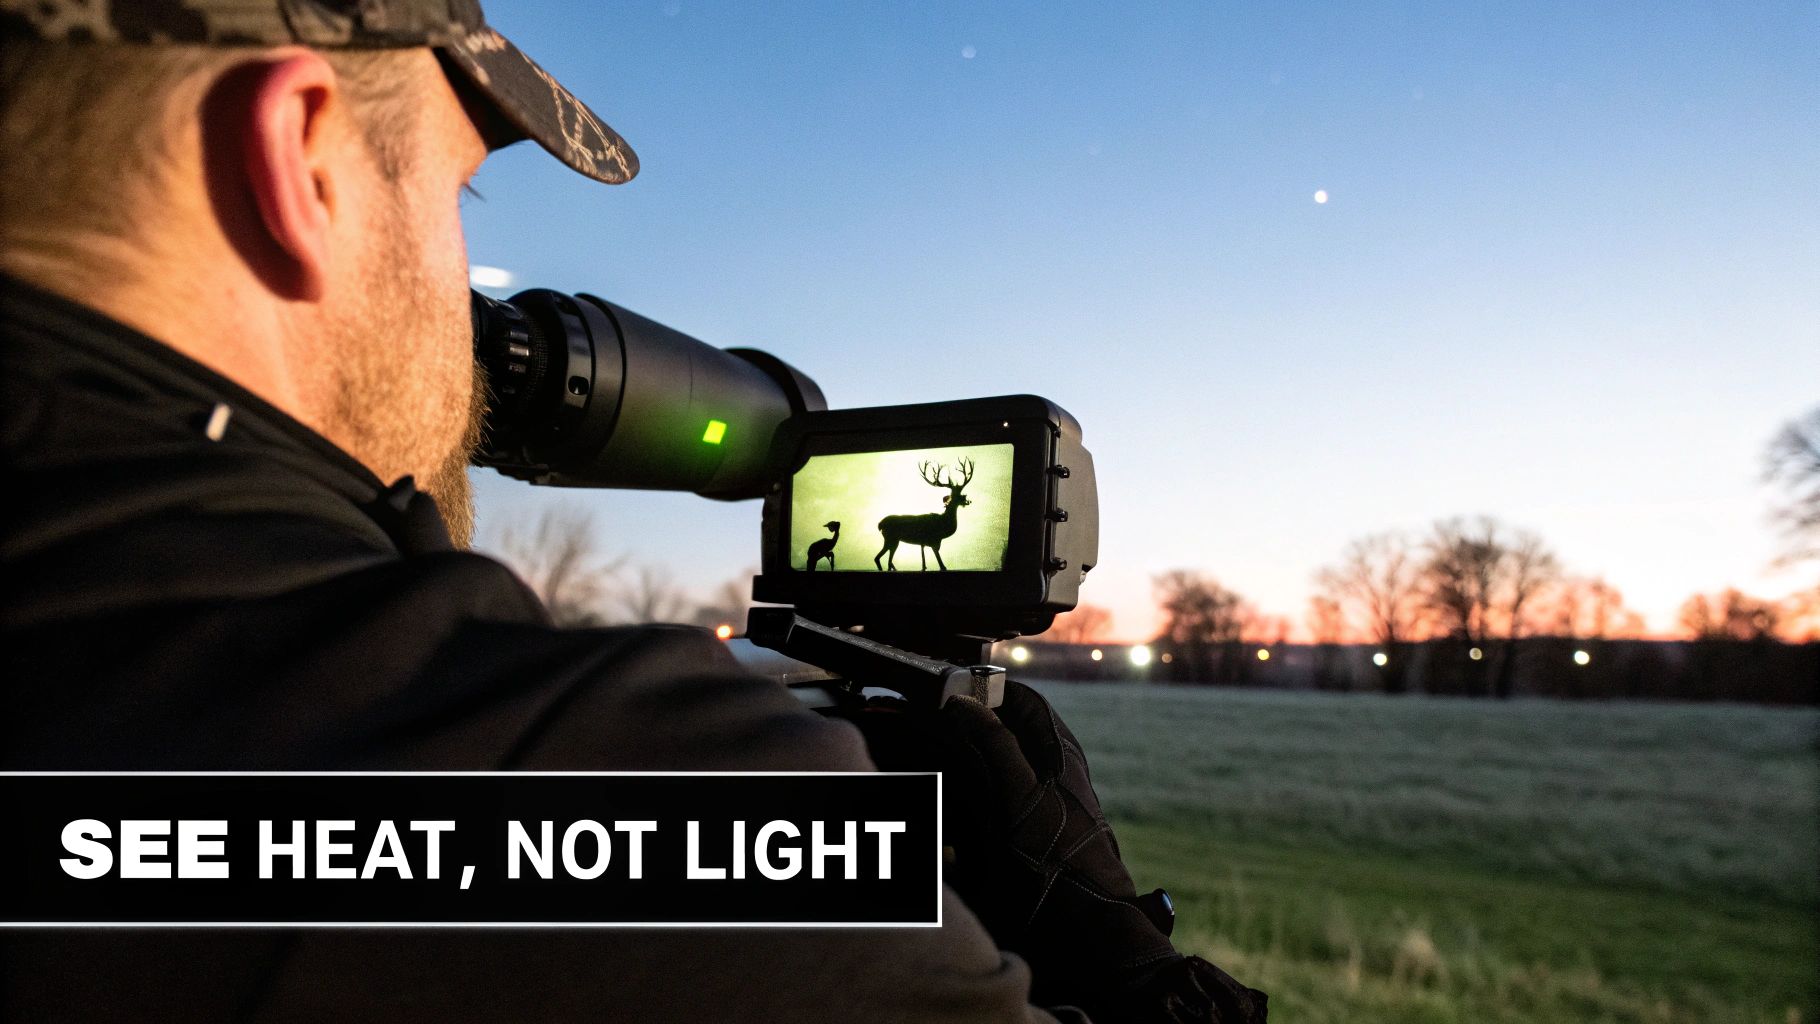
It’s easy to lump thermal in with traditional night vision, but they are worlds apart. Standard night vision simply amplifies whatever tiny bit of light is available. Thermal imaging, on the other hand, works on a whole different level by reading the invisible infrared radiation—the heat energy that every living creature gives off. This is the key difference and exactly what makes it so effective in the field.
How Thermal Optics Create an Image
The magic happens inside a tiny, specialized sensor called a microbolometer. This component is the heart of any thermal device. It picks up on incredibly small temperature differences in the environment and then converts that data into a picture you can see, called a thermogram. Each pixel you see on the screen represents a distinct temperature reading, painting a detailed heat map of everything in front of you.
This technology gives hunters a few massive advantages:
- Detection Through Obscurants: Since you're reading heat and not light, you can see right through things that would normally block your view. Animals hiding in thick fog, standing behind light brush, or lurking in deep shadows pop right out.
- No External Light Needed: Thermal scopes and monoculars are completely self-contained. They don’t need any moonlight, starlight, or an infrared (IR) illuminator to work. This means you can hunt in absolute, pitch-black darkness without ever revealing your own position.
The real game-changer isn't just seeing in the dark; it's the ability to detect a target's heat signature through environmental clutter. This dramatically improves situational awareness and target identification, leading to safer and more ethical hunting practices.
Thermal vs. Traditional Night Vision
The core difference is simple. Think of night vision like having superhuman hearing—it just makes a quiet sound louder. Thermal vision is more like a sixth sense, giving you a whole new layer of information about the world around you. Our guide comparing thermal night vision options gets into the weeds on this subject if you want to learn more.
This unique capability has completely changed the game for many hunters. What was once exclusively military-grade tech is now a common tool in the field. The market for hunting-specific thermal optics hit around $96 million in 2023 and is only expected to keep climbing.
This explosion in popularity, which you can read more about on Verified Market Reports, is a testament to how effective and affordable this gear has become. It’s not just about spotting game, either. It also makes recovering a downed animal quicker and more reliable, which is a cornerstone of being an ethical hunter.
Choosing the Right Thermal Optic
Picking the right thermal device can feel overwhelming, with a ton of tech specs and marketing jargon thrown your way. Let's cut through the noise. Your first big decision is whether to go with a dedicated thermal riflescope or a handheld thermal monocular. They both see in the dark, but they play very different roles on a hunt.
A thermal scope is your aiming tool—it mounts on your rifle and replaces your day scope for making the shot. A handheld monocular, on the other hand, is all about scanning and spotting. It lets you safely locate game without pointing your rifle all over the landscape.
Riflescopes vs. Handheld Monoculars
For most hunters, especially if you're chasing predators or hogs at night, the dream setup is having both. You can scan huge areas quickly with the lightweight monocular in your hand. Once you spot something, you bring up your rifle and use the scope to take a closer look and engage. It's safer, saves a ton of arm fatigue, and keeps you from sweeping a loaded weapon where it shouldn't be pointed.
Of course, budgets are a reality. If you can only swing one to start, your choice really boils down to how you hunt.
- For the Dedicated Night Hunter: If your main game is after dark and you need to make the shot, the thermal scope is a must-have. You can’t shoot what you can’t aim at.
- For the Versatile Scout: If you spend a lot of time scouting, tracking, or blood trailing, the monocular is incredibly handy. It's also a fantastic way to dip your toes into the world of thermal without committing to a full scope setup right away.
To really dig into the specifics, a good guide can be invaluable. Our deep dive into the best thermal monocular for hunting is a great place to start, breaking down the options to fit your exact needs.
To help you visualize the differences, here's a quick breakdown:
Thermal Scope vs. Monocular Feature Comparison
This table offers a side-by-side look at the primary functions and strengths of each device, helping you pinpoint which one aligns best with your hunting style and priorities.
| Feature | Thermal Riflescope | Thermal Monocular |
|---|---|---|
| Primary Use | Aiming and shooting | Scanning and observation |
| Mounting | Mounted directly to a rifle | Handheld |
| Safety | Requires pointing a rifle to see | Allows scanning without pointing a weapon |
| Field of View | Generally narrower for precision | Often wider for broad area scanning |
| Portability | Adds weight to the rifle | Lightweight and easy to carry |
| Cost | Typically higher | More budget-friendly entry point |
| Best For | Dedicated night hunters needing to shoot | Scouting, tracking, partner hunting |
Ultimately, a scope is for engaging targets, while a monocular is for finding them. Choosing which to buy first depends on which part of that process is your immediate priority.
Decoding the Specs That Actually Matter
Once you've picked a device type, you have to get into the nitty-gritty of the specs. Don't get lost in the marketing—three numbers truly define a thermal's performance and price: sensor resolution, refresh rate, and detection range.
Sensor Resolution
This is the king of all specs. Sensor Resolution directly impacts your image quality and is measured in pixels. The two main resolutions you’ll run into are 384×288 and 640×480.
A higher resolution sensor simply gathers more heat information, which translates into a sharper, cleaner, and more detailed picture. While a 384 unit works just fine for closer-range hunting, jumping to a 640 gives you a massive advantage in positively identifying animals at a distance.
Here’s a practical way to think about it: a 640×480 sensor has over 307,000 pixels working for you. A 384×288 sensor has just over 110,000. That huge gap in data is the difference between seeing a distinct coyote shape at 300 yards with a 640 unit, versus seeing a warm, fuzzy blob with a 384 unit at that same range.
Refresh Rate and Detection Range
Next up is the Refresh Rate, measured in Hertz (Hz). This simply tells you how many times the screen updates every second. You’ll almost always see 30Hz or 60Hz.
For hunting, especially if you're tracking anything that moves, you want the higher number. A 60Hz thermal gives you a buttery-smooth image, making it easy to follow a running hog without the picture getting choppy. A 30Hz unit will get the job done, but you'll definitely notice a lag on moving targets.
Finally, let's talk about Detection, Recognition, and Identification (DRI) Range. This is where manufacturers love to stretch the truth, so pay close attention.
- Detection: The farthest distance where the optic can see a heat signature. This could be just a couple of glowing pixels on your screen. It’s mostly a marketing number.
- Recognition: The distance where you can tell what kind of animal it is. For example, you can see it's a four-legged animal, not a person.
- Identification: This is the one that really counts. It's the distance where you can say with 100% certainty what you're looking at—telling a coyote from your buddy's German Shepherd.
Always focus on the identification range. An optic might claim it can "detect" a deer at 1,800 yards, but you might only be able to positively ID it as a buck you can legally shoot at 400 yards. For any ethical hunter, positive ID is non-negotiable.
The explosion of thermal optics is part of a bigger picture in hunting technology. It's a lot like how trail cameras went from a novelty to a must-have tool for scouting and managing wildlife. The trail camera market was valued at around USD 224 million in 2024, and some studies show that as many as 62% of North American hunters rely on them. You can read more on these trends in this detailed industry analysis.
From Box to Bullseye: Your First Zero
Getting a new thermal scope ready for the field is a bit different than slapping on traditional glass. It's not just about tightening a few screws; digital optics have their own quirks. Building real, hunt-ready confidence starts with getting the setup right from the very beginning.
The first, and most critical, step is mounting it correctly. This is about more than just getting it tight—it's about the right mount and the perfect position for proper eye relief. Eye relief, that crucial distance from the eyepiece to your eye where you get a full, clear picture, can be a lot less forgiving on thermals. Your goal is a setup that gives you a natural, repeatable cheek weld every single time you shoulder the rifle.
Nailing the Mount and Eye Relief
Unlike a standard scope where you might have a few inches of wiggle room, many thermal optics have a very specific sweet spot. This makes your choice of mount incredibly important.
- Quick Detach (QD) Mounts: These are a fantastic option if you plan on swapping between your thermal and a day scope on the same rifle. A good one will give you a reliable return-to-zero.
- Standard Mounts: If you're building a dedicated night rig, a solid, fixed mount is the way to go. It’s a true "set it and forget it" solution that you can trust won't budge.
Once you have the mount, it's time to find that perfect position. Shoulder your rifle in your natural shooting stance, but with your eyes closed. Get comfortable. Now, open your eyes. You should immediately see the entire screen without having to crane your neck or scrunch up. If you're seeing black rings or a partial image, you need to slide the scope forward or back in the rings.
A common mistake is mounting the optic too far forward, which forces you to stretch your neck to see. This isn't just uncomfortable; it's a recipe for inconsistent shots. The goal is a setup so natural that your head finds the exact same spot every time without you even thinking about it.
This quick guide to the core decisions when selecting an optic helps visualize the process.

This process shows how matching the optic's specs to your specific hunt and budget is the foundation for a successful setup.
The Secrets to a Perfect Thermal Zero
Zeroing a thermal introduces a new challenge: your target needs a heat signature. Trying to aim at a plain paper target on a cool day is an exercise in frustration—the reticle just blends into the background.
This is where a simple hand warmer becomes your best friend at the range. Just tape a small, activated hand warmer to the center of your target. It instantly creates a bright, unmistakable aiming point that the thermal sensor can't miss. Here's another tip from experience: try to avoid zeroing in direct, harsh sunlight. The sun can heat up the target backer or the berm behind it, creating a mess of thermal "noise" that can make your hot spot harder to distinguish.
Many modern thermals, like those from ATN, come with a "one-shot zero" function. This feature is a massive time and ammo saver, but the process can seem a little backward at first.
- Take Your First Shot: Aim dead-center on your heat source and squeeze off a round.
- Hold Steady: This is key. Do not move the rifle. Keep the crosshairs aimed exactly where they were for the shot.
- Adjust the Reticle: Go into the scope’s menu and use the controls to move a second, adjustable reticle from the center of your screen right over top of the bullet hole.
- Save the Zero: Once that secondary reticle is perfectly aligned with your point of impact, save the settings. Your main crosshairs are now calibrated.
What you're doing is telling the scope, "I was aimed here, but the bullet actually hit there—so make there the new center." It's an incredibly efficient way to sight in your thermal. Mastering this is the final piece of the puzzle, giving you the confidence you need to make a clean, ethical shot when it counts.
Getting the Most Out of Your Thermal in the Field
Having a thermal is one thing; knowing how to use it like a seasoned pro is another. The real advantage comes from mastering field tactics that turn that glowing screen into a decisive edge. A few small adjustments to your technique can be the difference between spooking game and filling your tag.
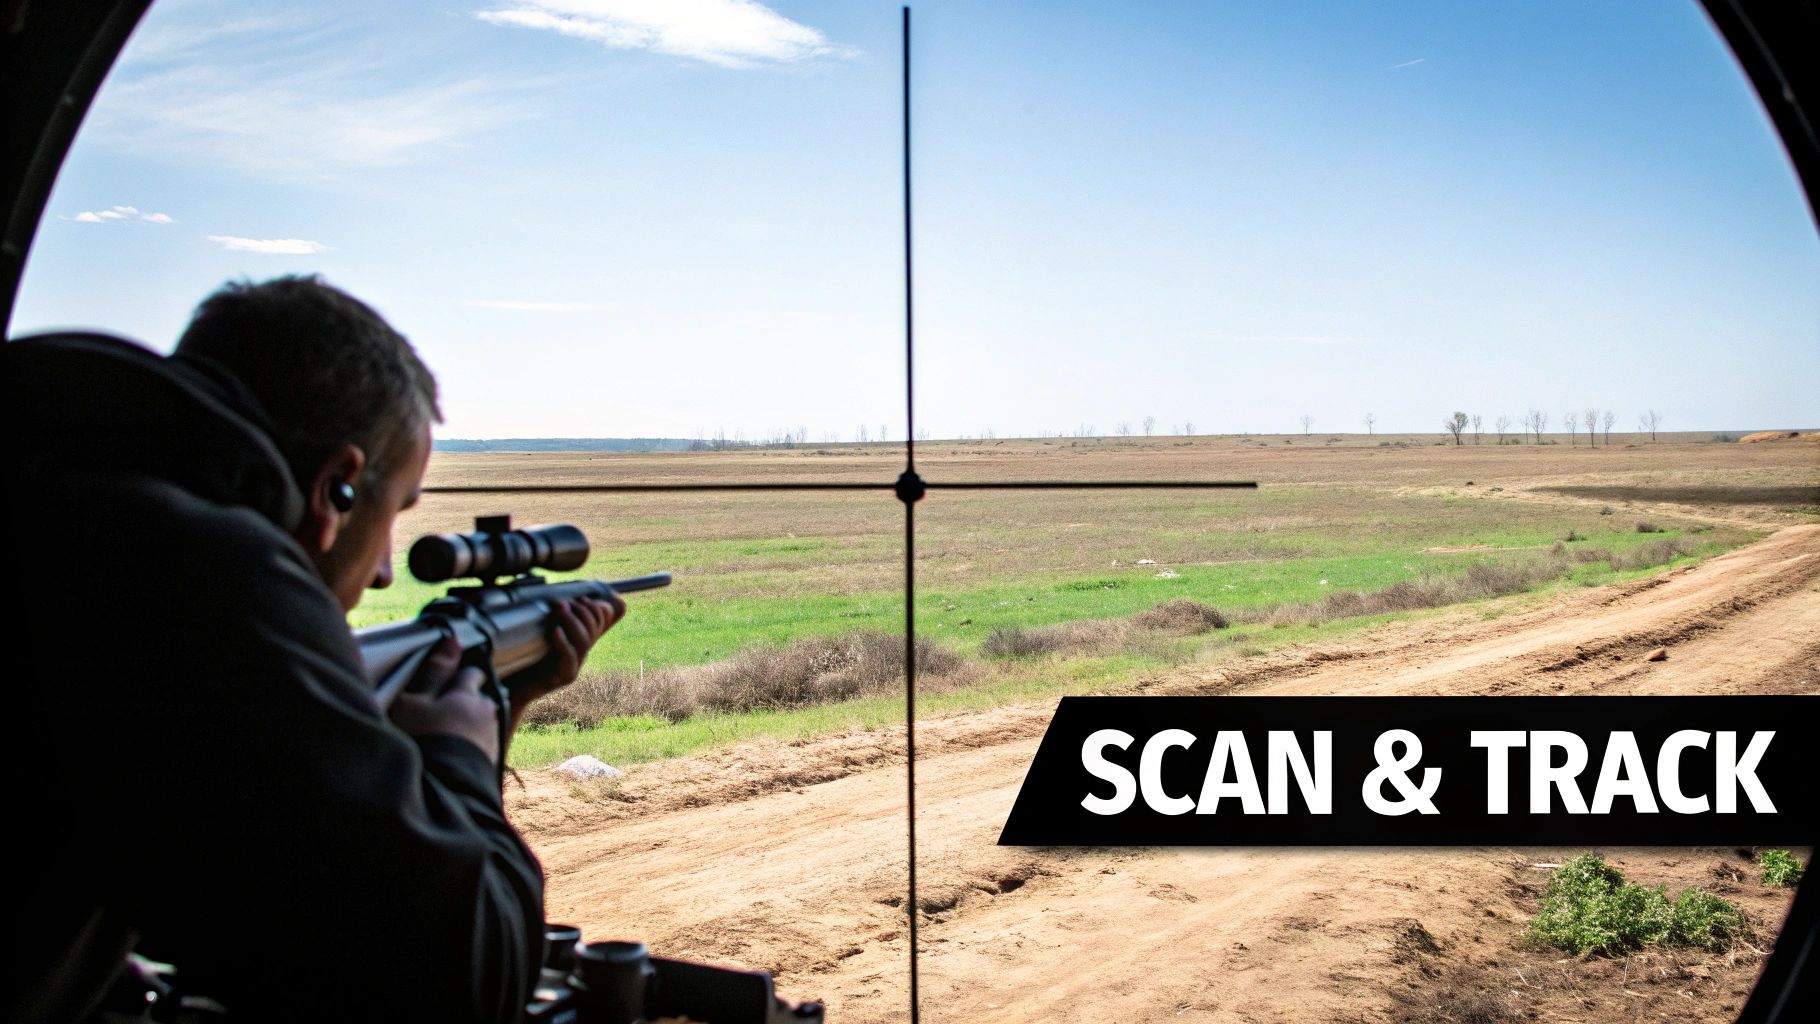
Develop a Methodical Scanning Routine
When you get to your spot, resist the urge to just randomly sweep the landscape. Start with a disciplined, slow pan across a 120° arc in front of you. This systematic approach is crucial for covering ground efficiently without missing the subtle heat signature of a bedded-down animal.
A structured sweep also keeps you from getting fatigued during a long night of glassing. Over time, it becomes second nature, allowing you to stay focused and sharp for hours.
- Move smoothly. Jerky movements can make it harder for the sensor to render a clear image.
- Pause and listen. Stop every 10–15 yards to scan and listen for anything out of place.
- Scan vertically. Don't just scan left to right; tilt your optic up and down to check ravines, hillsides, and tree cover.
Learn to Read the Heat
Not every bright blob on your screen is an animal. Experienced hunters get good at reading the nuances of a heat signature. You start to recognize the distinct shape of a deer's legs, the rhythmic movement of a walking coyote, or the tell-tale size difference between an adult hog and a piglet.
A seasoned thermal user can tell a coyote from a deer fawn at a distance just by picking up on those subtle thermal cues.
Master Your Color Palettes
Don't just stick to one color palette. Toggling between White Hot and Black Hot can reveal details you'd otherwise miss as ambient temperatures shift.
- White Hot is fantastic when it's cold out. It makes warm bodies pop against the cool background, creating maximum contrast.
- Black Hot often shines in warmer conditions, helping you pick out finer details and subtle heat differences.
- Rainbow or other colors can be useful for spotting downed game, as the gradients can make a fresh heat source stand out.
Many hunters find they can lock onto a target up to 30% faster just by picking the right palette for the conditions.
Follow the Glow: Tracking with Thermal
After you take a shot, your thermal becomes an incredible tracking tool. A wounded animal leaves a faint heat trail on the ground and surrounding brush. This residual heat is often far easier and faster to follow in the dark than a blood trail.
- Look for faint, warm lines or patches on the ground in a 360° circle from the point of impact.
- Slow way down so you don't trample the evidence.
- Tweak your contrast settings to make the faint heat trail appear brighter against the cooler ground.
Ethical and Efficient Recovery
Your responsibility as a hunter doesn't end when you pull the trigger. Thermal imaging makes recovering your harvest incredibly efficient, ensuring a quick and ethical end to the hunt. A quick scan of the area where the animal went down will usually light it up immediately.
This isn't just about speed; it's about respecting the animal and adhering to game laws. A clean, swift recovery is part of the deal. For more on using dedicated scanning tools, check out our guide on how thermal spotters can enhance your night vision and where to buy them.
How Weather Changes the Game
Your thermal optic performs differently in rain, fog, and high humidity. Water vapor in the air can scatter thermal radiation, making images appear washed out or less detailed. Knowing how to adapt is key.
- High Humidity/Fog: You'll likely need to crank up the contrast to cut through the moisture.
- Rain: Rain can make everything look "flat" thermally. Try switching palettes to see if one provides a clearer picture. A lens cover can also help shed water and keep your view clear.
Use a Monocular First, Scope Second
This is a huge safety and efficiency point. Constantly scanning with your rifle means you're pointing a loaded weapon all over the place. A handheld thermal monocular lets you scan freely and safely. Once you spot something, you can quietly raise your rifle and acquire the target with your scope.
Keep Your Gear in Top Shape
A thermal is a sophisticated piece of equipment. Taking care of it ensures it works when you need it most.
- Lens Care: The germanium lens is the most critical (and expensive) part. Clean it only with a dedicated lens cloth.
- Check Your Mount: Before every hunt, give your scope mount a quick check to make sure it's tight. A loose mount will destroy your zero.
- Firmware Updates: Manufacturers often release updates that improve performance or add features. Check their website periodically.
Fine-Tuning Your Settings for Peak Performance
Don't be afraid to dive into the settings menu. Creating custom profiles for different environments (e.g., open fields vs. dense woods) can be a game-changer.
- Digital Zoom: Use it sparingly. It just magnifies the pixels, which can lead to a grainy, unclear image.
- Refresh Rate: A 60Hz rate provides a smoother image when scanning or tracking moving targets, while 30Hz can sometimes offer slightly better battery life.
- Focus: A slightly out-of-focus image can make it impossible to identify an animal correctly. Get in the habit of adjusting your focus for different distances.
A properly tuned thermal can easily give you another 20% in identification range.
Taking the time to dial in these settings can shave critical seconds off your target acquisition time. Stay sharp, and always hunt ethically.
Hunting Legally and Ethically with Thermal Vision
Getting your hands on a thermal optic is a game-changer, no doubt about it. But with that power comes a serious amount of responsibility. The ability to own the night completely shifts the dynamic of a hunt, which is exactly why there’s a tangled mess of laws and ethics you have to sort through. For any hunter serious about using thermal imaging, getting this part right isn't optional.
The rules for hunting with thermals, or any night vision for that matter, are all over the map. One state might give you the green light for predators like coyotes or invasive species such as feral hogs. Cross the state line, and you might find that any artificial light or electronic scope is completely illegal for taking game.
It's not just a state-level thing, either. These regulations can get incredibly specific, changing from one county to the next, or even varying by a specific wildlife management area or hunting season. At the end of the day, it's on you to know the exact rules for the dirt you're standing on.
Finding and Understanding Your Local Hunting Laws
Before you even think about heading out, you've got to do your homework. The single best source for this information is always your state's fish and game agency.
- Official Agency Websites: Your state's Department of Natural Resources (DNR) or Fish and Wildlife Commission will have a website with the most up-to-date regulations. Find the annual hunting handbook—it's usually a PDF you can download right to your phone.
- Talk to a Game Warden: If you read something and it's as clear as mud, don't guess. Get the phone number for a local game warden and give them a call. They're the ones enforcing the laws, so they can give you a straight answer on using thermal optics in their area.
Here's the bottom line: Ignorance of the law is never an excuse. Getting busted for hunting illegally with a thermal can mean massive fines, losing your gear (yep, the rifle and the expensive optic), and potentially having your hunting license revoked.
The Ethics of Fair Chase in the Thermal Age
Laws are one thing, ethics are another. The whole concept of fair chase—giving the animal a fighting chance to escape—is the bedrock of modern hunting. Let's be honest, thermal technology can seriously challenge that balance if we don't use it with a good dose of respect and self-control.
The number one ethical rule is 100% positive target identification. A bright, warm blob on the screen is not a target; it's just a heat signature. You have to be able to tell what species it is, and sometimes even the sex, to know if it's a legal animal. A quality thermal helps, but it’s no substitute for sound judgment.
This flows right into the next critical point: know what's behind your target. This is gun safety 101, but it's even more important in the dark. Your thermal will light up your target, but it might not show you the farmhouse, county road, or another hunter in the background. Never, ever take a shot unless you're absolutely certain of your backstop. Every round that leaves your barrel is your responsibility, period.
Using thermal imaging for hunting is a privilege. By learning the laws and holding ourselves to a higher ethical standard, we ensure this incredible technology remains a legitimate tool for wildlife management for a long, long time.
A Few Common Questions About Thermal Hunting
If you're just getting into thermal, you've probably got questions. It's a completely different way of seeing the world, and it doesn't work like any other optic you've ever mounted on a rifle. Let's tackle some of the most common questions I hear from hunters making the switch.
Can You Actually Use a Thermal Scope During the Day?
Absolutely. This is probably the biggest myth out there, and it comes from people confusing thermal imaging with old-school night vision.
Traditional night vision amplifies ambient light, so pointing it at the sun or another bright light source can permanently cook the intensifier tube. Your thermal scope doesn't care about light one bit. It sees heat signatures, not visible light, so it works just as well at high noon as it does in the dead of night. In fact, daytime use can be a game-changer for spotting animals bedded down in thick cover or tucked away in deep shadows where your eyes would slide right past them.
What's the Real-World Difference Between Detection and Identification Range?
This is a big one. Getting this right is crucial for choosing the right optic and, more importantly, for hunting ethically. Manufacturers love to advertise huge "detection ranges," but for a hunter, the "identification range" is the only number that matters.
-
Detection Range: Think of this as the "something's out there" distance. It's the absolute farthest a sensor can pick up a heat source. On your screen, this might look like a couple of glowing pixels—a tiny, undefined white blob. You know something is warm, but you have no idea what it is.
-
Identification Range: This is the distance where you can look at the screen and know with 100% certainty what you're seeing. It's the range where you can clearly distinguish a coyote from your neighbor's German Shepherd or tell the difference between a big sow and a young deer.
For safe, ethical hunting, your shot decisions must always be based on the identification range. A scope might detect a warm body at 1,500 yards, but you might only be able to positively identify it as a legal hog at 350 yards. Never, ever shoot at a blob.
I Have a Scope, So Do I Really Need a Monocular Too?
You can get by without one, but I strongly advise against it. Having a dedicated handheld monocular is a huge advantage for both safety and success. The biggest reason comes down to basic firearm safety.
Sweeping a field for game by pointing your rifle everywhere is a terrible habit. With a lightweight monocular, you can scan for hours without getting tired and, most importantly, without pointing a loaded weapon at things you don't intend to shoot. This "spot with the mono, shoot with the scope" approach is how seasoned pros do it. It lets you find your target safely and efficiently before you even think about shouldering your rifle.
How Does Lousy Weather Affect Thermal?
Thermal optics can punch through a lot of stuff your eyes can't, but they aren't magic. Bad weather—think heavy rain, thick fog, snow, or even really high humidity—will absolutely reduce your effective range.
Water vapor in the air scatters and absorbs thermal energy, which can make the image on your screen look a bit washed out or flat. You'll still see far better than with any other technology, but you have to expect that your detection and identification distances will shrink when the weather turns south.
This is where better gear really shines. Higher-end sensors with better thermal sensitivity (measured in mK) do a much better job of cutting through that atmospheric interference. Tweaking your scope's contrast and brightness can also help you squeeze a bit more detail out of the image on a foggy night.
At Superior Tactical LLC, we provide the high-quality thermal optics and expert advice you need to hunt safely and effectively, day or night. Explore our curated selection of thermal scopes and monoculars to find the perfect gear for your next hunt.