A Guide to thermal imaging camera for wildlife: Essentials for Wildlife Watching
Picture this: you're out in the field as dusk settles, knowing wildlife is moving all around you, but you can’t see a thing. A thermal imaging camera completely changes that reality. It lets you peer into the pitch-black and see a world teeming with life, all by detecting the simple body heat of an animal.
It’s the ultimate tool for turning a dark, empty-looking landscape into a screen full of activity, giving you an edge you've never had before.

Seeing a Hidden World with Thermal Imaging
Anyone who spends time outdoors—whether you're a researcher, hunter, or just a nature lover—knows the frustration of losing track of an animal as the light fades. That buck you were watching simply melts into the shadows. A coyote becomes invisible in the brush. Nocturnal creatures only stir long after your eyes are useless.
Traditional tools like flashlights or even standard night vision just don't cut it. A bright light will almost certainly spook your target, and night vision can't see through dense foliage or camouflage. This is exactly where a thermal imaging camera for wildlife steps in.
How Thermal Works Its Magic
Unlike other optics, a thermal imager doesn't need any light to work. Instead, it detects the subtle infrared energy that all living things give off as heat. It’s like seeing the world in a spectrum of temperatures instead of colors.
Against a cool background of trees and dirt, a warm-blooded animal glows like a beacon. It doesn't matter if it's pitch black, foggy, or if the animal is perfectly camouflaged. You see it.
This technology is more than just a cool gadget; it gives you a powerful new sense. It lets you scan an entire field and instantly spot the heat signature of a deer bedded down hundreds of yards away. You can find, watch, and understand animal behavior without ever disturbing them.
The applications are as diverse as the people who use them, fundamentally changing how we interact with the wild.
How Thermal Imaging Empowers Different Users
This table breaks down the primary benefits a thermal imaging camera provides for various groups, highlighting its versatile applications.
| User Group | Primary Benefit | Key Application |
|---|---|---|
| Hunters | Ethical and efficient hunting practices | Positively identifying targets, avoiding non-target species, recovering game. |
| Wildlife Reseachers | Non-invasive data collection | Conducting 24/7 population counts and behavioral studies without disturbance. |
| Nature Lovers | Deeper connection and observation | Witnessing the secret lives of nocturnal animals that are otherwise invisible. |
| Farmers/Ranchers | Livestock and property security | Monitoring for predators, locating lost livestock, and securing fence lines. |
For each of these users, a thermal imager provides an undeniable advantage that was once unimaginable.
A thermal imager turns night into day, but instead of seeing light, you see life itself. It cuts through the visual noise to reveal the clear, unmistakable signature of an animal.
In the end, using a thermal imaging camera is about seeing more and seeing better. It improves safety by showing you what’s hidden in the dark, aids conservation through discreet monitoring, and simply makes your time outdoors more rewarding. This guide is here to walk you through everything you need to know to choose and master this incredible piece of gear.
How Thermal Cameras See Heat, Not Light
Imagine you're trying to spot a white rabbit during a blizzard. With your naked eye, it’s a lost cause. But what if you could see its body heat instead of its white fur? That rabbit would light up like a beacon against the cold snow. This is the simple, yet incredibly powerful, idea behind how a thermal imaging camera works for wildlife observation. It doesn't rely on visible light; it sees the world painted in a language of temperature.
Everything with a temperature above absolute zero—from a living, breathing animal to a rock that's been baking in the sun—emits infrared energy. A thermal camera's job is to capture this invisible energy and turn it into a picture based on those temperature differences. The resulting image, called a thermogram, unveils a hidden world where warm bodies stand out starkly from their cooler surroundings.
The magic happens inside a tiny, hyper-sensitive component called a microbolometer. Think of it as a grid made of thousands of microscopic sensors. When infrared radiation hits this grid, each tiny sensor heats up just a little. The camera’s internal processor then measures these minute changes across the entire grid and translates that data into the detailed heat-signature image you see on your screen. This is what allows you to spot the heat from a coyote across a field or a deer bedded down in dense brush.
Thermal Imaging vs. Night Vision
This is where a lot of people get tripped up, but it's crucial to understand that thermal imaging and night vision are fundamentally different technologies. Here's a simple way to think about it: night vision amplifies existing light, while thermal imaging detects heat.
- Night Vision: This tech works by gathering tiny amounts of ambient light—from the moon, stars, or even distant city glow—and intensifying it thousands of times to produce a visible image, which is usually green. It needs some light to work. It’s great for seeing details on something you can already faintly make out, but it can be defeated by camouflage or complete darkness.
- Thermal Imaging: This tech needs no light at all. Because it reads heat signatures, it’s far better for pure detection. A deer hiding in thick fog or behind a screen of leaves is still giving off body heat, and a thermal imager will see it right through those obstructions.
Essentially, night vision helps you identify something you're already aware of, whereas thermal helps you find something that is completely invisible to your eyes. If you want to dive deeper into the science, you can explore our guide on what thermal vision is.
Understanding Thermal Sensitivity and Palettes
Two specifications that have a massive impact on what you actually see in the field are thermal sensitivity and color palettes. Getting a handle on these is key to getting the clearest possible picture.
Thermal Sensitivity (NETD), or Noise Equivalent Temperature Difference, is the spec that tells you how well a camera can distinguish between tiny variations in temperature. It’s measured in milliKelvins (mK), and with NETD, a lower number is always better. For instance, a unit with a <25mK rating can resolve much smaller temperature differences than one rated at <50mK.
What does this mean for you? Better sensitivity gives you a sharper, more detailed image. It's the difference between seeing a blob of heat and being able to make out the subtle shape of an animal's antlers or tell it apart from a sun-warmed rock. This is especially true in challenging weather like high humidity or fog.
Color palettes are simply the different ways your thermal camera can display the heat information it's gathering. They might seem like a gimmick at first, but each one serves a very practical purpose.
- White Hot: This is the classic mode. The warmest objects appear white. It's the go-to for pure detection because a warm-blooded animal will pop brightly against a dark, cool background.
- Black Hot: This is the inverse, showing warm objects as black. Many experienced users prefer this for long scanning sessions because they find it causes less eye strain.
- Color Palettes: Modes like "Ironbow" or "Rainbow" use a spectrum of colors to represent different temperature gradients. These are fantastic for spotting fine details on a target and can also help reduce eye fatigue over many hours of observation.
The incredible advantage this technology provides is why we're seeing it explode in popularity for everything from conservation to hunting. The market for hunting-specific thermal imagers alone was valued at USD 96 million in 2023 and is only expected to climb. This growth is driven by the sheer effectiveness of detecting body heat from over 1,000 yards away, even through smoke or vegetation. In fact, it's been shown to boost detection accuracy by 40-50% over traditional night vision. For the hunters and tactical professionals we work with, that translates directly to safer, more successful outcomes.
Decoding the Specs That Matter for Wildlife
When you first dive into the world of thermal imaging, the spec sheets can look like a foreign language. It's a wall of numbers, acronyms, and technical jargon that doesn't tell you much about how the device will actually perform in the field. Let's cut through that noise and translate the most critical specs into real-world results.
The goal isn't just to understand what the numbers mean, but to see how they directly affect your ability to spot, track, and identify animals after dark. Getting this right means you’re investing in performance that fits your needs, whether you're scanning a wide-open field for coyotes or trying to pick out a bedded-down buck in dense timber.
Sensor Resolution Is Your Image Clarity
Think of sensor resolution as the number of tiny thermometers packed into your thermal's "eye." Each pixel captures a temperature reading, and the more pixels you have, the sharper and more detailed your image will be. This is, without a doubt, the single most important spec for overall performance.
A lower-resolution sensor, say 320×240, is perfectly fine for detecting heat signatures at moderate distances. You'll have no problem seeing a warm blob out there. But a high-resolution sensor, like a 640×480 or 640×512, gives you the clarity to confidently identify that blob as a deer and not a feral hog, even from much farther away.
Higher resolution gives you:
- Confident Identification: You can easily tell one species from another.
- Greater Detection Range: The added detail helps your brain recognize animal shapes at a distance.
- Usable Digital Zoom: Zooming in on a high-res image keeps it clear, while a low-res image just becomes a blocky mess.
To make this simpler, here's a flowchart that breaks down how to prioritize specs based on what you’re trying to accomplish in the field.
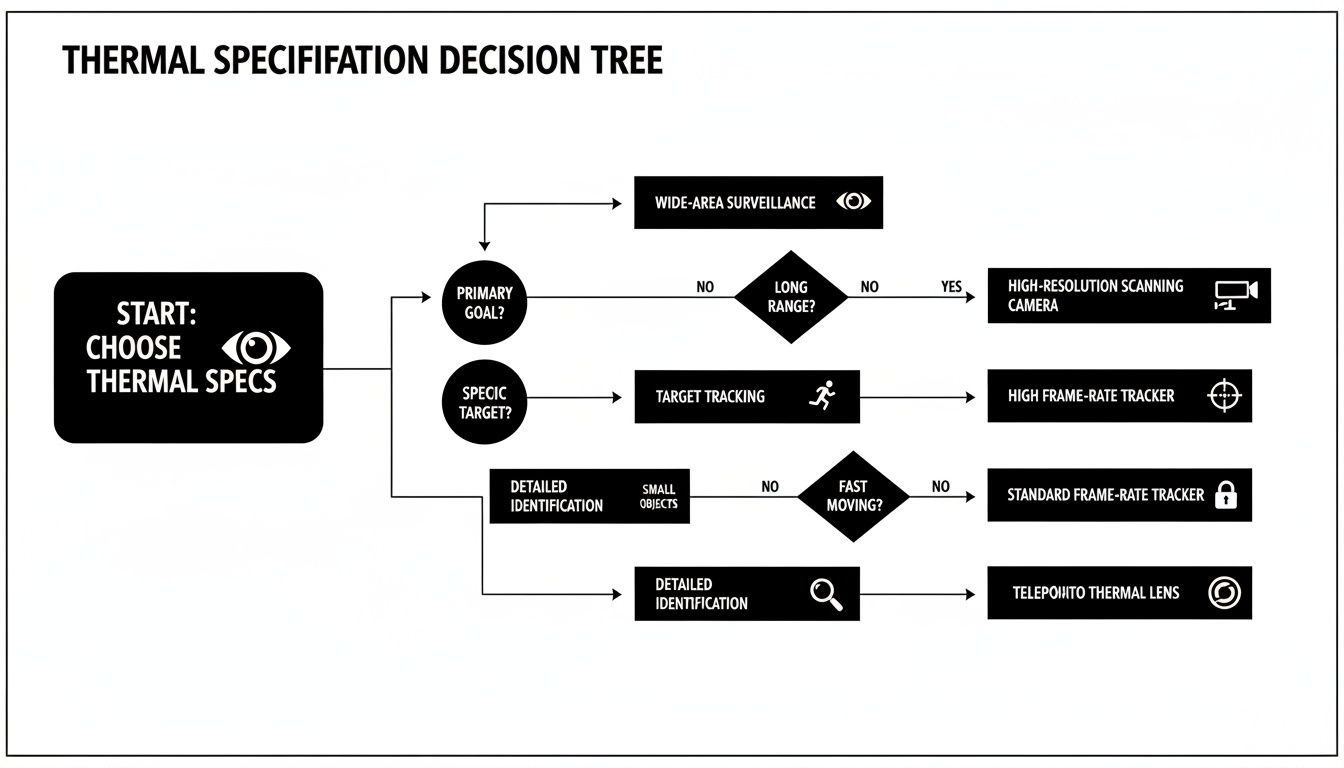
As you can see, the right choice always comes down to a trade-off. If your main goal is scanning a wide area, a lower magnification is your friend. But if you need positive identification at long range, sensor resolution is king.
Choosing the right combination of specs often comes down to balancing performance against your budget. This table breaks down what you can expect at different price points.
Thermal Spec Showdown: Performance vs. Price
| Specification | Budget Tier (e.g., 320×240, 30Hz) | Mid-Tier (e.g., 384×288, 50Hz) | High-End Tier (e.g., 640×512, 60Hz) | Real-World Impact |
|---|---|---|---|---|
| Sensor Resolution | Good for detection within 500 yards. Identification is challenging at a distance. | Clearer images, allowing for better recognition of animal types at medium ranges. | Crystal-clear identification at long ranges. Zoom is highly effective. | Higher resolution is the key to knowing what you're looking at, not just that something is there. |
| Refresh Rate | Can be choppy when tracking fast movers. Best for static observation or slow panning. | Smooth image for most scenarios, including tracking walking or trotting animals. | Buttery-smooth, fluid image. Essential for tracking fast-running targets like hogs or coyotes. | A high refresh rate prevents motion blur and makes scanning feel natural and seamless. |
| Focal Length (Lens) | Wide field of view (FOV). Excellent for scanning broad areas quickly. | A balanced mix of scanning ability and magnification for mid-range observation. | High base magnification. Best for long-distance spotting and detailed identification. | Shorter lenses for scanning, longer lenses for zooming. It’s a trade-off between coverage and detail. |
Ultimately, this table shows that "better" isn't always necessary. The best specs are the ones that align with your specific use case and environment.
Refresh Rate Smooths Out the Action
Refresh rate, measured in Hertz (Hz), tells you how many times per second the image on your screen updates. For watching wildlife—especially anything that moves—this spec is a game-changer.
A low refresh rate, like 30Hz or below, will produce a laggy, stuttering image when you pan across a field or try to follow a running animal. On the other hand, a high refresh rate of 50Hz or 60Hz delivers a fluid, real-time view. It feels more like watching a live video feed than a slideshow.
For tracking a fast-moving target like a coyote or a hog, a 60Hz refresh rate is essential. It ensures the image doesn't blur or stutter, allowing you to keep the animal clearly in your sights without disorientation.
The demand for this kind of performance is exploding. The global market for thermal imagers in hunting and wildlife observation was valued at USD 0.1 billion in 2024 and is projected to hit USD 0.3 billion by 2033. This growth is driven by enthusiasts and professionals who need reliable tech for ethical and effective fieldwork, with some hunters reporting up to a 30% higher success rate in tracking game. You can explore more on the thermal imager market growth from Business Research Insights.
Focal Length Determines Your Field of View
Finally, let's talk about the lens. The focal length of the lens determines your thermal’s base magnification and its field of view (FOV).
Here’s an easy way to think about it: a shorter focal length (like 25mm) is a wide-angle lens. It gives you a massive FOV, which is perfect for scanning a big pasture or food plot quickly. You can see more ground at once.
A longer focal length (like 50mm or 75mm) is a telephoto lens. It provides much higher built-in magnification, which narrows your FOV but lets you see incredible detail on animals that are far away.
The right choice depends entirely on your typical hunting or observation scenario. Many experienced users actually carry two devices: a handheld monocular with a wide FOV for scanning, and a scope with higher magnification for positive identification. Our guide on choosing the best thermal imaging monocular dives deeper into this two-device strategy.
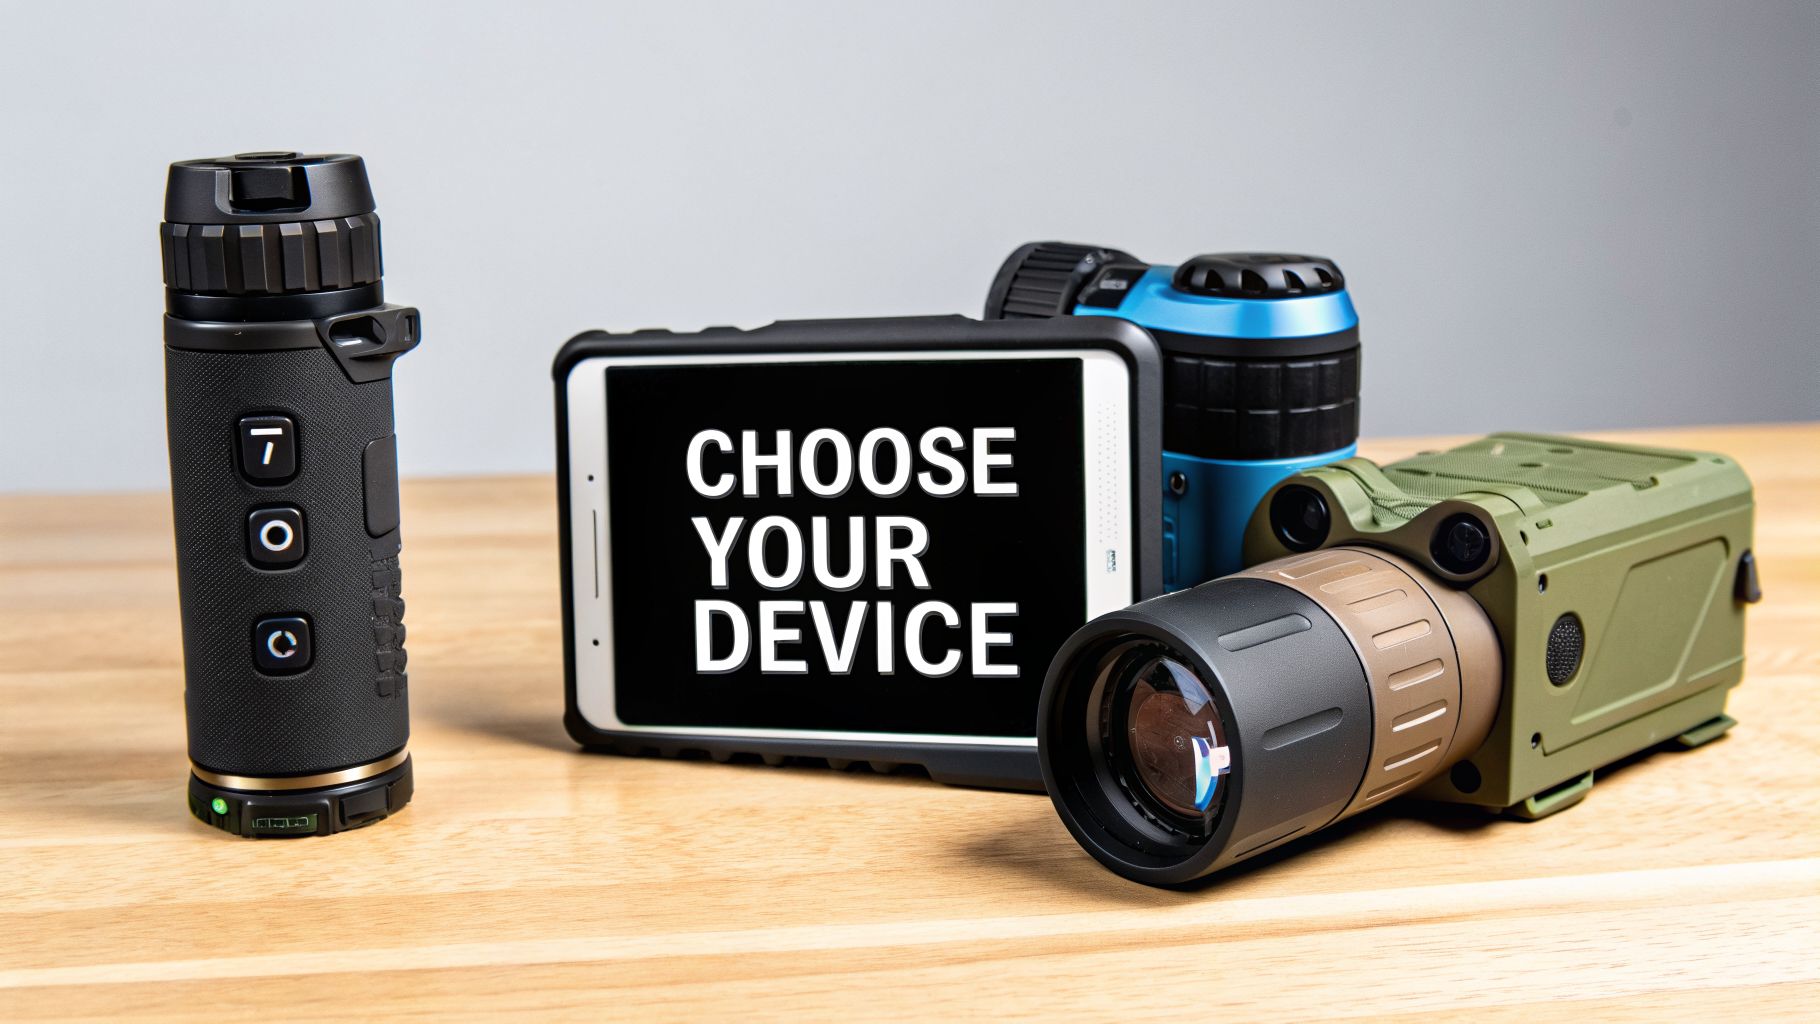
Choosing the Right Thermal Device Type
Knowing how thermals work is one thing, but picking the right tool for the job is a whole different ball game. Thermal devices aren’t a one-size-fits-all solution; the form factor you choose will make or break your experience in the field.
You’ve got four main flavors to consider: monoculars, dedicated scopes, binoculars, and clip-on systems. Each is built for a specific mission, whether you’re scanning a wide-open field for movement or lining up a perfect, ethical shot in total darkness. Let’s figure out which one belongs in your pack.
Thermal Monoculars The Versatile Scanner
If you're just getting into the world of thermal, or you need a do-it-all tool, this is where you start. The thermal monocular is the workhorse of the industry—a compact, handheld unit that’s light enough to live around your neck or in a jacket pocket.
Its main job is spotting and scanning. Because it’s so easy to handle, you can spend hours glassing fields, timberlines, and thickets for a heat signature without your arm feeling like it’s going to fall off. In the field, you’ll find yourself using it constantly to:
- Spot wildlife without having to point a rifle at everything that moves.
- Track downed game by following the heat trail it leaves behind.
- Navigate in the dark and avoid walking face-first into a tree or a startled animal.
- Boost your security and situational awareness around a campsite or homestead.
This brings us to the most common—and smartest—strategy I see in the field. A hunter will use a lightweight monocular to find an animal. Only after a target is located and identified do they bring up their rifle, which has a heavier thermal scope on it, to take the shot.
This two-device system is safer, less tiring, and just plain smarter than swinging a loaded rifle around like a pair of binoculars.
Dedicated Thermal Scopes For the Ethical Shot
A dedicated thermal scope does one thing, and it does it exceptionally well: it mounts to your firearm and helps you aim. These are rugged tools, built from the ground up to handle the recoil of powerful rifles. They’re packed with features like multiple reticle options, zeroing profiles for different loads, and even onboard ballistic calculators.
Sure, you can use a scope for scanning, but it's a terrible idea. They’re heavy, and it’s a cardinal sin of firearm safety to point your weapon at anything you don't intend to shoot. A dedicated scope is the tool you pick up after your monocular has done its job. It gives you the clear sight picture you need for a clean, ethical shot when the sun goes down. For serious hog and predator hunters, this is a non-negotiable piece of kit.
Thermal Binoculars For Ultimate Observation
Welcome to the top tier of thermal observation. Thermal binoculars use both of your eyes, which provides a viewing experience that is dramatically more comfortable and immersive than staring through a single eyepiece. If you’ve ever spent hours scanning with a monocular, you know all about the eye fatigue that sets in. Binoculars all but eliminate it.
This makes them the tool of choice for professional guides, wildlife biologists, and anyone who spends entire nights observing animals. Some high-end models even use dual sensors to create a more natural depth of field. They are the most expensive option, without a doubt, but for pure, long-duration observation, nothing else comes close.
Clip-On Systems The Hybrid Approach
Finally, we have the cleverest of the bunch: the thermal clip-on. These units attach to the front of your existing daytime rifle scope, effectively turning it into a thermal sight. The beauty here is flexibility. You get to keep using the high-quality glass and familiar reticle you’ve spent years training with, adding thermal capability only when you need it.
This also means you aren't forced to dedicate one rifle exclusively to night hunting. The downside? Getting a perfect alignment can sometimes be a bit fussy, and it does add extra weight and another moving part to your setup. But for those who want one rifle to do it all, a clip-on is a brilliant compromise.
Getting the Most Out of Your Thermal in the Field
Having a high-end thermal imager is a great start, but getting real results out in the field is a completely different ballgame. That’s where technique, a bit of environmental savvy, and truly knowing your gear come into play. This is what separates someone who just owns a thermal from someone who truly knows how to use one.
Let's move past just spotting warm blobs in the dark. We're going to cover the practical skills that will help you read the landscape, interpret what you’re seeing, and keep your gear running when it counts.
How to Scan Like a Pro
When people first get their hands on a thermal, their first instinct is to sweep it back and forth across the landscape like a searchlight. That’s one of the biggest mistakes you can make. Quick, jerky movements are a perfect way to miss a still animal bedded down in the brush.
The right way is slow and methodical. Picture the area in front of you as a grid. Start scanning slowly in a straight line from one side to the other. When you get to the end, drop your view down a bit and scan back the other way. It’s like mowing a lawn—you cover every inch, leaving no blind spots.
- Slow Down: Patience is everything. A quick scan will glide right over an animal that's partially hidden or not moving.
- Use Your Ears: Don't just rely on your eyes. Every few minutes, stop scanning and just listen. You'll often hear an animal long before you see it, which gives you a specific area to focus on with the thermal.
- Get High: Even a small hill or the top of your truck can make a huge difference. Gaining elevation opens up your field of view and lets you peer down into dips and gullies you’d otherwise miss.
This deliberate approach might feel slow at first, but it forces you to be thorough and will dramatically increase your spot rate.
Learning to Read the Heat
A thermal imager shows you differences in temperature, but it's your brain that has to make sense of the image. A classic rookie mistake is confusing a sun-baked rock with a bedded animal. Learning to distinguish between the two is a skill you’ll build with time in the field.
The key is to look for three things: shape, size, and behavior. An animal has a biological form—you can make out a head, neck, and legs. A rock is usually just an amorphous blob. With practice, you'll start recognizing the distinct heat profiles of different animals. A coyote is slender with a bushy, glowing tail; a deer is bulkier with that unmistakable long neck and head.
But the dead giveaway is always movement. A rock isn’t going to flick an ear or turn its head. If you’re staring at a warm spot and can’t quite make it out, just be patient. Watch it for a minute or two. A little patience is usually all it takes to get a positive ID.
Working With the Weather, Not Against It
Your thermal’s performance isn’t a fixed number; it changes constantly with the environment. Things like high humidity, dense fog, and rain will noticeably cut down your effective range and image clarity. This is because all that water vapor in the air absorbs and scatters the infrared energy your camera is trying to detect.
On a damp, humid night, you’ll notice that animals at a distance look fuzzier and less defined. This is when you have to step in and manually tweak your contrast and brightness settings to pull more detail from the scene. Many newer thermals have pre-set modes for "rain" or "fog," and they can be a massive help in cutting through the murk.
Even with these limitations, thermal technology has proven its worth. It’s no accident that North America dominates the global market, accounting for 34.2% of an industry projected to hit USD 4.12 billion by 2026. This growth is fueled by countless hunters and professionals who trust this tech because it can reduce the risk of misidentification by up to 35% in poor light. For a deeper dive into market trends, check out the analysis from Data Bridge Market Research.
Power and Pictures
Nothing cuts a night short faster than a dead battery. Make it a habit to start every trip with a full charge. If you’re planning a long night, bring a spare set of batteries or a small USB power bank—they’re a lifesaver. You can also stretch your battery life by dimming the screen brightness and turning off extra features like Wi-Fi when you're not actively using them.
And don’t forget about the record button! Capturing a unique wildlife sighting or the key moments of a hunt gives you more than just a memory to look back on. It’s also an incredible tool for reviewing animal behavior and sharpening your own skills for next time. If you're looking for a unit with great battery performance and recording, our detailed look at a top-tier hunting thermal monocular is a great place to start.
Ethical and Legal Use of Thermal Optics
Getting your hands on a good thermal imager is exciting. It opens up a whole new world after sunset, but it also means you’ve got some homework to do. This isn't just another piece of gear; it’s a powerful tool, and its use is rightly governed by a patchwork of laws and a strong sense of ethics that every responsible person in the field needs to take seriously.
The single most important thing to wrap your head around is that the rules change. A lot. Regulations for using thermal optics can vary wildly from one state to the next, and sometimes even between counties or specific wildlife management areas. What’s perfectly fine in one spot could land you with a hefty fine—and the loss of your hunting license—just a few miles down the road.
Know Before You Go
Before you even think about taking a thermal into the woods for a hunt, you have to check your local and state regulations. There's no shortcut for this. You'll quickly find that the law often makes a big distinction between simply watching animals and actively hunting them.
- Scouting and Observation: Using a thermal monocular to find game before a season opens or just to watch wildlife is often perfectly legal.
- Game Recovery: Many states give the green light to using thermals to find an animal you've already shot. This is an incredible use of the technology, helping ensure nothing goes to waste.
- Night Hunting: This is where things get tight. Some places have very open regulations for hunting invasive species like feral hogs or predators like coyotes at night. However, using thermals to hunt traditional game animals after dark is frequently banned outright.
Here's the bottom line, and it’s an absolute: ignorance of the law is never a valid excuse. Always, always check the specific rules for the species you're after in the exact location you'll be. A quick phone call to your state’s fish and game department is time well spent.
The Principle of Fair Chase
Beyond the black-and-white of the law is the spirit of ethical hunting and wildlife observation. The concept of fair chase is the bedrock of modern conservation, and it’s all about ensuring the animal has a reasonable chance and that the hunter doesn't have an overwhelming advantage.
A thermal imager is a massive advantage. Its purpose should be to help you make a positive ID on your target, confirm you have a safe backstop, and deliver a clean, humane shot. It’s about being a more effective and ethical hunter, not about making the hunt trivial.
For those of us who are just out there to watch, the same ethics apply. The goal is to observe animals without stressing them out or changing their natural behavior. That means keeping your distance, staying quiet, and never using your thermal to corner or chase an animal. You're a silent guest in their world; leave it just as you found it.
Clearing Up Common Questions
Even after going through all the specs and features, you probably still have a few questions rattling around. That’s perfectly normal. Here are some of the most common things people ask when they're getting ready to buy their first thermal imager for wildlife, hunting, or security.
Can a Thermal Camera See Through Walls or Glass?
This is probably the biggest myth out there, thanks to Hollywood. The straight answer is no. A thermal imager doesn't have X-ray vision; it simply reads the heat energy coming off the surface of an object. It can't see through solid things like walls, concrete, or thick metal.
Glass is a particularly interesting one. It actually blocks the long-wave infrared that thermals detect. If you point a thermal scope at a window, you won't see the person on the other side. Instead, glass acts like a thermal mirror—you’ll just see a faint, ghostly heat reflection of yourself.
How Far Can a Thermal Imaging Camera See Wildlife?
That's the million-dollar question, and the answer is, "it depends." The effective range of a thermal is a balancing act between three key things: its sensor resolution, the lens size, and how big your target is. For example, a high-end unit with a 640×512 sensor and a 50mm lens might let you spot a heat signature from a deer well over a mile away.
But seeing a warm spot is one thing; knowing what it is is another entirely. In the field, we break it down into three critical stages:
- Detection: "I see a warm blob out there." It's just a pixel or two that stands out from the cool background.
- Recognition: "Okay, that's definitely an animal." You can make out a basic shape, like a four-legged creature.
- Identification: "That's a coyote, not the neighbor's German Shepherd." You can see enough detail to be certain of the species.
For most hunting and observation, a quality mid-range thermal will let you positively identify animals out to several hundred yards, which is plenty for almost any scenario.
Can I Use a Thermal Camera During the Day?
Absolutely. This is a game-changer that many people overlook. Since a thermal camera sees heat instead of visible light, it works just as well at high noon as it does in pitch-black darkness.
During daylight hours, animals that are perfectly camouflaged in shadows or thick brush will still glow with their body heat when viewed through a thermal imager. This makes it an incredibly effective tool for spotting bedded deer or predators hiding in the shade.
Using a thermal during the day can feel like a superpower, revealing hidden animals you would have walked right past.
Can Drones Be Used with Thermal Cameras for Wildlife?
Yes, and they’ve become an essential piece of gear in professional wildlife management and conservation. A drone with a thermal camera allows researchers to survey huge, remote tracts of land quickly and without disturbing the local fauna. They're used for everything from population counts to finding poachers in national parks.
However, when it comes to hunting or recreational use, flying a drone is almost always illegal. The laws are very strict here, so always check your state and local regulations before even thinking about putting a thermal in the air.
At Superior Tactical LLC, we live and breathe this stuff. We provide the dependable thermal gear you need to own the night, whether you're on a hunt, a patrol, or an expedition. Our selection is hand-picked from brands we trust in the field. See our full lineup of battle-tested thermal optics.