The Operator’s Guide to the M68 Close Combat Optic
The M68 Close Combat Optic (CCO) is more than just a piece of gear; it’s a legend. For decades, this non-magnifying red dot sight has been the standard-issue optic for the U.S. military, fundamentally changing how soldiers fight. At its heart, the M68 is an American military designation for a series of combat-proven optics, starting with the Swedish-made Aimpoint CompM2.
It was the optic that taught a generation of warfighters to shoot with both eyes open, dramatically cutting down target acquisition time while boosting situational awareness when it mattered most.
A New Era of Marksmanship
Anyone who's trained extensively with traditional iron sights understands the mental checklist: front post, rear aperture, target. It's a deliberate, multi-step process that requires you to close one eye, instantly cutting your field of view in half. In the sterile environment of a square range, it works. In a high-stress, dynamic gunfight, those lost milliseconds and that tunnel vision can be fatal.
The M68 CCO threw that old playbook out the window. It introduced a new, brilliantly simple concept: put the red dot on the threat and press the trigger. This wasn't just a hardware upgrade; it was a philosophical shift in marksmanship. The focus moved from perfectly aligning sights to engaging threats with speed, confidence, and a full view of the battlefield.
The Core Principles of the M68
The M68’s legendary status isn’t an accident. It’s the result of a few simple but powerful design principles that made it an absolute workhorse. These concepts are just as critical today for anyone who relies on a rifle, from law enforcement and hunters to tactical professionals.
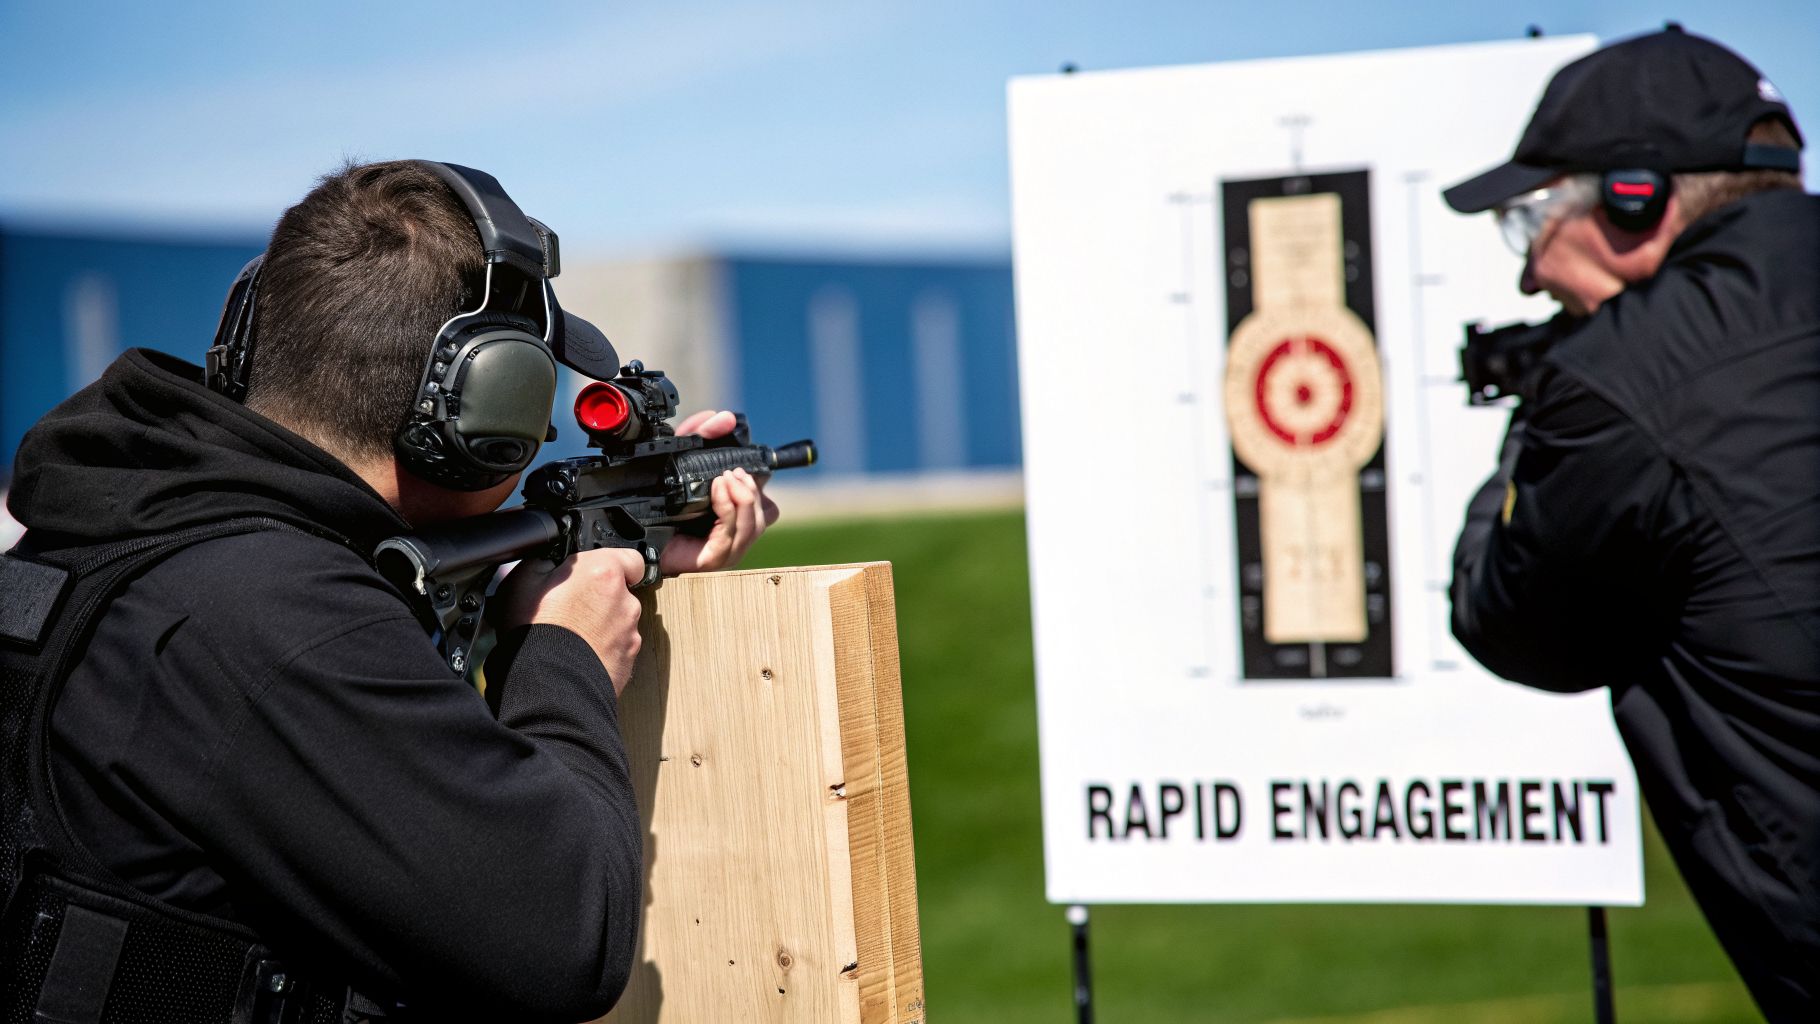
- Both-Eyes-Open Shooting: This is the big one. A non-magnified red dot lets your brain superimpose the dot over the target while both eyes stay open. You maintain all of your peripheral vision, making it far easier to track moving targets or spot a second threat.
- "Forgiving" Parallax Performance: The dot stays on target even if your head isn't perfectly aligned behind the optic. This is a lifesaver when you're forced to shoot from an awkward position, behind cover, or on the move, where a textbook cheek weld just isn't happening.
- Unquestionable Durability: The M68 was born for the battlefield. It’s waterproof, shockproof, and built to take the kind of abuse that would destroy lesser optics. It earned its reputation for being utterly reliable when you couldn't afford a failure.
The M68 simplified the act of aiming so soldiers could focus on the fight, not the tool. It boiled everything down to a single command: put the dot on the bad guy.
The story of how this optic went from a relatively unknown Swedish design to an icon of American military power is a lesson in smart, effective engineering. Now, let’s dive into every aspect of the M68, from its history and specs to how you can set one up and run it like a pro.
How a Swedish Underdog Became a US Army Icon
The story of the M68 is a classic David-and-Goliath situation, starting not in some sprawling American defense complex, but in a small Swedish company called Aimpoint. Back in the mid-1990s, the U.S. Army was looking for a single, standard-issue optic to give soldiers a real advantage in close-quarters combat.
This wasn't some small-time trial. The biggest names in optics showed up, all competing for a massive, game-changing contract. Aimpoint, with its simple tube-style red dot, was the clear underdog.
But here’s what happened. Aimpoint’s philosophy—focusing on bomb-proof durability, insane battery life, and dead-simple operation—lined up perfectly with what soldiers actually needed. The Army wanted a sight that just worked, every single time. In a decision that shocked the industry, the Swedish CompM model won the trials.
In August 1997, it was officially designated the M68 Close Combat Optic (CCO). With that victory came an almost impossible challenge: an initial order for 100,000 units over three years. For a company that was only making 10,000 to 12,000 sights a year with a tiny team of three or four people, this was a sink-or-swim moment.
From Small Shop to Global Standard
Scaling up production by nearly ten times wasn't just hard; it forced Aimpoint to completely reinvent itself. They had to overhaul their manufacturing, their supply chain, and their quality control, all while keeping the handmade precision that won them the contract.
The first M68s hit the field and made an immediate difference. Soldiers were getting on target faster and more accurately than they ever could with iron sights alone. The real trial by fire, though, came when the optic was issued to Special Operations units as part of the SOPMOD kit. These were the guys who pushed their equipment to the absolute limit, and their feedback from the battlefield was priceless.
"The early feedback loop from SOCOM was critical. They were the trailblazers, using the M68 in the harshest environments imaginable. Their experiences directly shaped the optic's evolution, hardening it for general issue."
The Evolution into the CompM2
Every lesson learned in combat was poured directly into the next generation of the sight, the Aimpoint CompM2. This wasn’t just a minor refresh; it was a battle-hardened evolution of the original.
The CompM2 integrated several key upgrades straight from operator feedback:
- Improved Durability: The housing was beefed up to handle the brutal reality of combat—drops, impacts, and constant vibration.
- Night Vision Compatibility: The CompM2 was one of the first red dots to feature dedicated brightness settings for night vision devices. This was a massive tactical advantage.
- Enhanced Water Resistance: The waterproofing was significantly improved, making the sight reliable for amphibious operations and in torrential downpours.
This cycle of deployment, feedback, and rapid improvement is what forged the M68’s legendary reputation. It wasn’t an optic designed in a clean lab; it was proven in the mud and sand of actual conflict. While other great technologies have come along since, like those in the history of EOTech sights, the M68’s core identity remains its absolute toughness and simplicity.
Anatomy of a Legend: Key Features and Variants
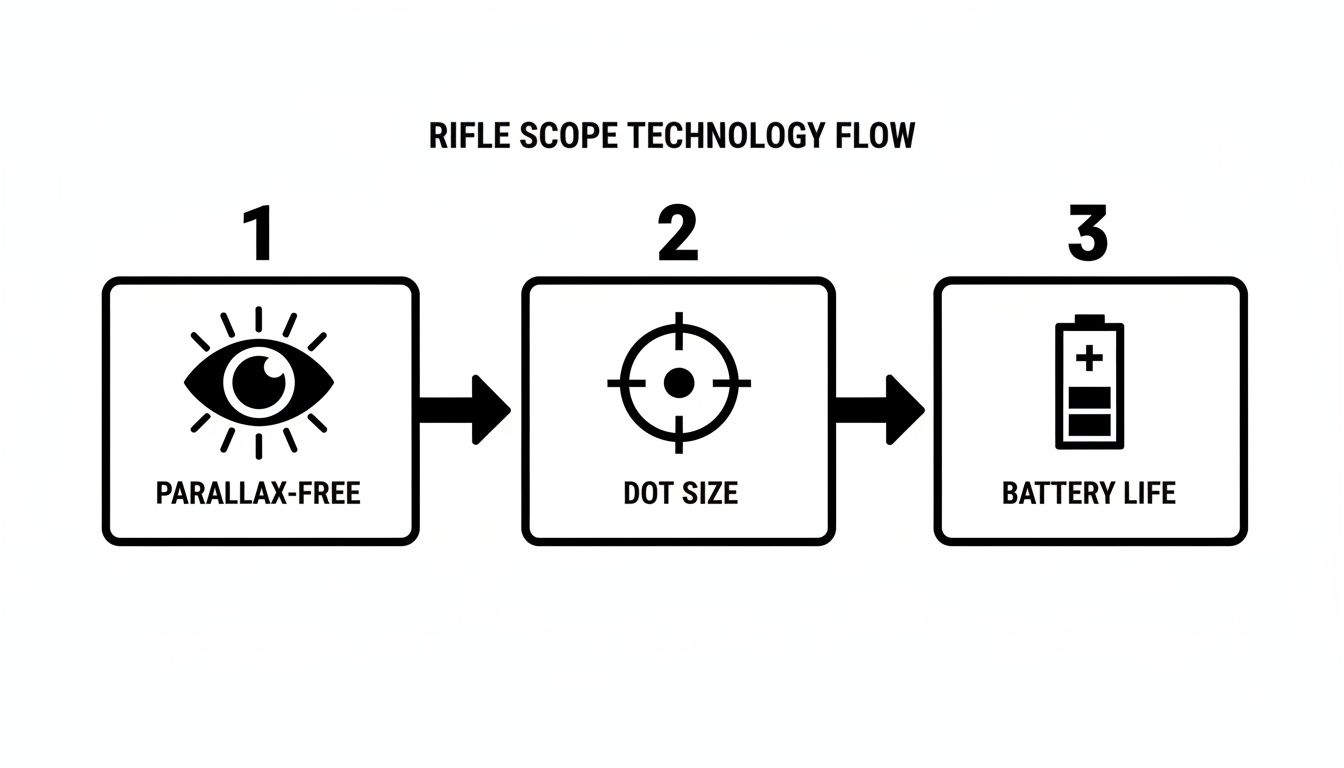
The M68’s legendary reputation wasn't built on its military service record alone. It’s rooted in the core technologies that make the optic so brutally effective, starting with a concept you hear all the time but may not fully grasp: being parallax-free.
Think about looking through a cheap scope or even just a cardboard tube. If your eye isn't perfectly centered, your view of the target shifts or disappears entirely. You're forced to get that perfect cheek weld every single time, which is a slow, unforgiving process, especially when your heart is pounding.
The M68 CCO is different. It’s more like looking through a clean, open window. You can shift your head left, right, up, or down, and your view of the target stays consistent. The parallax-free design means that as long as you can see that red dot, that’s where your round is going.
This is the M68's real superpower. When you're shooting from an awkward position, leaning around a barricade, or moving quickly, you don’t have to waste precious seconds finding a perfect sight picture. Just put the dot on the target and press the trigger.
Dot Size: The Trade-Off Between Speed and Precision
Another critical piece of the puzzle is the size of the aiming dot, which we measure in Minutes of Angle (MOA). Simply put, a 1 MOA dot covers a one-inch circle at 100 yards. The M68 family primarily uses 2 MOA and 4 MOA dots, and choosing between them comes down to a classic trade-off.
4 MOA Dot (M68/CompM2): This larger dot is incredibly easy for your eye to find, making it exceptionally fast for close-quarters work where speed is everything. The trade-off comes at a distance, where the dot can start to obscure smaller targets, making precise shots tougher.
2 MOA Dot (CompM3, CompM4): The smaller dot covers less of your target, which gives you a huge advantage when you need to make a precise shot at 100 yards or more. It might be a fraction of a second slower to acquire initially, but its versatility for engaging targets at varied distances is why it became the new standard.
You can think of it like this: a 4 MOA dot is a thick marker you use to quickly circle a threat, while a 2 MOA dot is a fine-tipped pen for marking a precise spot.
The Evolution of M68 Variants
The "M68" name doesn't belong to just one optic. It represents a whole family that has been refined over decades of hard-earned combat lessons. The jump from the original CompM2 to the modern CompM4s is one of the most significant leaps in tactical optics, and it was all about power.
The early models had a battery life measured in thousands of hours—which was fantastic for its time. But the CompM4 series completely rewrote the rules. By switching to a common AA battery and dramatically improving its power efficiency, Aimpoint achieved an incredible 80,000 hours of constant-on use. That's more than nine years.
This wasn’t just an incremental update; it fundamentally changed how soldiers used their optics. It went from being a piece of equipment you had to actively manage to a tool that was always ready. You could finally "set it and forget it," knowing it would be there when you needed it most.
To see just how much the optic has changed, it helps to compare the main variants side-by-side.
M68 Close Combat Optic Variant Comparison
This table shows the progression of the CCO, highlighting the key improvements that each new generation brought to the table.
| Feature | M68/CompM2 | CompM3 | CompM4/M4s |
|---|---|---|---|
| Battery Type | 1/3N Lithium | 2L76 or DL1/3N | Single AA |
| Battery Life | ~10,000 Hours | ~50,000 Hours | ~80,000 Hours |
| Dot Size | 4 MOA | 2 MOA or 4 MOA | 2 MOA |
| NV Settings | 4 Settings | 4 Settings | 7 Settings |
| Submersibility | 80 feet | 150 feet | 150 feet |
| Key Upgrade | Battle-proven standard | ACET technology boost | AA battery & massive life |
As you can see, the evolution shows a clear path of relentless refinement. Each model took the core strengths of the M68—its simplicity and sheer toughness—and pushed the boundaries of reliability and performance, especially when it came to keeping the dot on, year after year.
Setting Up Your M68 for Peak Performance
Getting your hands on a legendary optic like the M68 is just the first part of the equation. To truly unlock its potential, you have to get it mounted and zeroed correctly. This isn't just a technical exercise—it's about building the confidence that your rifle will perform exactly as expected, every single time.
It all starts with getting the optic mounted securely on your rifle. The most common M68 variants, like the CompM2 and CompM4, typically ship with the excellent QRP2 (Quick Release Pivot) mount. This thing is built like a tank and, more importantly, it's designed to return to zero even after you've taken the optic off and put it back on—a non-negotiable feature for serious professional use.
When you're securing the QRP2 mount, listen closely. You’ll tighten the large knob until you hear three audible clicks. That’s the sweet spot. The mount's built-in torque limiter ensures you get a rock-solid lockup without any risk of over-tightening and damaging your rifle's Picatinny rail.
Understanding Co-Witness
With the M68 locked down, the next decision is how you want it to line up with your iron sights. This relationship is called "co-witness," and it's essentially your built-in backup plan.
Absolute Co-witness: This is the most straightforward setup. Your red dot sits at the exact same height as your iron sights. When you look through your rear sight, the dot should sit right on top of the front sight post. It creates a single, unified sight picture, though some shooters find it a bit cluttered.
Lower 1/3 Co-witness: In this configuration, a riser places the optic slightly higher. The red dot floats in the middle of the window, giving you a clean, unobstructed view. Your iron sights are still visible in the lower third of the glass, ready to be used with a slight dip of your head.
So, which is better? It really comes down to personal preference and your specific gear. Lower 1/3 co-witness is incredibly popular, especially with professionals who might be wearing gas masks or other bulky headgear that makes getting a low cheek weld difficult.
The infographic below touches on the key technologies that make a solid co-witness and a reliable zero possible in the first place.
This illustrates just how critical the M68's parallax-free design is for a forgiving sight picture, regardless of your setup. While these principles are universal, the specifics can vary between optics; if you're curious about other systems, our guide on how to properly mount an EOTech offers a great point of comparison.
Achieving a Reliable Zero
Now for the fun part: zeroing the rifle. For a carbine chambered in 5.56mm, one of the most effective and time-tested methods is the 50/200-yard zero. This practical zero means your point of aim will be your point of impact at both 50 yards and again at roughly 200 yards.
The 50/200-yard zero is a combat-proven standard for a reason. It establishes a "battle-sight zero" (BZO) that allows a shooter to aim center-mass on a human-sized target and get effective hits from close-quarters distances all the way out to around 250 yards without thinking about holdovers. It simplifies shooting under stress.
Here’s a simple, no-fuss way to get it done:
- Get on Paper at 25 Yards: Start close. It saves you ammo and a lot of frustration. At the 25-yard line, focus on getting your shots on the paper and adjust the windage and elevation turrets until you're hitting your point of aim. A handy trick: the M68’s turret caps are designed to be used as adjustment tools.
- Fine-Tune at 50 Yards: Once you're dialed in at 25, move your target back to the 50-yard line. Fire a controlled three-shot group and make small, precise adjustments until that group is centered on the bullseye. This is where your zero is truly set.
- Confirm at Distance (Optional but Recommended): If you have access to a 200-yard range, now's the time to confirm. Your point of impact should be right on or very close to your point of aim. Depending on your specific rifle and ammo load, you might need a tiny final adjustment.
Once you’ve completed these steps, your M68 is officially mission-ready. You’ve transformed a great optic and rifle into a precise, reliable system you can count on.
Mastering Low Light with Night Vision and Magnifiers
The M68 is a fantastic optic in broad daylight, but its true potential is unlocked when the sun goes down. To get the most out of it, you need to think of it not just as an optic, but as the core of a system built for 24/7 capability.

This is where pairing the M68 with a night vision device (NVD), like the classic PVS-14 monocular, really shows the optic's professional pedigree. The M68 was built from the ground up with this in mind, which is why you'll find dedicated night vision brightness settings on later models.
Those ultra-dim settings are absolutely essential. If you tried to use a standard daytime setting with an NVD, the dot would create a massive, blinding "bloom"—like staring into a car's high beams. It washes out your entire sight picture and can even damage the sensitive image intensifier tube in your night vision. The M68’s NV modes keep the dot sharp and usable without overpowering your gear.
Mounting Strategies for Night Vision
When you’re running a monocular NVD, you have two main schools of thought on how to set it up. Each one has its own pros and cons depending on what you're doing.
Weapon-Mounted NVD: This involves placing the monocular on the rail right behind your M68. It turns your rifle into a dedicated night-fighting tool, and the aiming process feels very natural and stable. The big downside is that your NVD is now stuck to your gun, so you can't scan or navigate without pointing your weapon around.
Helmet-Mounted NVD: This is how most professionals run it. The NVD is on your helmet, letting you scan your surroundings with your head up while the rifle is at a low-ready. When a threat appears, you bring the rifle up into your line of sight and look through the M68 with your NV-equipped eye.
The helmet-mounted setup gives you vastly superior mobility and situational awareness. It lets you keep your head in the fight, scanning and moving independently of where your rifle is pointed.
This method, often called "passive aiming," takes some practice to get a fast and consistent sight picture. But the tactical flexibility it offers is a game-changer. For a deeper dive into this with another popular optic type, our guide on using PVS-14 monoculars with holographic sights offers some great parallel insights.
Extending Range and Identifying Threats
A solid low-light setup isn't just about seeing in the dark; it's about being effective at a distance and knowing exactly what you're shooting at. That's where magnifiers and lights become critical.
Tossing a 3x magnifier on a flip-to-side mount behind your M68 is a huge force multiplier. It lets you pop from 1x for close-quarters work to 3x for better observation and shooting at distance, all without taking a hand off your weapon.
Finally, a quality weapon light is non-negotiable for positive target identification (PID). Your night vision will tell you something is out there, but a blast of white light is what confirms what or who it is—an absolutely critical step before you make a lethal-force decision.
This whole system-based approach is a direct result of the M68's long, hard-fought history. Since its introduction in 1997, the U.S. military has fielded over 700,000 M68 CCOs. That battlefield refinement, combined with massive improvements in battery life from a few hundred hours to over 80,000 hours, makes it the perfect anchor for a modern, do-it-all rifle. You can read more about its service history and updated specs on the official military gear update page.
Your M68 CCO Questions, Answered
Anytime you're looking at a piece of gear with a history as long as the M68's, you're bound to have some questions. Is it still relevant? Which version should I get? Is a used one worth the risk? Let's get straight to the real-world answers you need to figure out if this optic is the right fit for your rifle.
We'll cover the most common questions we hear, from the practical differences between the models to whether it makes sense for a hunting rig.
What Is the Real-World Difference Between a CompM2 and a CompM4?
On the surface, they look similar, but the main difference comes down to one thing: power. It's all about the battery type and how long it lasts.
The CompM2, the original M68, runs on a single 1/3N lithium battery. Back in its day, getting thousands of hours from one battery was a game-changer, and it’s still a perfectly capable optic. But the CompM4 took things to a whole new level.
It uses a single, common AA battery—the kind you can find literally anywhere—to deliver an incredible 8 years of continuous use on a single battery. That means you can turn it on and leave it on. The CompM4 is the ultimate "set-it-and-forget-it" optic for a duty or home defense rifle. A surplus CompM2, however, is a fantastic value and the go-to choice for building out a historically accurate "clone" rifle.
Is Buying a Used or Surplus M68 CCO a Good Idea?
It absolutely can be. You can get a bomb-proof, professional-grade optic for a fraction of the original cost, but you have to do your homework. A little bit of inspection can save you from buying someone else's headache.
Here’s a quick checklist to run through:
- Dot Clarity: Turn the optic on and check the dot. It should be a clean, round aiming point. Tap the housing firmly with your palm—if the dot flickers or dies, walk away.
- Body Integrity: Scratches and scuffs from honest use are fine; these are military optics, after all. What you need to look for are deep gouges, dents, or cracks in the housing that could point to a serious impact.
- Turret Function: Turn the windage and elevation knobs. You should feel and hear distinct, positive "clicks" with each adjustment. Mushy or silent turrets are a major red flag.
- Night Vision Test: If you plan on running night vision, crank the brightness down to the lowest settings. They need to be dim enough not to "bloom" out your image, which can be distracting and potentially harmful to your NVD.
Buying from a reputable source that stands behind its products is the most important step. A good surplus optic is a tank; a bad one is a paperweight.
Can I Use the M68 CCO for Hunting?
Without a doubt. The m68 close combat optic is an outstanding choice for any kind of hunting where targets appear quickly and shots are taken on the move. It excels in thick brush for hogs or in dense woods where you might only get a fleeting shot at a deer.
The "both-eyes-open" aiming is what makes it so effective, giving you total situational awareness of the animal and your surroundings. And since it was built to survive combat, it’s completely waterproof and tough enough to handle being banged around in any weather you'll encounter. For more versatility, throw a 3x magnifier behind it, and you've got a system that can handle just about any hunting scenario.
For those looking to build out a complete low-light system around a battle-proven optic, Superior Tactical LLC offers a curated selection of night vision, thermals, and accessories that pair perfectly with the M68 CCO. Explore our collection of mission-ready gear at superiortac.com to find the right tools for your needs.