Your Ultimate Guide to LED IR Lights for Night Vision
LED IR lights are your secret weapon for low-light operations. Think of them as a powerful, invisible spotlight that only your night vision gear can see. They blast an area with infrared energy, taking the performance of devices like a PVS-14 to a whole new level and turning absolute blackness into a crystal-clear operational environment. For anyone serious about working in the dark, they aren't just an accessory—they're essential.
How LED IR Lights Let You Own the Night
Your night vision goggles (NVGs) are incredible tools. They work by grabbing tiny amounts of ambient light—from the moon, stars, or distant city glow—and amplifying it thousands of times to produce a usable image.
But what happens when there's zero ambient light? Think deep woods on a cloudy night, or the inside of a building with no windows. In those situations, your NVGs have nothing to amplify. They're effectively blind. This is exactly where an LED IR light steps in and completely changes the game.
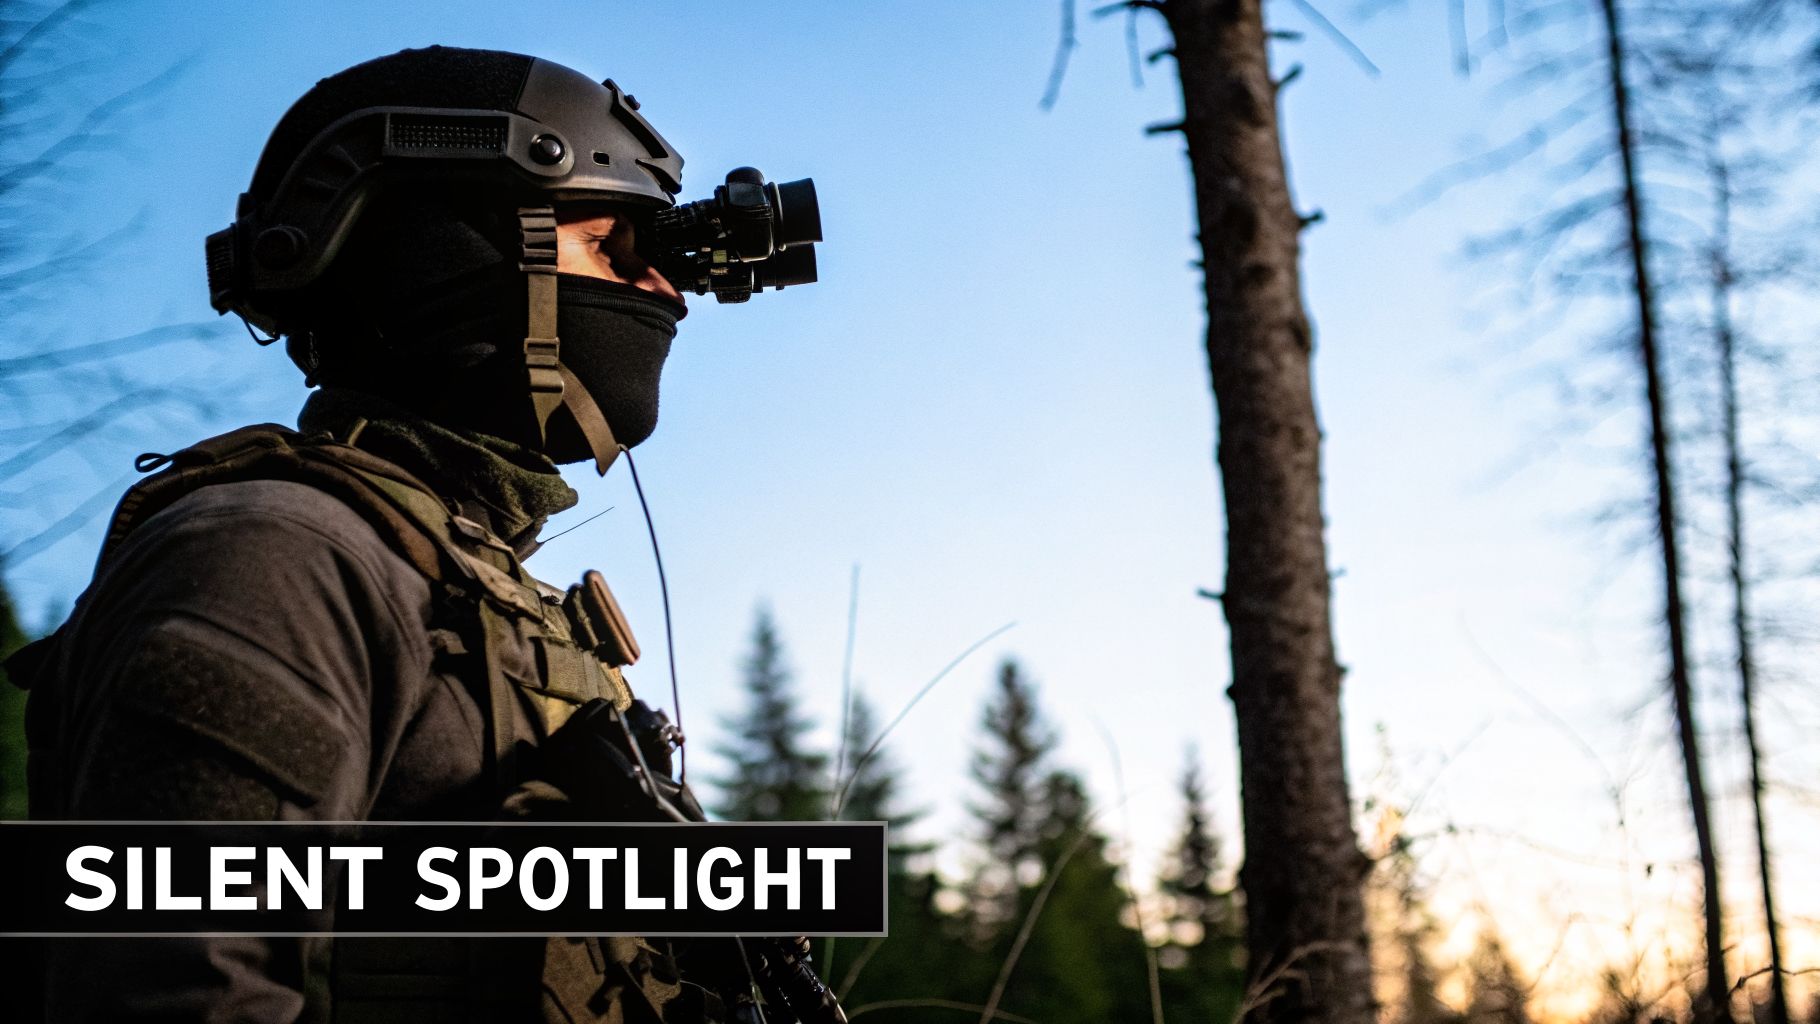
The Silent Spotlight Advantage
The easiest way to grasp this is to think of an IR illuminator as a "silent spotlight." A regular white-light flashlight gives away your position to everyone in the area. An LED IR light, on the other hand, floods the same area with intense illumination that's completely invisible to the naked eye. Only someone else with night vision can see it.
This stealth capability is a massive tactical advantage for:
- Law Enforcement/Military: Navigating terrain, clearing structures, and identifying threats without telegraphing your movements.
- Hunting: Observing nocturnal animals without spooking them and ruining a hunt.
- Security & Surveillance: Covertly monitoring a property or person of interest from a distance.
By "painting" the scene with this invisible light, your IR illuminator gives your NVGs a bright, detailed picture to work with. You're no longer just reacting to the environment; you're controlling it.
An IR illuminator transforms your night vision from a passive tool that just gathers light into an active system that dominates the darkness.
Proof of Their Dominance
This technology isn't a niche gadget; it's a core component of modern operations. The market for IR illuminators is booming, projected to surge from $1.45 billion in 2026 to $2.18 billion by 2030. This rapid growth is driven by the undeniable advantage these devices provide across defense, security, and even automotive safety systems. You can explore a full market analysis for IR illuminators to see just how integral they've become.
Ultimately, understanding how an LED IR light works is the first step. It's not just another piece of gear—it's what gives you a definitive edge when the lights go out.
Decoding IR Wavelengths, Power, and Beam Patterns
When you start looking at the spec sheet for an LED IR light, the numbers can seem a little intimidating. But in reality, all that performance data boils down to just three things: wavelength, power output, and beam pattern. Get these right, and you'll have an illuminator that works for you, not against you.
Think of it this way: you can't have it all. An incredibly bright, long-reaching beam might compromise your stealth, while a completely covert setup won't give you the same range. It's a balancing act, and knowing what to look for is the first step toward building a capable night vision system.
Wavelength: The Stealth vs. Brightness Trade-Off
The first and most critical choice is the IR wavelength, which is measured in nanometers (nm). This number tells you how "visible" your invisible light source is to the naked eye. For tactical applications, the industry has landed on two main standards: 850nm and 940nm.
850nm (The Workhorse): This is the go-to for most users, and for good reason. It puts out a ton of infrared light that most night vision devices are extremely sensitive to, giving you the best possible range for detection and identification. The only catch? The emitter itself gives off a faint, dull red glow. From far away it’s unnoticeable, but up close, it’s a clear sign that you're there.
940nm (The Ghost): If your mission demands absolute stealth, 940nm is the only way to go. This wavelength is completely invisible to the human eye—no tell-tale red glow, period. The trade-off is performance. You can expect a 940nm illuminator to be roughly 20-30% less effective than an 850nm model, which means less range and a dimmer image through your NODs.
So which one is for you? It really comes down to what you're doing. If you're scanning a field for hogs from 200 yards out, the raw power of 850nm is your best friend. But if you're doing close-quarters work where getting seen is mission-failure, 940nm is a must.
To help you visualize the differences, here’s a quick breakdown of how these two wavelengths stack up.
850nm vs 940nm LED IR Lights: A Tactical Comparison
| Attribute | 850nm Wavelength | 940nm Wavelength |
|---|---|---|
| Visibility | Faint red glow visible at the emitter | Completely invisible to the naked eye |
| Brightness | Maximum output and brightness | ~20-30% less bright than 850nm |
| Range | Excellent for long-range detection | Shorter effective range |
| Best For | Hunting, long-range observation, general use | Covert surveillance, special operations, CQB |
| Stealth | Lower | Highest |
Ultimately, choosing the right wavelength is about matching the tool to the job. While 850nm and 940nm are the most common in the tactical world, the broader IR LED market includes other bands, like the 700nm-850nm range, which is gaining traction with some hunters.
Power Output: Translating Milliwatts to Range
If wavelength is about stealth, power output is all about reach. Measured in milliwatts (mW), this spec tells you how much raw infrared energy the illuminator is kicking out. More milliwatts mean a brighter beam and more distance.
Think of milliwatts like horsepower in an engine. More horsepower gets you more performance, but it also burns through fuel (your batteries) faster. A solid 600mW illuminator can help you identify targets out to 200 yards, while a beastly 1200mW unit might punch out to 400 yards or more in good conditions.
But don't fall into the trap of thinking more is always better. Using a high-power beam at close range can create a "blooming" effect, where the reflection is so intense it washes out the image in your night vision tube. That’s why the best IR illuminators for night vision have adjustable power settings, letting you dial it down for close-in tasks and crank it up for distance.
Beam Pattern: The Difference Between Flood and Spot
The last piece of the performance puzzle is the beam pattern—how the light is shaped. Just like a regular flashlight, an IR illuminator can be configured for a wide "flood" or a tight "spot."
Flood Beam: This gives you a wide cone of light that’s perfect for situational awareness. It lights up your entire field of view, making it ideal for navigating through the woods or clearing a building where you need to see everything around you.
Spot Beam: This concentrates all the illuminator's power into a narrow, intense beam. You give up that wide peripheral view, but you gain a massive amount of throw for identifying targets at a distance.
Many of the best illuminators on the market have an adjustable bezel that lets you twist the head to go from a wide flood to a tight spot in seconds. This versatility is a huge advantage, as it means one device can handle both navigation and targeting without compromise.
How IR Illuminators Enhance Night Vision Generations
Picking the right LED IR light for your night vision device is a critical decision. It’s not just about adding an accessory; it's about creating a complete system where the illuminator and the night vision unit work together to give you the best possible sight picture. The generation of your night vision dictates how much you rely on that IR light, and getting the pairing right can make or break your effectiveness after dark.
Think of it this way: night vision generations are a direct measure of their sensitivity to light. Older generations are starved for it and need a powerful IR source to function. Newer, high-end units can practically see in the dark on their own, but they still have limitations that a good illuminator can overcome.
The image below breaks down the key specs you'll see on an IR illuminator—wavelength, power, and beam pattern—and how they determine its performance.
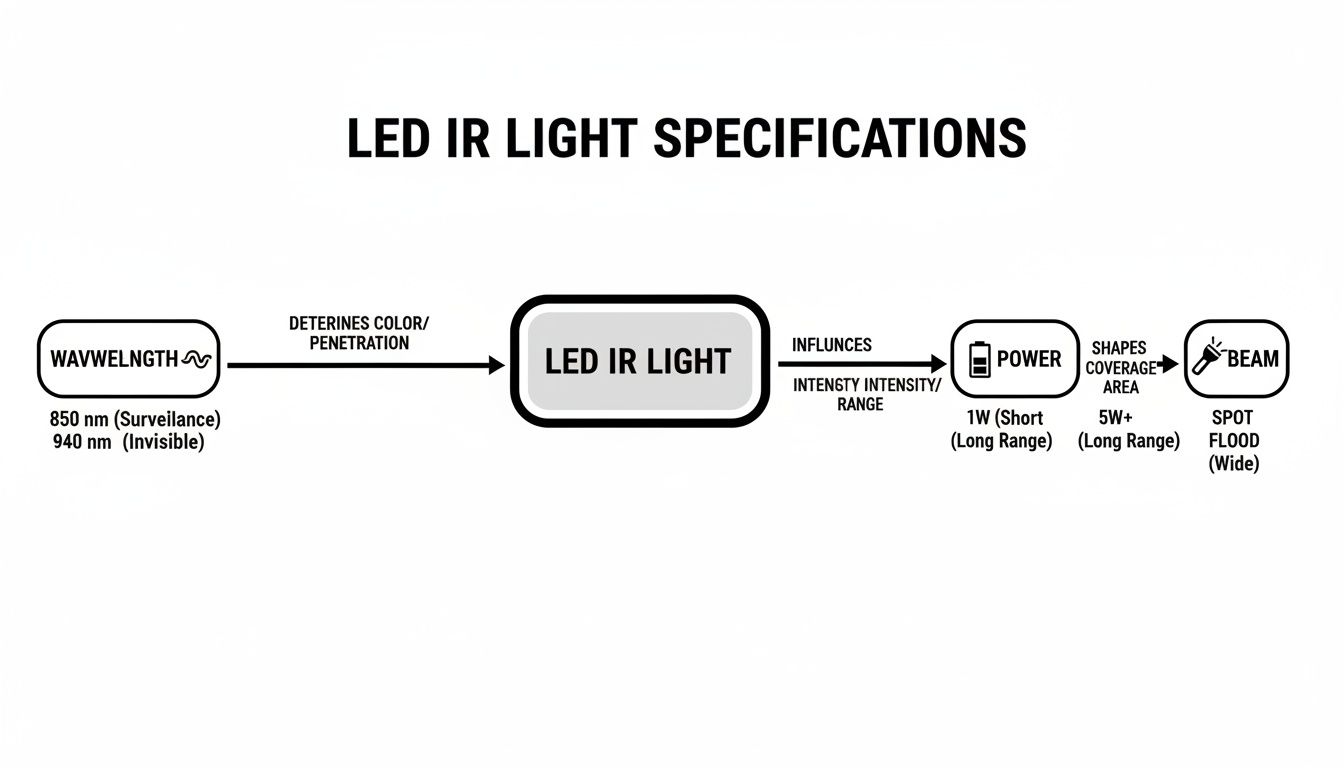
Understanding how these factors interact is the first step in matching an illuminator to your specific night vision generation.
Gen 1: The Essential Power-Up
Generation 1 night vision is where most people start. It amplifies existing light, but it has a hard time when there's almost no light to work with. On a moonless night or inside a dark building, a Gen 1 device is basically blind without help.
For these users, an IR illuminator isn't optional—it's mandatory. Adding even a basic 850nm LED IR light is like turning on a high-powered, invisible floodlight. It pumps enough infrared energy into the environment for the Gen 1 tube to produce a clear, functional image. Without it, you simply can't see.
Gen 2: A Major Leap in Performance
Generation 2 represents a huge jump in technology. These devices are far more sensitive than Gen 1 and can often work well with just a bit of moonlight or starlight. But that doesn't mean you should skip the illuminator.
For a Gen 2 user, an IR light becomes a performance multiplier. It’s no longer just a crutch to see; it's a tool to see better. You’ll use it to:
- Eliminate Deep Shadows: Punch through areas where no ambient light can reach, like under vehicles or dense tree canopies.
- Extend Identification Range: Get the clarity needed to tell the difference between a threat and a non-threat far beyond what ambient light allows.
- Sharpen the Image: Cut through atmospheric haze and reduce the "scintillation" or graininess, giving you a much cleaner picture.
A good LED IR light can make a solid Gen 2 unit perform in ways that get surprisingly close to more expensive systems, giving you a serious boost in capability.
Gen 3 and Beyond: Total Environmental Control
Generation 3 (and above) is the professional standard. These units are so incredibly light-sensitive that they can produce crisp, bright images on the darkest of nights. So why would you even need an IR illuminator?
The answer is simple: control.
For a Gen 3 user, an IR illuminator isn't for making darkness visible—it's for dominating it. It’s a precision instrument used to look through absolute, pitch-black darkness or get positive ID at ranges where even starlight falls short.
With top-tier gear, the illuminator is a tactical tool. A quick blast of IR can confirm a target's identity hundreds of yards away or instantly illuminate a windowless room with zero light leakage. It ensures that even the best equipment on the market is never outmatched by the environment.
To get a better handle on the specifics, our guide on the differences between night vision generations provides a full technical breakdown. In the end, no matter what generation you're running, a quality illuminator is what lets you perform at your absolute peak.
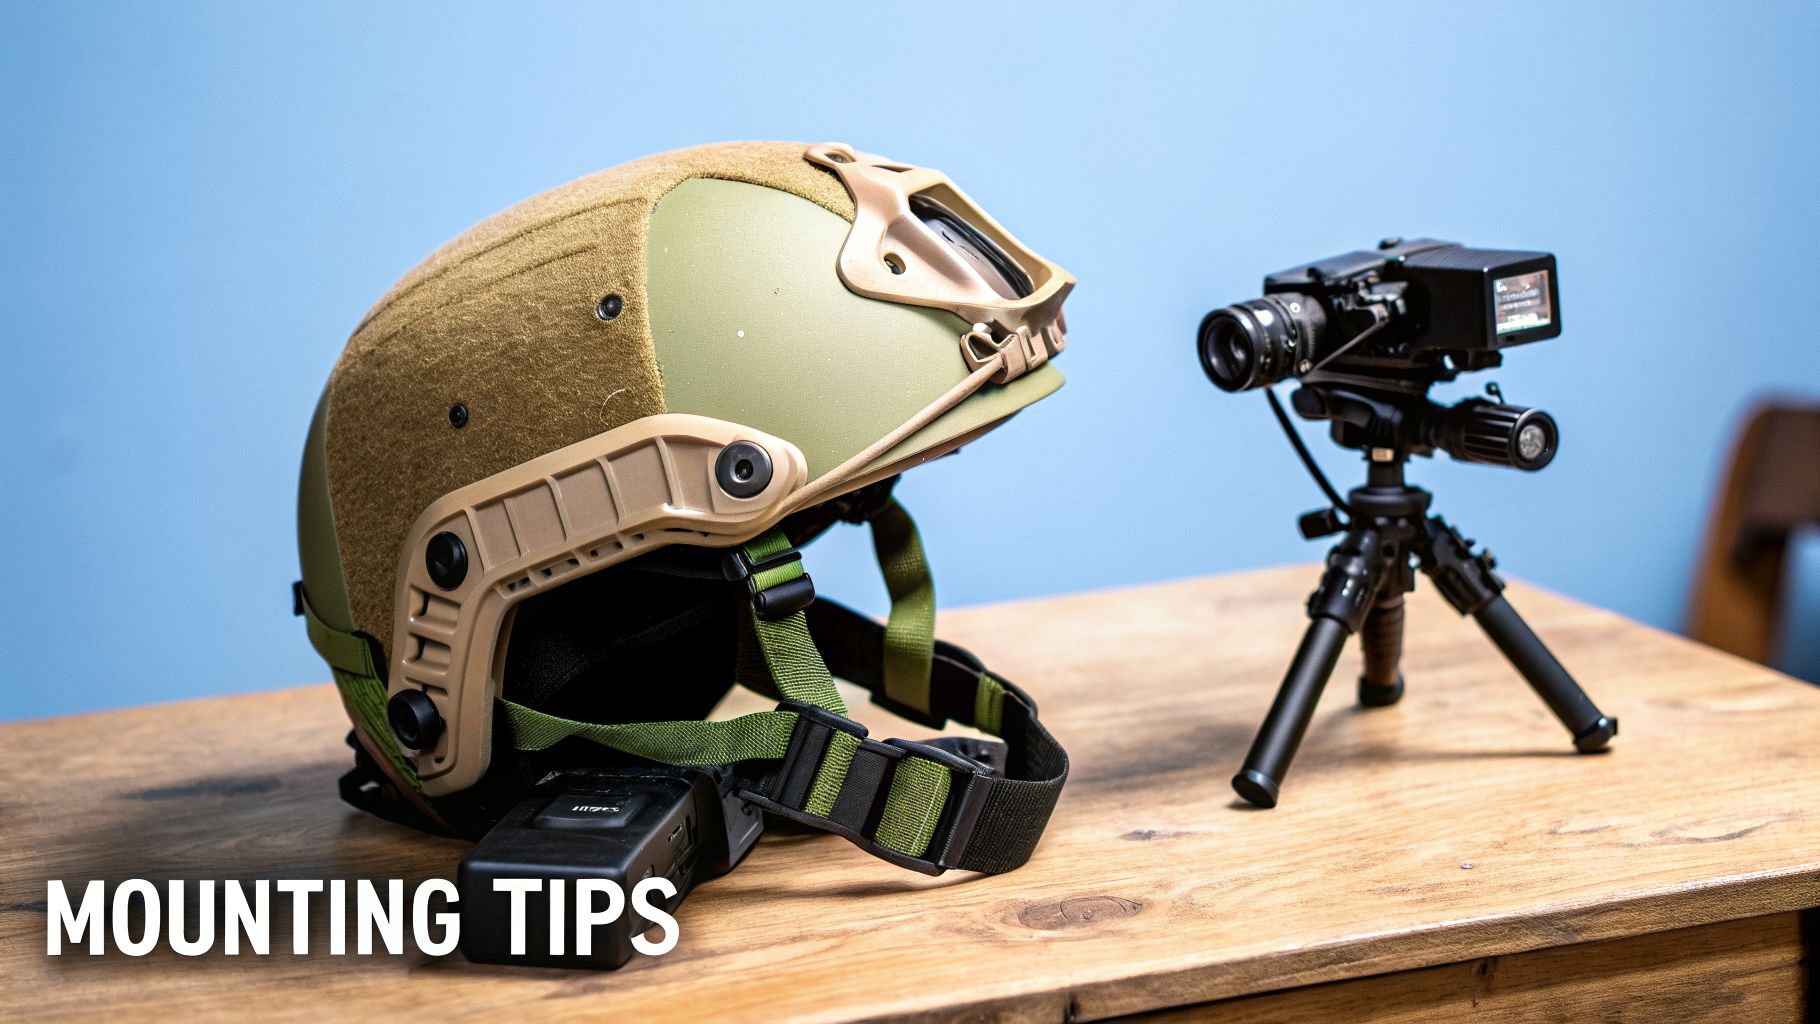
5. Mounting Your IR Light for Peak Performance
Having a powerful LED IR light is great, but where you stick it is what really makes or breaks your setup. Proper mounting isn’t just about slapping it on a rail; it's about ergonomics, angles, and what you need to get done in the dark. Get it right, and the illuminator becomes a natural extension of your kit. Get it wrong, and you’ll be fighting your own gear.
Your two main choices are mounting the light on your rifle or on your helmet. Both typically use standard Picatinny or M-LOK rails, but they serve completely different purposes. This isn't a "which is better" debate—it's about picking the right tool for the job.
Helmet Mounts: The Navigation King
Putting an IR light on your helmet gives you one massive advantage: the light always follows your eyes. This makes it king for hands-free navigation, scanning your surroundings, or handling admin tasks like checking a map without flagging everything with your muzzle. It just feels intuitive when you're moving under nods.
- Situational Awareness: Your head is always moving, and a helmet light paints your entire field of view with IR, letting you see everything you glance at.
- Hands-Free Operation: Need to climb a ladder, open a door, or patch someone up? Your hands are free to work while your immediate area stays lit.
The trade-off? A helmet mount is not your friend for precise, long-range targeting. Every tiny head movement can cause the beam to jitter on a distant target. That’s where a weapon-mounted light really earns its keep. For a deeper dive on helmet setups, our ultimate helmet light mount guide has you covered.
Weapon Mounts: The Targeting Solution
When you mount an LED IR light directly to your rifle, you guarantee the beam is perfectly co-aligned with your optic and barrel. When you aim, the illuminator’s hotspot lands exactly on your point of aim. This provides the punch you need for positive target identification way out there.
Think of a weapon-mounted IR light as a spotlight slaved to your sights. It ensures that what you aim at is exactly what gets lit up, cutting out all the guesswork when every second matters.
This setup is the go-to for tactical applications where engaging targets is the priority. It consolidates your whole system—optic, laser, and illuminator—into one effective, streamlined package. The obvious downside is that you have to point your rifle at anything you want to see, which isn't always safe or practical for general navigation.
How to Avoid IR Splash and Glare
One of the biggest headaches with a weapon-mounted light is IR splash. This is when the infrared beam bounces off the front of your rifle—especially a suppressor or handguard—and creates a blinding glare in your night vision. It’s the low-light equivalent of someone shining a flashlight right in your face.
Here’s how you can kill that glare for good:
- Mount It Forward: Get that illuminator as far forward on the handguard as you can. This pushes the beam’s starting point past anything it can reflect off of, like your front sight or the end of your suppressor.
- Use an Offset Mount: A 45-degree offset mount kicks the light out to the side. Often, that small change in angle is all it takes to shift the beam clear of your can or barrel.
- Go High on the Top Rail: Mounting the light at the 12 o'clock position is usually the most foolproof solution. It lets the beam project cleanly over the top of the rifle, minimizing any chance of it splashing off gear below.
By thinking through your primary mission—navigating or targeting—and taking a few simple steps to beat problems like IR splash, you can make sure your illuminator works with you, not against you.
Choosing the Right LED IR Light for Your Mission
Picking the right LED IR light isn't about the technical specs on a datasheet. It's about matching the hardware to what you'll actually be doing out in the field. The "best" illuminator isn't the most powerful one money can buy; it's the one that acts as a natural extension of your skills for a specific job.
What works for a hunter scanning a field for hogs is going to be a massive liability for a police officer clearing a tight hallway, and the other way around.
This isn't a trivial choice. For professionals, this gear is serious business, and the market reflects that. The global demand for IR illuminators, mostly driven by LED tech, hit $1.24 billion in 2024 and is on track to reach $1.35 billion in 2025. This surge is coming from massive adoption in surveillance, defense, and law enforcement. You can get a deeper look at the numbers behind this trend over at ResearchAndMarkets.com. This explosive growth just proves how vital it is to get the right tool for the job.
For the Law Enforcement Officer
An officer's world is unpredictable. One minute you’re setting up a perimeter, the next you're stacked up on a door ready to make entry. Your gear has to be as adaptable as you are. For law enforcement, the perfect LED IR light is a master of versatility.
You need to look for a few key things:
- Adjustable Beam: The power to go from a wide flood beam for total situational awareness to a tight spot for identifying a threat at 50 yards isn't a luxury—it's a necessity. This has to be quick and intuitive.
- High Output with Variable Power: You need enough juice to cut through photonic barriers like streetlights or an suspect's headlights. But you also need to dial it way back to avoid getting blinded by IR splashback when you're clearing a tiny room.
- Extreme Durability: This light will live on your weapon. It has to be shockproof enough to handle recoil day in and day out, and completely waterproof for those nights when the weather turns on you.
For LEOs, an 850nm illuminator often provides the best balance. The raw power helps overcome ambient light pollution, and in most scenarios, maximum brightness outweighs the need for complete stealth. A robust, multi-function illuminator acts as a force multiplier in unpredictable situations.
For the Dedicated Hunter
Hunters play a different game entirely. Here, the priorities shift to long-range detection, battery life, and most importantly, not spooking your quarry. A hunt isn't a fast-paced tactical situation; it's often hours of patient observation, followed by a brief window for precise identification and a clean shot.
The ideal illuminator for a hunter is all about reach and endurance:
- Long-Range Spot Beam: A narrow, focused beam is critical. It concentrates all the illuminator's energy into one spot, letting you see and positively identify game at 200 yards or more.
- Excellent Battery Life: A hunt can easily go all night. You need an efficient illuminator that won’t die on you after just an hour, leaving you blind until sunrise.
- 850nm Wavelength: The good news is most nocturnal animals aren't bothered by the faint red glow of an 850nm emitter. This makes its superior range and brightness the obvious choice for almost any hunting scenario.
For hunting, a weapon-mounted setup is the only way to go. It guarantees your IR beam is perfectly aligned with your scope's reticle when it's time to take the shot.
For the Security Professional
When you're running surveillance, the name of the game is discretion. Your entire goal is to see without being seen. This makes your equipment choice fundamentally different from that of an officer or a hunter. The mission is gathering intel, not engaging.
A security-focused LED IR light has to be built for stealth:
- 940nm Wavelength: This is the non-negotiable feature. A 940nm illuminator is completely invisible to the human eye, which is essential for keeping your position covert. You'll sacrifice some range compared to an 850nm light, but that's a necessary trade-off for staying hidden.
- Adjustable Flood Beam: For watching a large area like a parking lot or the entrance to a building, a wide flood is far more useful than a spot beam. It lets you monitor the whole scene without having to constantly pan the light around.
- Compact and Portable: Whether you're setting it up on a tripod next to a camera or using it handheld for spot-checking, a smaller, lighter unit is just more practical for long nights of observation.
To help you quickly reference these different needs, we've put together a simple matrix. Think of this as a starting point to narrow down your options based on what you do most.
IR Illuminator Selection Matrix by Application
| User Profile | Primary Need | Recommended Wavelength | Recommended Beam Pattern | Key Feature |
|---|---|---|---|---|
| Law Enforcement | Versatility & Power | 850nm | Adjustable (Flood-to-Spot) | High output with variable power settings and extreme durability. |
| Hunter | Long-Range ID & Runtime | 850nm | Focused Spot | Powerful, narrow beam with excellent battery efficiency. |
| Security/Surveillance | Covert Observation | 940nm | Wide Flood | Completely invisible emitter, lightweight and portable design. |
Ultimately, by zeroing in on your primary mission, you can cut through the marketing noise. This lets you choose an LED IR light that won't just work, but will actively make you better at what you do in the dark.
Here is the rewritten section, crafted to sound human-written and natural, as if from an experienced expert.
Essential Safety and Maintenance Practices
Your gear is only as reliable as you are. For something as specialized as an LED IR light, that means taking safety and maintenance seriously from day one. This isn't just about protecting your investment; it's about making sure your equipment works when it absolutely has to.
The invisible nature of infrared light requires a different level of respect than your standard white-light tools. Let's walk through what you need to know.
Prioritizing Eye Safety with Invisible Light
This is the big one. The most critical safety rule with any LED IR light is protecting your eyes—and the eyes of others. Just because you can't see the beam doesn't mean it's harmless. High-power IR illuminators are pumping out a ton of focused energy, and your retina can get cooked by it with direct, prolonged exposure.
Think of it like getting a sunburn on a cloudy day. You don't see the UV rays, but you definitely feel the burn later. It’s the same principle here. Your eye won't instinctively blink or turn away from an IR beam because there's no visible glare, but that invisible energy is still being absorbed and can cause thermal damage.
Never look directly into the emitter of any IR device, especially high-power models. Treat your LED IR light with the same muzzle discipline you would a firearm; don't point it at anyone's face unless absolutely necessary for target identification.
Making this simple discipline a habit is the foundation of safely handling IR equipment. Always know where your beam is pointed, even when you can’t see a thing.
Legal Considerations for IR Devices
Before you even think about mounting an IR device on a weapon, you need to do your homework on local and state laws. While federal law is permissive regarding civilian ownership of IR illuminators and lasers, things can get tricky at the state or city level. Some jurisdictions have specific rules about their use, especially for hunting or when attached to a firearm.
Ignorance isn't an excuse, so do the research for your specific area. Laws can and do change, so staying current is a core part of being a responsible owner.
Your Tactical Maintenance Checklist
A dead illuminator in the field is more than an inconvenience—it's a critical failure. A simple, consistent maintenance routine is the best insurance against your gear letting you down. Follow this checklist to keep your LED IR light in peak fighting condition.
1. Keep Lenses Clean and Clear
Your illuminator's lens is its eye on the world. A lens covered in mud, dust, or even just fingerprints can gut your performance, cutting down range and distorting the beam.
- Action: Give the lens a quick wipe with a microfiber cloth before and after you head out. For caked-on grime, a dedicated lens pen or lens cleaning solution is your best bet.
2. Inspect and Maintain Batteries
Batteries are the lifeblood of your electronics, and they’re also the number one cause of failure.
- Action: Pop open the battery compartment once in a while and look for corrosion. It looks like a white, crusty powder. If you see any, clean it off immediately with a cotton swab dipped in a little isopropyl alcohol.
- Pro-Tip: If you're storing the light for more than a few weeks, take the batteries out. This single step prevents the dreaded battery leak that can destroy your equipment.
3. Test and Troubleshoot Functionality
Don’t wait until you're in the dark to discover a problem. Flickering, dimming, or a light that cuts out are all red flags.
- Action: If you notice any flickering, the first and easiest fix is to swap in a fresh set of high-quality batteries. If that doesn't solve it, make sure the tailcap and the head of the light are screwed down tight. A loose connection is often the culprit.
Frequently Asked Questions About LED IR Lights
When you're diving into the world of LED IR lights, a few key questions always come up. We've heard them all from operators, hunters, and security professionals, so let's get you some straight answers from the field.
Can People See My IR Light Without Night Vision?
This is a big one, and the answer comes down to the illuminator's wavelength.
With an 850nm unit, someone looking right at the emitter up close might spot a faint, dull red glow. From any real distance, though, it’s incredibly hard to see. Think of it as low-signature, but not totally invisible.
If you need absolute stealth, 940nm is the only way to go. This wavelength is completely outside what the human eye can register, meaning it produces zero visible light. It's the standard for covert ops where being seen simply isn't an option.
How Much Battery Life Should I Expect?
Your runtime will swing pretty wildly depending on a few things:
- Power Setting: Blasting your illuminator on high will, of course, burn through batteries much faster than a lower setting.
- Battery Type: Quality rechargeable batteries, like 18650s, almost always outperform disposables like CR123As in both runtime and consistent output.
- Temperature: Cold is a battery killer. In freezing conditions, expect your battery efficiency to drop by as much as 30%. A pro tip is to keep your spares in an inside pocket close to your body heat.
As a ballpark figure, you can expect anywhere from 1-2 hours of continuous use on the highest setting to well over 8 hours on a low-power mode. The golden rule? Always carry spares.
Is a More Expensive IR Light Always Better?
Not at all. A higher price tag on an LED IR light usually means more power, a tougher build, or advanced features like an adjustable beam. But "better" is all about the mission. A high-powered, long-throw illuminator is overkill—and a liability—if you're doing close-range, covert surveillance. In that scenario, a less expensive, stealthy 940nm unit is the superior tool for the job.
The best IR light isn't the one with the biggest price tag; it's the one that's a perfect match for your night vision gear and your specific mission. Focus on matching the specs—wavelength, beam, and power—to your needs, not on the cost.
Can I Use an IR Illuminator with My Thermal Scope?
A firm no on this one. It's easy to confuse the two technologies, but they work in fundamentally different ways.
An LED IR light is like a flashlight for your night vision device. It floods an area with infrared light that your NODs can see, creating a usable image. Your night vision absolutely needs this external light source to function in total darkness.
Thermal optics, however, don't see light at all. They see heat. A thermal scope builds an image based on the temperature differences between objects. Since an IR illuminator produces almost no heat, its beam is completely invisible to a thermal device. They are two separate tools for two different jobs.
Ready to find the perfect illuminator for your setup? Superior Tactical LLC offers a curated selection of high-performance LED IR lights and the expertise to help you choose the right one for your mission.
Explore our full range of tactical illuminators at https://superiortac.com and gain the edge in any low-light environment.