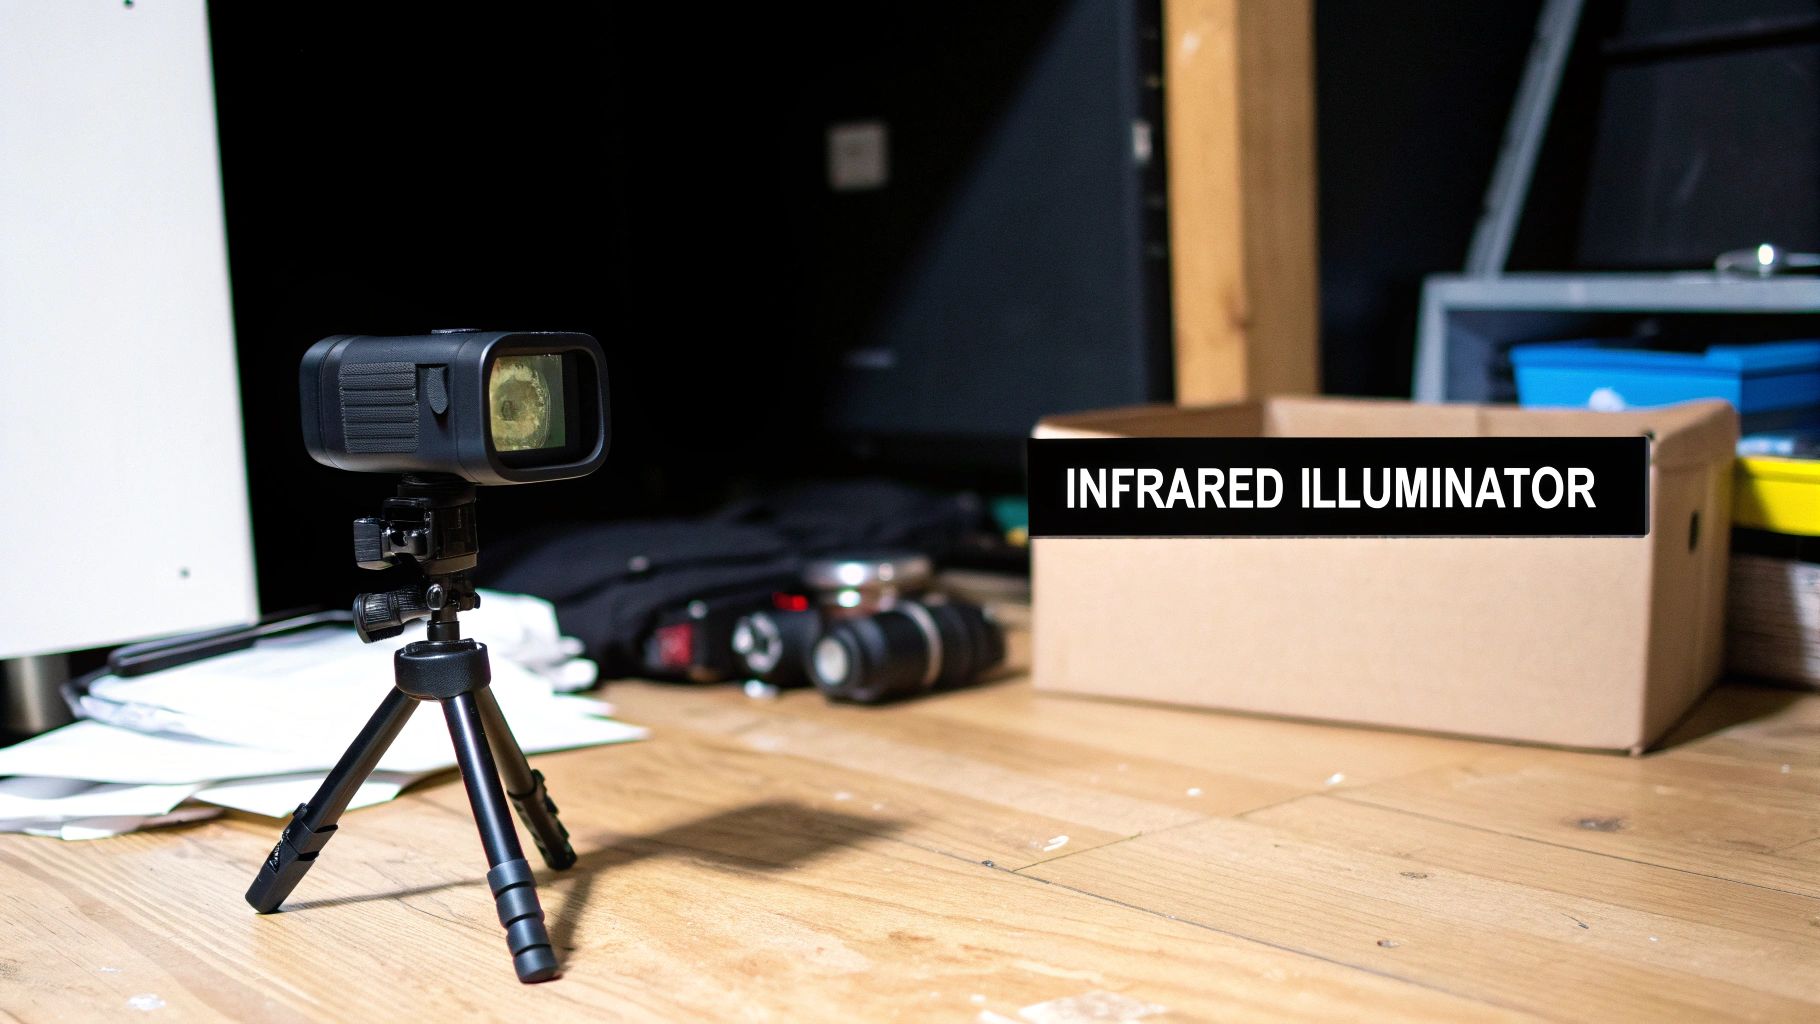
Infrared Illuminator Light A Guide to Dominating the Dark
An infrared illuminator light is basically a high-powered flashlight, but with a critical twist: the light it puts out is completely invisible to the human eye. Think of it this way: your night vision gear is an amplifier, not a magic wand. It needs some light to work with. When there's absolutely none, an IR illuminator steps in to provide its own stealthy light source, turning pitch-black into a crystal-clear image for your device.
What Is An Infrared Illuminator Light
Picture yourself in a windowless room, sealed off from all light. Your top-of-the-line night vision goggles are useless, showing you nothing but a noisy, static-filled view. Why? Because there's no ambient light—from the moon, stars, or anything else—for them to multiply.
Now, imagine you flip a switch on a small device. Suddenly, your goggles see the room as if it were brilliantly lit, picking up every detail. To your naked eye, however, the room is still shrouded in absolute darkness. That's exactly what an infrared illuminator does.
The Force Multiplier in Darkness
It's a common misunderstanding that night vision can "see in the dark." The truth is, these devices are light amplification tools. They scoop up tiny amounts of available light and boost them thousands of times. If there’s zero light, even the most sensitive Generation 3 night vision is blind.
An IR illuminator fixes this by generating its own light in the infrared spectrum. This light is outside what humans and most animals can see, but it's the perfect wavelength for night vision sensors and specific digital cameras. It single-handedly turns your passive night vision into an active system that works anywhere, anytime.
Key Takeaway: An IR illuminator isn't just about seeing better in the dark. It’s about having the ability to see at all when there’s no light, giving you a massive tactical edge.
This makes the infrared illuminator light a non-negotiable piece of kit for anyone who can't afford to be limited by their environment. It’s the difference between guessing what’s out there and knowing for sure. To really grasp this, you can learn more about the crucial synergy between an infrared illuminator and night vision systems.
Who Relies on This Technology
For professionals, the advantage is huge. It gives them the power to light up a target, navigate difficult terrain, or gather intel without giving away their position with a visible flashlight beam. For these operators, an IR illuminator isn't an accessory; it's a fundamental part of their gear.
- Law Enforcement: Cops running surveillance can use IR to get clean video evidence in a dark alley without tipping off suspects.
- Military Personnel: Special forces teams need powerful, weapon-mounted illuminators to PID threats at a distance before making a move.
- Hunters: Smart hunters use them to scan a field on a moonless night, spotting game without sending them running with a standard light.
- Security Professionals: A security team watching over a large property can light up entire zones for their cameras, getting sharp, usable footage through the night.
How Infrared Illuminators Work
To really get how an IR illuminator works, picture the entire light spectrum as a massive radio dial. Our eyes are permanently tuned to one tiny sliver of that dial—the "visible spectrum," which contains every color we can see. Everything else on that dial is invisible to us, just like you can't hear a radio station if you’re on the wrong frequency.
An infrared illuminator is basically a flashlight that operates on a frequency just outside what our eyes can pick up. It throws a powerful beam of light that, to you and me, simply isn't there.
But for a night vision device, that invisible beam is like a high-powered spotlight. It paints the entire scene with light that only your gear can see, letting you get a crystal-clear image even in pitch-black conditions with zero ambient light.
The demand for this "invisible flashlight" capability is booming, especially in professional security and tactical fields. The market for IR illuminators surged from $1.32 billion in 2025 to $1.45 billion in 2026—a 10% jump in just one year. Projections show it’s on track to hit $3.91 billion by 2029, driven by a worldwide need for better surveillance tools.
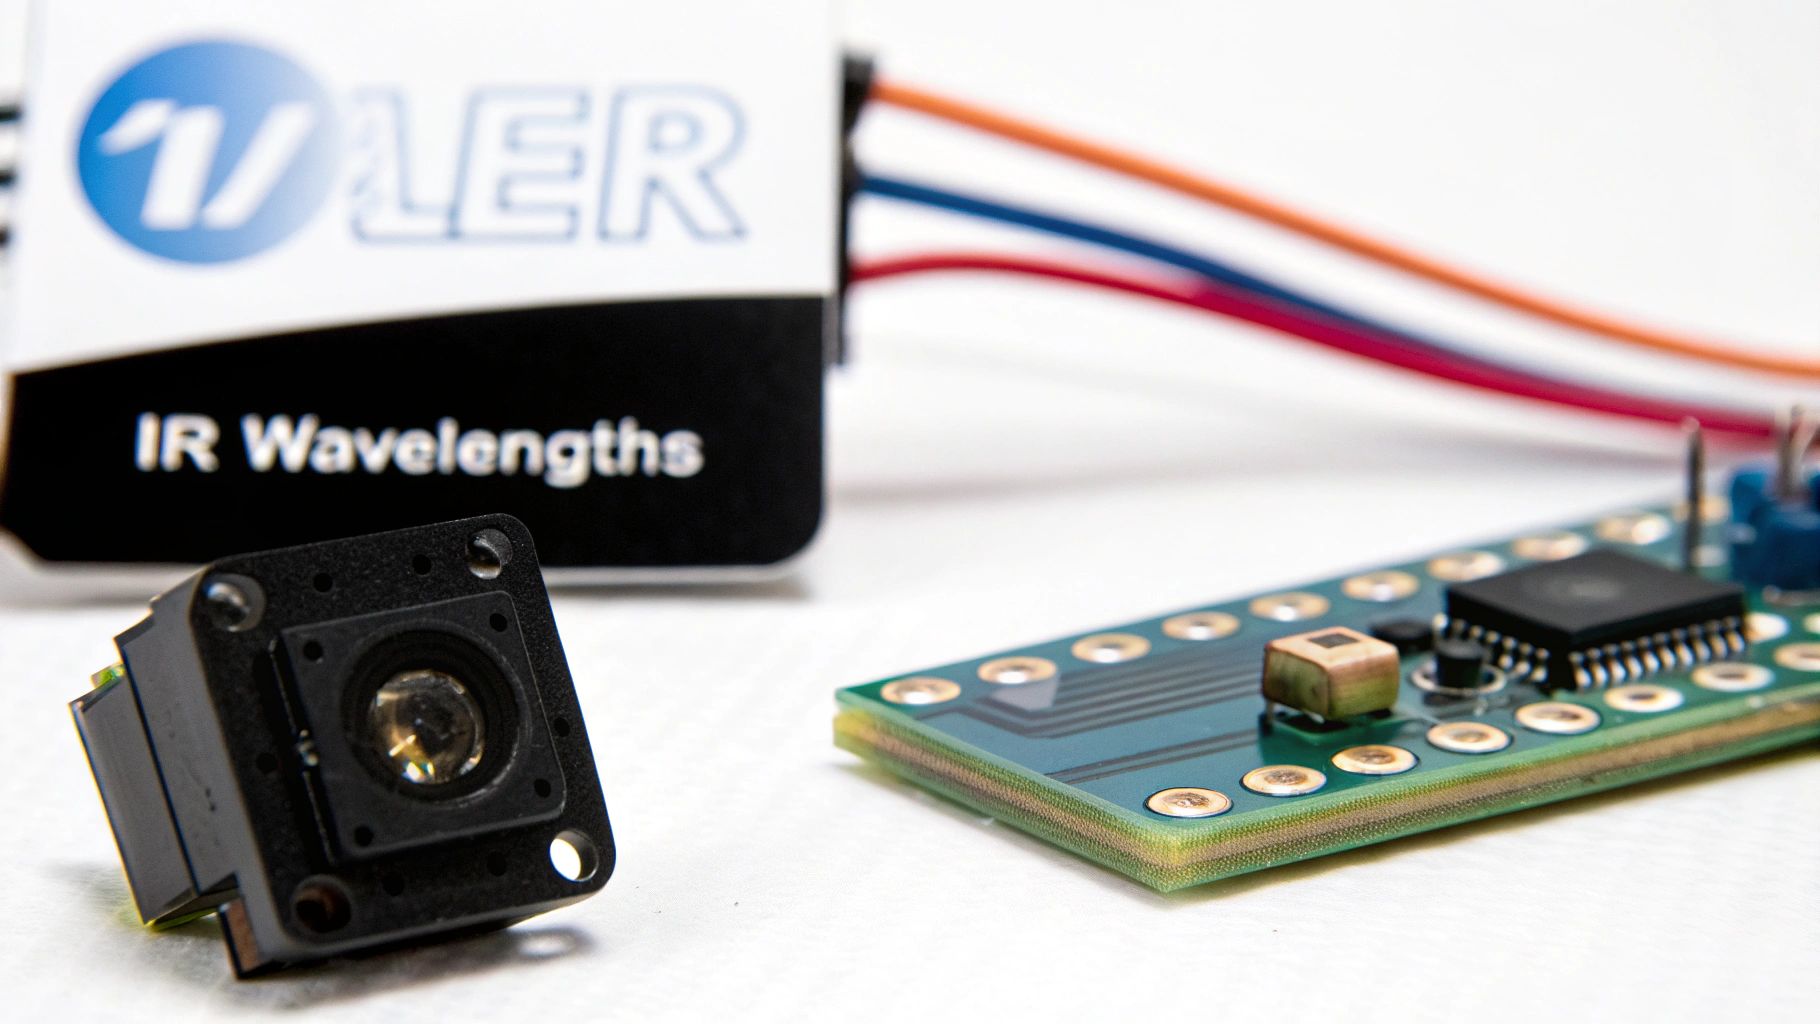
The Science of Wavelengths
When you start looking at IR illuminators, you'll immediately see two numbers pop up: 850nm (nanometers) and 940nm. Think of these as the specific "channels" the infrared light is broadcast on. Both are invisible, but they behave very differently in the field.
An 850nm illuminator is the workhorse. It's more common because it produces a much brighter beam for your night vision device, giving you significantly more range. The catch? The LED emitter itself gives off a faint, dull red glow that's visible if someone is looking directly at it. That's why it's often called "semi-covert."
A 940nm illuminator, on the other hand, is considered "fully covert." Its LED produces absolutely no visible signature. It's the go-to for situations where staying completely hidden is non-negotiable. The trade-off is performance. Night vision sensors aren't as sensitive to this wavelength, so a 940nm unit will have roughly 30-40% less range and intensity than an 850nm illuminator with the same power rating.
Choosing the right wavelength is a critical decision based on your operational needs. Here’s a quick breakdown of how they stack up.
Comparing 850nm vs 940nm IR Wavelengths
| Feature | 850nm Wavelength ('Semi-Covert') | 940nm Wavelength ('Fully Covert') |
|---|---|---|
| Visibility | Emitter has a faint red glow, visible to the naked eye | Emitter is completely invisible, no visible signature |
| Illumination Range | Superior range and brightness | 30-40% less range than an equivalent 850nm model |
| Night Vision Sensitivity | Highly sensitive for most NV devices (Gen 2, Gen 3, Digital) | Less sensitive, requiring more power for the same output |
| Best Use Case | General purpose, hunting, long-range surveillance | Deep cover operations, special forces, situations where stealth is paramount |
Ultimately, the choice between 850nm and 940nm is a direct trade-off between performance and stealth. You have to decide if maximum illumination range or total invisibility is the mission priority.
Understanding Power Output and Beam Patterns
Beyond the wavelength, an illuminator's real-world effectiveness comes down to its power output and beam pattern.
Power, usually measured in milliwatts (mW), is the raw horsepower. More power generally means a brighter beam that can reach out further. But power is only half the equation—how you shape that power is just as important. That's where the beam pattern comes in. Most professional units let you adjust the beam on the fly.
- Flood Beam: This is a wide, soft beam that lights up a huge area up close. It's perfect for maintaining situational awareness, clearing a room, or navigating a trail where seeing what's to your left and right is critical.
- Spot Beam: This focuses all the illuminator's power into a tight, intense hotspot. You use a spot beam for long-range work, like positively identifying a target hundreds of yards away or lasing a specific object for surveillance.
A great analogy is the adjustable nozzle on a fire hose. You can set it to a wide "fog" to cool a large area (flood) or a tight, powerful stream to punch through a window (spot). To get a better feel for how these settings impact different gear, check out our in-depth guide covering IR illuminators for night vision.
The ability to snap instantly from a wide flood to a tight spot is what separates the toys from the tools. An operator can scan a field with a flood, see a flicker of movement, and in a split second, punch in to a spot beam to see exactly what it is. That versatility is indispensable in a dynamic environment.
Real-World Applications for Tactical Operations
It's one thing to understand the physics of an IR illuminator, but it's another thing entirely to see how it performs when the stakes are high. In the field, this isn't just another piece of gear—it's a critical tool that gives operators a massive advantage when there's no room for error. An IR illuminator fundamentally changes the game, turning the liability of total darkness into a serious tactical strength.
Think of it this way: every scenario starts with the same problem—no light. An IR illuminator provides the solution by painting the environment with a powerful, invisible beam that only your night vision gear can see. Suddenly, you can move and operate with absolute clarity and confidence.
Law Enforcement Surveillance
For any law enforcement officer, solid, undeniable evidence is the goal. But how do you get it during a nighttime surveillance op when flipping on a light would blow the entire mission? An officer trying to document activity in a dark alley or a remote warehouse is often stuck with grainy, worthless footage from ambient light alone.
This is where a high-quality infrared illuminator light completely changes the outcome. By pairing a powerful IR unit with their night vision or IR-sensitive cameras, officers can wash an entire area in invisible light. The result? Crisp, clear video evidence that captures faces, license plates, and actions in detail. The subjects have no idea they're being watched. This capability is absolutely vital for everything from drug stings to high-stakes counter-terrorism work.
Expert Insight: Good surveillance is about seeing without being seen. An IR illuminator lets officers "paint" a scene with light that's only visible to their equipment, making them invisible observers who can document everything as if it were happening in broad daylight.
The demand for these kinds of covert tools is exploding. For professionals using image-intensified gear like Gen 3 PVS-14s, illuminators are now considered standard-issue. It's no surprise that the global IR illuminators market is expected to hit $2.18 billion by 2030, growing at a steady 10.6% each year. This trend, highlighted by industry analysts at Research Nester, shows just how essential this tech has become.
Night Hunting and Pest Control
Hunters operate under a strict code: you must positively identify your target before you even think about taking a shot. This gets incredibly difficult in the dead of night when game is most active. A regular flashlight will send any animal running for the hills, and even the best night vision scope can struggle on a cloudy, moonless night, leaving you with a fuzzy image where you can't tell a hog from a rock.
An infrared illuminator light cuts right through this problem. It dramatically boosts the range and clarity of your night vision, letting you scan a field with a wide "flood" beam. Once you spot movement, you can crank it down to a tight "spot" beam for a closer look. This gives you positive ID at distances well beyond what the scope could manage on its own, ensuring a safe, ethical shot without giving yourself away. For ultimate stealth, a 940nm illuminator is the go-to, as its glow is completely invisible to the naked eye.
Perimeter Security and Asset Protection
If you're tasked with securing a large area like an industrial park, a critical infrastructure site, or a sprawling rural property, you know how tough it is. Patrolling huge, unlit perimeters is a nightmare, and your fixed security cameras often have blind spots in the far corners where the light doesn't reach.
By mounting powerful, fixed infrared illuminators alongside your camera network, you can turn a passive system into an active one. These units can throw a wide blanket of IR light over hundreds of meters, making sure every camera delivers sharp, usable footage all night long. A small security team can now effectively watch over a massive area from a single control room, spotting threats long before they become a real problem. For a deeper dive into how these tools fit into a broader security plan, check out our overview of different night vision lights and how they are used.
How To Choose The Right Infrared Illuminator
Picking the right infrared illuminator isn't about finding the "best" one on the market. It’s about finding the right one for your specific mission, gear, and environment. A high-powered, long-range illuminator might be perfect for a security pro watching a wide-open perimeter, but it would be completely overkill—and maybe even a liability—for someone clearing rooms. The trick is to strike the right balance between performance, stealth, and practicality.
The whole process starts with a simple question: What are you trying to do? The needs of a hunter are worlds apart from those of a law enforcement officer on a surveillance operation. Nailing this down first will guide every other decision you make, ensuring you get a tool that actually makes you more effective, not one that gets in the way.
This decision tree gives you a simplified path for figuring out what you need based on your primary job.
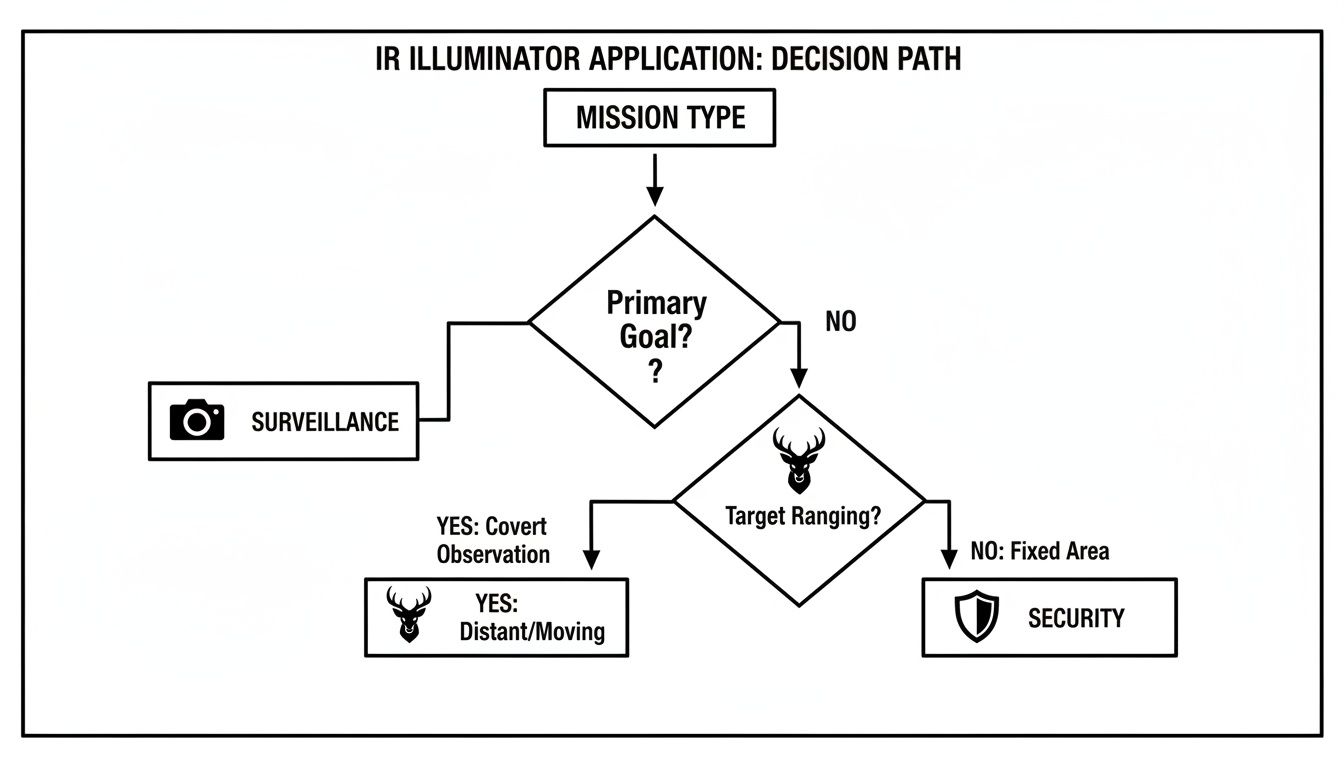
As you can see, defining the mission—surveillance, hunting, or security—is the critical first step. It immediately starts to narrow down the kind of hardware you should be looking at.
Match The Wavelength To The Mission
Your first big decision is wavelength: 850nm or 940nm. This is a classic trade-off between raw power and total stealth.
850nm (Semi-Covert): This is the industry workhorse for a reason. It gives your night vision device the most punch, maximizing brightness and range. The catch? The emitter gives off a faint, dull red glow that someone can spot if they're looking right at it. This makes it the go-to for situations where seeing as far as possible is more important than being 100% invisible, like long-range target ID or just moving around.
940nm (Fully Covert): When you absolutely cannot be seen, this is your only choice. The emitter is completely invisible to the naked eye, offering true stealth. The trade-off is a serious hit to performance—a 940nm illuminator will have about 30-40% less range than an 850nm model with the same power output. This is what you want for covert surveillance or hunting animals that are easily spooked.
Crucial Question: Is it more important to see as far as possible, or to remain completely unseen? Your answer will immediately point you to the right wavelength.
Determine Your Power And Range Needs
Next up, how far do you realistically need to see? Power is often listed in milliwatts (mW), but what really counts is the effective range. The tiny built-in illuminator on a digital scope might only be useful out to 100 meters. On the other hand, a high-power, weapon-mounted unit can throw a usable beam hundreds of meters downrange.
Think about your typical engagement distances. For close-quarters work or navigating a dense forest, a lower-power "flood" beam is all you need. If you're spotting targets across an open field or securing a large property, you'll need a high-power illuminator with a tight, focusable "spot" beam. Be careful not to overdo it; too much power up close will "wash out" your image, blinding your night vision tube with reflected IR light.
Select The Right Form Factor And Mounts
How you plan to carry and use the illuminator is just as important. The main options are weapon-mounted, helmet-mounted, or handheld.
Weapon-Mounted: This is the standard tactical setup. It keeps the IR beam locked in with your optic, which is critical for aiming. You’ll want an illuminator that’s compatible with common mounting systems like Picatinny (MIL-STD-1913) or M-LOK.
Helmet-Mounted: Sticking a small illuminator on your helmet gives you hands-free light wherever you look. This is a game-changer for navigation, working on a vehicle, or admin and medical tasks in the dark.
Handheld: A handheld unit gives you the most flexibility. You can scan an area without flagging it with your weapon, or you can hand it off to a teammate. Many handheld models can also be slipped into a weapon mount if needed.
Don't forget to consider the ergonomics. Switch placement and intuitive controls are everything when you're under pressure. Good cable management is a must.
Consider The Power Source
Finally, check what kind of batteries it takes. Most professional-grade illuminators use common battery types so you aren't left searching for a rare power source in the middle of nowhere.
- CR123A: This is the king of batteries for tactical gear. They pack a lot of power and have a long shelf life, but they can be pricey.
- AA / AAA: You can find these anywhere on the planet. They might not offer the same runtime or power as CR123As in high-drain devices, but their availability is a huge plus.
- Rechargeable Cells (e.g., 18650): More and more units are running on rechargeable lithium-ion batteries like the 18650. They offer excellent performance and save you money in the long run, but you have to plan for recharging them.
Try to standardize your power source with your other critical gear. Sticking to one or two battery types simplifies your logistics and means you're less likely to get caught powerless when it counts. By carefully weighing these factors—wavelength, range, form, and power—you can confidently pick the perfect infrared illuminator for the job.
Getting Your Illuminator Dialed In: Setup and Aiming
Owning a top-tier infrared illuminator is just the starting point. If you don't set it up and aim it correctly, you're not unlocking its full potential. A poorly aligned unit can actually do more harm than good, causing confusion and costing you precious seconds when it matters most. The real goal is to get the illuminator so perfectly integrated with your system that using it is pure muscle memory.
It all begins with how you physically mount the device. For a weapon-mounted illuminator, you need to lock it down tight on your rail, whether it's a Picatinny or M-LOK system. But where you put it is just as important. You want it somewhere it won’t interfere with your grip, block your optic’s view, or cast a weird shadow from your barrel or suppressor.
Don't forget about the switch. Whether you’re using a tailcap button or a remote pressure pad, you need to be able to hit it instantly without shifting your firing grip. Clean up your cables, too—it’s not just for looks. Tidy wiring prevents snags that could rip gear off your rifle or give away your position.
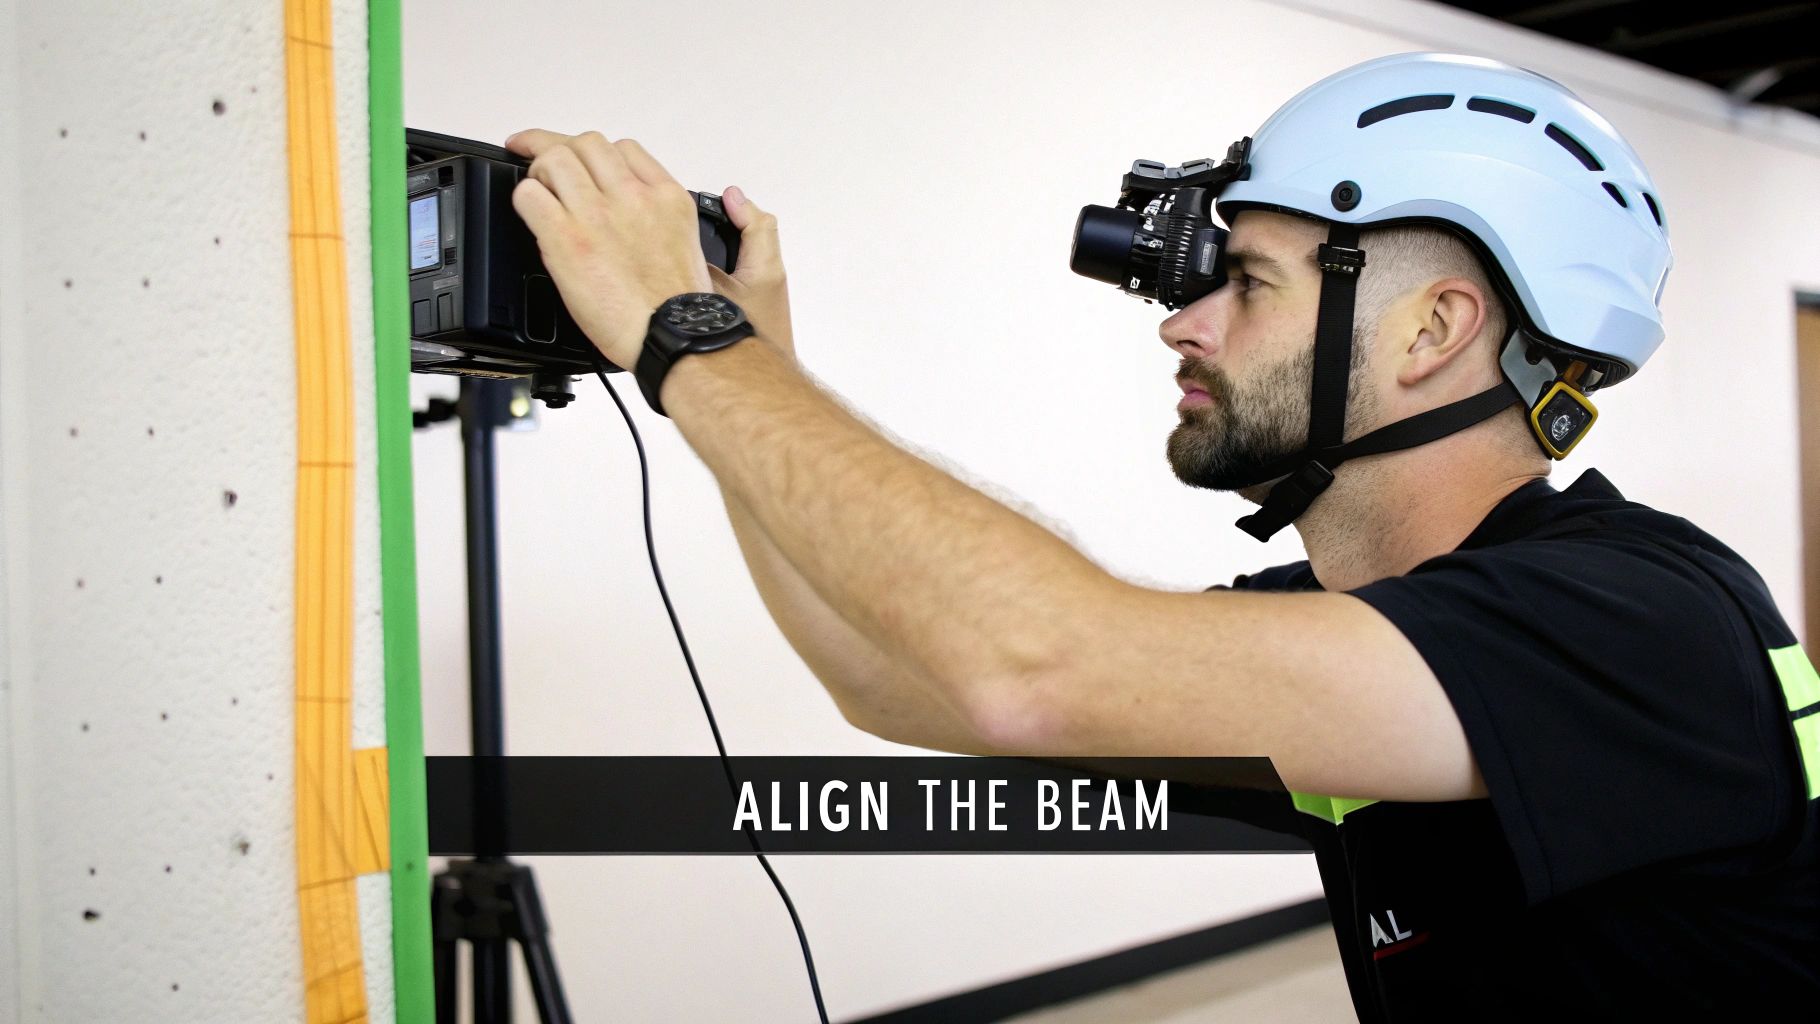
Aligning the IR Beam: Where the Magic Happens
This is the most critical part of setting up a weapon-mounted infrared illuminator light: aligning its beam with your optic. We call this "zeroing the illuminator," and it’s the process of making sure the brightest part of your IR beam lands exactly where your reticle is aimed. Skip this, and you could be aiming at a target while your light is pointing somewhere else entirely.
The objective is simple: your point of aim (POA) needs to be the same as your point of illumination (POI). When they’re co-aligned, there’s no more guesswork. You can engage targets with total confidence, knowing that what you see in your scope is exactly what’s being lit up downrange.
Pro Tip: Do your final alignment check at a distance you expect to actually use the gear. A beam that looks dead-on at 25 meters might be noticeably off at 200 meters because of the offset between your optic and the illuminator.
A Step-by-Step Guide to Zeroing
Getting a perfect zero isn't complicated, but it does require a dark space and a steady platform. Using a tripod, bipod, or even just some sandbags will make the process much easier and your adjustments far more precise.
- Lock It Down: First things first, make sure your optic (or IR laser) and your illuminator are both rock-solid on your weapon. Any play or wobble will make getting a consistent zero impossible.
- Set Up a Target: Place a non-reflective target at a known distance. For most rifle applications, somewhere between 50 to 100 meters is a great place to start.
- Aim and See: Look through your night vision device and center your reticle on the target. Now, turn on the illuminator and see where the "hotspot"—the brightest center of the beam—is actually hitting.
- Adjust and Center: Use the illuminator's windage and elevation dials to walk the beam’s hotspot right onto your reticle. Make small, deliberate adjustments.
- Confirm at Range: If you have the space, double-check your zero at a longer distance to make sure everything lines up as it should.
Once you’ve gone through these steps, your infrared illuminator light is no longer just a flashlight. It’s a precision instrument that helps you find, identify, and engage targets with speed and accuracy, giving you a huge advantage in any low-light environment.
Common Questions About Infrared Illuminators
Even after you've got the basics down, you'll find that real-world situations bring up new questions. Getting straight answers is key to using your gear confidently and effectively. We're going to tackle some of the most common questions we hear from guys in the field.
We'll cover everything from spooking game to what works with different optics. Let's clear up the confusion.
Can Animals See The Glow From An 850nm Infrared Illuminator Light?
Yes, they often can. Many animals, especially predators and common game, are able to see the faint red glow coming from an 850nm IR illuminator. It’s a whole lot better than a white flashlight, but it’s not truly invisible, particularly if they're looking right at you. For night hunters, this is a huge deal.
If you need absolute stealth, a 940nm illuminator is what you want. It has zero visible signature, making it completely invisible to just about any animal out there. The trade-off is that you won’t get as much range, but when you can't afford to be seen, 940nm is the only way to go.
Key Takeaway: If not spooking wildlife is your top priority, go with a 940nm illuminator. If you need maximum illumination range and a faint glow is an acceptable risk, 850nm packs more punch.
Will An IR Illuminator Work With Digital Night Vision Or Thermal Scopes?
An infrared illuminator light is a game-changer for digital night vision. The sensors in digital NV are extremely sensitive to infrared light, and adding an external illuminator can dramatically improve performance. It often takes a grainy, barely usable image and makes it crisp and clear.
However, an IR illuminator will NOT work with a thermal scope. This is a critical point to understand. Thermal optics see heat, not light. An IR illuminator doesn't make a target hotter, so a thermal sensor won't even know it's there. To get the best of both, some advanced setups "fuse" the two technologies, overlaying a thermal image on top of an IR-assisted night vision picture.
How Do I Know If My Night Vision Device Needs An IR Illuminator?
You absolutely need an infrared illuminator light if you plan on being in total darkness. Think inside a building with no windows, a deep cave, or out in the woods on a moonless, overcast night. There's simply no light for your device to amplify.
Even top-tier Gen 3 tubes, which are incredible at amplifying tiny amounts of light, can't make something out of nothing. If your image looks "sparkly" or has a lot of static (scintillation), that's the tube telling you it's starved for light. An IR illuminator provides that light, cleaning up the image so you can actually see what you're looking at.
Are High-Power Infrared Illuminators Legal To Own?
For the most part, yes. In the United States, there are generally no federal laws stopping a civilian from owning a high-power infrared illuminator. The regulations people get confused about are for infrared lasers, which the FDA classifies based on their power and potential to cause eye damage.
Since illuminators use LEDs, not lasers, they are considered eye-safe at any reasonable distance and don't fall under those same rules. That said, you still need to check your state and local laws. Some places have specific restrictions on using any kind of artificial light for hunting at night, and that can include your IR illuminator.
Ready to find the perfect infrared illuminator to complete your low-light setup? Superior Tactical LLC offers a curated selection of high-performance illuminators, night vision devices, and tactical accessories to keep you mission-ready. Explore our collection and get expert guidance at https://superiortac.com.