How Make Night Vision: Your Complete DIY Build Guide
Building your own night vision device is an incredibly rewarding project. It’s a chance to get hands-on with the kind of low-light technology that professionals rely on and build something that’s truly your own. This isn’t just about strapping a camera to a headset; it’s about understanding and assembling the core components—the image intensifier tube, the housing, and the optics—that make these devices work.
This guide is a direct, no-nonsense walkthrough to help you do it right, blending the technical details with practical advice I’ve picked up over the years.
Your Guide to Building a DIY Night Vision Device
Think of this as your roadmap for putting together a high-performance night vision system from scratch. I wrote this for the enthusiast who wants to go beyond off-the-shelf options and build a device that fits their exact needs. Maybe you’re a hunter looking for a custom setup or someone who values preparedness and wants a reliable tool in their kit. Whatever your reason, the process is both accessible and deeply satisfying.
My goal here is to give you the skills to not only assemble your own night vision monocular but also to maintain it. We’ll start with the basics, run through the essential parts you’ll find in our DIY night vision kits, and lay out a clear path for assembly.
From Battlefield Tech to Your Workbench
The ability to “own the night” has been a massive tactical advantage for decades. It really all started to change during the Vietnam War with the introduction of Gen 1 ‘Starlight’ scopes. For the first time, you could amplify ambient light up to 1,000x without needing a massive, obvious IR illuminator. U.S. forces used this to gain a huge edge in low-light jungle operations. The image was fuzzy by today’s standards, sure, but it was a revolutionary leap.
Things have moved fast since then. The 1970s brought us Gen 2, which cranked up light amplification to 20,000x and delivered a much sharper picture. By the time Operation Desert Storm kicked off in 1991, night vision was arguably the U.S. Army’s single “biggest advantage,” leading to an incredible 98% hit rate in tank battles fought in total darkness.
This rapid evolution from clunky military hardware to the sleek, powerful Gen 3 and Gen 4 systems is what makes high-quality DIY builds possible today. You’re literally building on the shoulders of giants. You can get a fantastic deep dive into this history over at the Rebtech NVG historical archives.
What We’re Covering Here
Before you start turning screws, it’s good to have a solid overview of what you’ll be working with. Here’s a quick table to get you familiar with the key players in your build.
Quick Guide to DIY Night Vision Build Components
| Component | Function | Key Consideration |
|---|---|---|
| Image Intensifier Tube | The heart of the device; amplifies photons into a visible image. | This is where you don’t want to cut corners. The tube’s specs (FOM, SNR) dictate overall performance. |
| Housing | The protective chassis that holds everything together. | Choose one that fits your intended use, whether it’s helmet-mounted or handheld. Weight and durability are key. |
| Objective Lens Assembly | Gathers ambient light and focuses it onto the image tube. | Quality glass means a clearer, brighter image. Look for good light transmission and low distortion. |
| Eyepiece Assembly | Magnifies the image from the tube for your eye. | A good eyepiece provides a clear view, a wide field of vision, and proper eye relief for comfort. |
| Power Supply | Provides the necessary high voltage to the image intensifier tube. | Usually integrated into the housing. Battery type and life are the main things to think about here. |
This table just scratches the surface, but it gives you a good idea of how each piece contributes to the final product.
The Plan of Attack
This guide is much more than a simple IKEA-style instruction manual. It’s a full resource designed to get you from a box of parts to a fully functional device. Here’s what we’ll break down:
- Understanding the Core Tech: We’ll dig into what makes an image intensifier tube tick and what specs like FOM and SNR actually mean for what you see in the dark.
- The Essential Parts List: You’ll get a detailed checklist of every part and tool needed, from the housing and lenses down to the smallest retaining ring.
- Step-by-Step Assembly: I’ll walk you through putting the monocular together with clear, practical instructions. We’ll focus on doing it safely and correctly the first time.
- Calibration and Final Checks: Learn why nitrogen purging is so important and how to properly collimate, focus, and test your new NVD.
By the time you’re done, you won’t just have a night vision device—you’ll have the knowledge to build a tool that performs exactly how you need it to, when you need it most.
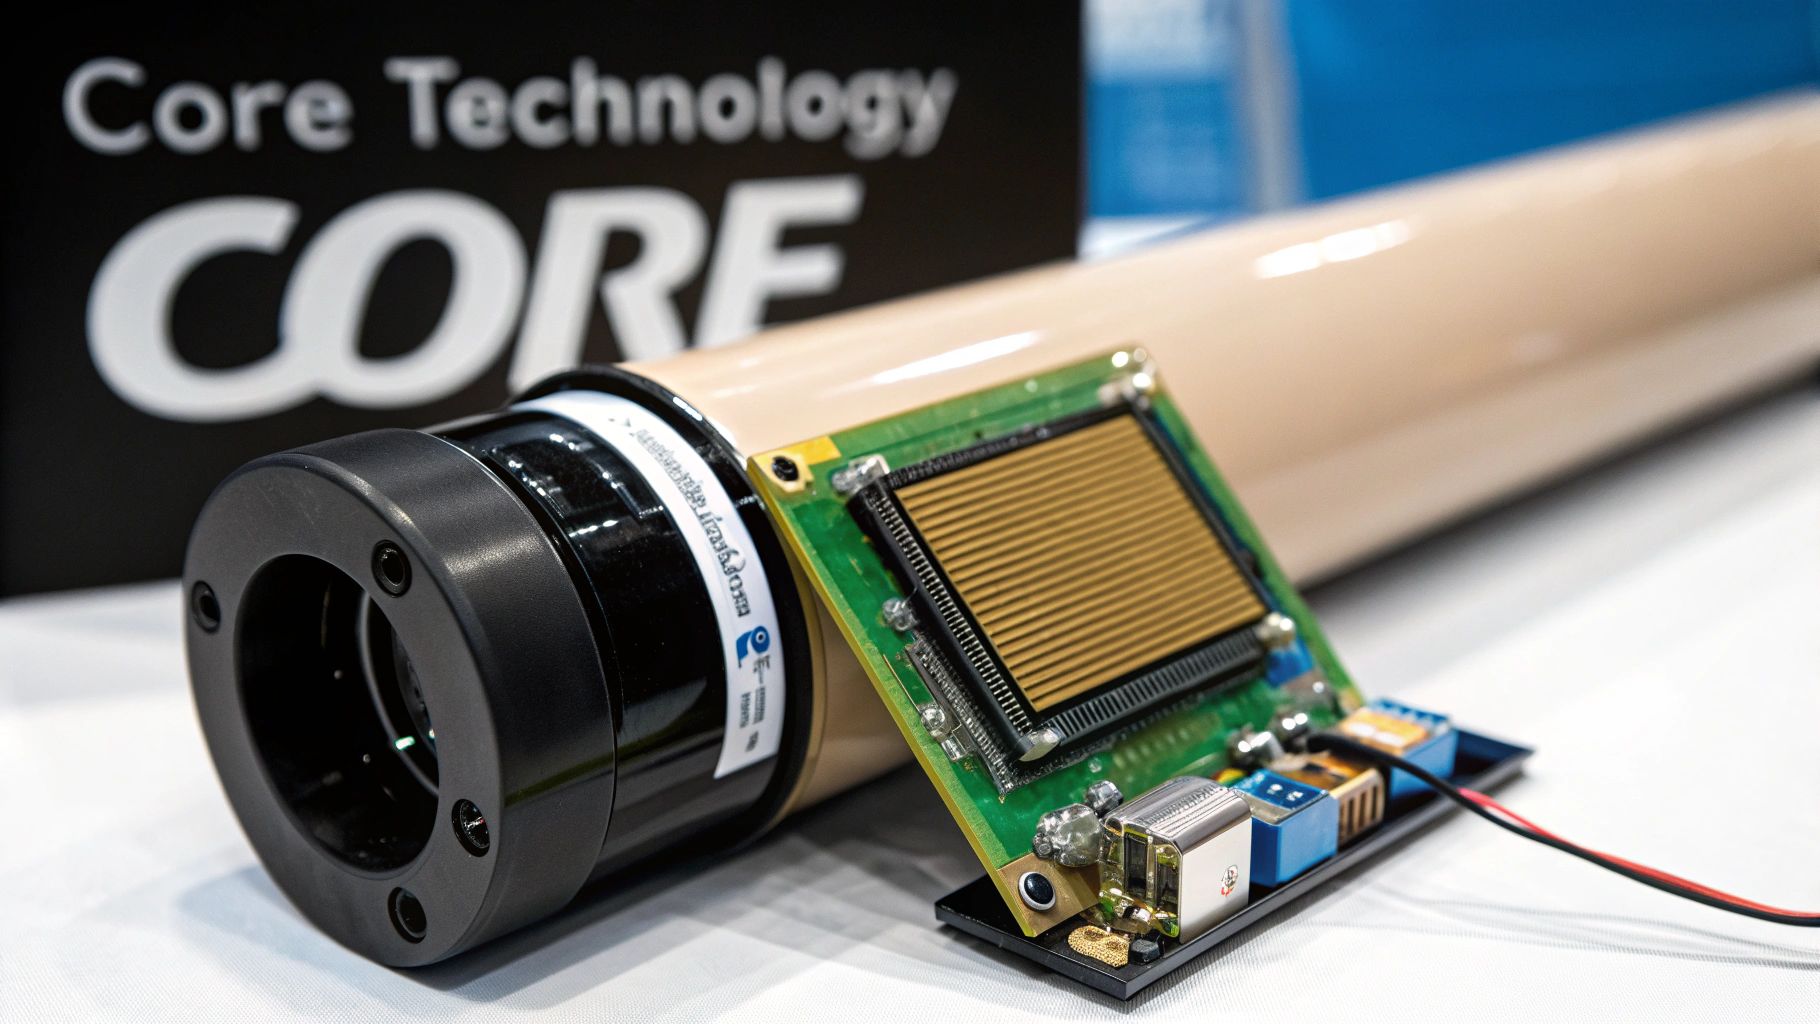
Getting to Grips With Core Night Vision Technology
Before you even think about picking up a soldering iron, it’s crucial to get a handle on what’s happening inside the device you’re building. This isn’t just about theory; understanding the fundamentals helps you choose the right parts, troubleshoot problems, and really appreciate what you’ve created.
At the very heart of any serious night vision device is the image intensifier tube. This is the magic component, the engine that transforms a nearly pitch-black scene into a clear, usable image. The best way to think of it is as a three-stage relay race for light particles, also known as photons.
This technology has come a long way. The earliest systems, like the German ‘Vampir’ units fitted to about 50 Panther tanks during WWII, were incredibly clunky and needed a huge, power-hungry infrared spotlight to work. These “Gen 0” devices were easily spotted because their IR source lit them up like a Christmas tree to anyone else with night vision.
The Three-Step Process of Light Amplification
Today’s passive systems are worlds apart, capable of amplifying ambient light thousands of times over without needing an external light source. It all happens inside that intensifier tube in three distinct steps.
- The Photocathode: This is the first stop. When the faintest bit of light from the moon or stars enters the lens, it hits the photocathode. This surface has one job: to convert those incoming light particles (photons) into electrons.
- The Microchannel Plate (MCP): Here’s where the real amplification happens. The MCP is a wafer-thin glass disc packed with millions of microscopic channels. As the electrons from the photocathode enter these channels, they bounce off the walls, knocking loose thousands more electrons in a massive chain reaction.
- The Phosphor Screen: Finally, this avalanche of multiplied electrons slams into the phosphor screen at the end of the tube. The screen lights up wherever an electron hits it, instantly converting the electron energy back into visible light—the classic green or white image you see through the eyepiece.
The Big Picture: The journey from a photon hitting the lens to a vastly brighter image appearing on the phosphor screen happens almost instantaneously. This isn’t a digital camera taking a picture; it’s a direct, real-time amplification of the light that’s already there.
What Do All the Specs Actually Mean?
When you start shopping for an image intensifier tube, you’re going to get hit with a wall of technical jargon. Don’t let it overwhelm you. For a practical build, you only need to focus on a few key metrics that really define performance.
| Specification | What It Really Means | Why It Matters for Your Build |
|---|---|---|
| Photosensitivity | How good the tube is at converting light into an electronic signal (measured in µA/lm). | Higher is better. This is the tube’s raw ability to suck in light in the darkest conditions. |
| Resolution | The sharpness and detail of the image, measured in line pairs per millimeter (lp/mm). | A higher number means a crisp, clear image. It’s the difference between a blurry picture and a high-definition one. |
| Signal-to-Noise Ratio (SNR) | The ratio of the good stuff (the image) to the bad stuff (the sparkly static or “scintillation”). | This might be the single most important spec. A high SNR gives you a clean, steady image with minimal graininess, especially when it gets really dark. |
You’ll often see a spec called Figure of Merit (FOM), which is simply the resolution (lp/mm) multiplied by the SNR. It’s a great shorthand for quickly comparing the overall performance potential of different tubes. If you want to dive deeper into the manufacturing side, you can explore our guide on how night vision devices are made.
One last thing to look for is autogating. This is a non-negotiable feature for any modern build. It’s a protective circuit that rapidly flickers the tube’s power supply when exposed to sudden bright light, like a car’s headlights or a muzzle flash. This prevents the image from washing out and, more importantly, protects the tube itself from getting burned or permanently damaged.
Gathering Your Parts and Tools for the Build
Any project, especially one as precise as building a night vision device, lives and dies by its preparation. Before you even think about putting pieces together, you need to have everything laid out and ready to go. Trust me, there’s nothing more frustrating than getting halfway through an assembly only to realize you’re missing a critical tool or part.
The most straightforward path for a first-timer is grabbing a dedicated build kit, like a PVS-14 kit. These bundles are a lifesaver because they handle the compatibility for you, including the housing, battery pack, and lens assemblies. Your main job then becomes sourcing the heart of the whole operation: the image intensifier tube.
Sourcing Your Core Components
Your night vision device is an ecosystem of parts that have to play nicely together. Let’s walk through the non-negotiables.
- Image Intensifier Tube: This is where the magic happens and where most of your budget will go. You’ll be choosing between a Gen 2 or Gen 3 tube. Pay close attention to the spec sheet—specifically the FOM (Figure of Merit) and the SNR (Signal-to-Noise Ratio), as these numbers directly translate to performance in the dark.
- Housing Assembly: Think of this as the chassis. It protects your expensive tube and holds all the optics in perfect alignment. PVS-14 style housings are the go-to for a reason; they’re tough, modular, and have a massive ecosystem of accessories.
- Objective Lens Assembly: This is the eye of your device, gathering every last bit of ambient light and focusing it onto the tube. Don’t cheap out here. High-quality, multi-coated glass is a must, as it directly impacts how bright and clear your final image will be.
- Ocular (Eyepiece) Lens Assembly: This lens takes the glowing image from the tube’s phosphor screen and presents it to your eye. A good eyepiece means a crisp view, comfortable eye relief, and a generous field of view.
Remember, your optics are the window to the tube’s soul. Skimping on glass is like putting cheap tires on a performance car—you’re just throttling the very performance you paid for. To get a better handle on what makes good glass good, take a look at our guide on the top features to look for in a quality night vision monocular.
Assembling Your Essential Toolkit
Beyond the main components, you’re going to need a few specialized tools. Trying to get by with the wrong ones is a surefire way to damage delicate threads, scratch a lens, or worse.
Pro Tip: Your workspace is just as important as your tools. Find a clean, well-lit spot with as little dust as possible. I always put down a soft, lint-free mat to protect parts and prevent a catastrophic drop onto a hard floor.
Before you start, make sure you have these tools within arm’s reach.
Essential Toolkit for Your Night Vision Build
Having the right tools is half the battle. This table breaks down exactly what you’ll need to assemble, calibrate, and maintain your device without causing any damage.
| Tool | Purpose | Pro Tip |
|---|---|---|
| Spanner Wrench | Needed to properly tighten or loosen the retaining rings for the objective and ocular lenses. | Buy a good, adjustable one. A cheap spanner wrench will slip and put a nice, deep scratch in your lens or housing. Don’t ask how I know. |
| Lens Pen or Blower | The only safe way to remove dust and debris from optical surfaces without leaving micro-scratches. | Never use canned air. The propellants can leave a permanent film on your lens coatings. A simple rubber air blower is all you need. |
| Microfiber Lens Cloths | For carefully wiping away fingerprints or smudges from the lenses. | Always start with a fresh, clean cloth. A dirty one just grinds abrasive dust particles into your expensive lens coatings. |
| Nitrile Gloves | Keeps the natural oils and fingerprints from your hands off the image tube and glass surfaces. | If you touch anything besides your parts, put on a fresh pair. This simple habit saves a ton of cleaning headaches later. |
| Small Screwdriver Set | For the tiny screws on the housing, battery compartment, or other accessories. | Get a jeweler’s or electronics screwdriver set. The ones with magnetic tips are fantastic for not losing those tiny screws. |
With these items laid out, you turn a potentially chaotic job into a smooth, methodical process. It’s the difference between a frustrating afternoon and a rewarding project that results in a high-performance night vision device you built yourself. Now, let’s move on to inspecting each part before we start the assembly.
Assembling Your Night Vision Monocular
Alright, you’ve got all your components laid out and inspected. This is where the magic happens. We’re about to turn that collection of parts into a functional night vision device. Let me be clear: this isn’t a race. Take a deep breath, work methodically, and be patient. Rushing through this process is the fastest way to get a speck of dust permanently sealed inside your optic or, even worse, cross-thread a delicate part. Precision is the name of the game.
The entire build boils down to three main phases: getting the housing ready, installing the intensifier tube, and then fitting the lenses. Each step builds on the last, so getting one thing right makes the next part that much easier.
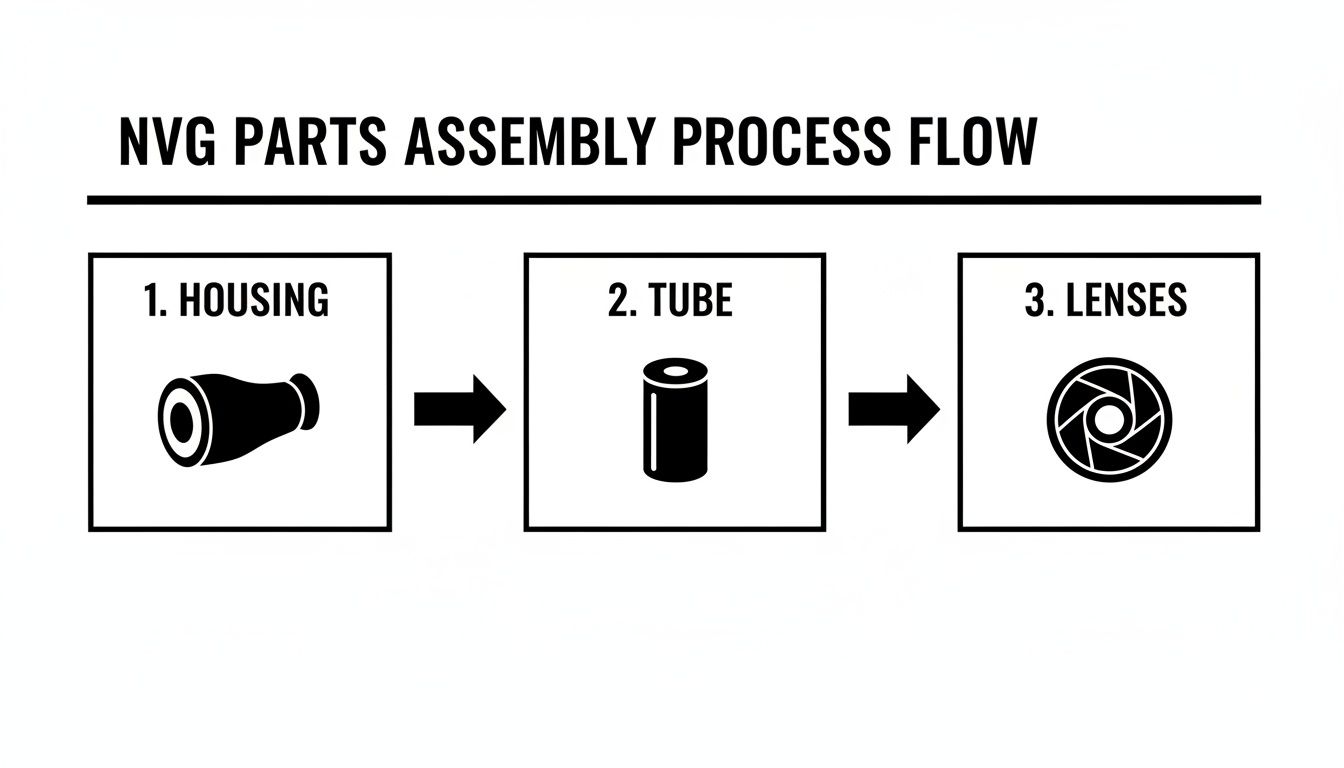
Think of it like building anything else—a solid foundation is everything.
Preparing the Housing and Installing the Tube
First things first, grab the housing. Even if it looks clean, give the inside a quick blast with an air blower. You’d be surprised what kind of tiny particles can be lurking in there, and you definitely don’t want them ending up on your tube.
Now, with your nitrile gloves on, it’s time to handle the heart of the device: the image intensifier tube. Look closely and you’ll see small electrical contacts. These need to line up perfectly with the pins inside the housing.
This alignment is absolutely critical. If you try to force the tube in at the wrong angle, you risk bending or breaking those sensitive contacts, which will turn your very expensive tube into a paperweight. Gently guide the tube into the housing until it sits flush. You shouldn’t have to muscle it in.
With the tube seated, you’ll use a retaining ring to lock it in place. This ring threads into the housing, pressing the tube against the power supply contacts. Use your spanner wrench to tighten it down, but stop as soon as it feels snug. Overtightening can put a ton of stress on the tube and the housing itself.
Builder’s Insight: Here’s a pro tip. Before you completely tighten that retaining ring, do a quick power check. Pop a battery in and turn the unit on. A healthy tube will make the phosphor screen glow. This simple test confirms you have a good electrical contact and a working tube before you seal everything up for good.
Installing the Objective Lens Assembly
Next up is the objective lens—the “eye” of your monocular that gathers all the available light. Before you even think about threading it in, make sure the threads on both the housing and the lens are spotless. A single grain of sand or a metal shaving can cause cross-threading, and that can destroy the housing.
Carefully begin threading the objective lens assembly into the front of the housing. It should feel smooth, with almost no resistance. If it starts to bind up, stop immediately. Back it out, check the threads again, and restart.
Once it’s threaded in, you’ll secure it with another retaining ring. Same deal as before: use the spanner wrench to tighten it until it’s snug. You’re just trying to eliminate any wobble or looseness in the lens, not set a world record for torque.
Fitting the Ocular and Final Checks
The last piece of the puzzle is the ocular lens assembly, also known as the eyepiece. This is what you look through, so keeping it perfectly clean is non-negotiable. Give the lens and the rear opening of the housing another quick puff of air.
Just like the objective, the eyepiece threads right into the back of the housing. Screw it in gently, ensuring the threads engage cleanly from the start. This assembly will also have a diopter adjustment, which is what lets you focus the image for your own eyesight.
With the eyepiece installed, do a full visual check. Put the objective lens cap on and look through the monocular. Are there any big, distracting specks of dust? If so, it’s much better to take it apart and clean it now than to try and ignore it later.
Watch out for these common build-day blunders:
- Fingerprints on Optics: Skin oil can permanently damage lens coatings. Always wear gloves and handle lenses by their edges.
- Cross-Threading Components: This is easily the most common and costly mistake. If it doesn’t feel right when you’re threading it, it isn’t. Don’t force it.
- Overtightening Retaining Rings: Going full beast-mode on the retaining rings can crack the housing or even damage the tube. Snug is all you need.
And that’s it—you’ve officially turned a box of parts into a night vision monocular. The device is structurally complete. The next crucial steps are purging the system with nitrogen and calibrating it to wring out every last bit of performance.
Getting It Ready for the Field: Purging and Calibration
You’ve got it all put together, and it even turns on. It’s easy to think you’re done at this point, but hold on. The assembly is just the first part of the job. What comes next—purging the housing and calibrating the optics—is what turns your pile of parts into a reliable, professional-grade tool that won’t let you down when you need it most.
This is where you make it truly field-ready.
Why You Can’t Skip a Nitrogen Purge
Let’s talk about one of the most critical, and often overlooked, steps: nitrogen purging. Every time you assemble a night vision device, you trap a little bit of the regular air you’re breathing inside the housing. That air is full of moisture.
When you take your device from a warm house out into the cool night, that moisture condenses on the inside of the lenses. Suddenly, your view is completely fogged up, making the unit totally useless.
Purging with nitrogen gas solves this problem completely. Nitrogen is totally dry and inert, so by flushing out the normal air and replacing it with pure nitrogen, you remove every last bit of moisture. There’s simply nothing left inside to cause fogging.
This one step delivers two huge wins for your build:
- It’s a fog-proof guarantee. Your view will stay perfectly clear, no matter how quickly the temperature drops.
- It protects your investment. A dry, inert environment prevents corrosion from forming on the sensitive electronics and delicate coatings of your image intensifier tube over the long haul.
To do this yourself, you’ll need a nitrogen tank, a regulator, and a specific PVS-14 purging kit. You hook it up to the purge ports on the housing, pushing nitrogen in one side and letting the old, moist air out the other. After a few cycles, you seal it up tight. If you want to dive deeper into long-term upkeep, our guide on the maintenance and care for a PVS-14 monocular has some great tips.
A Quick Word on Professional Service: Honestly, while you can do this at home with the right gear, this is one area where having a pro handle it is worth considering. A dedicated technician has the specialized equipment to pull a perfect vacuum and ensure an absolutely moisture-free seal, which is the gold standard for long-term durability.
Dialing in a Razor-Sharp Image
With the housing purged and sealed, it’s time to get the optics perfectly tuned. This isn’t just about twisting a knob until it looks “okay.” It’s a two-part process to ensure the image is tack-sharp from the screen right in front of your eye all the way out to the horizon.
First, Set Your Diopter
Think of the diopter as the focus for your eye. It’s like setting the prescription on a pair of glasses. To do this, leave the day cap on the objective lens and power up the unit. You’ll see the faint green glow of the screen, maybe with a few tiny specks or a subtle honeycomb pattern.
Now, twist the diopter adjustment on the eyepiece. Your goal is to get that screen pattern, and any tiny imperfections (blems), as crisp and sharp as you possibly can. Once you’ve set this for your eyesight, you shouldn’t have to touch it again unless a buddy with different vision borrows your device.
Next, Set Your Infinity Focus
This step calibrates the objective lens—the one at the front—for focusing on things far away. The best way to do this is to go outside at night.
Find a single, bright point of light in the distance. A bright star is perfect, but a faraway streetlight will also work just fine. Looking at that object, adjust the objective lens focus until that tiny point of light is as sharp and crisp as possible. You’ve just set your infinity focus. Now, anything from about 50 yards out to the stars will be perfectly clear, and you’ll only need to adjust it for closer objects.
The Final Shakedown: A Real-World Test
Time for the final exam. Take your monocular out somewhere dark and really put it through its paces. Don’t just look at one thing—move around, scan different areas, and pay attention to how it performs.
Here’s what you’re looking for:
- Image Clarity: Is the picture sharp and consistent across the entire field of view?
- Gain Function: When you turn the gain knob, does the image brightness smoothly increase and decrease as it should?
- Check for Debris: Look carefully for any new, prominent black spots that you didn’t see during your initial tube inspection. These could be tiny specks of dust that got inside during assembly.
- Overall Performance: Just use it. Walk around, identify objects near and far. The image should feel stable and clear, giving you the confidence to navigate easily in the dark.
Once your build passes this real-world test, you can be confident that you’ve done more than just assemble it—you’ve properly calibrated and proven it’s ready for action.
Answering Your Top Questions About Building Night Vision
When you first decide to build your own night vision device, a ton of questions probably start swirling around. It’s a project that sits at the intersection of optics, electronics, and careful assembly, so it’s only natural to want to get your facts straight before you dive in. Let’s walk through some of the most common questions I get from people just starting out.
Getting a handle on these details upfront will make the entire process, from buying parts to the final assembly, a whole lot smoother.
Is Building My Own Night Vision Device Legal?
This is the big one, and for good reason. The short answer is yes, it is generally legal for a U.S. citizen to purchase parts and build a night vision device for personal use. But there’s a huge “but” you need to be aware of.
The entire world of high-end night vision is governed by the International Traffic in Arms Regulations (ITAR). These are strict federal laws controlling the export of anything considered defense-related, and that absolutely includes high-performance components like Gen 3 image intensifier tubes.
So, what does that mean for your project?
- You cannot sell, ship, or even hand your device to a non-U.S. person.
- Taking your device out of the country, even for a hunting trip, is a serious violation without a nearly impossible-to-get license.
- All your parts must be sourced from within the U.S. and stay here.
Here at Superior Tactical LLC, we adhere strictly to ITAR—it’s non-negotiable. Make sure you’re always in full compliance with all federal, state, and local regulations.
What’s the Real Difference Between Green and White Phosphor?
The image color you see through your device comes down to the phosphor screen in the image tube. For decades, that iconic “night vision green” was all there was. Now, white phosphor has taken the market by storm.
Green phosphor (the technical name is P43) creates that classic, high-contrast view. The human eye is incredibly sensitive to shades of green, which makes it easy to spot details in the dark. The downside? Some people find it causes eye fatigue after using it for extended periods.
White phosphor (P45), on the other hand, produces a black-and-white image that many find more natural and easier on the eyes. From my experience and what I hear from other users, it often gives a better sense of depth and contrast. It’s like the difference between watching a movie with a green filter over it versus watching a crisp, classic black-and-white film. It really comes down to personal preference.
My Take: The tube’s core performance metrics—like resolution and Signal-to-Noise Ratio (SNR)—have nothing to do with the color. But the user experience is worlds apart. White phosphor typically costs more, but for many, the improved visual comfort and clarity are worth every penny.
What Are Blemishes and Should I Be Worried?
As you shop for image intensifier tubes, you’ll see the term “blems” everywhere. It’s just shorthand for blemishes—tiny black spots you can see in the image.
It’s really important to understand that blems are just cosmetic artifacts from the manufacturing process. They have zero impact on the tube’s actual performance or how long it will last. In fact, almost every tube has at least a few tiny spots.
These spots are graded based on their location, which is divided into three zones:
- Zone 1: The dead center of your view.
- Zone 2: The ring between the center and the outer edge.
- Zone 3: The very edge of your field of view.
A blem right in the middle (Zone 1) is obviously the most distracting. Spots on the far edges (Zone 3) are something you’ll likely never even notice when you’re actually using the device. A “spot-spec” tube is one with virtually no distracting blems in Zone 1. However, picking a tube with a few acceptable spots in Zones 2 or 3 is a great strategy for getting a high-spec unit without breaking the bank.
Ready to start your build with confidence? At Superior Tactical LLC, we offer a full range of high-quality housings, image intensifier tubes, and complete DIY kits to help you create a top-tier night vision device. https://superiortac.com