Your Guide to Generation 1 Night Vision Technology
Generation 1 night vision is where it all started. This is the technology that first brought the power of seeing in the dark out of the exclusive realm of high-end military tech and made it accessible. At its core, a Gen 1 device works by gathering the tiny, barely-there amounts of ambient light and cranking up the volume, so to speak, turning a whisper of light into something your eyes can clearly see.
The result is that signature green-hued image, giving you a massive advantage over the naked eye without breaking the bank.
How Gen 1 Bends The Rules Of Darkness
Think of a Generation 1 device not as a camera, but as a light amplifier. It scoops up faint particles of light—photons from the moon, stars, or distant city glow—that are far too weak for our eyes to register. Then, it boosts that signal thousands of times over, painting a visible picture for you. This whole process takes place inside the heart of the unit: the image intensifier tube.
This technology was a game-changer back in the 1960s, really coming into its own during the Vietnam War. Before Gen 1, night vision often required big, active infrared (IR) spotlights that basically screamed "Here I am!" to the enemy. Gen 1 devices, however, could passively amplify existing light by about 1,000 times. This was a huge tactical leap, letting soldiers own the night without giving away their position.
The process of turning a murky night into a clear, green-tinted view happens in the blink of an eye.
The Four Steps From Photon To Picture
The real magic kicks off when those faint photons of light pass through the objective lens and hit the image intensifier tube. It's here, inside a vacuum-sealed tube, that a rapid-fire sequence of events turns invisible light into a usable image.
This diagram breaks down exactly how it works.
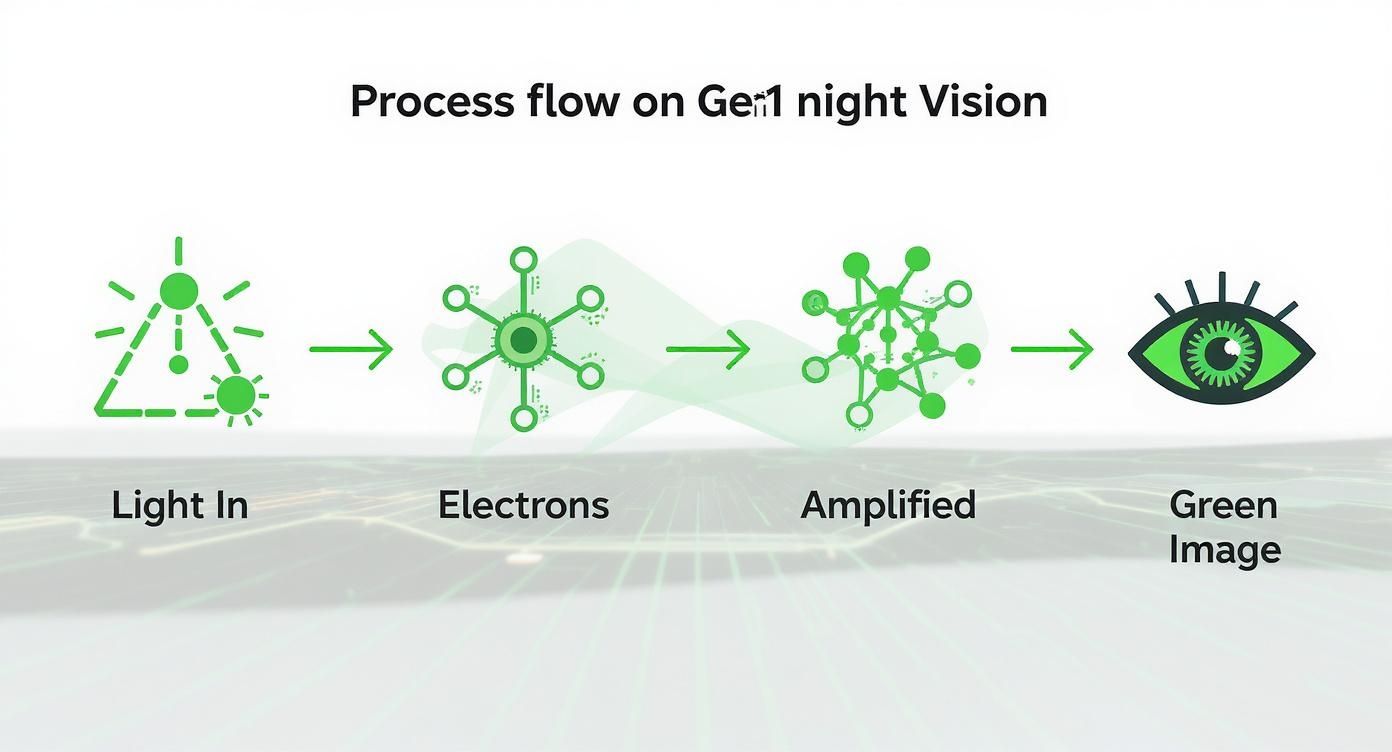
As you can see, it's a straightforward amplification process. Each stage builds on the one before it, ultimately creating that glowing green image you see through the eyepiece. This entire sequence is driven by a high-voltage power supply, which is what creates that faint, high-pitched whine you often hear from Gen 1 units.
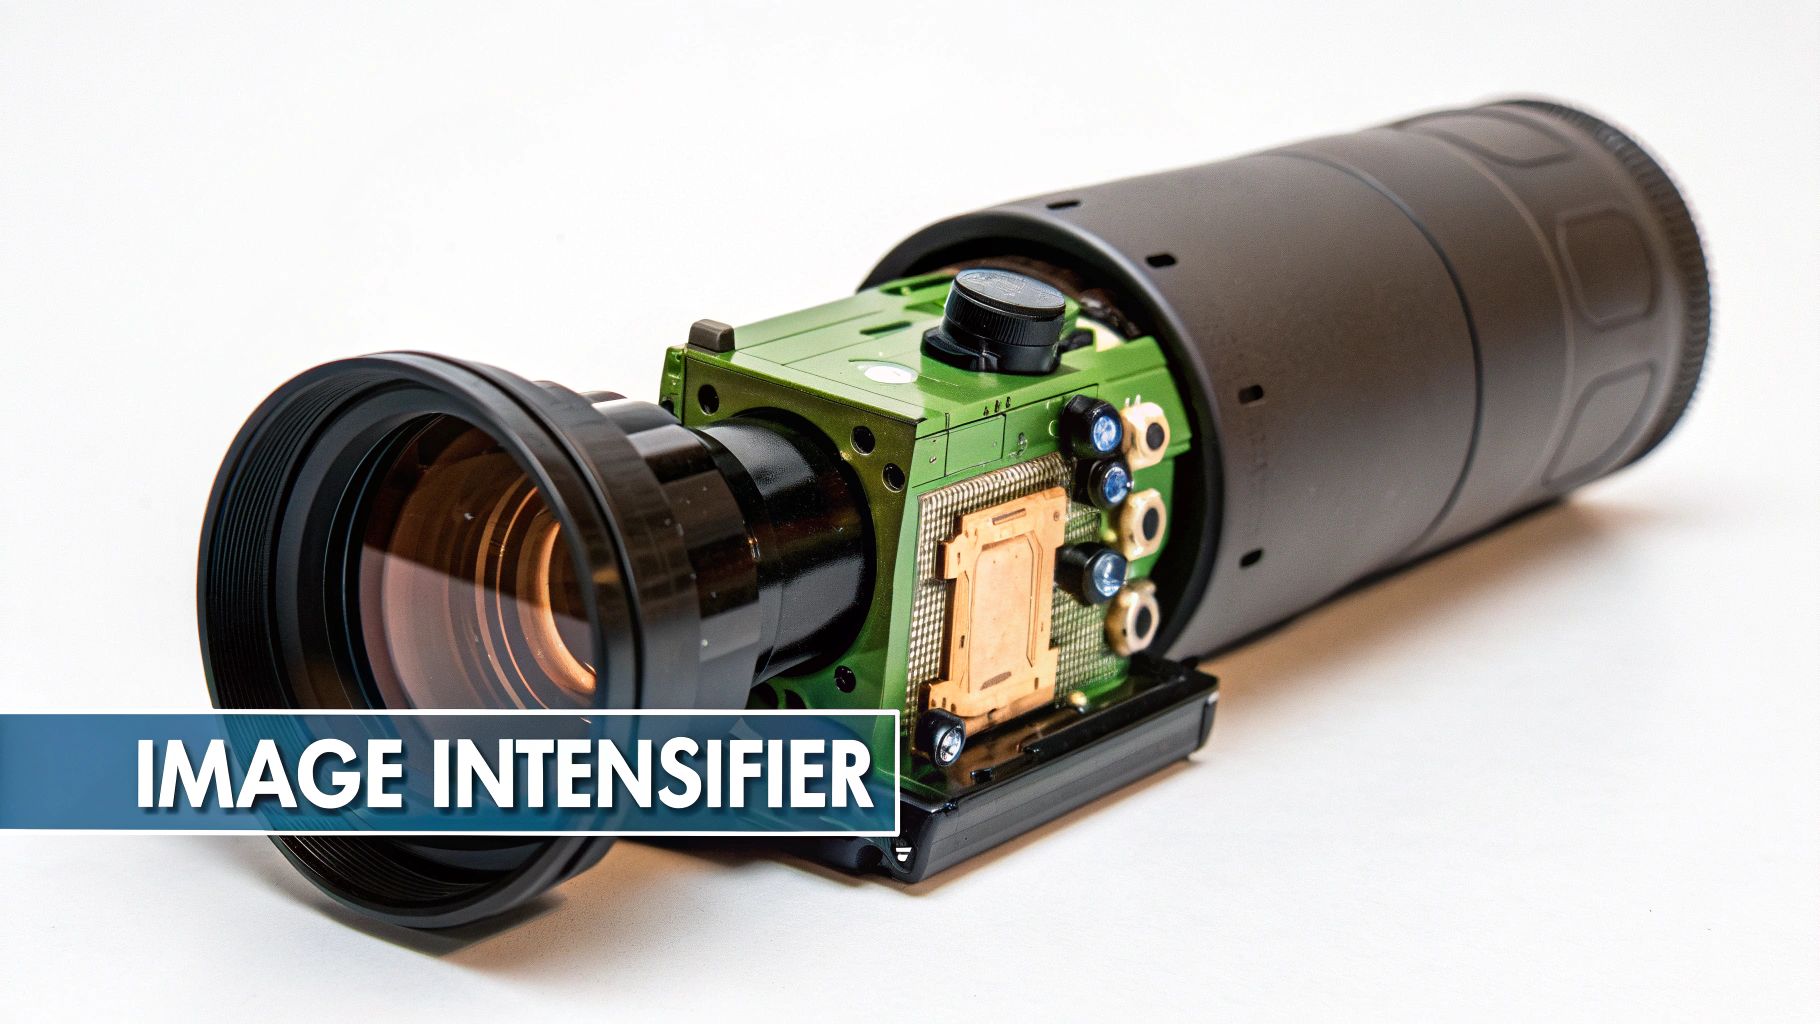
The Core Components That Make It Happen
To get a better handle on the process, let's break down the key parts inside that image intensifier tube and what they do.
Core Components of a Gen 1 Night Vision Device
| Component | Function | Analogy |
|---|---|---|
| Photocathode | Converts incoming light (photons) into electrical energy (electrons). | Think of a tiny solar panel that turns light into an electrical current. |
| Electrostatic Field | Grabs these new electrons, speeds them up, and aims them at the phosphor screen. | It's like a slingshot, launching the electrons forward with incredible speed. |
| Phosphor Screen | Lights up when the high-energy electrons crash into it, turning them back into visible light. | It works just like an old CRT television screen that glows when hit by an electron beam. |
Putting it all together, you can see how these parts work in concert to make the magic happen.
The most important thing to remember is that Gen 1 night vision needs some light to work with. It can't create an image out of thin air. If you're in a place with absolutely zero light, like a windowless basement, you'll need an infrared (IR) illuminator to act as an invisible flashlight for the device.
So, why the green image? That's all down to the phosphor screen. Green was chosen specifically because the human eye is most sensitive to its wavelengths. This allows us to pick out more detail and reduces eye strain, which is a big deal when you're staring through a device for hours.
If you're curious about the nitty-gritty of how these components are built and assembled, you can get a behind-the-scenes look at how night vision devices are made. Getting a grip on this fundamental process is the key to understanding both the strengths and the inherent limitations of generation 1 night vision technology.
What to Expect: Gen 1 Performance and Limitations
When you’re getting into generation 1 night vision, the most important thing is to have realistic expectations. It’s a massive leap forward from using just your own eyes, but it’s not the magic you see in movies. Think of it like a souped-up starter car: it’s a blast and gets you into the game, but it’s not going to keep up with a purpose-built racer.
The performance of any Gen 1 unit is tied directly to how much ambient light is available. On a bright, moonlit night, the image will look surprisingly crisp. But on a dark, overcast evening, it's a completely different story. This dependency on available light is the defining characteristic of this technology.
Getting Used to the Gen 1 View
The first time you peer through a Gen 1 device, you’ll notice a few visual quirks. Don’t worry, your unit isn’t broken—these are just signatures of the technology at work. Learning to recognize and look past them is the key to using your gear effectively.
The most obvious thing you'll see is geometric distortion, which creates a slight "fish-eye" effect. The center of the image will be relatively clear, but the view gets a bit stretched and warped toward the outer edges. This is just a byproduct of how the internal components work.
You'll also run into a few other common traits:
- Scintillation: This is a faint, snowy, or sparkling look across the screen, especially when it’s really dark. It's basically visual noise as the tube works overtime to amplify what little light it can find.
- Blooming (Halo Effect): If a bright light like a streetlight or a headlamp enters your view, it will create a bright, hazy halo around it. This "bloom" washes out the immediate area because the tube is getting overloaded with light in that one spot.
- Black Spots: You might notice tiny, permanent black dots on the screen. These are just minor cosmetic blemishes from the manufacturing process and are perfectly normal for Gen 1 tubes.
These are all part of the Gen 1 experience. It might feel a bit distracting at first, but with a little practice, your brain learns to ignore them and focus on the action in the center of the view.
So, How Far Can You Actually See?
This is the big question everyone asks about generation 1 night vision. The honest answer is: it depends on what you mean by "see." Spotting a barn from a few hundred yards away is one thing; identifying a specific animal at that same distance is another entirely.
Gen 1 tubes amplify available light by about 1,000x, which was a huge deal when they first came out. But that power came with limits. They need moonlight or starlight to function well and really struggle on cloudy nights without help. This gives them a practical, effective range of about 50 to 75 meters for getting a clear I.D. on a target. As you'll find when you explore the journey of night vision technology from military to civilian use, this range was one of the key drivers for developing later generations.
To put it in real-world terms, let's imagine you're scanning for a coyote:
- Detection (Up to 150 yards): You'll see movement or a dark shape that doesn't belong. You know something's out there, but you can’t tell what.
- Recognition (Up to 100 yards): At this distance, you can probably make out a general shape. You’d know it's an animal on four legs and not a person.
- Identification (50-75 yards): This is the sweet spot. Inside this range, you can confidently identify the target as a coyote and see some detail.
Remember, these distances are for good conditions, like a half-moon night. If it’s pitch black, those numbers drop significantly unless you bring in some help.
Why an IR Illuminator Is Not Optional
The single most important accessory for any Gen 1 unit is an infrared (IR) illuminator. Think of it as an invisible flashlight. It throws out a beam of light that your eyes can't see, but to your night vision device, it's like flipping on a floodlight.
Without an IR illuminator, a Gen 1 device is basically a paperweight in true darkness, like in a thick forest with no moon. But once you turn one on, you can light up that same pitch-black scene and see everything clearly. It's the tool that lets you create your own "moonlight" whenever you need it, making it an absolute must-have for anyone who's serious about using generation 1 night vision.
Practical Uses for Gen 1 Night Vision
So, we've broken down the specs and quirks of generation 1 night vision. Now, where does this tech actually fit in the real world? It's easy to dismiss Gen 1 when you see what newer generations can do, but that would be a mistake. It’s far from useless.
Think of it as the perfect entry point. For a lot of folks, Gen 1 is the ideal tool for casual, short-range observation where having any night vision is a huge leap forward from the naked eye. It’s all about a massive capability boost without the massive price tag.

Backyard Wildlife Observation
Ever hear a rustle in the bushes at night and wonder what’s out there? This is where a Gen 1 monocular really shines. It's the perfect gadget for figuring out what’s making all that noise in the backyard after dark.
You can sit on your porch and watch a fox trot across the lawn or see an owl land in a tree—all without scaring them off with a bright light. For these close-up, low-stakes situations, Gen 1 is more than enough to identify animals and enjoy watching them go about their business.
Camping and Hiking Navigation
A Gen 1 device can be a great companion when you're out camping or hiking on a trail you already know well. It’s not what you’d want for navigating treacherous, unfamiliar territory, but for finding your way from the campfire back to the tent? Absolutely.
Instead of blasting a flashlight and killing your night-adjusted vision, a monocular lets you scan your surroundings quietly. It'll help you spot that tree root before you trip over it and make out reflective trail markers in the distance.
For many people, the goal isn't military-grade surveillance. It's about making a hobby better or adding a bit of safety. In that context, Generation 1 night vision delivers incredible value for what you pay.
Basic Home and Property Security
If you're a homeowner wanting a budget-friendly way to check things out at night, Gen 1 is a solid step up from just squinting into the darkness. It gives you a way to investigate a weird noise or scan your fence line from the security of your house.
This is perfect for figuring out if that sound was just a branch falling or something that actually needs your attention. It’s not built for professional security work, but for basic peace of mind, it’s a practical and affordable tool. You can learn more about where it fits by exploring the applications of night vision for wildlife, search and rescue, and home security to see how different tech serves different needs.
Airsoft and Paintball Games
Gen 1 has found a natural home in recreational sports like airsoft and paintball. Playing at night adds a whole new level of strategy, and having a Gen 1 unit can give you a serious edge without having to spend a fortune on a Gen 2 or Gen 3 device.
Players can spot opponents hiding in the shadows, move around the field more confidently, and coordinate attacks. Since the distances are short and it’s all for fun, the limitations of Gen 1 just don't matter as much. This makes it a smart and very popular choice for enthusiasts.
Comparing Night Vision Generations
To really get a feel for what generation 1 night vision can do, it helps to see how it measures up against the newer, more advanced stuff. Each jump in technology brought some serious improvements, but that also meant a serious jump in price. The road from Gen 1 to Gen 3 is all about fixing the weak spots of the previous generation, leading to devices that are clearer, brighter, and more dependable.

This isn't about crowning a "best" generation. It's about understanding what you get for your money. For a lot of people, the affordable performance of a Gen 1 unit is a perfect match for what they need. For others, the high-end features of Gen 2 or Gen 3 are non-negotiable. Let's dig into what really sets them apart.
The Gen 2 Game-Changer: The Micro-Channel Plate
The single biggest leap forward in night vision came with Generation 2 and one critical new part: the Micro-Channel Plate (MCP). This addition completely changed how the image gets intensified.
Picture the MCP as a super-thin glass disc, like a microscopic honeycomb, packed with millions of tiny, angled tubes. It's placed right after the photocathode. When an electron from the photocathode hits the wall of one of these channels, it knocks loose a few more electrons. These new electrons then bounce off the walls themselves, creating a snowball effect.
By the time the signal exits the plate, that one initial electron has turned into a cascade of thousands. This process massively boosts the image's brightness (gain) and results in a much cleaner, crisper picture with way less of the "fish-eye" distortion you often see around the edges of a Gen 1 image. The MCP is the heart of what makes Gen 2 such a huge step up.
Gen 3: The Pinnacle of Performance
Generation 3 took the solid foundation of Gen 2 and refined it to a razor's edge. The breakthrough here was switching to a gallium arsenide (GaAs) photocathode. This material is way more efficient at turning light particles (photons) into electrons, especially in the near-infrared part of the spectrum that's invisible to our eyes.
So, what does that mean out in the field? It means Gen 3 devices are incredibly sensitive. They can paint a bright, high-resolution picture on a moonless, overcast night under a thick canopy of trees—conditions where Gen 1 and even Gen 2 units would just show you a dark, grainy mess.
This top-tier performance in near-total darkness, combined with an incredibly long tube life often rated for over 10,000 hours, is why Gen 3 is the gold standard for military and law enforcement. Naturally, that level of performance comes with a price tag to match.
A Head-to-Head Comparison
Sometimes the best way to see the differences is to put them side-by-side. Here’s a quick breakdown of how the three main analog generations stack up.
Night Vision Generation Comparison
| Feature | Generation 1 | Generation 2 | Generation 3 |
|---|---|---|---|
| Image Clarity | Noticeable edge distortion; lower resolution. | Sharper image with minimal distortion. | Highest resolution and clarity. |
| Light Gain | Approx. 1,000x | 20,000x – 30,000x | 30,000x – 50,000x+ |
| Low-Light Ability | Heavily reliant on ambient light or IR illuminator. | Good performance in low light. | Excellent performance in extremely low light. |
| Tube Lifespan | ~1,500 hours | ~2,500 – 5,000 hours | ~10,000+ hours |
| Cost | Most affordable, entry-level pricing. | Mid-range, a significant investment. | Highest cost, professional-grade pricing. |
As you can see, each generation offers a clear upgrade in performance and durability, but it comes at a cost. This is precisely why generation 1 night vision is still so popular.
For the price of a single Gen 3 monocular, you could outfit an entire family or group with Gen 1 devices. It's an accessible entry point that provides a genuine night vision capability without requiring a professional-level budget, making it perfect for hobbyists and recreational users.
Choosing Your First Gen 1 Device
https://www.youtube.com/embed/j5NEmkA-7kY
Jumping into the world of generation 1 night vision is a huge step, but picking that first device can feel a little overwhelming. If you get it right, you're set up for a great experience. Get it wrong, and you're stuck with gear that just doesn't fit what you need to do.
The first question you have to ask yourself is simple: What am I going to do with it? Are you scanning a back pasture for coyotes, keeping an eye on your property, or just exploring the woods after dark? Your answer points you directly to the right piece of gear.
Matching the Device Type to Your Activity
Gen 1 gear comes in a few different flavors, and the physical shape—the form factor—is one of the biggest differentiators. You wouldn't use a hammer to turn a screw, and you wouldn't use a bulky set of binos for something that requires a lightweight monocular.
Here’s a breakdown of the common setups you'll see:
- Monoculars: This is where most people start, and for good reason. They're compact, light enough to use with one hand, and great for just about anything—scanning your surroundings, watching for wildlife, or general security checks. Their portability is their biggest strength.
- Binoculars: With two tubes and two eyepieces, binoculars give you a much more natural and comfortable view, especially if you're going to be looking through them for a long time. They’re heavier, sure, but perfect for stationary observation from a deer stand or a fixed position.
- Scopes: These are built for one job: mounting on a rifle. A Gen 1 scope is an affordable way to get into nighttime hunting or pest control at closer distances. They're built tough enough to handle recoil and come with a built-in reticle for aiming.
Picking the right form factor is everything. A heavy binocular rig is just going to get in the way if you're trying to move quickly, while a simple monocular is a perfect fit.
If there's one accessory that's a game-changer for Gen 1, it's a good infrared (IR) illuminator. Most units have a small one built-in, but adding a more powerful, external IR torch will radically boost your effective range and clean up the image. It can light up a pitch-black field like it's daytime.
Essential Features to Look For
Once you've settled on the type of device, a few other details separate the solid gear from the junk. Paying attention to these things will make sure you walk away with a tool you can actually rely on.
First, look at the build quality. You want a housing made from tough polymer or aluminum that can take a few bumps and handle a little rain. This is gear for the outdoors, after all. Also, check the rated battery life—you don't want your vision cutting out at the worst possible moment.
Finally, think about how you might want to mount it. Even if you're buying a handheld monocular, having the option to put it on a tripod for stable viewing or a helmet for hands-free use gives you a ton of flexibility down the road. Thinking about this stuff now saves a lot of headaches later. For a deeper dive, check out our full guide on how to choose the right night vision device for your needs.
Your Top Questions About Gen 1 Night Vision Answered
Diving into generation 1 night vision for the first time is exciting, but it’s natural to have a few questions. Getting a handle on how this technology works, and its little quirks, is the key to getting the most out of your gear. Let's clear up some of the most common things new users wonder about.
Can You Use Generation 1 Night Vision During the Day?
That’s a hard no. Firing up a Gen 1 device in daylight is one of the fastest ways to ruin it. The image intensifier tube is incredibly sensitive to light, designed to multiply what little it can find in the dark.
When you hit it with a flood of bright light, like sunlight, you'll overwhelm and permanently burn the tube. This will leave you with big, ugly black spots in your field of view or, worst-case scenario, a completely dead unit. Rule of thumb: if it’s not dark, the lens cap stays on.
What's That High-Pitched Whine I Hear?
If you hear a faint, high-pitched whine coming from your Gen 1 unit, don't worry—it's not broken. That sound is a classic signature of this generation of night vision.
The noise is coming from the internal power supply. This little workhorse has the job of taking the low voltage from your batteries and cranking it way up to the thousands of volts needed to make the image intensifier tube work. Later generations have much quieter, more sophisticated power supplies, but for Gen 1, that sound is perfectly normal.
Think of it as the engine humming. That whine is just confirmation that the power supply is doing its job, getting ready to turn a pitch-black scene into something you can see.
Do I Really Need an IR Illuminator?
Yes. While a Gen 1 device can work on its own by amplifying ambient light, you should really think of an IR illuminator as a mandatory piece of kit, not an optional add-on.
On a moonless night, deep in the woods, or inside a building with no windows, your Gen 1 unit just won't have enough light to work with. An IR illuminator is basically a flashlight that your eyes can't see but your night vision device can.
Flipping on an IR illuminator gives you an immediate, dramatic boost in performance:
- Brightness: It bathes the area in infrared light, instantly making the image brighter and much more usable.
- Clarity: The extra light cuts down on the grainy "scintillation" effect and sharpens the image, giving you a better view and extending how far you can identify things.
How Long Does a Gen 1 Tube Last?
Compared to newer tech, Generation 1 tubes have a more limited lifespan. You can generally expect to get somewhere between 1,000 to 1,500 hours of runtime out of a Gen 1 tube.
Keep in mind, it's not a sudden death. The tube's performance will slowly degrade over hundreds of hours of use. You'll notice the image getting dimmer and losing some of its crispness as the internal components wear down. To get the most life out of it, be religious about avoiding bright light, switch it off when you're not using it, and always store it with the lens cap securely on.
Ready to find the perfect gear to start exploring the night? At Superior Tactical LLC, we offer a curated selection of tactical optics and accessories to get you mission-ready. Our team provides straightforward guidance to help you make the right choice for your needs.
Explore our full catalog of night vision and tactical gear at https://superiortac.com.