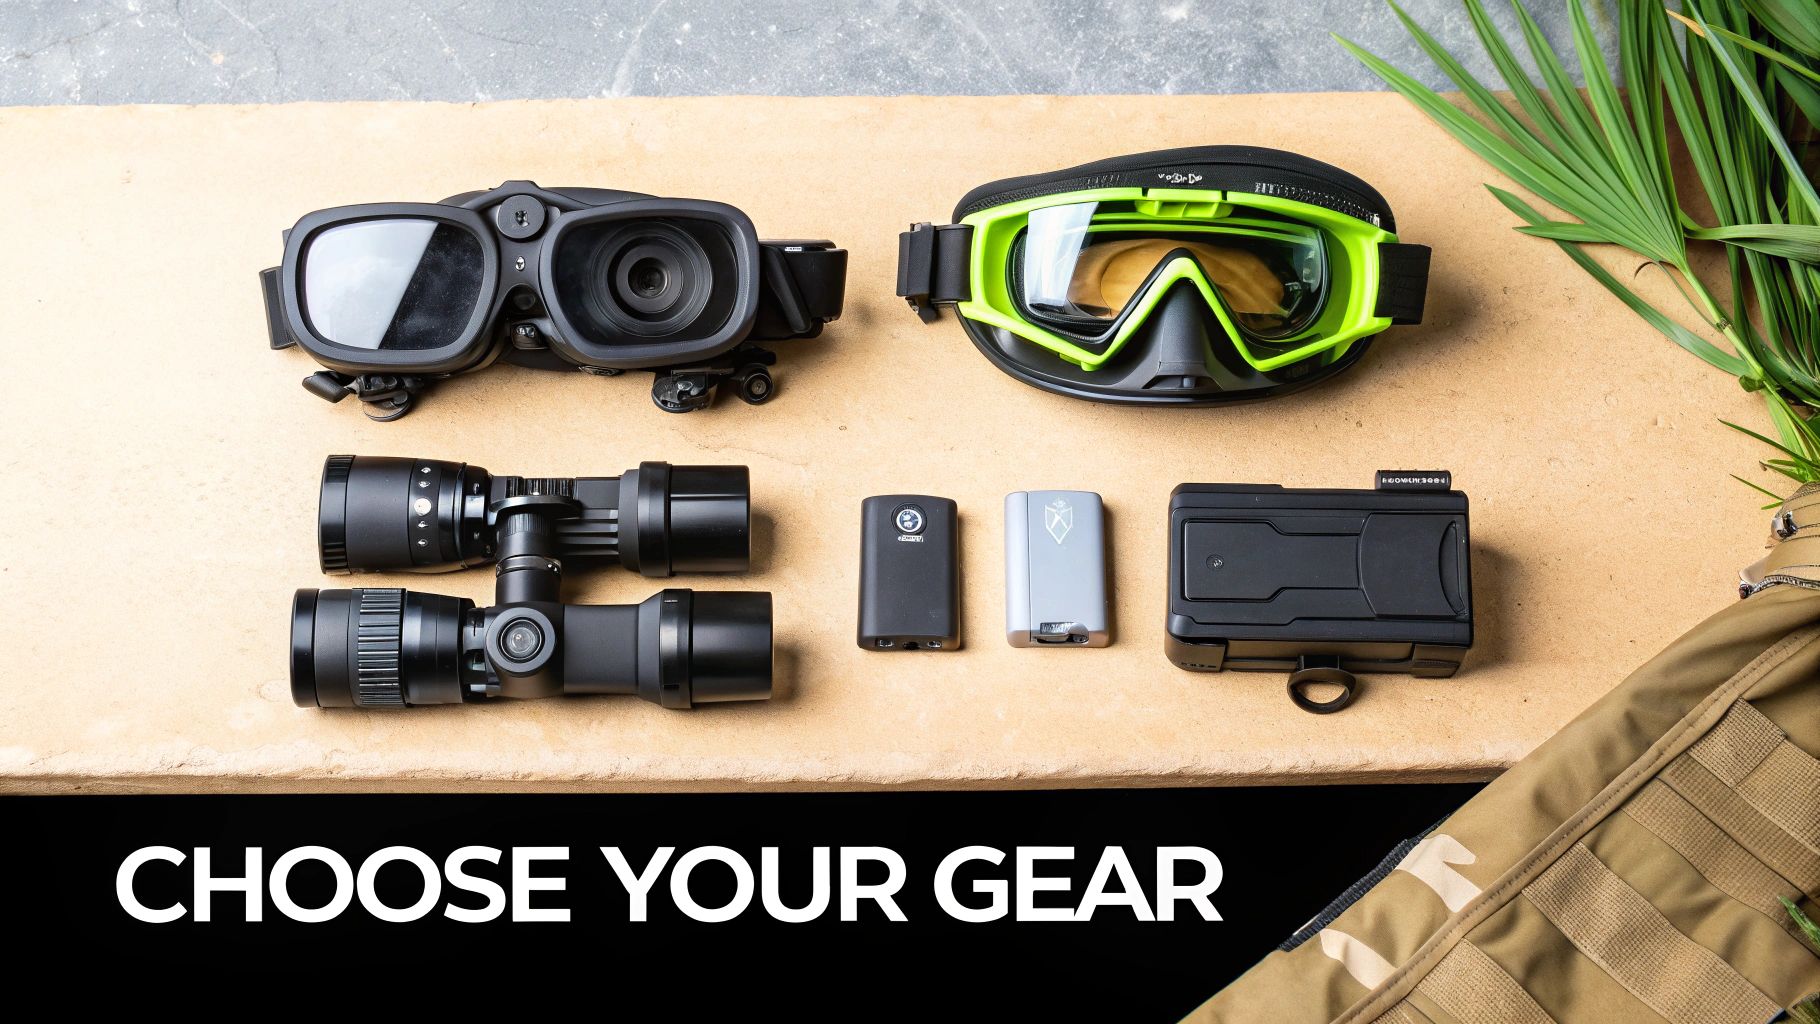
A Guide to a Camera With Night Vision
A modern camera with night vision isn't just another piece of gear—it's what gives you the upper hand when the sun goes down. For law enforcement, hunters, and anyone tasked with protecting critical assets, this technology can mean the difference between seeing a threat and being completely blind to it.
Seeing in the Dark: How Night Vision Works
Ever wondered how you can see crystal-clear images in near-total darkness? It’s not magic. It’s some seriously impressive science and engineering that lets a night vision camera turn an otherwise invisible world into a detailed picture.
This technology has come a long way from the clunky, heavy equipment of the past. Today's devices are lighter, sharper, and more accessible than ever, which is why we're seeing them everywhere. The global market for night vision surveillance cameras was recently valued at over USD 230 billion and is expected to hit USD 1.57 trillion soon, growing at an astonishing rate of 23.5% annually. That’s not just a niche; it’s an explosion.
Why You Need to Know the Difference
Getting a handle on the fundamentals is the most important step in choosing the right gear. If you don't know what makes these systems tick, you could easily end up with a very expensive paperweight that doesn't fit your actual needs. This guide is here to make sure that doesn't happen.
We're going to break down the three main ways these cameras see in the dark:
- Image Intensification: This is the classic "green screen" night vision. It takes tiny amounts of ambient light—from the moon, stars, or distant city glow—and amplifies it thousands of times to create a visible image.
- Active Infrared (IR): Think of this as an invisible flashlight. Common in security cameras, these systems blast an area with infrared light that's invisible to the human eye but perfectly visible to the camera's sensor.
- Thermal Imaging: This is a whole different ballgame. Instead of seeing light, thermal cameras see heat. This allows you to spot a warm body through pitch-black darkness, fog, smoke, and even camouflage.
Understanding how these technologies differ is the key to picking the right tool for the job. For a more detailed breakdown of the physics behind it all, check out our guide on how night vision works. Once you've got that down, you'll be ready for the next section, where we’ll get into the nitty-gritty specs that separate the high-performance gear from the rest.
The Three Core Night Vision Technologies
If you want to own the night, you first need to understand the "magic" that lets a camera with night vision see in the dark. This isn't a one-size-fits-all game. There are three completely different ways to pierce the darkness, and each has its own strengths and weaknesses on the ground. Getting these fundamentals straight is the first and most important step toward choosing gear that won’t fail you when it counts.
The stakes for picking the right tech are getting higher. Night vision is the cornerstone of tactical advantage in low-light operations, and the global market reflects that—it's projected to climb from USD 8.57 billion to USD 12.91 billion, a growth rate of 8.5% CAGR. This isn't just about cool gear; it's driven by serious defense and security needs that demand the right tool for the job.
The image below highlights the main groups fueling this demand: law enforcement, hunters, and security pros. Each one has a different mission, which is exactly why knowing the tech inside and out is so critical.

As you can see, a hunter tracking hogs has different needs than an officer clearing a building. Let's break down the technologies that serve them.
To simplify things, here's a quick look at how these technologies stack up against each other.
Night Vision Technology at a Glance
| Technology Type | How It Works | Best For | Key Limitation |
|---|---|---|---|
| Image Intensification (I²) | Amplifies tiny amounts of existing ambient light (starlight, moonlight) thousands of times. | Navigating terrain and positively identifying targets with high detail. | Requires at least some ambient light to function; ineffective in total darkness. |
| Active Infrared (IR) | Projects its own invisible infrared light (like an invisible flashlight) and reads the reflection. | Surveillance in zero-light environments (e.g., warehouses, basements). | Limited range; the IR illuminator can be seen by other night vision devices. |
| Thermal Imaging | Detects differences in heat signatures, creating an image based on temperature, not light. | Detecting living targets through camouflage, smoke, or fog at long distances. | Provides less detail for identification; you see a heat shape, not a clear face. |
This table gives you the high-level view, but the real expertise comes from understanding the details of each.
1. Image Intensification: The Classic Green Glow
When people talk about night vision, this is usually what they picture: that iconic green-hued image from the movies. This is image intensification (I²), and the best way to think of it is as a massive light amplifier.
At the heart of the device is an image intensifier tube. It grabs whatever tiny amount of ambient light it can find—from stars, the moon, or even distant city lights—and multiplies those photons by the thousands. This creates a bright, usable image. The classic green color is no accident; the human eye is most sensitive to green, making it easier to see detail for long periods.
Key Takeaway: Image intensification is king when you need to see details. Because it enhances the existing scene, it's perfect for navigating terrain and positively identifying a target.
The performance of I² devices is broken down into "Generations":
- Generation 1 (Gen 1): This is the entry point. It's affordable and works, but you'll notice some distortion around the edges of the image (a "fish-eye" effect). It needs a decent amount of moonlight to be truly effective.
- Generation 2 (Gen 2): A major step up. Gen 2 introduced a micro-channel plate (MCP), which boosts the light amplification way beyond Gen 1. The result is a brighter, sharper image with less distortion, making it a solid choice for serious professional use.
- Generation 3 (Gen 3): The gold standard for military and law enforcement units. Gen 3 tubes provide the cleanest, brightest images in near-total darkness, offering the best resolution and performance you can get.
2. Active Infrared: The Invisible Flashlight
So, what do you do when there's no ambient light at all? Think inside a sealed building, a deep cave, or a moonless, overcast night in the middle of nowhere. That's where Active Infrared (IR) technology takes over. It doesn't find light—it makes its own.
An active IR camera with night vision uses a built-in IR illuminator. This is basically a flashlight that shines a beam of light in the infrared spectrum, which is totally invisible to your eyes. The camera's sensor, however, is built to see this IR light perfectly.
You see this tech everywhere in security cameras. The device floods an area with that invisible IR light, which bounces off everything in the room and comes back to the lens, creating a crisp black-and-white picture. It’s a dead-simple, reliable way to get a clear view in absolute darkness. For a deeper dive into the technical specs, check out our detailed comparison of night vision technologies.
3. Thermal Imaging: Seeing Heat, Not Light
This brings us to the real game-changer: thermal imaging. Unlike the other two, thermal couldn't care less about light. It sees an entirely different part of the spectrum: heat.
Everything—from a person to a rock to a recently driven truck—gives off thermal energy as long as its temperature is above absolute zero. A thermal imager captures these tiny differences in heat and builds a picture, called a thermogram. Hotter objects like people, animals, and engines glow brightly, while cooler background objects remain dark.
This gives thermal a massive tactical advantage:
- It works in zero light, period.
- It punches right through visual barriers like smoke, fog, and even light brush.
- It's the ultimate tool for detection, because you can't hide a heat signature with camouflage.
Because it sees heat, a thermal device is for detection, not necessarily identification. You’ll spot a heat signature from a huge distance, long before you could see it with an I² device, but you won't be able to make out facial features. It’s the ultimate early-warning system.
Cracking the Code: What Night Vision Specs Actually Mean
Stepping into the world of night vision is like learning a new language. It's full of acronyms and numbers that can feel intimidating, but they're the key to understanding how a device will perform when the lights go out. Getting a handle on these specs is the difference between buying a game-changing tool and a very expensive paperweight.
Let's cut through the jargon and translate the spec sheet into what you’ll actually see in the dark.

Whether you’re eyeing a top-tier image intensifier or a digital security camera, these are the numbers that separate the serious gear from the toys.
The One Number to Rule Them All: FOM in Image Intensifiers
For traditional image intensifier (I²) tubes, there’s one number that tells you almost everything you need to know: Figure of Merit (FOM). Think of it as the tube’s overall grade—a single score that gives you a quick and reliable measure of its performance. A higher FOM means a cleaner, sharper image. It's that simple.
FOM isn't magic; it’s just a calculation using two other crucial specs:
- Resolution (Lp/mm): This is all about detail. Measured in line pairs per millimeter (Lp/mm), it tells you how sharp the image is. A high resolution lets you distinguish between a branch and an antler, or identify a person's face from a distance.
- Signal-to-Noise Ratio (SNR): This is the measure of image clarity, especially when it gets really dark. The "signal" is the picture you want to see, and the "noise" is that fuzzy, sparkling static that can wash out the image. A high SNR means the tube cuts through the noise to deliver a clean picture, even on a moonless night.
FOM = Resolution (Lp/mm) x Signal-to-Noise Ratio (SNR)
A top-tier Gen 3 tube will often have a FOM of 2000 or higher, which is outstanding. Anything below 1600 is generally considered lower-end. This single number is your best friend when comparing I² devices.
Key Specs for All Types of Night Vision
Beyond FOM, a few other numbers apply to everything from digital scopes to thermal imagers. These specs define what the device can do for you in the real world.
Effective Range
This is the first question everyone asks, but the answer is always "it depends." Effective range isn't a hard number. It's totally dependent on the environment—how much starlight you have for an I² device, or the temperature difference for a thermal unit. Manufacturers often list detection, recognition, and identification ranges. Pay close attention to which one they're advertising, as "detection" (seeing a blob) is a whole lot different than "identification" (knowing what that blob is).
Digital Resolution
For digital and thermal cameras, resolution is measured in pixels, just like your TV (e.g., 640×480 or 1920×1080). More pixels on target mean a sharper, more detailed image, which is crucial for making positive IDs at a distance. With thermal, high resolution is what lets you tell the difference between a raccoon and a coyote.
IR Wavelength: 850nm vs. 940nm
If your camera uses a built-in or external IR illuminator, the light's wavelength is a major tactical consideration. You're making a trade-off between performance and stealth.
- 850nm IR: This is the workhorse. It throws a powerful beam of light that gives you a much longer illumination range and a brighter picture. The catch? The emitter gives off a faint red glow that’s visible to the naked eye and sticks out like a sore thumb to anyone else with night vision.
- 940nm IR: This is your stealth option. Often called "covert IR," the emitter is completely invisible to human eyes. The trade-off is significant: its illumination power is roughly 30-40% weaker than an 850nm illuminator, which means you're sacrificing a good chunk of your effective range.
The right choice depends entirely on your needs. For perimeter security on your property, 850nm is probably fine. If you’re trying to remain unseen, 940nm is the only way to go.
Critical Specs Just for Thermal Imagers
Thermal optics operate differently, so they have their own set of specs to watch out for.
Refresh Rate (Hz)
Measured in Hertz (Hz), the refresh rate is how many times per second the image updates. This is absolutely critical if you plan on tracking anything that moves.
A slow refresh rate, like 9Hz, creates a choppy, lagging video that makes it nearly impossible to follow a running hog or a moving vehicle. A high refresh rate of 30Hz or 60Hz delivers a smooth, fluid image that feels like watching a live video. For any dynamic use like hunting or surveillance, a high refresh rate isn't just a luxury—it's a necessity.
Don't Forget the Practical Stuff
Finally, don't get so lost in the numbers that you forget about how you'll actually use the gear.
- Mounting Options: How can you use it? Can it be mounted on a helmet for hands-free use, clipped onto a rifle, or is it just a handheld spotter? A device like a PVS-14 monocular is so popular because its mounting versatility makes it a true multi-tool.
- Power Source: Check what kind of batteries it takes. Does it run on common AAs or CR123s that you can find anywhere, or does it need a special rechargeable pack? You don't want your gear to die in the field because you can't find the right power source.
- Weight and Durability: Ounces equal pounds, and pounds equal pain. Every ounce matters on a long night. Also, look for a good durability rating like IP67, which means it's sealed against dust and can survive being submerged in water. Your gear needs to be as tough as you are.
Choosing the Right Gear for Your Mission
Knowing the tech is one thing, but making it work for you in the field is a whole different ball game. The "best" night vision device is useless if it's the wrong tool for the job. This is where we bridge the gap between specs on a page and performance on a mission, matching the right gear to what you actually need to do.
The ideal setup depends entirely on your objective. A rig perfect for spotting hogs at 300 yards is a terrible choice for clearing a building, and vice versa. Let's break down the go-to configurations for the most common applications.
For Law Enforcement and Tactical Teams
When the stakes are this high, performance is everything. For officers and tactical professionals, total situational awareness is the only goal. Every second counts, and the ability to move, identify, and communicate in the dark can be the difference between life and death.
The undisputed gold standard here is a helmet-mounted, high-FOM Gen 3 dual-tube goggle system.
- Why Dual Tubes? Two tubes give you true depth perception. That’s critical for moving fast through complex spaces like buildings or over rough ground. It also dramatically cuts down on eye strain during long operations and makes tasks like driving or handling gear feel natural.
- Why High-FOM Gen 3? These units produce the cleanest, brightest, and most detailed images money can buy. A high Figure of Merit (2000+) guarantees maximum clarity even in near-total darkness, which is essential for positive threat identification at a distance and making split-second, justifiable decisions.
This setup offers unparalleled awareness and, just as importantly, keeps both hands free for your weapon, comms, or other critical tasks.
For the Serious Hunter
Modern hunting is a game of precision. The goal isn't just to see something out there; it's to properly identify the animal, accurately judge the distance, and ensure a clean, ethical harvest. This demands a two-part system that plays to the unique strengths of both I² and thermal imaging.
The killer combo for hunting is a Gen 3 monocular for scanning paired with a thermal weapon scope.
- Scanning with a Monocular: A quality Gen 3 monocular, like a PVS-14, is your best friend for getting to the stand and keeping an eye on your surroundings. You can see every detail of the terrain, spot other hunters, and move silently without giving away your position.
- Targeting with Thermal: The moment you detect movement, the thermal scope takes over. It slices right through darkness, fog, and brush to make that heat signature pop. It is the ultimate detection tool, letting you spot an animal's body heat long before you could ever make out its shape.
This hybrid approach delivers the best of both worlds. You use the incredible detail of image intensification to navigate and understand the environment, then switch to the raw detection power of thermal for the final, critical moments of the hunt.
For Perimeter Security
Protecting a piece of property, whether it's your home or a larger facility, is all about creating layers of security. The mission is early detection and reliable identification, buying you the maximum amount of time to react. A mix of fixed and mobile systems is the way to build a truly robust security net.
A highly effective setup combines fixed IR security cameras with a long-range thermal monocular for patrols.
Fixed IR cameras provide constant, automated monitoring of critical areas like gates and doorways. And now, new AI-powered systems are a huge leap forward, cutting false alarms by 30-50% by using real-time analysis to tell the difference between a raccoon and a real threat.
Adding a powerful handheld thermal to the mix is a true force multiplier. It lets you actively patrol and scan the perimeter, spotting potential intruders far beyond the range of your fixed cameras and through visual cover like thick fog or bushes.
For the Prepared Individual
For anyone focused on general preparedness, versatility is king. You need a single piece of gear that can adapt to anything, from navigating a blackout to observing your property from a static position.
The undisputed champion of versatility is the PVS-14 Gen 3 monocular.
This one device can be:
- Handheld: Use it as a simple, powerful spotting scope.
- Helmet-Mounted: Flip it down for hands-free movement and navigation.
- Weapon-Mounted: Place it behind a red dot for a capable low-light aiming solution.
Its incredible adaptability makes it the Swiss Army knife of night vision. A high-quality PVS-14 is a rock-solid investment that can fill multiple roles, making it the perfect choice for someone who needs one camera with night vision to cover all the bases. If you want a deeper dive, check out our guide on how to choose the right night vision device for your needs.
Recommended Night Vision Configuration by Use Case
To make it even clearer, we've boiled down our recommendations into a simple chart. Think of this as your cheat sheet for matching the mission to the gear.
| Use Case | Primary Technology | Recommended Gear | Key Advantage |
|---|---|---|---|
| Law Enforcement | Gen 3 I² | Dual-Tube Goggles (DTNVS, RNVG) | True depth perception & hands-free operation |
| Hunting | Hybrid (I² + Thermal) | Gen 3 Monocular + Thermal Scope | Ultimate detection & positive identification |
| Perimeter Security | Hybrid (IR + Thermal) | Fixed IR Cameras + Thermal Monocular | 24/7 monitoring & long-range patrol detection |
| Preparedness | Gen 3 I² | PVS-14 Monocular | Maximum versatility for any scenario |
Each of these setups is optimized for a specific set of challenges. By understanding your primary needs first, you can avoid buying the wrong tool and invest in a system that will give you a decisive advantage when the lights go out.
Looking After Your Gear: Legal and Maintenance Realities
So, you've decided to invest in a serious piece of night vision gear, maybe even a top-of-the-line Gen 3 unit. That's fantastic, but owning this kind of tech isn't just about what you do with it in the field. It comes with some real-world responsibilities, both legally and in terms of simple, common-sense care. Getting this wrong can land you in hot water or, just as bad, turn your expensive new toy into a paperweight.
First, let's talk about the big one: International Traffic in Arms Regulations (ITAR). This is a set of federal rules you absolutely need to know about. The U.S. government classifies high-end night vision, especially anything with Gen 3 tubes, as a defense article. In simple terms, it's considered military-grade technology. That means it's illegal to export it or even carry it out of the United States without getting the government's explicit blessing.
The Bottom Line: ITAR exists to keep advanced U.S. military tech out of the wrong hands. For you, this is non-negotiable. Trying to sell, ship, or even take your Gen 3 device on a trip outside the U.S. is a serious federal crime. This is exactly why you buy from a trusted, U.S.-based dealer like Superior Tactical—it guarantees your gear is legit and the purchase is above board.
Protecting Your Investment: Maintenance That Matters
Once you've navigated the legal side, you need to think about keeping your gear in fighting shape. Night vision devices are precision instruments, not hammers. Their delicate insides need a little TLC to avoid permanent, and very expensive, damage.
The absolute number one rule? Keep it away from bright light. This is the mortal enemy of any image intensifier (I²) tube. Pointing a powered-on unit at a streetlight, a car's high beams, or—worst of all—the sun will instantly burn the phosphor screen. This leaves permanent black spots in your vision, effectively ruining the device. When you're not using it, that daylight lens cap stays on. No exceptions.
Beyond that golden rule, a bit of routine upkeep will go a long way in preserving your NVD for years to come.
- Keep It Clean: Only use proper lens cleaning cloths and solutions. Think of your NVD's lenses like the glass on a high-end camera. Anything abrasive will scratch the coatings and degrade your image.
- Mind the Batteries: If you're putting the device away for a while, take the batteries out. A leaking battery can corrode the electronics, a messy and often unfixable problem.
- Store It Smart: A hard, padded case is your best friend. Keep it somewhere cool and dry to protect the unit from bumps, moisture, and wild temperature swings that can mess with the internal components.
Mastering your legal duties and these simple maintenance habits will ensure your night vision camera remains a reliable, high-performing tool for a decade or even longer.
Your Final Night Vision Checklist
Look, choosing the right night vision setup is a big commitment. We’ve gone deep into the tech, the specs, and what it all means in the real world. Now, let’s tie it all together and make sure the gear you choose is the gear you actually need.
Before you make a move, take a minute to walk through these key questions. Being brutally honest with your answers will cut through the noise and point you straight to the right rig for your mission.
The Four Core Questions
What am I really doing with this? Will you be on the move, needing to keep your hands free for navigation or a weapon? Or are you setting up in a static position to observe? This is the fundamental split between head-mounted goggles, a handheld monocular, or a dedicated weapon sight.
How dark is dark? Think about your typical operating environment. Are you under open, starry skies with some ambient light to work with, or are you clearing a pitch-black basement with no windows? This is the critical question that will push you toward either image intensification or a thermal/IR setup.
How far out do I need to see? Is your goal to spot a warm body at 500 yards, or do you need to positively identify a threat at 100 yards? Your answer here will determine whether you need the long-range detection of thermal or the target identification clarity of I².
What's my budget? Let's be realistic. While everyone wants the best, your budget dictates what's possible. It might mean that a high-performance Gen 2+ unit is a smarter buy for you than stretching for a Gen 3 system. Good gear you can afford is better than great gear you can't.
Answering these four questions is the single best way to match the technology to your actual needs. It gets you out of the weeds of specs and focuses on what will actually work for you in the field.
Think of this as your final gut check. Once you have clear answers, you'll be in a much better position to pick the right system. And when you're ready, our team is here to talk through the options and make sure you get the right gear for the job.
Frequently Asked Questions
Stepping into the world of night vision can feel a bit overwhelming. Let's tackle some of the most common questions we get from folks trying to pick the right gear.
Green Versus White Phosphor
This really boils down to personal preference and what your brain interprets as a clearer image. The classic "green glow" of traditional night vision isn't just for movies; the human eye is most sensitive to shades of green, which makes it less strenuous to look at for hours on end.
On the other hand, many operators are now switching to white phosphor. It produces a black-and-white image that can make the scene feel more natural. For a lot of users, this sharp contrast makes it easier to pick out details, judge distances, and identify potential threats hiding in the shadows. It costs a bit more, but it’s quickly becoming the go-to for serious tactical use.
Can Night Vision See Through Fog or Smoke?
This is a fantastic question because it gets right to the heart of how different technologies work.
- Image Intensification (I²): Nope. An I² tube works by amplifying existing ambient light. Since fog, thick smoke, or heavy dust physically block that light from reaching the device, all you’ll see is a bright, glowing wall of haze.
- Thermal Imaging: You bet. Thermal doesn't care about light; it sees heat. It can punch right through smoke, fog, and even light foliage to spot a heat signature, making it the undisputed champ for detection in bad weather or obscured environments.
How Long Do Image Intensifier Tubes Last?
Modern Gen 3 tubes are built to last. We're talking about a typical lifespan of over 10,000 hours. For most people, that's more than a decade of solid, reliable use before you'd even begin to notice a drop in performance.
The secret is treating it with respect. The number one thing you can do to protect your investment and maximize its life is to avoid exposing it to bright light when it's on.
Honestly, we see more tubes fail from being dropped or zapped by a sudden bright light than from simply wearing out. Treat it like the sensitive piece of optical equipment it is, and it will serve you for years to come.
Ready to choose the right gear for your mission? The expert team at Superior Tactical LLC is here to help you select the perfect camera with night vision and tactical accessories. Get expert advice on our website.