Night Vision for Hunting A Beginner’s Guide
Night vision technology is a complete game-changer, letting you see with incredible clarity when it’s nearly pitch-black outside. It fundamentally extends your hunting day, opening up the night. By either amplifying the tiniest bit of available light or picking up on heat signatures, it makes nocturnal predators and pests easy to spot. This tech gives you a massive advantage, boosting both your safety and your success rate.
Why Modern Hunters Are Turning to Night Vision
Picture the woods after sunset—a whole other world comes alive right after you’ve packed it in for the day. For most of hunting history, that world was off-limits. Once the sun went down, the hunt was over. Not anymore. Today, night vision for hunting has gone from a secret military tool to a must-have piece of gear for any serious hunter.

This isn’t about some complicated science experiment; it’s about a simple, powerful advantage. Think of a night vision device as a light-gathering superpower. It takes faint traces of starlight or moonlight—light your naked eye can’t do anything with—and cranks up the brightness thousands of times. The result is a crisp, clear view of a landscape that would otherwise be just a black void.
The Strategic Edge After Sundown
Being able to see in the dark gives you a few key advantages that completely change how you hunt. The biggest one? It unlocks the prime time when many of your target species are on the move. Animals like hogs, coyotes, and other predators do most of their feeding and moving under the cover of darkness.
By turning night into day, you’re no longer just a visitor in their world; you become an active participant. This strategic advantage is the primary reason hunters are adopting this technology at an increasing rate.
It’s not just about seeing, either. Night vision gives you a real leg up on responsible and effective hunting. The core benefits really boil down to this:
- Enhanced Safety: Let’s be honest, stumbling around in the dark is a great way to get hurt. Night vision lets you spot holes, rocks, and other hazards, keeping you aware of your surroundings so you can get home in one piece.
- Precise Target Identification: The first rule of ethical hunting is knowing exactly what you’re aiming at. Night vision gives you the clarity to tell a coyote from a stray dog, ensuring you take a clean, responsible shot every time.
- Increased Success Rates: It’s simple math. More time in the field means more opportunities. You can pattern and hunt animals when they’re most active and least wary, which naturally leads to more successful trips.
Ultimately, adding night vision to your kit is about more than just a cool new gadget. It’s a total shift in hunting strategy. For those who want to dive deeper, it’s worth exploring how night vision goggles can improve your hunt and provide that undeniable edge. It allows you to hunt smarter, safer, and more effectively in conditions that used to send everyone else home.
Understanding the Core Night Vision Technologies
Before you can pick the right night vision for your hunt, you have to get a handle on what’s going on under the hood. It’s not a one-size-fits-all world. The two big players on the field are Image Intensification (I²) and Thermal Imaging, and they see the world in completely different ways.
Think of Image Intensification as a light amplifier on steroids. It scoops up whatever tiny bit of ambient light is available—from the moon, stars, or even a distant barn light—and multiplies it thousands of times. This is what creates that classic, glowing green picture most people think of when they hear “night vision.”
Thermal imaging is a different beast altogether. It doesn’t see light; it sees heat. Every single thing out there, living or not, gives off thermal energy. A thermal scope picks up on these tiny temperature differences and paints a picture from them, usually making warm objects glow bright white, yellow, or red against a dark background.
Image Intensification: The Light Multiplier
The magic behind I² is a component called the image intensifier tube. This is the heart and soul of the device. When faint light particles (photons) enter the scope, they hit a special screen called a photocathode, which knocks electrons loose.
These electrons are then shot through a microchannel plate—a tiny disc packed with millions of microscopic channels. As the electrons zip through, they bounce off the channel walls, creating a massive chain reaction that multiplies their numbers by tens of thousands. Finally, this supercharged flood of electrons slams into a phosphor screen, lighting it up to create the image you see through the eyepiece.
The real strength of Image Intensification is the sheer detail it provides. You can see textures, shadows, and depth, making it much easier to identify exactly what you’re looking at and judge the terrain.
Because I² technology works by amplifying light, its performance is directly linked to how much light is available. On a clear night with a full moon, the view will be stunningly crisp. But on a cloudy, moonless night deep in the timber, you’ll likely need an IR illuminator—basically an infrared flashlight that’s invisible to the naked eye—to give the unit enough light to work with.
Thermal Imaging: The Heat Detector
Thermal imaging works on a completely different principle. It couldn’t care less if it’s bright sunshine or pitch-black darkness. Its sensor, known as a microbolometer, reads infrared energy—heat—and builds a visual map of the temperature differences it detects.
This is why thermal is the undisputed king of detection. A warm-bodied animal like a coyote or a hog will pop out from the cooler background like a lightbulb. It can also see right through smoke, fog, and light brush that would easily hide an animal from an I² device.
This unique ability gives thermal a huge edge in certain hunting situations.
- Detection Through Cover: Animals partially hidden by tall grass or brush are easily spotted because their heat signature shines right through.
- Tracking Wounded Game: A fresh blood trail is warmer than the cool ground, making it glow on a thermal scanner for a while after the shot.
- Weather Immunity: Heavy fog or dust that would completely blind traditional night vision has almost no effect on a thermal imager’s power to spot heat.
The tradeoff? Thermal images don’t give you the same level of detail as I². You see a very clear heat shape, but you won’t make out the texture of an animal’s fur or the fine points on a rack of antlers. The background can also look a bit flat and washed out since it isn’t rendering light and shadows. You can dive deeper into the nuts and bolts by reading up on night vision technology explained thermal imaging vs digital night vision vs analog night vision to see a full comparison.
Image Intensification vs Thermal Imaging for Hunting
Deciding between the two really comes down to what you need your device to do. Are you trying to spot targets from a distance, or do you need to positively identify them up close? This table breaks down the core differences from a hunter’s perspective.
| Feature | Image Intensification (I²) | Thermal Imaging |
|---|---|---|
| Primary Function | Identification | Detection |
| How It Works | Amplifies ambient light | Detects heat signatures (infrared energy) |
| Image Detail | High. Shows texture, depth, and shadows. | Lower. Shows heat shapes and silhouettes. |
| Sees Through Cover | No. Obscured by fog, smoke, and foliage. | Yes. Can detect heat through smoke, fog, and light brush. |
| Light Dependency | High. Requires some ambient light or an IR illuminator. | None. Works in absolute darkness. |
| Best For | Target identification, navigation, assessing terrain. | Scanning for game, tracking, hunting in poor weather. |
| Common Use | NV Scopes, Goggles | Scanners, Scopes |
Ultimately, the choice boils down to your primary goal. For pure, fast, and foolproof detection, nothing on the market beats thermal. But for positive identification and getting a clear, detailed picture of your target and its surroundings, Image Intensification is the tried-and-true classic.
How to Choose the Right Night Vision Gear
Diving into the world of night vision hunting can feel like you’re learning a new language. You’ll hear terms like “Gen 3,” “monocular,” and “detection range” thrown around, and it’s easy to feel a bit lost. But don’t worry—choosing the right gear is actually pretty straightforward once you break it down. It all comes down to a few key decisions based on how you hunt.
The first thing to sort out is the type of device you need. This isn’t just about what it looks like; it’s about what it’s built to do. Each form factor is a tool designed for a specific job.
- Scopes: These are your workhorses. They mount directly to your rifle and are built for one thing: aiming and taking the shot. They give you the magnification and built-in reticle you need for precision.
- Monoculars: Think of these as the ultimate spotters. You hold them in your hand or mount them on a helmet. They’re fantastic for quick scanning, letting you keep one eye adjusted to the natural darkness while you sweep an area.
- Binoculars/Goggles: By using both eyes, these give you a real sense of depth perception and a more natural field of view. This makes them perfect for long stakeouts or navigating rough terrain in the dark.
For most hunters I know, the sweet spot is a combination. A thermal monocular is incredible for sweeping a field and picking up a heat signature in seconds. Once you’ve got a target, you switch to your dedicated night vision scope for positive identification and the shot.
Understanding the Generations of Power
When people talk about traditional Image Intensification (I²) technology, “Generations” are the best measure of performance. It’s a lot like the horsepower of an engine—each generation is a huge leap forward in power, clarity, and, of course, price.
Gen 1 is your starting point. It’s the oldest tech on the block, which makes it the most affordable. It can amplify existing light a few thousand times. It’ll get the job done on a moonlit night, but you’ll notice some distortion around the edges, almost like a “fish-eye” lens. In really dark conditions, an IR illuminator isn’t just helpful; it’s required.
Gen 2 is where things get serious. This generation offers a much cleaner and brighter image with way less distortion. These units can amplify light by around 20,000 times. For a lot of hunters, Gen 2 is the perfect balance of performance and price, working really well in most low-light situations.
Gen 3 is the top of the line, the same stuff used by military and law enforcement. We’re talking light amplification of 30,000-50,000 times or more. This gets you the sharpest, brightest images possible, even on the darkest, most overcast nights. As you’d expect, that top-tier performance comes with a top-tier price tag.
Then there’s Digital Night Vision. This is a different beast altogether. It works like a digital camera, using a sensor to capture light and show it on a tiny screen. While it can’t quite hang with a Gen 3 tube in near-total darkness, digital brings its own perks to the table. You can record video, use it in full color during the day, and you never have to worry about a bright light damaging the unit.
Key Specifications That Matter Most
Once you’ve got the form factor and generation figured out, a few technical specs will make or break your experience in the field. If you focus on these, you can cut through the marketing fluff and find gear that actually works for your hunting style.
- Resolution: This is all about image clarity, measured in line pairs per millimeter (lp/mm). A higher number means a sharper, more detailed picture. That’s what lets you tell the difference between a coyote and a calf from a few hundred yards out.
- Detection Range: This spec tells you the maximum distance at which you can spot a man-sized target. But be realistic here. “Detection” just means you can see something is there. The “recognition” range (knowing it’s an animal) and “identification” range (knowing it’s a hog) will be much, much shorter.
- Battery Life: This is huge. Nothing’s worse than your gear dying in the middle of a long night. Pay attention to the runtime, but also check what kind of batteries it takes. Standard AA or CR123 batteries are a lot easier to find in a pinch than some proprietary battery pack.
This simple chart can help you visualize the two main paths in night vision technology.
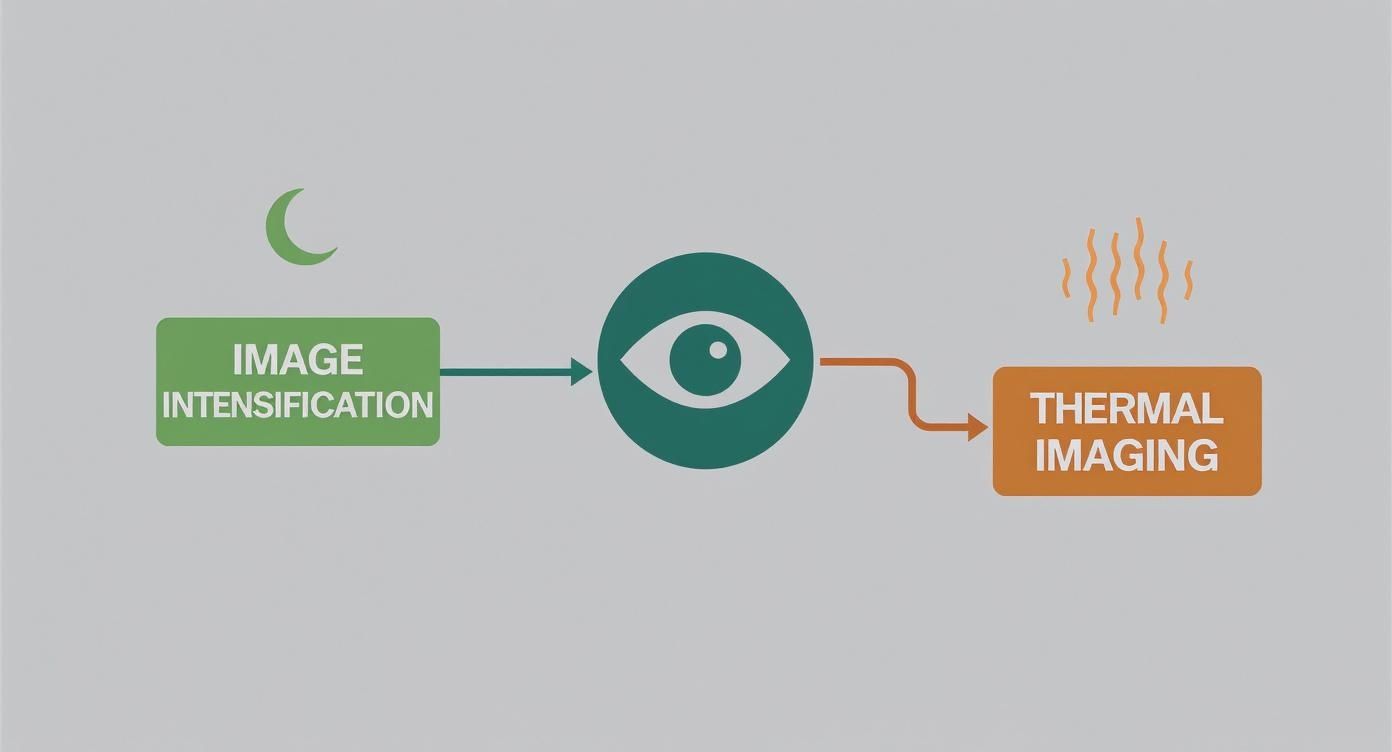
As you can see, you’re either choosing to amplify existing light (Image Intensification) or detect heat signatures (Thermal Imaging). Both get you there, but they paint a very different picture of the night.
Building Your Personalized Checklist
There’s no such thing as the single “best” night vision device for hunting. There’s only the best device for you. What you need comes down to your budget, what you’re hunting, and where you’re hunting it.
The market for this gear is booming because more hunters are seeing the advantage. The night vision riflescope market was valued at around USD 1.3 billion in 2023 and is expected to hit nearly USD 2.5 billion by 2032. That growth is being driven by people like us, with hunting making up roughly 60% of the civilian market.
Pro Tip: Your target animal dictates your needs. A coyote hunter shooting across a 300-yard field needs far more range and clarity than a hog hunter working in dense brush at 75 yards.
To narrow down your options, just ask yourself a few honest questions:
- What is my realistic budget? Let’s be real, this is the biggest factor. It will point you toward the right generation or technology from the get-go.
- What am I hunting? Coyotes, hogs, and bobcats all behave differently and live in different types of terrain.
- What is my typical engagement distance? If you’re shooting long-range, you’ll need to invest in better resolution and magnification.
- What are my local light conditions? Are you in wide-open fields under a starry sky, or deep in a dark forest with a thick canopy?
Answering these will lead you straight to the right combination of tech, specs, and form factor. For an even deeper dive, check out our complete guide on how to choose the right night vision device for your needs. Making a smart, informed choice now means your investment will pay off with successful and ethical hunts for years to come.
Your First Night Out in the Field
There’s nothing quite like holding that new night vision scope. The real fun, though, starts when you step out into the pitch-black. Getting comfortable and confident with your gear is what separates a frustrating night from a successful hunt, and this is where we bridge that gap from theory to practice.
Let’s get one thing straight: an accurate shot starts with a proper zero. With night vision for hunting, this isn’t just important—it’s everything. A poorly zeroed scope is a recipe for missed shots and, worse, unethical ones. Take the time to get this right.
Mounting and Zeroing Your Scope
Before you even think about hunting, that scope needs to be mounted like it’s part of the rifle. A solid, repeatable zero is your foundation for every single shot.
- Secure the Mount: Get that scope mounted on your rifle’s rail and follow the manufacturer’s torque specs to the letter. A loose mount is the number one reason a zero starts to wander, and it’ll drive you crazy trying to figure out what’s wrong.
- Boresight It: A simple laser boresighter will save you a ton of time and ammo. Just pop it in the barrel, and you can get the scope’s reticle roughly aligned with where the rifle is pointing without firing a single round. This will at least get you “on paper” at the range.
- Live-Fire Zeroing: Now for the real work. If you have a digital scope with a day mode, head to the range during daylight. For an I² scope, dusk is your best bet. Fire a tight, three-shot group at a set distance—50 or 100 yards is standard. From there, make careful adjustments to your windage and elevation based on where your group landed.
- Confirm, Confirm, Confirm: After you’ve made an adjustment, fire another group. Is it centered? If so, great. If not, repeat the process. Don’t stop until your groups are hitting the bullseye consistently.
Field Techniques for a Successful Hunt
With your rifle dialed in, your success now hinges on how you move and observe. Navigating the darkness is a different game entirely. It rewards patience and a deliberate approach.
The gear we have access to today is incredible, and it’s getting better and more affordable all the time. It’s no surprise that the market for night vision weapon sights was valued at around USD 4.2 billion in 2024 and is expected to climb to USD 7.5 billion by 2033. This boom is all thanks to new tech making these tools more accessible for guys like us. You can discover more insights about the night vision weapon sights market growth and see where the technology is headed.
Field Tip: When you’re scanning for game, slow is smooth and smooth is fast. Pan across the landscape methodically, in sections. Pause often and just look, letting your eyes soak in the scene. Quick, jerky movements will send animals running and cause you to overlook the subtle flicker of an ear or the outline of a back.
Navigating Common Night Hunting Challenges
Hunting after dark throws a few curveballs you won’t see during the day. Knowing what they are and how to handle them is half the battle.
- Judging Distance: This is a big one. The flat, green-and-black world you see through your scope kills your depth perception, making it incredibly tough to judge how far away something is. A good laser rangefinder isn’t a luxury; it’s a necessity. Always range your target before you even think about taking a shot.
- Target Identification: This is the most important rule of all. You must be 100% certain of your target and what is behind it. Use your scope’s magnification and clarity to confirm it’s the animal you’re after. A pair of glowing eyes is never enough to justify pulling the trigger.
- Managing Light Bloom: A stray porch light, the headlights of a distant car, or even a full moon can cause a bright “bloom” that washes out your image. Most modern scopes have auto-gating to help with this, but it’s still smart to be aware of light sources and use terrain to block them when you can.
Mastering these basics will give you the confidence to own the night, turning that piece of high-tech gear into a true extension of your senses.
Protecting Your Night Vision Investment
Dropping serious cash on high-performance night vision is a big step. Just like any other critical piece of gear, it needs proper care if you want it to work when it counts. Protecting your optics isn’t rocket science, but it does take discipline. A simple maintenance routine is all it takes to guarantee years of reliability and successful hunts.
Your device’s biggest threats are moisture, hard knocks, and—for traditional image intensifier units—bright sunlight. Any of these can wreck performance or kill your unit outright. The good news is that a little prevention goes a long way toward avoiding a costly repair bill.
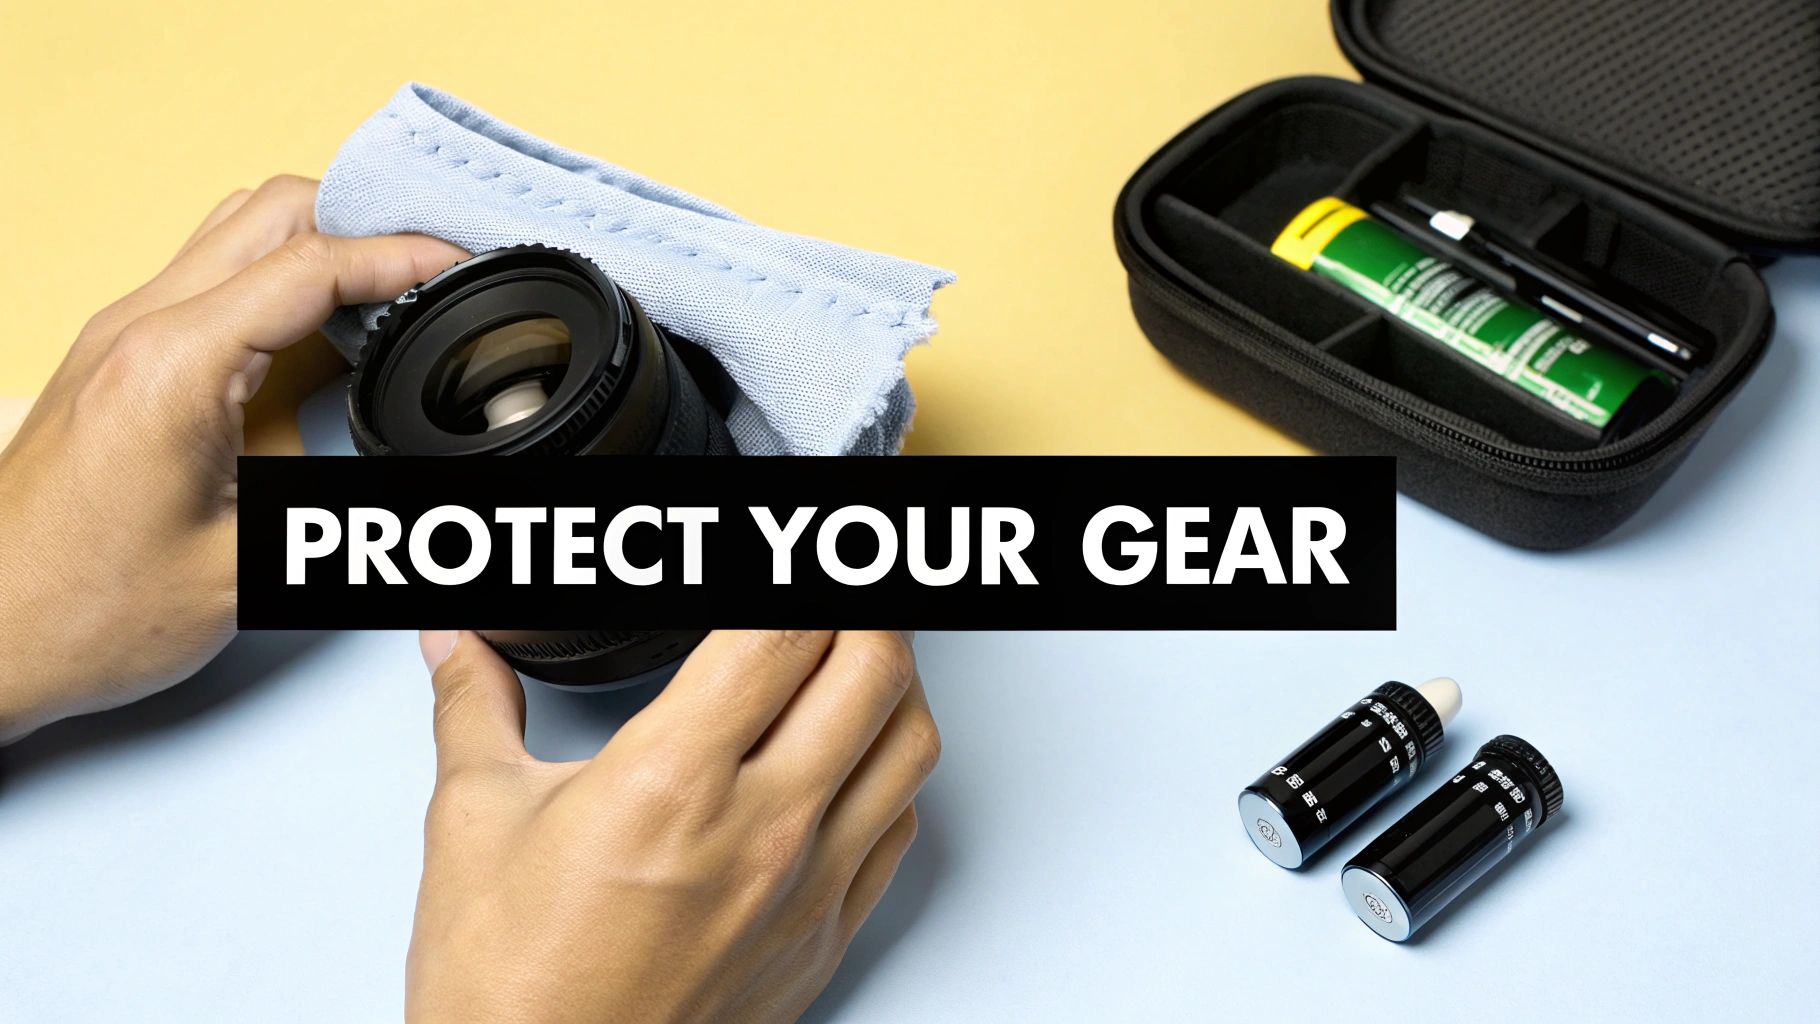
Essential Care and Cleaning Practices
Taking care of your lenses is absolutely non-negotiable. Those special coatings are what make the image pop, but they’re delicate and scratch easily, which will permanently screw up your image clarity. Whatever you do, don’t use your shirt sleeve or a paper towel to wipe them down.
Instead, stick to this simple and safe cleaning method:
- Get the Grit Off: First, use a can of compressed air or a soft lens brush to blow away any loose dust or dirt. Wiping a gritty lens is the number one way to put a scratch in it.
- Use the Right Stuff: Put a few drops of a dedicated lens cleaning solution onto a fresh microfiber cloth or a piece of lens tissue. Never, ever spray the solution directly onto the lens.
- Wipe Smart: Start from the center and gently wipe in a circular motion, moving outwards. This pulls any leftover gunk away from the heart of your field of view instead of just smearing it around.
Storage and Battery Management
What you do with your gear between hunts is just as important as how you handle it in the field. The right storage habits can prevent a ton of headaches, from moisture damage to dead electronics. Always keep your device in a hard, padded case to protect it from getting banged around in the truck.
Believe it or not, the most common reason field electronics die isn’t a factory defect—it’s battery corrosion. If you’re putting your night vision away for more than a few weeks, always take the batteries out. A leaky battery can eat through the internal components and turn your expensive optic into a paperweight.
Finally, the golden rule for any image intensifier (I²) device is to always keep the lens cap on when the sun is out. Pointing an active tube at a bright light source can cause permanent burns, leaving you with ugly black spots in your sight picture. For both I² and thermal units, just get in the habit of capping the lens when it’s not in use. It protects the glass and, for I² tubes, it saves the tube’s life. These simple habits will make sure your investment is ready to go every single time you head out.
Know the Law, Hunt with Honor
Getting your hands on high-tech night hunting gear is one thing, but using it responsibly is a whole different ballgame. Before you ever step foot in the field after sunset, you need to dive deep into your local regulations. The laws can shift dramatically from state to state, county to county, and even from one animal to the next.
What’s perfectly fine for hog hunting in Texas might land you in serious trouble if you try it on coyotes in another state. The rules often get incredibly specific, dictating if you can hunt at night and precisely what kind of gear is allowed. Some places might give the green light for thermal but ban traditional image intensifiers, or the other way around. Your first and most important stop should always be your state’s wildlife agency website—it’s the only place to get the final word.
Beyond the Rulebook: The Spirit of the Hunt
Once you’ve got the laws down, you have to think about the ethics. The core principle of fair chase doesn’t just vanish when the sun sets; if anything, it becomes even more important.
Your number one ethical responsibility is achieving 100% positive target identification. A glowing blob on a thermal screen or a pair of green eyes in the distance is not, and never will be, enough to pull the trigger.
True night hunting demands absolute certainty. It means leveraging the incredible clarity of modern optics to not only identify the species but also to see what’s behind it, ensuring a safe, clean, and humane harvest that honors the animal.
Being an ethical night hunter also means being a good steward of the land. You have to minimize your impact on the entire ecosystem. That means moving quietly, respecting property lines, and doing your best not to disturb animals you aren’t targeting. This commitment is what separates a true hunter from someone just playing with cool toys. It’s how we protect the sport for generations to come.
Common Questions About Night Vision Hunting
Even after you’ve got the basics down, jumping into night vision for hunting for the first time usually brings up a handful of specific questions. Let’s tackle some of the most common things hunters ask. Think of this as a final Q&A before you head out into the field after dark.
You’re not alone in getting interested in this gear. The global market for night vision devices was already valued at around USD 7.02 billion in 2022, and it’s expected to shoot up to USD 16.32 billion by 2030. A huge piece of that pie is coming from regular folks like us, with wildlife observation and hunting projected to grow by a massive 12.8% each year. You can dig into more data on the expanding night vision device market to see just how much recreational use is driving things forward.
Can I Use My Night Vision During the Day?
This is a big one, and getting it wrong can be a costly mistake. The answer completely depends on what kind of night vision you have.
- Image Intensification (I²): Absolutely not. Never. Using a traditional tube-based night vision device in the daylight—even for a second without the protective lens cap on—can permanently fry the intensifier tube. Bright light will literally burn the tube, leaving you with permanent black spots in your view.
- Digital & Thermal: Yep, no problem. These technologies are built differently and aren’t damaged by bright light. In fact, many digital scopes come with a full-color “day mode,” and since thermal works by seeing heat, it functions just fine 24/7.
What Is the Real Difference Between Gen 2 and Gen 3?
Both are worlds better than Gen 1, but the leap from Gen 2 to Gen 3 is pretty substantial. The real magic happens at the photocathode, which is the part that turns faint light into electrons. Gen 3 units use a much more efficient material, gallium arsenide, to do this job.
So, what does that mean for you? It means a noticeably brighter, cleaner, and sharper image, especially on those pitch-black nights where a Gen 2 unit might start to show some graininess. Gen 3 tubes also have a much longer lifespan, typically rated for 10,000+ hours of use, while a Gen 2 tube is usually in the 2,500-5,000 hour range. Of course, that extra performance and durability come at a higher price.
Here’s the simplest way to think about it: Gen 2 gives you a solid advantage in the dark. Gen 3 gets you as close as you can to turning night into day.
Do I Really Need an IR Illuminator?
An IR (Infrared) illuminator is basically a flashlight that’s invisible to the naked eye but shines like a spotlight for your night vision device. Whether you need one depends on your gear and where you’re hunting.
For any I² or digital night vision, an IR illuminator is almost always a must-have. On a cloudy, moonless night or deep under a thick tree canopy, there just isn’t enough ambient light for your device to amplify. Flicking on an IR illuminator floods the area with light your device can see, dramatically brightening the image and pushing out your effective range.
On the other hand, thermal imaging devices do not need an IR illuminator at all. They see heat signatures, not reflected light, so an IR beam would be completely invisible to them anyway.
Ready to gear up and own the night? The experts at Superior Tactical LLC have the knowledge and the equipment to get you set up right. From high-end thermal scopes to tough-as-nails Gen 3 monoculars, they can help you find the perfect rig for your next hunt. https://superiortac.com