What Is Collimation And Why It Matters For Tactical Optics
At its most basic, collimation is simply the process of getting light rays to travel in perfectly straight, parallel lines.
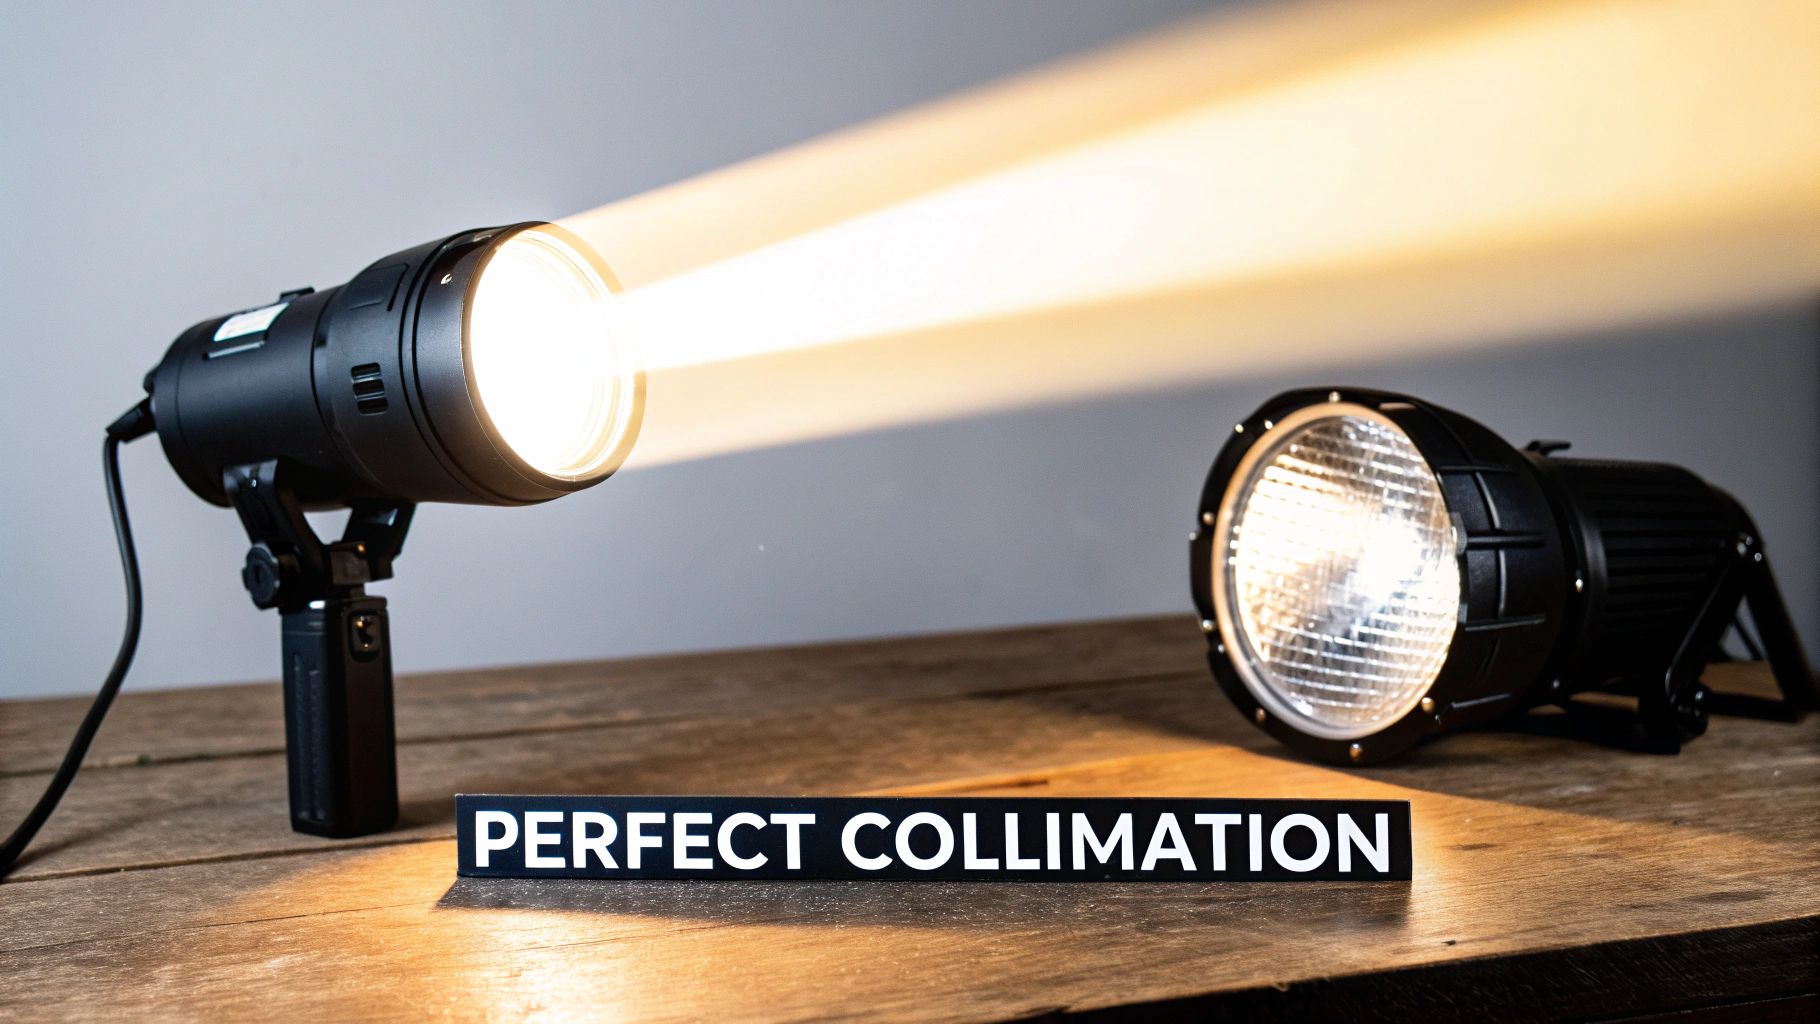
Picture the difference between a cheap, generic flashlight and a high-end spotlight. The flashlight throws a wide, dim, and fuzzy circle of light that dissipates quickly. The spotlight, on the other hand, projects a tight, incredibly bright beam that seems to cut through the darkness. That's collimation in action—gathering scattered light and forcing it into a focused, powerful stream.
What Is Collimation In Simple Terms?
Light naturally wants to spread out, or diverge, losing its intensity and focus the farther it travels. Collimation is the art of taming that light. By using a precise arrangement of lenses or mirrors, we can gather those diverging rays and essentially straighten them out, making them all travel parallel to each other.
This isn't just a concept for physicists in a lab; it's absolutely critical to how your tactical gear performs. The razor-sharp, parallax-free dot in your rifle sight, the clear, crisp image you see through night vision goggles, and the pinpoint accuracy of a laser designator all hinge on this fundamental optical principle. Without proper collimation, your gear would give you blurry images and an aimpoint you couldn't trust.
The Foundation of Modern Optics
The idea of aligning light isn't new. It actually dates back to the early 19th century. In 1814, Joseph von Fraunhofer built the first spectroscope and integrated a collimator to produce parallel light rays, which allowed for incredibly precise analysis of starlight. This single innovation boosted spectral accuracy by over 90% compared to the methods used before him. You can find more deep-dive info on these kinds of optical considerations on the Edmund Optics website.
That same principle is just as essential today for anyone who relies on tactical optics. It's what ensures the light forming an image or projecting a reticle is perfectly organized and aligned—a non-negotiable for performance when every little detail counts.
Proper collimation gives you:
- Maximum Clarity: It’s what makes images in night vision and thermal devices sharp instead of fuzzy.
- Pinpoint Accuracy: It’s the key to eliminating parallax error in red dots and holographic sights.
- Effective Range: It focuses laser energy into a tight, concentrated beam for marking targets at a distance.
In essence, collimation transforms a chaotic mess of scattered light into a coherent, high-performance beam. It’s the invisible engineering that guarantees what you see through your optic is true, clear, and precisely where it needs to be for the job at hand.
This table gives a quick rundown of the practical differences between a collimated system and an uncollimated one in the field.
Collimated vs Uncollimated Light In Tactical Gear
| Characteristic | Collimated System (e.g., EOTech Red Dot) | Uncollimated System (e.g., Basic Flashlight) |
|---|---|---|
| Light Beam | Rays are parallel; beam stays tight over distance. | Rays diverge; beam spreads out and weakens quickly. |
| Accuracy | High. Aiming point is parallax-free and consistent. | Low. No precise aiming reference. |
| Image/Reticle | Crisp, sharp, and clearly defined. | Diffuse, blurry, and undefined. |
| Effective Range | Long. Maintains intensity and focus for targeting. | Short. Loses effectiveness rapidly over distance. |
As you can see, the benefits of collimation are what turn a simple light-emitting device into a precision instrument. It’s the core technology that allows for accurate, reliable performance from modern optics.
Why Perfect Optical Alignment Is Non-Negotiable
When your optics are misaligned, it’s not just a small technical glitch—it's a direct route to failure in the field. Poor collimation creates real, tangible problems that gut the reliability of your most critical gear. We're talking missed shots, distorted images, and a dangerous level of uncertainty when every second is on the line.
Think of it like driving a car with a terrible wheel alignment. Sure, it'll move, but it will constantly pull to one side, fight you on every turn, and become dangerously unpredictable at speed. An optic with bad alignment is no different. It won't give you a true or stable point of aim, making it fundamentally untrustworthy.
The Real-World Cost of Misalignment
The consequences of poor collimation are immediate and severe. A police officer in a high-stress situation needs their red dot to be true, no matter their head position. A hunter needs a crisp, unified image through their thermal scope to take an ethical shot at dusk. These aren't just nice-to-haves; they are absolute performance requirements.
Let’s put this into perspective:
- For Law Enforcement: A red dot sight with bad alignment suffers from parallax error. This means the dot appears to shift on the target if the officer's eye isn't perfectly centered. In a dynamic encounter, that slight shift is the difference between a hit and a miss.
- For a Hunter: In a thermal scope, poor collimation can lead to a blurry or ghosted image, making it tough to properly identify the target. This compromises not just the hunt, but safety itself.
- For a Security Professional: With dual-tube night vision, improper collimation prevents the images from each tube from merging into one. The result is a disorienting, headache-inducing view that causes severe eye strain and kills your situational awareness.
The bottom line is that collimation isn't just about getting a pretty picture. It's the bedrock of reliability. It guarantees your aiming point stays put, your view is clear, and your equipment acts as an extension of your will.
Understanding Parallax Error
Parallax is the arch-nemesis of precision shooting, and good collimation is how you defeat it. In simple terms, parallax is the apparent movement of an object when you look at it from different angles. In optics, it’s what makes your reticle seem to wander off target if your eye moves even a fraction of an inch off-center.
A properly collimated red dot or holographic sight works by projecting a reticle that appears to be focused out at infinity. This optical sleight-of-hand is what practically eliminates parallax at typical engagement distances. It’s the magic that ensures the dot stays on the target even if your head is moving or you don’t have a perfect cheek weld. This allows for incredibly fast, two-eyes-open shooting. Of course, getting the entire system right matters, too. For more on that, check out our guide on how to measure scope height to dial in your setup.
Ultimately, perfect optical alignment is non-negotiable because it turns your gear from a potential liability into a reliable tool. It builds the confidence you need to act decisively, knowing that where you aim is exactly where you'll hit.
How Collimation Powers Your Tactical Gear
The core idea of collimation—getting light rays to travel in parallel lines—is a single concept, but how it's used across tactical gear is incredibly varied. Engineers apply this principle in very specific ways depending on the job at hand, whether that's aiming, illuminating a target, or simply seeing in the dark. Once you grasp these differences, you start to see just how essential collimation is to the equipment you rely on.
Each piece of gear uses its own method to put collimated light to work, turning a fundamental law of physics into a real-world tactical advantage. From projecting a laser beam hundreds of meters to creating an aiming point that’s free of parallax, collimation is the secret sauce.
Laser Designators and IR Illuminators
When you look at a laser designator, like the classic PEQ-15, the name of the game is projecting as much energy as possible onto a distant target. The device takes the messy, scattered light from a laser diode and uses a collimating lens to squeeze it into a tight, focused beam. This is what keeps the beam from spreading out over distance, ensuring the dot stays small and intense way downrange.
It’s this efficiency that allows a small, weapon-mounted laser to be so effective for marking targets. Without that precise alignment, the laser's energy would just diffuse into a faint, useless glow after only a short distance.
Just how powerful can this be? Think back to the Apollo 11 mission in 1969. NASA bounced collimated laser beams off reflectors left on the Moon—a distance of over 384,000 km. That incredible feat demonstrated that a perfectly aligned beam can conquer mind-boggling distances, a concept that directly translates to the performance of the tactical lasers we use today. You can get a deeper dive into the science of collimated beams and their applications on RP-Photonics.
Red Dot and Holographic Sights
Red dot sights and holographic weapon sights perform a different kind of optical trick. Instead of shooting a beam out onto the target, they use a collimating lens or mirror to project a reticle that appears to be focused at infinity. This is the magic behind a parallax-free aiming system.
Because the light rays from the reticle are parallel, you can move your head around behind the optic, and the dot won't seem to shift its position on the target. This is what makes the fast, intuitive, two-eyes-open style of shooting possible.
Simply put, the collimator in a red dot sight makes the aiming point behave as if it's already sitting on the target, regardless of your head position. It’s a clever illusion that translates directly to speed and accuracy.
Night Vision Systems
In night vision gear, collimation is all about image quality and preventing eye fatigue. A night vision device amplifies ambient light and projects that image onto a small phosphor screen inside the image intensifier tube. A collimating lens, which we call the eyepiece or ocular lens, sits right between that screen and your eye.
Its job is to take the light from that tiny, flat screen and present it to your eye as a perfectly focused, clear picture. This ensures the entire image is sharp from edge to edge, which is critical for avoiding the eye strain and headaches that come from a distorted or out-of-focus view. When you’re using a dual-tube system (binoculars or goggles), proper collimation is what merges the two images into a single, seamless 3D view, giving you true depth perception in the dark.
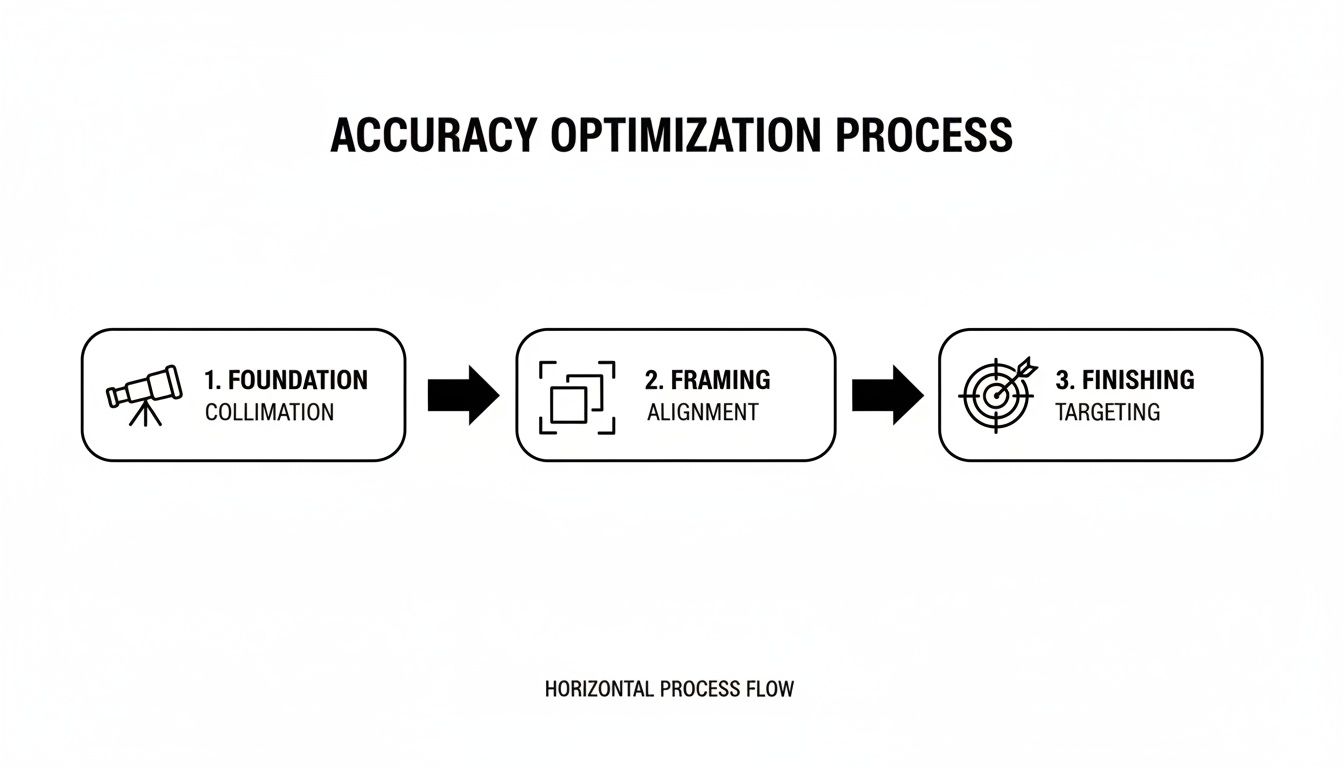
The Link Between Collimation, Boresighting, and Zeroing
In the world of precision shooting, you'll hear the terms collimation, boresighting, and zeroing thrown around a lot. It’s easy to get them mixed up, and frankly, a lot of people use them interchangeably. But they’re not the same thing.
Think of them as three distinct, sequential steps you have to take to get your rifle truly accurate. Mess up the order or skip a step, and you're just setting yourself up for frustration and wasted ammo at the range. It’s like building a house—you can't frame the walls before you've poured a solid foundation.
Laying the Foundation With Collimation
Collimation is step one—it's the perfectly level foundation for our house. This is a purely internal process inside your optic, where the manufacturer aligns all the lenses and components with painstaking precision. This alignment ensures the light passing through the scope forms perfectly parallel rays, which is the magic behind a crisp, clean image and a stable aiming point without parallax.
This isn't something you do yourself. A quality optic comes collimated straight from the factory. If the internal collimation is off, the optic is a lemon, plain and simple. No amount of fiddling with the turrets will ever make it right. It’s like trying to build on a crooked foundation—nothing will ever be truly straight.
Framing the Walls With Boresighting
Once your foundation is set, it's time for boresighting. This is where you align the optic with your rifle's barrel. In our house analogy, this is like framing the walls and making sure they're square to the foundation. All boresighting does is get your optic and your barrel pointing in the same general direction.
It’s a rough, get-you-in-the-ballpark alignment. Whether you use a laser boresighter or just pull the bolt and look down the barrel, you’re just trying to get the reticle close to where the bore is aimed. This is a critical step, though, because it ensures your first shots will actually be on the paper, saving you the headache of chasing your impacts all over the target. If you want to dive deeper into getting your optic mounted securely before this, check out our guide on mounting an EOTech sight.
Hanging the Pictures With Zeroing
With the foundation laid and the walls up, you can finally move on to zeroing. This is the fine-tuning. It's where you adjust your optic so the point of aim matches the bullet's point of impact at a specific distance. Think of it as hanging the pictures perfectly level on the walls you just framed.
Zeroing is what dials in the system for the real world. It accounts for all the variables—bullet drop, wind, and the specific ammo you’re shooting. You do this by firing live rounds at a target and making small, precise clicks on your windage and elevation turrets until your groups land exactly where your reticle is. This is the final confirmation that your rifle, optic, and ammunition are all working together as one cohesive system.
Here’s a simple way to remember it: Collimation makes the optic true to itself. Boresighting makes the optic true to the rifle. Zeroing makes the whole setup true to the target.
This progression shows just how critical it is to start with a properly collimated optic. Modern optics have come a long way; collimated rifle scopes developed since the Vietnam era have cut parallax errors by as much as 50% at 600 yards. The same goes for the collimated image intensifiers in today's night vision, which maintain incredible resolution. You can find more on this at Ocean Insight's blog about collimating lenses. Without that solid, collimated base, boresighting and zeroing are just a fool's errand.
How To Check And Adjust Collimation On Your Gear
Knowing the theory is one thing, but getting hands-on with your gear is what builds real confidence. The good news is that many of the most important collimation checks are things you can do yourself without a technician's toolkit. The trick is knowing what you can fix in the field and when it's time to call in a pro.
This guide will walk you through some practical, user-level checks for common tactical optics. From boresighting a rifle to making sure your night vision is properly aligned, these simple steps will help you keep your equipment performing at its peak.
Boresighting A Rifle With A Laser Collimator
One of the most common and useful tasks you'll perform is boresighting. Think of it as getting your optic and your rifle's barrel pointed in the same general direction. This crucial first step gets your first shots on paper, saving you a ton of time and ammo when you go to zero your rifle for real. The easiest way to do this is with a laser boresighter.
Here’s how it’s done:
- Safety First, Always: Unload your firearm. Double-check that the chamber is empty. Keep it pointed in a safe direction.
- Insert the Boresighter: Depending on the model you have, you'll either place the laser boresighter into the chamber like a regular cartridge or insert it into the muzzle.
- Project the Laser: Switch the laser on. You should see a small dot projected onto a target roughly 25 yards away.
- Adjust the Optic: Now, without moving the rifle, look through your scope or red dot. Use your windage and elevation turrets to move the reticle until it sits directly on top of the projected laser dot.
- Remove and Verify: Once they're aligned, take the boresighter out. Your rifle is now boresighted and ready for the fine-tuning that comes with a live-fire zero.
This simple alignment forges that critical link between your barrel and your optic. When you have a solid setup, like a quality Picatinny rail scope, starting with a good boresight ensures the whole system works together from the ground up.
Checking Dual-Tube Night Vision Collimation
If you run dual-tube night vision goggles, proper collimation is the difference between a clear, immersive view and an instant headache. When the tubes are misaligned, your brain has to work overtime trying to merge two slightly different images. This quickly leads to eye strain and fatigue.
Here’s a quick field check you can do anywhere:
- Find a distant object with clear vertical and horizontal lines, like the corner of a building or a telephone pole, and focus both tubes on it.
- Look through the device naturally, letting your eyes relax. The two images from each tube should effortlessly merge into a single, sharp picture. There should be no ghosting or double vision.
- Next, slowly pull the goggles away from your face. If the collimation is good, the single image should hold together perfectly. If you see the images start to split apart as you pull the device back, that's a dead giveaway that your collimation is off.
A Word of Caution: While checking the collimation on your NODs is easy, adjusting it is not a DIY job. It requires specialized tools and expertise. If you spot a split image, the unit needs professional service. Trying to fix it yourself is a fast way to void your warranty and potentially cause permanent damage.
The path to true accuracy always starts with a solid, well-aligned foundation. Everything else is built on top of that.
This process really drives home the point: getting collimation right is the non-negotiable first step. Only then can you move on to proper alignment and final tuning.
Quick Field Checks for Your Optics
You don't always need a full suite of tools to spot a problem. Here are a few quick checks you can perform in the field to get a rough idea of your gear's alignment.
| Optic Type | Simple Check Method | Tools Needed |
|---|---|---|
| Red Dot Sight | Focus on a distant target (~50 yards). Move your head around slightly behind the optic. If the dot shifts significantly off the target, your parallax may need attention. | None |
| Rifle Scope | Perform a "box test." Fire a group, then adjust the turrets up, right, down, and left by a set number of clicks, firing a group at each corner. The final group should return to the original position. | Rifle, ammo, target, steady rest |
| Night Vision (Dual) | Look at a single point of light in the distance (e.g., a star). The two images should merge into one clean point without doubling or splitting. | None |
These simple tests aren't a substitute for a proper technical inspection, but they can help you quickly identify a potential issue before it becomes a real problem during a critical moment.
Got Questions About Optical Collimation?
Even after you get the hang of what collimation is, some practical questions always pop up when you're actually out there handling your gear. How often do I need to check this? What's the real difference between these two sights? Getting straight answers helps you trust your equipment, so let's tackle some of the most common questions we hear.
We'll skip the jargon and give you direct, field-tested advice to help you keep your optics ready for action.
How Often Should I Check My Optic's Collimation?
Honestly, for high-quality optics, you shouldn't have to. The factory collimation on a well-built scope or red dot is tough as nails and designed to handle serious abuse. You don't need to put it on a routine maintenance schedule.
The time to check is if your gear takes a major hit—say, you drop your rifle and it lands hard on the scope—or if you suddenly notice your zero has shifted for no apparent reason.
For dual-tube night vision, your own eyes are the best indicator. If you start getting headaches, eye strain, or seeing double after using your unit, that's a classic sign the tubes are out of sync. A quick check before a mission or a big hunt is never a bad idea, if only for peace of mind.
A well-built optic should hold its internal alignment through years of regular use. Think of a collimation check as a diagnostic tool for when you suspect a problem, not as routine preventative maintenance.
Can I Collimate My Own Optics At Home?
That really depends on the optic and what you mean by "collimate." Some alignment tasks are meant for the user, while others are strictly for technicians with specialized tools.
-
You can do this: Boresighting a rifle scope is a perfect example. Whether you're using a laser boresighter or just looking down the barrel, you're performing a basic collimation procedure to align the scope with the bore. This is a standard part of setting up a rifle.
-
Leave this to the pros: Don't even think about cracking open a sealed red dot, holographic sight, or night vision device to mess with the internal lenses or intensifier tubes. This kind of work requires a clean room and specific equipment.
Attempting a DIY repair on a sealed optic will instantly void your warranty, let in dust and moisture, and you'll almost certainly do more harm than good. If you think there’s an internal problem, send it in for professional service.
What's The Difference Between A Collimator Sight And A Red Dot Sight?
This is a great question, and it's a common point of confusion because the terms have blended over time. The short answer is that today, there’s no real difference in how we use the terms. One describes the technology, and the other describes the final product.
A collimator is the actual lens assembly inside the sight. Its job is to take the light from the LED emitter and project it as a beam of parallel rays. This is the magic that creates a sharp, parallax-free aiming point.
A red dot sight is the complete device you mount on your firearm that contains a collimating lens system. "Collimator sight" is just an older, more technical term for what everyone now calls a red dot.
Simply put, every modern red dot sight is a collimator sight. The collimator is the core engine that makes the whole thing work.
At Superior Tactical LLC, we know that perfectly collimated optics are non-negotiable for staying on target. From rugged red dots to crystal-clear night vision, our gear is built to perform when it counts. Explore our curated selection of tactical equipment and see why our 10-year warranty on Gen 3 night vision systems is trusted by professionals.