Your Guide to Choosing a Thermal Attachment for Scope
A thermal attachment for a scope is a clever piece of gear that clips right onto the front of your regular daytime scope, giving it instant thermal vision. It’s like putting a special lens on your trusted optic that lets you see heat signatures through total darkness, thick fog, or even smoke. The best part? You don't have to re-zero or swap out your entire setup.
Seeing in the Dark Without Changing Scopes
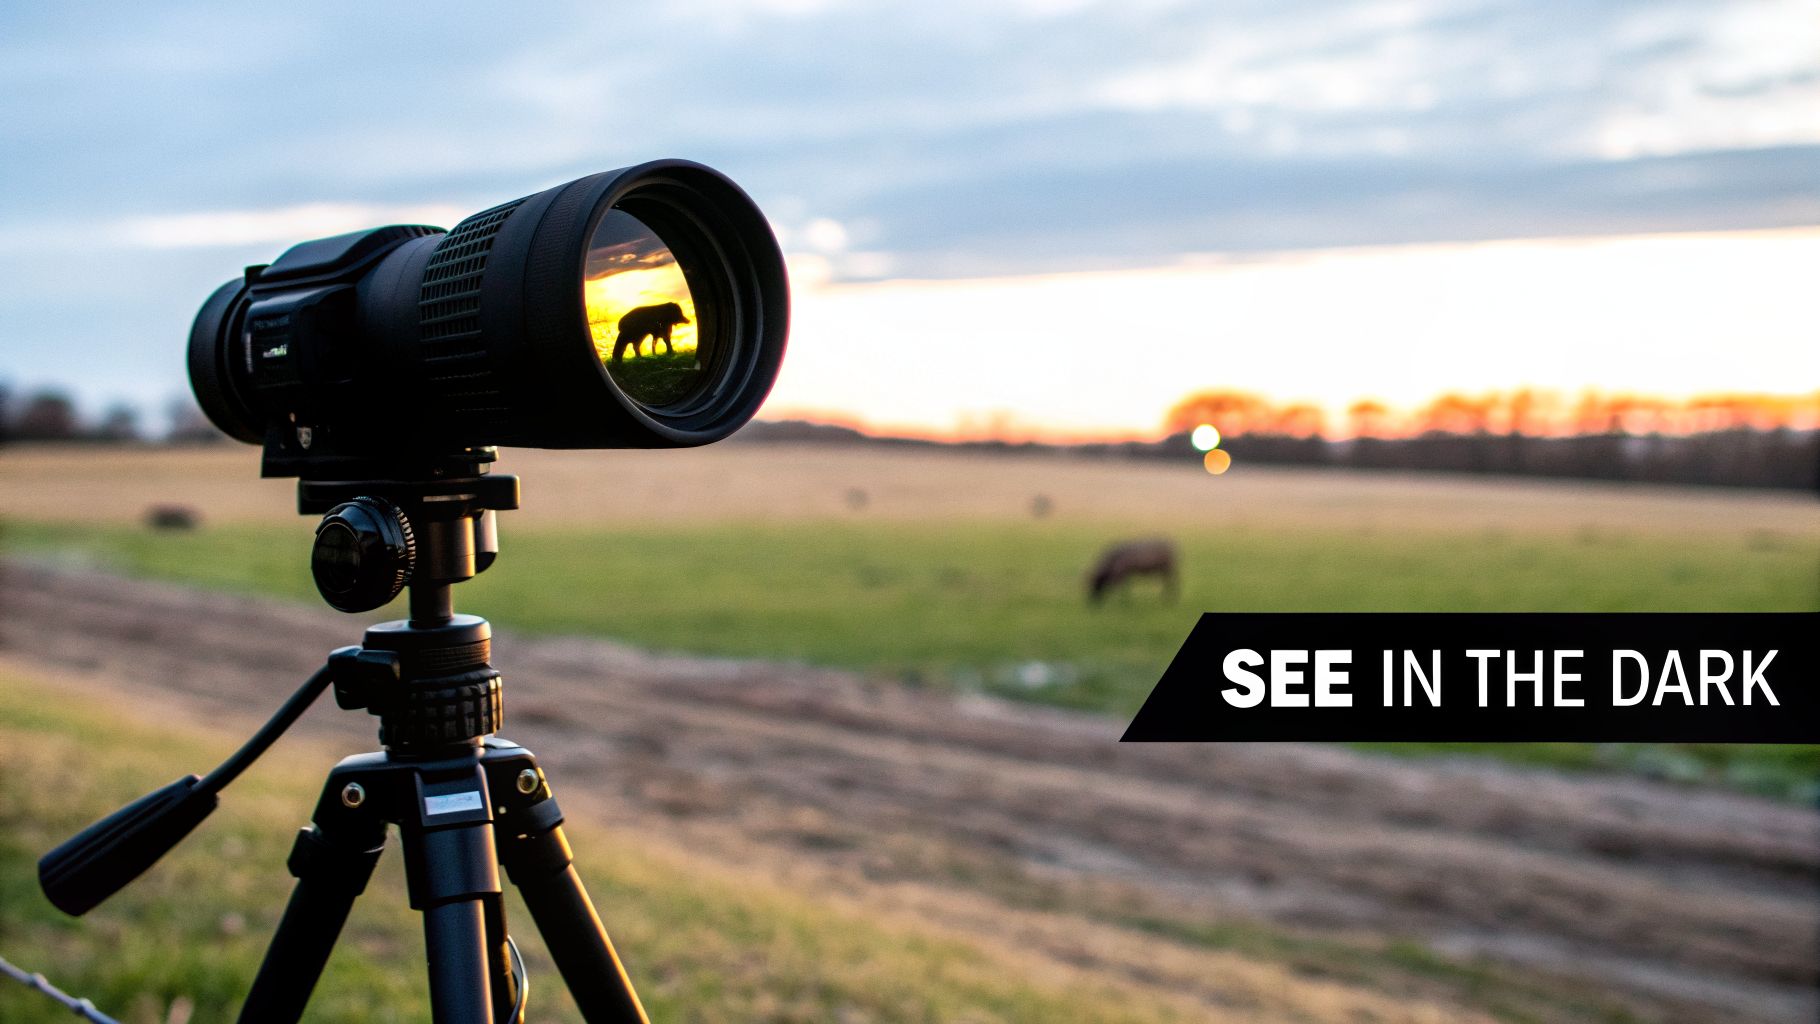
Think about your favorite rifle scope—the one you know inside and out. It’s perfectly zeroed, the glass is crystal clear, and your muscle memory is dialed in. Now, imagine that same optic suddenly having the power to spot a warm body hundreds of yards away in the dead of night. That’s exactly what a thermal attachment, often called a clip-on, brings to the table.
Instead of detaching your day scope and mounting a completely different thermal optic, a clip-on simply attaches in front. It captures the thermal radiation from the scene, processes it into a digital image, and projects that image directly through your scope. This means you keep using your familiar reticle, maintain your established cheek weld, and don't have to learn a new system.
A Game Changer for Versatility
This technology is a huge leap forward for anyone who operates in changing light conditions. For a hunter, it’s the difference between finding a downed animal after sunset and losing it. For law enforcement, it offers a tactical edge when searching a dark building or conducting surveillance from a distance. The applications are immediate and practical.
The growing popularity isn't just anecdotal. The global market for infrared thermal imaging scopes was valued at USD 156 million in 2025 and is expected to reach USD 209 million by 2034. This surge is fueled by increased defense spending, wider adoption by police departments, and major leaps in sensor technology. You can explore more data on this market expansion and its key drivers.
The real beauty of this setup is adaptability. You get one device that upgrades any rifle with a day scope for nighttime use, saving you the cost and hassle of buying multiple dedicated thermal optics.
Understanding the Core Concepts
If you're new to thermal clip-ons, it helps to break down how they work. These devices are built for seamless integration, giving you powerful capabilities without a frustrating learning curve.
To put it simply, here are the key things to know about a thermal attachment.
| Concept | Description |
|---|---|
| Primary Function | Adds thermal imaging capabilities to a standard day scope. |
| Mounting | Attaches in front of the scope's objective lens. |
| Key Advantage | You keep your existing scope, reticle, and zero. |
| Best Use Case | Shooters who need both day and night capability from one rifle. |
| Maintains Zero | High-quality units are collimated to prevent point-of-impact shift. |
This blend of cost-effectiveness and operational flexibility makes a thermal attachment for a scope a powerful tool. It delivers advanced detection while preserving the familiarity and precision you've already perfected with your daytime gear.
How a Clip On Translates Heat Into an Image
Ever wondered how a thermal clip-on sees in total darkness, turning an invisible world of heat into a clear picture you can use? It’s not magic, but it is a fascinating process that relies on some pretty sophisticated technology.
Think of your thermal attachment as a highly specialized digital camera. Your phone's camera captures visible light to create a photo, but a thermal device captures invisible infrared radiation. This allows it to paint a picture based on tiny temperature differences, which is exactly why it works flawlessly whether it's high noon or pitch black.
Capturing the Heat Signature
The whole process kicks off with a very special lens. Unlike the glass in your day scope, the lens on a thermal unit is typically made from germanium. This rare material is opaque to visible light but perfectly transparent to the long-wave infrared energy we call heat. It’s the gateway, gathering all the heat signatures from the scene and focusing them squarely onto the sensor.
That focused energy strikes the heart of the system: the microbolometer. This is essentially a grid containing thousands of microscopic, heat-sensitive pixels. As each tiny detector absorbs infrared energy, it warms up, causing a measurable change in its electrical resistance.
In essence, the microbolometer creates a highly detailed "heat map" of the environment. A warmer object, like a coyote, will cause its corresponding pixels on the sensor to register a stronger signal than the cooler pixels detecting the surrounding trees or ground.
This ability to pick up on minute temperature variations is the foundation of all thermal imaging. The raw output isn't a picture just yet; it's a complex dataset representing thousands of individual temperature readings from across the sensor. If you want a deeper dive into the science, you can learn more about what thermal vision is and how these subtle signatures are detected.
From Data to a Usable Image
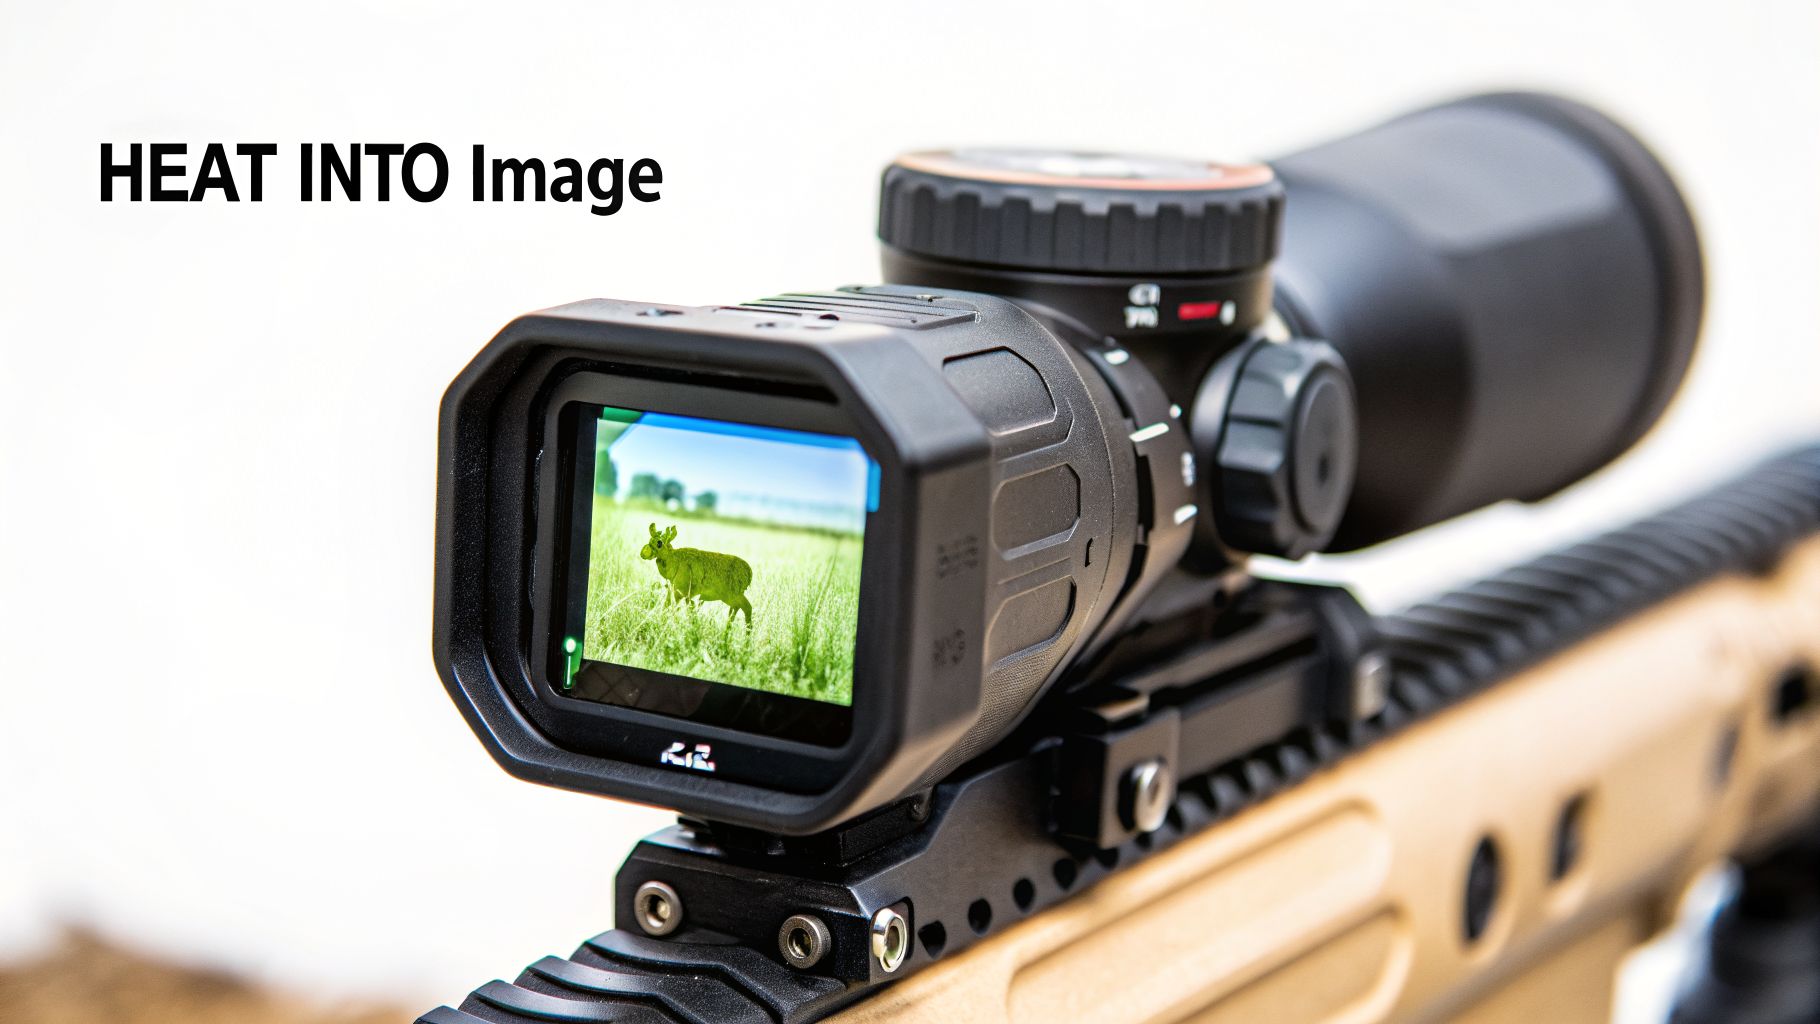
With the heat map created, the device's onboard processor gets to work. This tiny computer is the translator, converting the raw electrical resistance values from each pixel into a visual image. It assigns different colors or shades of gray to different temperature levels, generating the familiar thermal image you see on a screen.
But the journey isn't over. The attachment now has to display this new thermal image so your day scope can see it. It does this by projecting the picture onto a small, high-resolution display screen tucked inside the unit itself.
- Step 1 The Heat Map: The germanium lens focuses infrared energy onto the microbolometer sensor.
- Step 2 The Translation: The processor converts the sensor's temperature data into a visible digital image.
- Step 3 The Projection: The internal screen displays the thermal image, ready to be viewed by your scope.
This projected image is precisely collimated, a technical term that just means it's perfectly aligned with your day scope's optical path. So, when you look through your eyepiece, you aren't looking through the thermal attachment. You're actually looking at a crisp digital video feed being displayed right in front of your scope's objective lens, with your trusted reticle laid perfectly over the top.
Clip On Attachment Versus a Dedicated Thermal Scope
So, you’re ready to add thermal vision to your rifle setup. You’ve now hit the first major decision point: should you go with a versatile clip-on thermal attachment or a fully integrated, dedicated thermal scope? While both will let you see heat signatures in total darkness, they get you there in very different ways and offer completely different user experiences.
A thermal attachment for scope is essentially a high-tech module that turns your favorite day scope into a thermal optic. On the other hand, a dedicated thermal scope is a self-contained system built from the ground up for one job and one job only—thermal targeting. Getting a handle on their core differences is the only way to make a smart purchase that actually fits how you shoot.
The Case for Flexibility
The biggest draw for a thermal clip-on is, without a doubt, its flexibility. Let's say you have a premium day scope you've spent years with. The glass is crystal clear, you trust it completely, and you can shoot dimes with it. A clip-on lets you keep that beloved optic right where it is and simply add thermal capability when the sun goes down.
This approach has some serious practical upsides:
- Maintained Zero: This is a big one. Because the clip-on mounts in front of your scope and projects a perfectly aligned image through it, your rifle's zero doesn't change. You use the same reticle you’ve already mastered.
- Cost Efficiency: While they aren’t cheap, a quality clip-on can be a more budget-friendly route than buying an entirely new high-end dedicated thermal scope, especially if you've already invested in great daytime glass.
- System Familiarity: You’re not learning a new optic. Your cheek weld, eye relief, and muscle memory stay exactly the same, which can make a huge difference when the pressure is on.
For a shooter who needs one rifle to do it all, a clip-on is a fantastic solution. You can hunt varmints in the bright afternoon, and when dusk falls, you can snap the thermal unit on in seconds to start calling in coyotes.
The Argument for Specialization
A dedicated thermal scope delivers a different kind of payoff: purpose-built performance. Every single part of the system—from the sensor and processor to the digital reticle—is designed to work in perfect harmony. That deep integration often results in a smoother, more refined user experience.
For instance, dedicated scopes have digital magnification that often gives you a clearer image at distance than what you get by magnifying the clip-on's screen with your day scope. They also feature built-in digital reticles and multiple zeroing profiles, letting you set up the scope for different rifles or ammo types. If you have a rifle that is only for night hunting, a dedicated scope is a powerful, streamlined choice.
The growth in this tech shows just how critical it's become. The thermal imaging market, which includes the thermal attachment for scope segment, was valued at USD 14.9 billion in 2025 and is expected to surge to USD 41.3 billion by 2035. While a lot of that is handheld cameras, the tactical scope segment is exploding. You can explore the full thermal imaging market analysis and trends to see just how fast this technology is expanding.
If you’re building a dedicated night rifle and want the absolute best image quality in a single package, a standalone thermal scope is tough to beat. But for shooters who value versatility and want to enhance their existing gear, a clip-on offers incredible capability.
To make the choice clearer, let’s put these two systems side-by-side. If you want to go even further down the rabbit hole, our https://superiortac.com/a-complete-guide-to-thermal-night-vision-scopes/ provides a much deeper look at these technologies.
Clip-On Thermal Attachment vs. Dedicated Thermal Scope
This table breaks down the key differences to help you decide which system is the right tool for your specific needs and budget.
| Feature | Thermal Attachment (Clip-On) | Dedicated Thermal Scope |
|---|---|---|
| Flexibility | Excellent. Adds thermal to any rifle with a compatible day scope. | Limited. A single-purpose optic for one rifle. |
| Zeroing | No re-zero required. Uses the day scope's zero. | Requires its own zero. Must be sighted in like any scope. |
| Cost | Generally more cost-effective if you own a good day scope. | Higher initial cost for a complete, high-quality system. |
| Image Quality | Can be degraded by high day scope magnification. | Optimized internal system often provides superior image clarity. |
| Simplicity | Quick to attach/detach, but requires alignment. | Self-contained and simple to operate once zeroed. |
Ultimately, think of it this way: the clip-on is the versatile multi-tool you can adapt to any situation. The dedicated scope is the specialized surgical instrument, designed to do one thing perfectly. Your mission will tell you which one to grab.
Decoding the Specs on Your Next Thermal Attachment
Ever felt your eyes glaze over looking at a thermal attachment's spec sheet? It’s a wall of acronyms, numbers, and technical terms that can feel overwhelming. The good news is you don’t need an engineering degree to figure it out.
Let's cut through the noise and talk about what these numbers actually mean when you’re out in the field. By the end of this, you'll be able to confidently compare models and know precisely what your money is getting you.
Resolution: The Foundation of Image Quality
If there's one spec to pay close attention to, it’s sensor resolution. The easiest way to think about it is like the pixel count on your TV. More pixels mean a sharper, clearer image, which is everything when you need to positively identify a target.
An entry-level attachment might come with a 384×288 pixel sensor. That's plenty for spotting a coyote in an open field at reasonable distances. But step up to a high-end 640×480 or 640×512 sensor, and the difference is night and day. That extra detail makes it much easier to tell a big hog from a small deer way out there.
The core takeaway is simple: more pixels equal more information. For long-range work where a positive ID is non-negotiable, spending more on a higher-resolution sensor is almost always money well spent.
Thankfully, this kind of performance is getting more accessible. The entire thermal imaging systems market was valued at USD 6.19 billion in 2022 and is projected to hit USD 8.71 billion by 2027. A big reason for this growth is that the core components are getting cheaper, which means better gear for us. You can learn more about the key drivers in the thermal imaging market to see how this trend affects product development.
Refresh Rate: Smoothing Out the Action
Next up is refresh rate, which is measured in Hertz (Hz). This number tells you how many times per second the image updates on your screen. You’ll typically see rates of 30Hz, 50Hz, or 60Hz.
Think about watching a choppy, low-frame-rate video—it’s jarring and hard to follow. The same thing happens with a thermal. A low refresh rate like 30Hz makes tracking moving targets feel laggy, almost like the animal is skipping across your screen.
On the other hand, a higher refresh rate of 50Hz or 60Hz delivers a smooth, fluid picture that looks and feels like real-time. This is absolutely critical for any fast-paced situation, such as:
- Tracking moving game: Following a running coyote or a trotting hog becomes second nature.
- Scanning large areas: Panning your rifle across a landscape feels completely seamless.
- Shooting from a vehicle: The image stays clear and stable, even with the added motion.
If you’re only glassing for static targets, 30Hz can work. But for any serious hunting or tactical use, a 50Hz or 60Hz refresh rate is the modern standard you should be looking for.
Field of View and Detection Range
These two specs are a team. They define how much of the world you can see at once and how far out you can spot a heat signature with your thermal attachment for scope.
Field of View (FOV) is your window to the world. A wide FOV lets you see a huge chunk of the landscape, which is perfect for scanning big, open pastures. A narrow FOV is more like a telephoto lens—it gives you a "zoomed-in" perspective that's better for observing a specific target from far away.
Detection Range is the marketing number you'll see splashed across the box, often touting distances over 1,500 yards. It’s the absolute maximum distance the sensor can pick up a man-sized heat blob. But here's the crucial part: detection isn't the same as identification.
- Detection: "I see a warm spot out there."
- Recognition: "That spot looks like a four-legged animal."
- Identification: "That is a coyote, not the neighbor's retriever."
Pay less attention to the huge detection range and focus on the identification range. Make sure that number lines up with how far you typically shoot. Seeing a heat signature is one thing; knowing exactly what it is before you pull the trigger is what truly matters.
Mounting and Aligning Your Clip-On for Peak Accuracy
Your thermal clip-on's biggest selling point is that you don't have to re-zero your rifle every time you use it. But that promise only holds true if you get the mounting right. A sloppy installation will almost certainly cause a point-of-impact shift, completely undermining the advantage of a clip-on system.
The good news is that mounting one of these units is a simple affair. When done correctly, the thermal image lines up perfectly with your day scope's optical center, meaning you can trust your existing zero. This is what gives you the ability to seamlessly transition from daylight to total darkness.
The Correct Mounting Procedure
Your main goal is to attach the thermal unit securely to your rifle's rail, right in front of your primary optic. Most clip-ons use a quick-detach (QD) mount made for a standard Picatinny rail. To ensure a reliable return to zero, consistency is everything—always attach the device to the exact same rail slot.
Follow these steps for a rock-solid mount:
- Prepare the Rail: Give the section of your Picatinny rail a quick wipe-down. Make sure it's clean and clear of any dirt, carbon, or debris that could prevent the mount from seating flush.
- Position the Unit: Set the clip-on on the rail directly in front of your day scope's objective lens. You want a small gap between them—a few millimeters is perfect. They should never touch.
- Secure the Mount: Lock down the QD lever or tighten the mounting bolts based on the manufacturer’s specs. Give it a firm wiggle test; the unit should have absolutely zero wobble or play. A loose mount is the #1 reason for accuracy issues.
This selection guide flowchart walks you through the key decisions on specs like resolution, refresh rate, and detection range when choosing a thermal device.
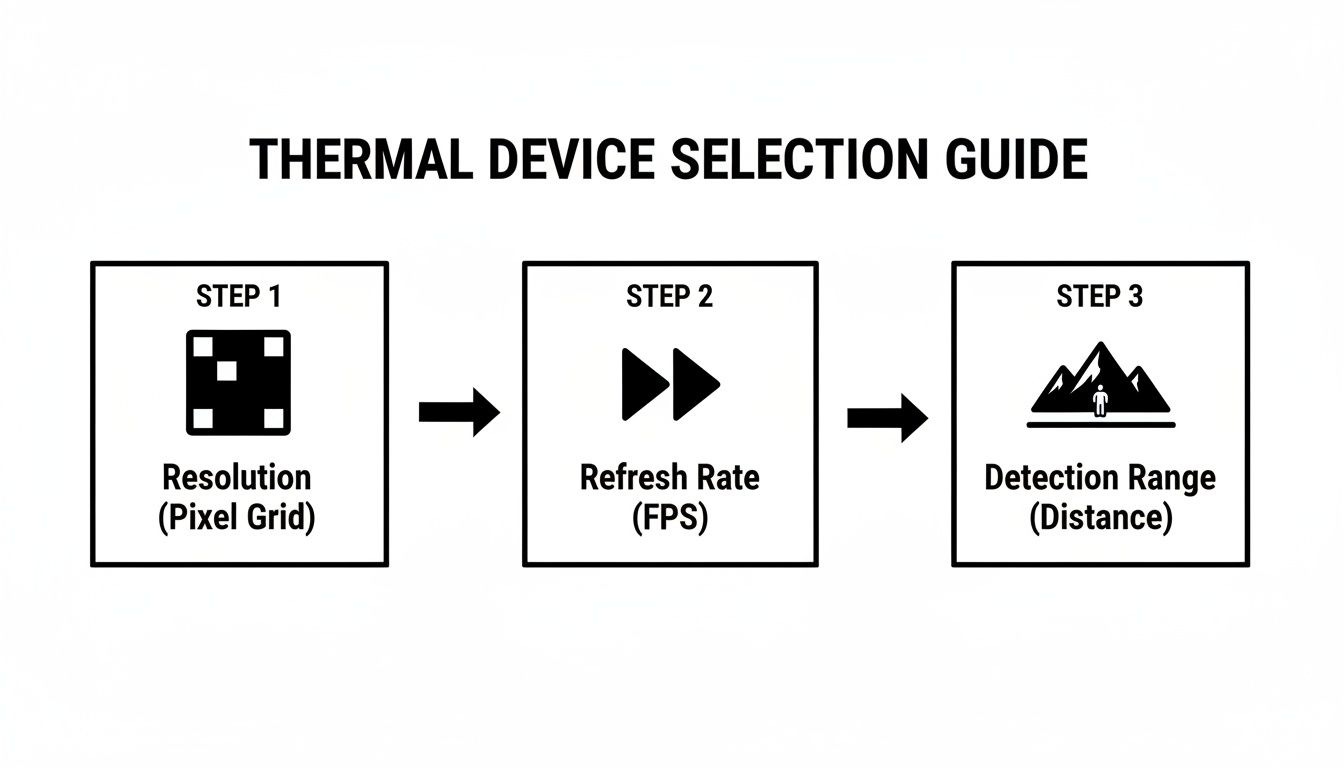
As you can see, the hardware specs have a massive impact on performance. Proper mounting is what lets you actually take advantage of that high-tech capability in the real world. If you want to learn more about the foundation of any good optics setup, check out our guide on choosing a Picatinny rail for your scope.
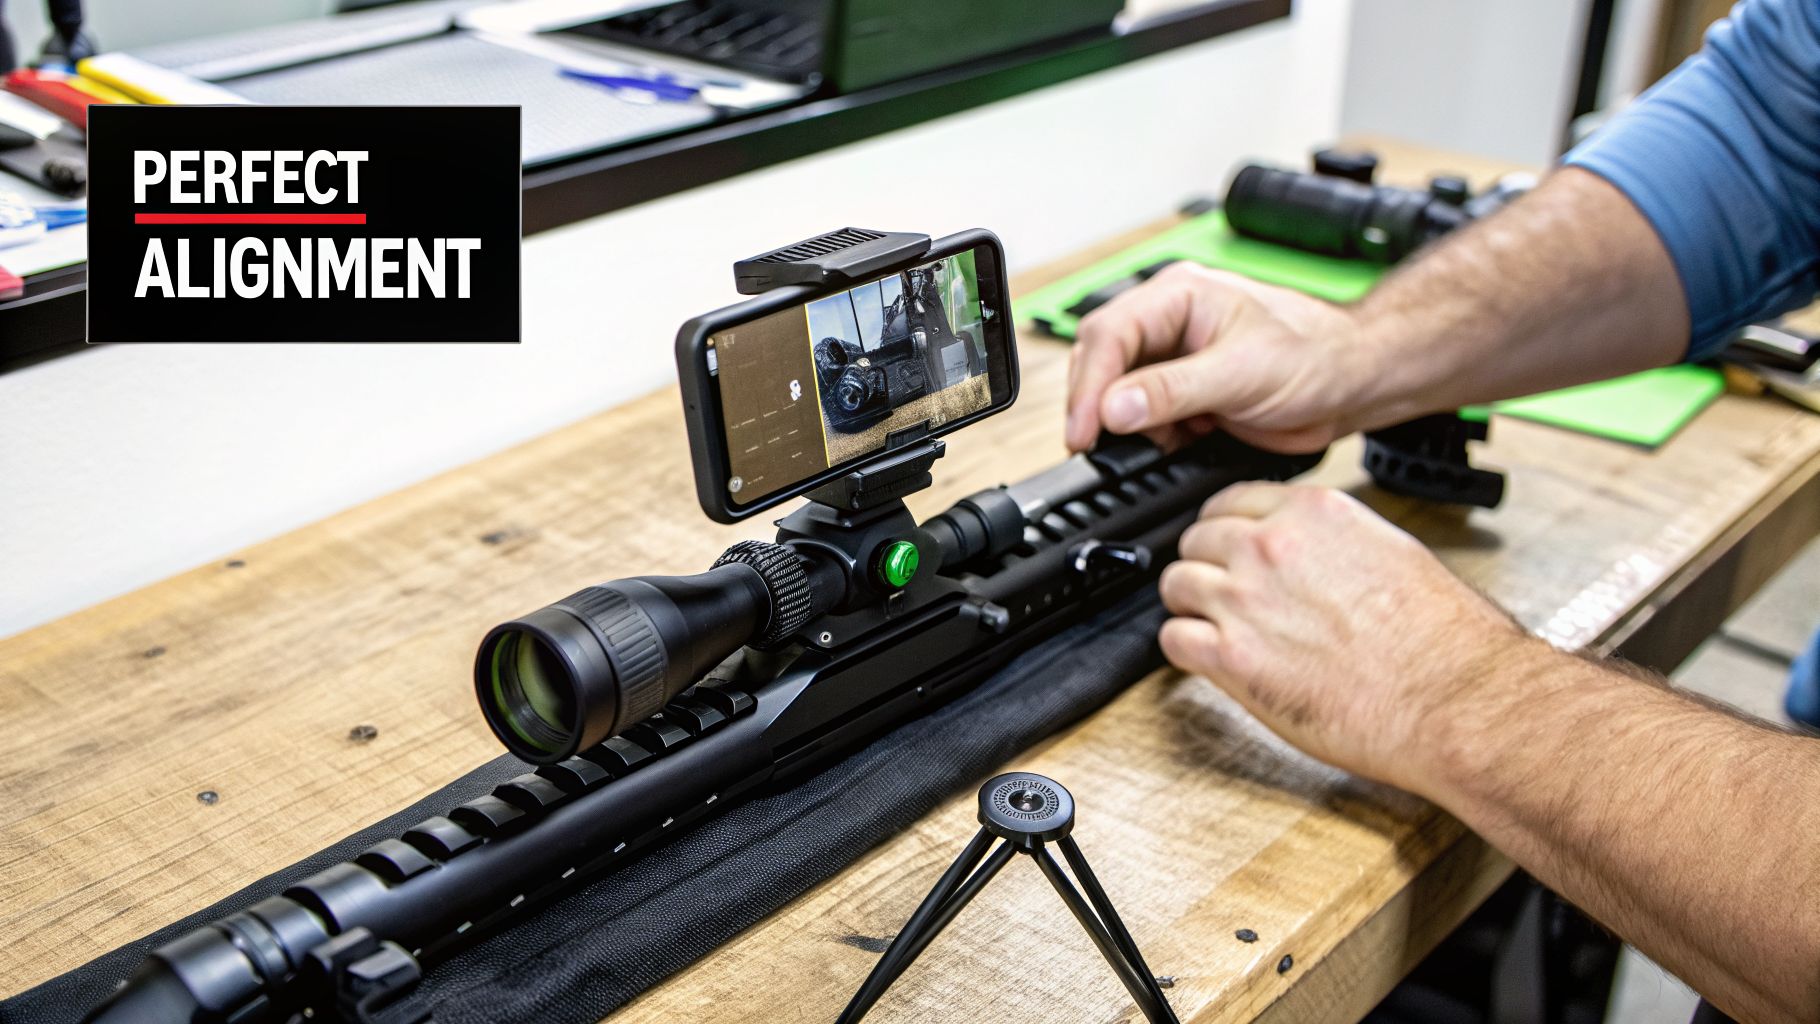
Fine-Tuning with Collimation
Once the unit is mounted, you’ll need to make sure the thermal picture is perfectly centered behind your day scope’s reticle. This fine-tuning process is called collimation. Any quality thermal attachment comes factory-collimated to be extremely close, but tiny adjustments are usually necessary to account for minor differences in scope height and mount tolerances.
Collimation is not the same as zeroing. You aren't adjusting for bullet impact. Instead, you're just digitally shifting the thermal image (up/down/left/right) on the clip-on's internal screen until it's perfectly aligned with your day scope's crosshairs.
The whole process happens right in the device's menu. You'll find a setting often labeled "Alignment" or "Boresight" that brings up a crosshair on the thermal screen. From there, you just use the device's buttons to move that crosshair until it stacks perfectly on top of your scope's reticle. Save the setting, and you're done.
It's always smart to confirm your zero with a few shots at the range, but you should find that it’s right where you left it.
Real World Missions for Thermal Attachments
Specs on a page are one thing, but where a thermal attachment for scope really earns its keep is out in the field. This is where the talk about resolution and refresh rates translates into real-world results. Let's look at a few scenarios where this technology is an absolute game-changer.
Think about a rancher who’s been losing calves to coyotes that only hunt in complete darkness. For weeks, every attempt to catch them with a spotlight has failed—the smart predators just bolt the second the beam hits them. Frustrated, he clips a thermal attachment onto his favorite bolt-action rifle.
Now, the dynamic is completely different. From his back porch, he can scan the entire pasture. The thermal's wide field of view lets him cover a massive area without moving an inch. A warm, four-legged shape finally materializes near the tree line. Thanks to the sharp resolution, he can clearly identify it as a coyote, not the neighbor's dog. The animal has no idea it's being watched. Using the familiar reticle of his own day scope, he makes a clean, ethical shot and protects his herd.
Law Enforcement and Tactical Response
The stakes get even higher for law enforcement. Picture a tactical team responding to a warehouse break-in. The suspects have killed the power, plunging the massive building into a maze of pitch-black aisles and blind corners. It’s an incredibly dangerous environment for a search.
An officer with a patrol rifle and a thermal clip-on takes point. The attachment instantly defeats the darkness, painting a clear picture of the scene. It immediately picks up two heat signatures hiding deep within a set of storage racks. The suspects think they’re invisible in the shadows, but their own body heat betrays them.
In this situation, the thermal's power to see through visual concealment is a massive tactical advantage. The team can locate and neutralize the threat without walking into an ambush, making the entire operation safer for everyone.
The Hunter Tracking Elusive Game
For hunters, these tools can mean the difference between going home empty-handed and a successful, ethical harvest. Consider a hunter tracking a wounded wild hog in the mountains just as a thick, cold fog settles in. The fog makes visual tracking impossible, and the blood trail is vanishing fast.
With daylight gone and visibility at zero, the chances of finding the animal are getting slim. He attaches a thermal clip-on to his rifle and starts scanning the dense brush. The fog that blinds his eyes might as well not be there for the thermal sensor.
After a few minutes of patient scanning, a faint warm spot appears about 80 yards out—the hog, bedded down and completely hidden from sight. The thermal attachment for scope didn't just find a lost animal; it ensured the hunt ended ethically, even when conditions were stacked against him.
Common Questions About Thermal Scope Attachments
Even after you get the hang of how a thermal attachment for scope works, a lot of practical questions pop up. It's one thing to understand the tech, but another to figure out how it will actually perform with the gear you already own. Let's tackle some of the most common concerns we hear from people looking to make the leap.
The idea here is to get these nagging questions out of the way so you can feel confident you're making the right choice and can get your equipment running perfectly from day one.
Will It Affect My Scope's Zero?
This is the big one, and for good reason. The short answer is no, it shouldn't. A quality thermal clip-on is factory-collimated, which is a fancy way of saying it's built to pass the thermal image through your scope without messing with your point of impact (POI).
That said, I always recommend firing a few confirmation shots after you first mount it and before any critical use, like a hunt or mission. Most good units also have a digital collimation menu. This lets you make tiny tweaks to perfectly line up the thermal image with your reticle, ensuring your zero is dead-on.
Can It Be Used With Any Day Scope?
While these attachments are incredibly versatile, you can't just slap one on any scope and expect perfect results. They really shine when paired with optics that have a low base magnification, usually in the 1x to 4x range.
Trying to use a clip-on with a high-magnification scope often leads to a pixelated or blurry image.
Think of it this way: your day scope is magnifying the clip-on's small internal screen. It’s just like zooming in way too far on a photo on your phone—eventually, you start seeing the individual pixels, and the image quality tanks. Always double-check the manufacturer's recommended magnification range for the specific model you're considering.
What Is the Difference Between Thermal and Night Vision?
It's easy to lump these two together, but they are completely different technologies that see the world in fundamentally different ways.
Night Vision: This is what most people think of first. It’s an image intensification (I²) system that works by amplifying small amounts of existing light—from the moon, stars, or an IR illuminator. It needs some light to work and is fantastic for getting clear details for positive identification.
Thermal Imaging: This tech doesn't see light; it sees heat. It detects infrared radiation given off by objects and needs no light at all to function. This allows it to punch through smoke, fog, and thick brush by highlighting temperature differences, making it the undisputed king of detection.
In practice, many pros use both. A thermal attachment for scope is the perfect tool for finding a heat signature in the dark, while traditional night vision can then be used to get a positive ID on what you've found.
At Superior Tactical LLC, we specialize in providing the gear you need to own the night. Whether you need a versatile thermal clip-on or a dedicated night vision device, our team offers the expertise and products to keep you mission-ready. Explore our full range of thermal and night vision optics today.