Finding the Best Night Vision Binoculars
Figuring out which night vision binoculars are the best isn’t about finding a single top-tier model. It’s about finding the right tool for your specific job. The most expensive, military-grade unit is often total overkill for watching raccoons in the backyard, just as a budget-friendly model will leave you frustrated on a serious nighttime hunt. This guide will walk you through everything you need to know to choose with confidence.
How to Choose the Right Night Vision Binoculars
Think about it like picking out a vehicle. You wouldn’t buy a Ferrari to crawl up a rocky mountain path, and you definitely wouldn’t enter a tractor in a cross-country road race. Each is built for a purpose, and the “best” one is all about where you’re going and what you’re doing. The world of night vision optics works the exact same way.
Your decision really boils down to balancing three key things:
- Your Mission: What are you actually doing? Hunting predators, navigating a boat at night, securing your property, or just enjoying nature? Each activity calls for different capabilities.
- The Technology Generation: The “engine” inside the binoculars—Gen 1, Gen 2, Gen 3, or Digital—is the single biggest factor determining performance, clarity, and, of course, price.
- The Critical Specs: Things like resolution, field of view, and the power of the built-in infrared (IR) illuminator directly impact the quality of the image you see through the eyepieces.
A Quick Guide to Night Vision Generations
To help you get your bearings, this table breaks down the fundamental differences between the main types of night vision technology. It’s a great starting point for seeing which category lines up with your budget and expectations before we get into the nitty-gritty details.
| Generation Type | Typical Cost | Performance Level | Best Use Case |
|---|---|---|---|
| Gen 1 | $200 – $600 | Entry-Level: Good for basic, short-range viewing but often requires IR illumination. | Backyard observation, camping, casual use. |
| Gen 2 | $1,500 – $3,500 | Intermediate: Clearer, brighter images with better low-light performance. | Serious hunting, wildlife tracking, property security. |
| Gen 3 | $3,500 – $10,000+ | Professional-Grade: Exceptional clarity and range, even in near-total darkness. | Law enforcement, military, professional surveillance. |
| Digital | $300 – $2,000 | Versatile: Offers features like recording and daytime use; quality varies by price. | Tech-savvy users, hunting, evidence gathering. |
These devices aren’t a niche gadget anymore. Night vision models now account for about 27.1% of the entire binoculars market, which is a huge piece of an industry valued at roughly USD 0.89 billion. That kind of demand tells you a lot of people see the value in conquering the darkness. You can dig into more market share data over at Business Research Insights.
One of the most common mistakes I see is people overspending on specs they’ll never actually need. A hunter tracking hogs needs a long detection range above all else. Someone watching their property line will get more value from a wide field of view and the ability to record video. Always define your primary goal first.
Dropping serious cash on a piece of gear online can be intimidating. For some solid tips on how to spot legitimate sellers and make sure you’re getting the real deal, take a look at our guide on how to buy night vision binoculars online safely. When you match your needs with the right technology from the start, you’re making an investment that will pay off for years to come.
How Night Vision Technology Actually Works
Ever wondered how a good pair of night vision binoculars turns a pitch-black scene into a bright, visible image? It’s not magic, but it’s pretty close. The secret is a process called light amplification.
Night vision doesn’t create light out of thin air. Instead, it scoops up the tiny, often invisible, amounts of ambient light—from the moon, stars, or even distant city glow—and multiplies it thousands of times.
Think of it like the amplifier at a concert. A faint whisper into a microphone can be cranked up to fill an entire stadium. In the same way, night vision binoculars take the faintest glimmer of light and “turn up the volume” so your eyes can see what’s hidden in the dark.
This is done in two main ways: the classic analog method and the more modern digital approach. Each has its own way of turning night into day.
The Analog Approach: Image Intensification
The classic, eerie green glow you probably associate with night vision comes from a process called image intensification. This is the technology you’ll find in Gen 1, Gen 2, and Gen 3 devices, and it all revolves around a remarkable piece of hardware called an image intensifier tube.
Here’s a quick rundown of how it works its magic:
- Gathering Photons: First, the objective lens gathers whatever ambient light is available and focuses it onto a special surface called a photocathode.
- Converting to Electrons: When light particles (photons) hit the photocathode, it converts their energy into electrical particles (electrons).
- Multiplying the Signal: Now for the amplification part. The electrons enter a microchannel plate (MCP), a tiny glass disc peppered with millions of microscopic channels. As the electrons zig-zag through these channels, they knock loose thousands more electrons, creating a massive cascade. Gen 3 tubes are incredibly efficient at this, amplifying light by 30,000 to 50,000 times.
- Creating the Image: This supercharged flood of electrons then slams into a phosphor screen at the other end of the tube. The screen lights up wherever an electron hits it, instantly creating the bright, clear image you see. That iconic green color? It’s used because the human eye is most sensitive to green light, which helps you see more detail and reduces eye strain.
The Rise of Digital Night Vision
A newer technology takes a completely different path. Digital night vision operates a lot like a modern digital camera that’s been built to excel in low light. Instead of an analog tube, it relies on a highly sensitive electronic sensor—usually a Charge-Coupled Device (CCD) or a Complementary Metal-Oxide-Semiconductor (CMOS) sensor.
The real difference is in the processing. Analog tech directly amplifies the light itself to create a view. Digital tech, on the other hand, captures light as electronic data, processes that data with a microchip, and then displays it on a tiny screen inside the eyepiece.
This digital workflow comes with some cool perks. You can often record video, snap photos, and even use the device during the day without worrying about damaging sensitive components. As sensor technology keeps getting better, high-end digital models are closing the performance gap with traditional analog night vision.
If you’re curious to go deeper, you can learn more about the differences between thermal, digital, and analog night vision in our detailed guide.
This infographic breaks down the key things to consider when you’re shopping: your needs, the technology generation, and the image resolution.
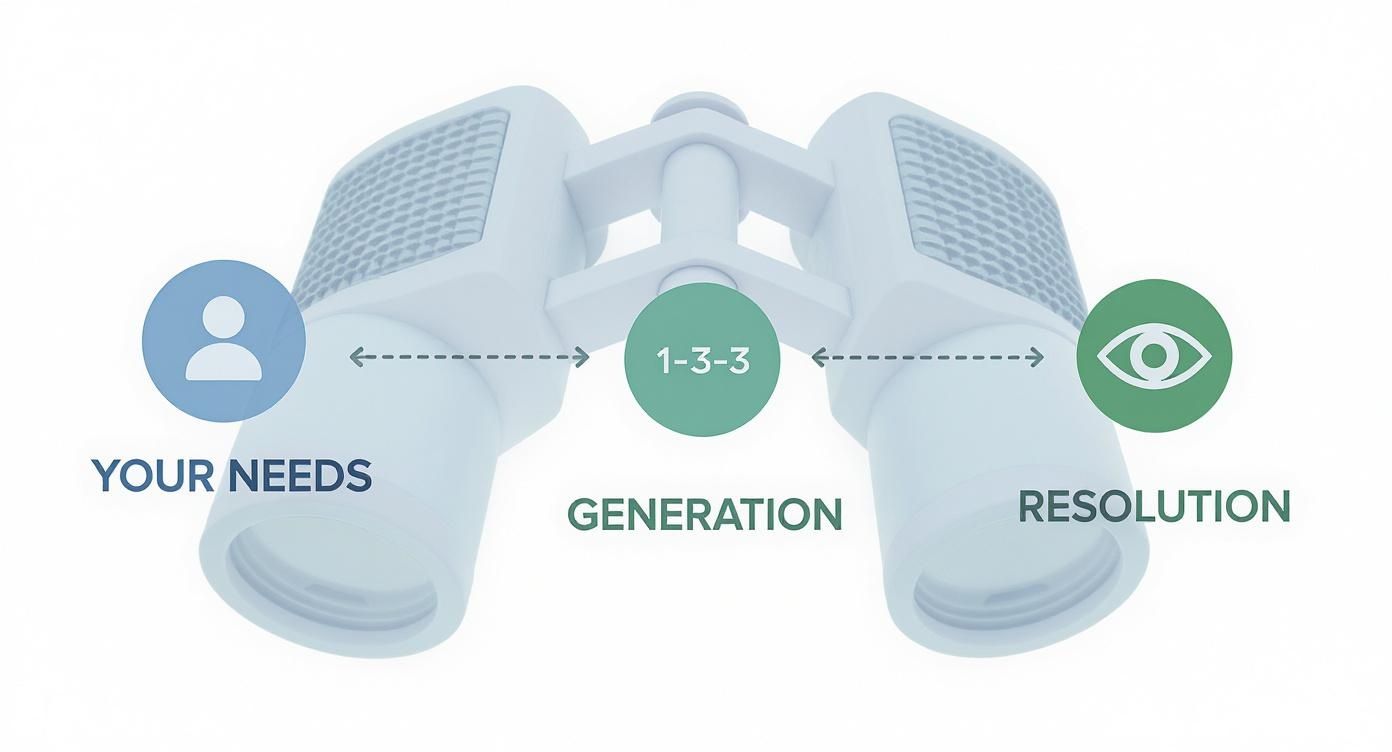
As you can see, these three factors are all connected. Getting a handle on them is the first step toward picking the right device. Ultimately, understanding how the tech works helps you see why certain features cost more and empowers you to make a choice you’ll be happy with.
Understanding the Generations of Night Vision
Just like cars have evolved from the Model T to today’s electric powerhouses, night vision technology has progressed through distinct “generations.” Each leap forward brought a massive jump in performance, clarity, and what you can actually do in the dark. Getting a handle on these generations is the single most important step in picking the right night vision binoculars, as it dictates both the price tag and what you can expect to see.
The technology has come a long way from its military-only roots in the mid-20th century. Modern units now pack in everything from infrared sensors and digital image processing to thermal imaging, giving us incredible clarity and range. You can dive deeper into these trends and see where things are headed by checking out the future of night vision technology.
So, let’s break down what each generation means for you out in the field.
Gen 1: The Affordable Entry Point
Generation 1 is the most common and budget-friendly type of analog night vision you’ll find. Think of it as the starting line—it gets you in the game, but it’s not built for breaking records. Gen 1 was revolutionary for its time, but it has some clear limitations by today’s standards.
These devices work by amplifying ambient light several thousand times, which is plenty for casual use like scanning your backyard or navigating a campsite. But on a truly dark, moonless night, they almost always need a hand from a built-in infrared (IR) illuminator to create a decent picture.
You’ll also run into a few signature quirks:
- Image Distortion: The view often has a “fisheye” look, with the edges of the image appearing curved or warped.
- Blooming: Point it at a bright light, like a distant streetlight or a friend’s flashlight, and you’ll get a big, bright halo that can wash out everything else.
- Shorter Lifespan: The intensifier tubes in Gen 1 units don’t last as long as their more advanced cousins.
Even with these trade-offs, Gen 1 is perfect for anyone curious about night vision who doesn’t want to make a huge financial commitment. It’s a fantastic tool for short-range observation and getting your feet wet with the technology.
Gen 2: The Serious Hobbyist’s Choice
Generation 2 represents a massive leap forward, and it’s all thanks to one key component: the microchannel plate (MCP). This tiny disc acts like a massive electron multiplier, dramatically boosting the signal to create a much brighter, cleaner, and sharper image. A good Gen 2 device amplifies light by around 20,000 times.
This boost in performance makes Gen 2 the sweet spot for a lot of serious users—hunters, landowners, and dedicated wildlife watchers. The image quality is worlds better than Gen 1, with far less distortion and the ability to work well in low light without constantly relying on an IR illuminator.
For many people, a high-quality Gen 2+ unit offers the ideal balance of performance and price. It delivers a clear, reliable image that is more than capable for most non-military applications, from tracking game to conducting surveillance.
You’ll invest more for Gen 2, but the return on that investment is immediately obvious the first time you look through one. This is where night vision stops being a cool gadget and becomes a truly effective tool.
Gen 3: The Gold Standard
This is the real deal. Generation 3 is the current standard for military forces, law enforcement, and other professionals who can’t afford to compromise. The magic here is a gallium arsenide photocathode, which is incredibly efficient at converting light particles (photons) into electrons. This pushes light amplification into the stratosphere, from 30,000 to over 50,000 times.
The result? An exceptionally crisp and bright image, even in what seems like total darkness to the naked eye. Gen 3 devices boast superior resolution (typically 64+ line pairs per millimeter) and an excellent signal-to-noise ratio, which translates to a clean image with very little of the “static” or graininess seen in lower generations.
Most Gen 3 units also come with critical professional features:
- Autogating: This tech protects the tube from sudden flashes of bright light, like a muzzle flash or car headlights. It instantly adjusts the power, preventing the image from washing out and allowing you to stay focused on the situation.
- Longevity: Gen 3 tubes are built to last, often rated for over 10,000 hours of use—more than double what you’d expect from a Gen 2 tube.
This level of performance doesn’t come cheap, but for anyone who needs the absolute best visibility in the most demanding conditions, there is no substitute for Gen 3.
Digital Night Vision: The Versatile Modern Option
Finally, we have digital night vision, which plays by a completely different set of rules. Instead of an analog intensifier tube, it uses a digital camera sensor (like the CCD or CMOS sensor in a modern camera) that’s extremely sensitive to low light. The image is captured, processed electronically, and then displayed on a small screen inside the eyepiece.
This digital approach brings some unique and powerful advantages to the table:
- Daytime Use: You can’t damage a digital sensor with bright light, so these devices work just as well in broad daylight as they do at night.
- Recording: Most digital units come with the ability to record video and snap photos, which is perfect for documenting a hunt, gathering evidence, or just sharing what you saw.
- Affordability: Entry-level digital models can give you performance that rivals Gen 1 at a similar price, while high-end digital units are now nipping at the heels of Gen 2+.
The main trade-off is that some digital devices have a tiny bit of screen lag, and the image can feel more “pixelated” compared to the smooth, organic view of an analog tube. Still, as sensor technology gets better every year, digital is quickly becoming the go-to choice for those who want flexibility and modern features.
Key Specifications You Must Understand
While the “generation” gives you a great starting point, the specs on the product page are what really tell the story. Understanding these numbers is like learning to read the stat sheet for a star athlete—it tells you exactly where they excel and where they fall short. Let’s decode the most important specs so you can find the right tool for the job.
These details separate a decent device from a great one. They ensure you’re buying a specific level of performance, not just a label.
Resolution: The Measure of Clarity
Think of resolution in night vision like the pixel count on your TV. More pixels mean a sharper, crisper picture, and it’s no different here. For analog night vision, we measure this in line pairs per millimeter (lp/mm).
This spec tells you how many tiny black and white lines can be resolved within a one-millimeter space on the intensifier tube. A higher number means more lines are packed in, which translates directly to finer detail in the image you see.
- Gen 1: Usually sits around 30-40 lp/mm. You’ll see what’s out there, but the image is often grainy.
- Gen 2: Makes a big leap to 45-54 lp/mm. This is where the image starts getting much clearer.
- Gen 3: This is professional-grade stuff, starting at 64 lp/mm and climbing higher. The clarity is exceptional.
Just like a 4K TV makes an old standard-def set look blurry, the difference here is night and day. Higher resolution is what lets you identify a shape in the distance as a coyote, not just a funny-looking rock.
Field of View: Your Window to the World
Field of View (FOV) is simply how much you can see at once. It’s like the difference between looking through a panoramic window versus a narrow porthole. FOV is usually measured in degrees or in feet at 1,000 yards.
A wide FOV is fantastic for scanning large areas, like an open field or a backyard, because you can catch movement more easily. On the flip side, a narrow FOV typically comes with higher magnification, which is better for zeroing in on a specific target far away. It’s a classic trade-off: see more space or see one thing in more detail.
Detection Range: How Far Can You Really See?
This is easily the most misunderstood spec out there. Manufacturers love to advertise huge numbers, but you have to read between the lines. There are actually three different kinds of “range.”
- Detection Range: This is the absolute maximum distance you can spot a man-sized heat signature or silhouette. You’ll know something is there, but you won’t have a clue what it is.
- Recognition Range: At this distance, you can tell what you’re looking at. Is it a person or a deer? You can make that distinction.
- Identification Range: This is the closest range, where you can pick out specific details. For instance, you can see if the person you’re observing is carrying something.
Always dig for the specifics. A device might “detect” a target at 800 yards, but you might only be able to actually “identify” it at 150 yards. Setting your expectations based on these three levels will save you from a lot of frustration. For anyone curious about what modern tech can achieve, checking out a selection of digital binoculars with night vision can offer a good baseline for today’s performance standards.
The Built-In IR Illuminator: Your Personal Moonlight
An Infrared (IR) Illuminator is basically a special flashlight. It shoots out a beam of light that’s completely invisible to your eyes but shows up bright as day to your night vision device. It’s the equivalent of turning on your car’s headlights in total darkness.
When there’s zero ambient light—think a sealed basement, a deep cave, or a cloudy, moonless night in the woods—even a top-tier Gen 3 unit can’t make an image from nothing. That’s when you flip on the IR illuminator. It floods the area with infrared light, giving the binoculars what they need to produce a bright, clear picture. The power of the built-in IR can make or break the performance of Gen 1 and digital models.
Key Night Vision Specifications by Price Tier
To help you connect the dots between price and performance, here’s a quick breakdown of what you can generally expect at different budget levels.
| Price Tier | Typical Resolution (lp/mm) | Effective Range (Yards) | Common Features |
|---|---|---|---|
| Entry-Level ($200-$600) | 30-45 lp/mm (Analog/Digital) | 75-150 (Recognition) | Built-in IR required, basic recording |
| Mid-Range ($1,500-$3,500) | 45-54 lp/mm (Gen 2) | 150-300 (Recognition) | Works well in low light, better durability |
| High-End ($3,500+) | 64+ lp/mm (Gen 3) | 300+ (Recognition) | Autogating, exceptional low-light vision |
As you can see, spending more gets you significantly better clarity and range. This table should give you a solid framework for evaluating whether a particular device is priced fairly for the performance it offers.
Matching Your Binoculars to Your Activity

Knowing the tech is one thing, but the real trick to finding the best night vision binoculars is matching those specs to what you’ll actually be doing. It’s about getting a tool you’ll love to use, not just an expensive gadget that ends up collecting dust on a shelf.
This is how you go from just reading a spec sheet to picking a device that truly fits your passion. With the global market for night vision growing, we’re seeing more and more devices built for specific uses like hunting, security, and watching wildlife. You can dig deeper into these market trends over at DataIntelo.
So, let’s break down how to connect the features to your mission.
For the Hunter and Outdoorsman
When you’re out in the backcountry tracking game, your gear needs to be as tough as you are. For hunters, it boils down to three things: durability, long-range detection, and weather resistance. You need a pair of binoculars that can survive a drop, a sudden downpour, and the general wear and tear of being in the wild.
Here’s what to look for:
- Long Detection Range: You have to be able to spot an animal from hundreds of yards away. This means you should be looking at higher-generation devices (Gen 2 or better) that really amplify the available light.
- Rugged Construction: Look for models with a shockproof and water-resistant rating, something like IP67. A rubberized armor coating is also a huge plus, giving you a solid grip and an extra layer of protection from bumps.
- Magnification Power: A good balance, say 3x to 5x magnification, is key. It’s enough to identify targets at a distance without making the image so shaky that it’s useless when you’re breathing hard after a trek.
For Home and Property Security
Keeping an eye on your property at night is a totally different ballgame. You’re not trying to spot a single deer a quarter-mile away; you’re monitoring a wide area for anything out of the ordinary, often much closer to home. The priorities here shift from raw distance to broad awareness and the ability to capture evidence.
A wide Field of View (FOV) is your best friend. It lets you scan your whole yard or property line without constantly whipping your head back and forth. Just as important, the ability to record what you see is a must-have for any serious security setup.
For security, a digital night vision system is often the way to go. You get built-in recording, and you can even use them during the day for general surveillance. That’s a level of versatility you just don’t get with traditional analog units.
For the Wildlife Observer
Getting a glimpse of animals in their natural habitat means being invisible. The absolute last thing you want is to spook a fox or an owl with a loud click or a blindingly bright IR beam. For wildlife enthusiasts, it’s all about image clarity and pure stealth.
Your perfect device will have:
- High Resolution: You need a crisp, clean image to tell the difference between two similar species or see the subtle details of an animal’s behavior. A high lp/mm rating is what delivers that sharp detail.
- Quiet Operation: Check for models that have silent buttons and focus wheels. Any little sound can bring a magical wildlife moment to an abrupt end.
- Adjustable IR Illuminator: A powerful IR is great, but sometimes it’s too much—it can wash out the image or startle animals. An adjustable illuminator gives you the control to add just enough light to see clearly without being intrusive.
For Marine and Boating Use
The open water at night is a whole different beast. You’re dealing with fog, sea spray, and the constant rocking of the boat, all of which can make standard night vision a nightmare to use. For anyone on the water, two features are non-negotiable.
First, your binoculars absolutely must be waterproof and fog-proof. Look for a rating like IPX7 and nitrogen-purged optics. Second, image stabilization is a complete game-changer. It uses electronics to counteract the boat’s movement, giving you a steady view. Without it, you’re just fighting a blurry, bouncing image, making it nearly impossible to navigate or spot obstacles.
Taking Care of Your Night Vision Gear
Think of your night vision binoculars as a serious piece of high-performance equipment. Just like you wouldn’t neglect a finely tuned engine, giving your optics the right care is what guarantees they’ll perform for years to come. A few simple habits can prevent some seriously expensive mistakes.
The golden rule, especially for traditional analog night vision (Gen 1, 2, or 3), is to never, ever expose the intensifier tubes to bright light. Firing them up in broad daylight or accidentally pointing them at a streetlamp can permanently burn the tube. You’ll be left with black spots in your view that you can’t get rid of.
It’s a bit like the film in an old camera. One bright flash can overexpose it, ruining that spot on the negative forever. The lesson is simple: always keep those lens caps on unless you’re actively using them in the dark.
Keeping Your Lenses Crystal Clear
The special anti-reflective coatings on your lenses are your best friend for a bright, clear image. They’re also delicate. Wiping a dusty lens with the corner of your t-shirt is a surefire way to scratch them and degrade your view.
Here’s the right way to clean them:
- Get the Grit Off First: Before you wipe anything, use a can of compressed air or a soft lens brush to blow away any dust or sand. If you don’t, you’re just grinding that grit into the coating.
- Use the Right Stuff: Grab a dedicated lens cleaning solution and a clean microfiber cloth. Put a few drops on the cloth, not directly on the lens.
- Wipe Smart, Not Hard: Start from the center of the lens and gently wipe in a circular motion, moving toward the edge. This pushes any smudges out instead of cornering them.
Batteries and Long-Term Storage
Nothing’s worse than pulling out your gear for a night hunt only to find the batteries are dead. Good battery habits and proper storage mean your binoculars are ready to go when you are.
If you’re putting the unit away for more than a week, take the batteries out. Battery leakage is the silent killer of electronics, and the corrosion it causes can wreck the internal contacts beyond repair. It’s an easy problem to avoid.
When you’re not using them, store your binoculars in their protective case somewhere cool and dry. Big temperature swings aren’t great for the electronics or the seals.
Finally, pay attention to the warranty. A solid warranty isn’t just a piece of paper; it’s a reflection of the manufacturer’s confidence in their product. When you see a brand offering 10-year coverage on their Gen 3 systems, you know they’ve built something to last. It’s your ultimate backup for a complex and valuable tool.
Answering Your Final Questions
As you get closer to choosing the right night vision binoculars, a few last-minute questions always seem to surface. It’s completely normal. Let’s walk through the most common ones I hear so you can feel 100% confident in your decision.
One of the first things people ask is if they can use their night vision during the day. For traditional analog units—that’s your Gen 1, 2, and 3 devices—the answer is a firm no. It’s a quick way to burn out the sensitive intensifier tube, leaving you with permanent black spots in your image.
Digital night vision, on the other hand, is a different story. Since it works more like a high-tech camera, you can use it in broad daylight without any risk of damage. That flexibility is a huge plus for digital models.
Why Is Everything Always Green?
That classic, glowing green image you see in movies isn’t just for cinematic effect. It’s actually rooted in human biology. Our eyes are most sensitive to the color green, which means we can distinguish more shades and pick up on subtle details in that part of the spectrum.
By using a green phosphor display, manufacturers make it easier for our eyes to process information in the dark. This specific color also helps cut down on eye strain, which is a lifesaver when you’re scanning an area for hours at a time. It’s the sweet spot between clarity and comfort.
How Far Can I Really See?
This is easily the most common—and most misunderstood—question of all. You’ll see devices advertised with massive detection ranges, but you have to read between the lines to know what that really means in the field. There are three key distances to understand:
- Detection Range: This is the absolute maximum distance where you can spot a heat signature or a vague shape. You know something is out there, but that’s about it.
- Recognition Range: At this distance, you can start to make out what you’re looking at. Is that a deer or a person? This is where you can tell the difference.
- Identification Range: This is the closest and most detailed range. You can identify specific features, like confirming the person you’re looking at is a friend, not a stranger.
When you’re comparing specs, always focus on the recognition and identification ranges. Those are the numbers that will tell you how useful the device will actually be for your needs.
Ready to see what the darkness has been hiding? Explore a curated selection of professional-grade night vision and thermal optics at Superior Tactical LLC. Find the perfect gear backed by expert support and a 10-year warranty on Gen 3 systems. https://superiortac.com