Your Guide to Night Vision Monocular Head Mounts
A night vision monocular head mount is exactly what it sounds like: a system for wearing a night vision device on your head, leaving your hands completely free. This setup is what elevates a simple optic from a viewing tool into an integral piece of your gear, giving you a serious advantage for navigating and operating in total darkness. The real magic here is the boost in situational awareness and total freedom of movement.
Seeing in the Dark: The Power of Hands-Free Night Vision
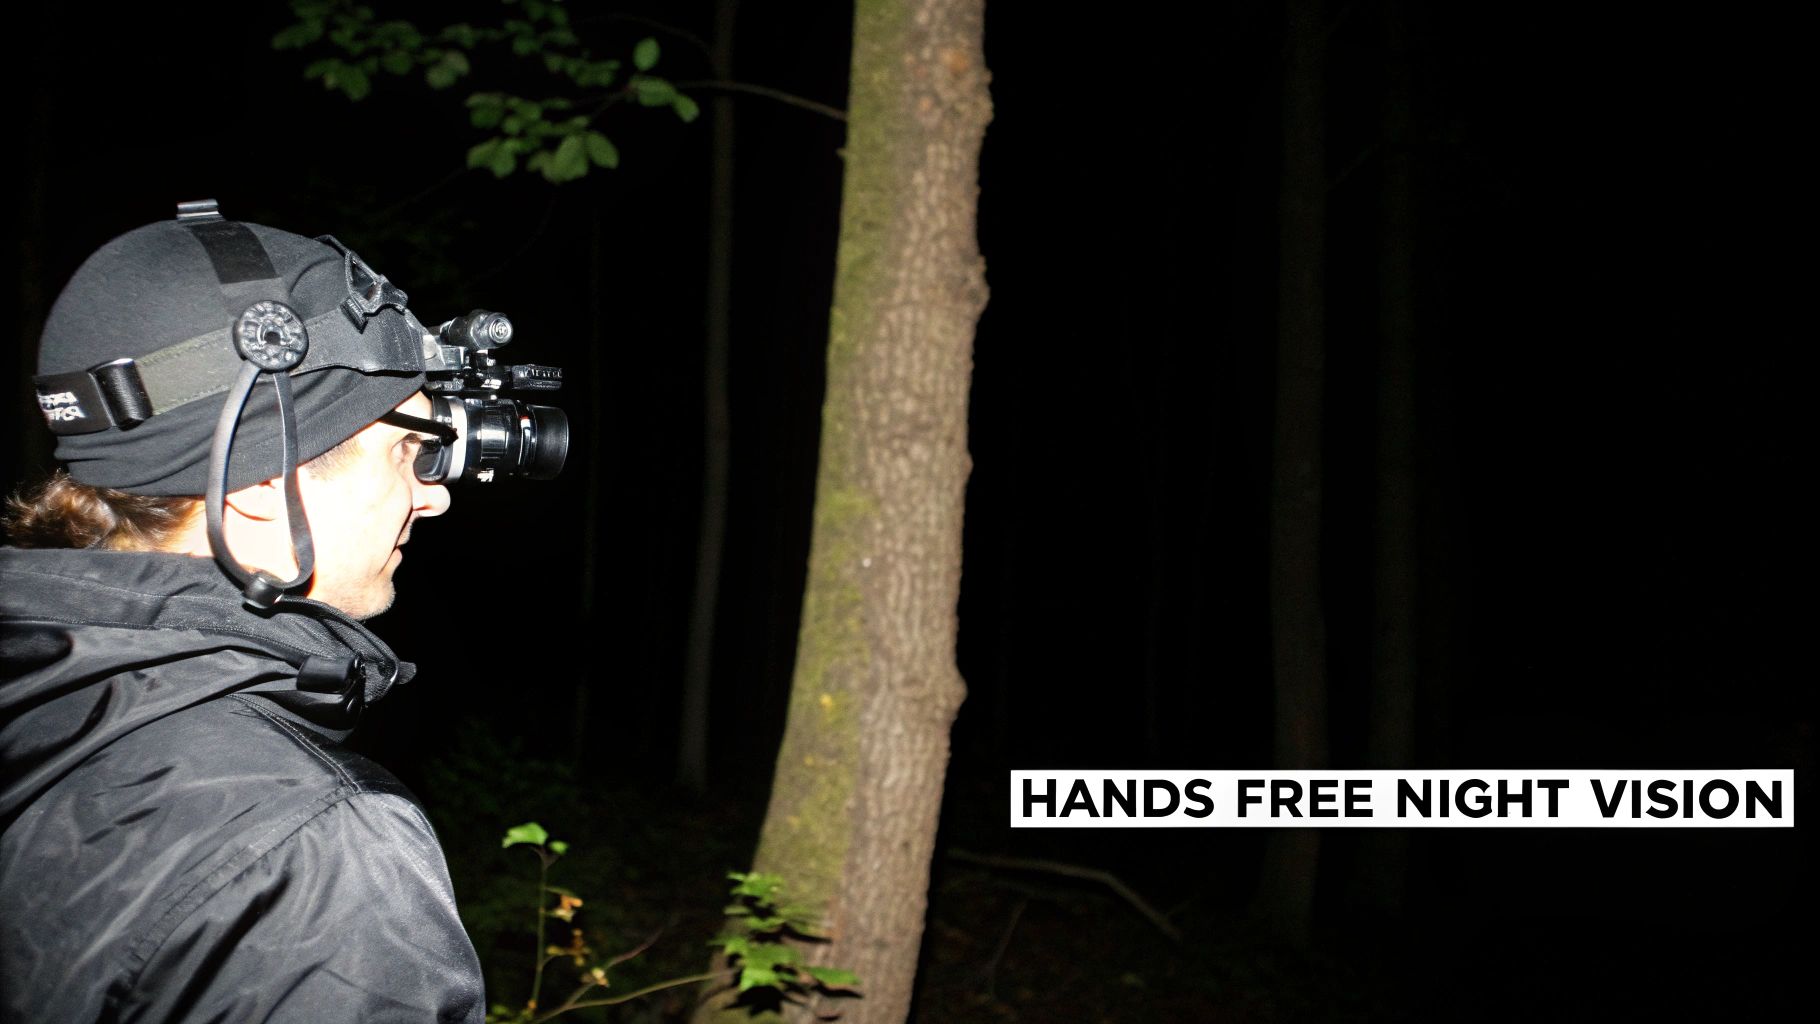
Think about trying to navigate a dark trail, fix a piece of equipment, or track an animal while fumbling with a flashlight. The moment you need your hands, you’re plunged back into darkness. A handheld night vision monocular has the same problem—it’s incredibly powerful, but it ties up one of your hands. The head mount changes everything.
It’s the difference between holding a tool and having a new sense. A handheld monocular is something you use, but a head-mounted system becomes a true extension of your own vision. This is what makes a night vision monocular head mount such a game-changer for anyone who works or plays after the sun goes down.
Breaking Down the System
A complete head-mounted rig is a system of three core components working in harmony. Getting a handle on how they fit together is the first step to building a setup that’s stable, comfortable, and actually works when you need it to. Each piece is just as important as the next.
Here’s what you’re working with:
- The Monocular: This is the heart of the system—the optic that actually gathers and amplifies light, turning pitch-black into a visible landscape.
- The Mount: This is the articulating arm that connects your monocular to your headgear. It’s what lets you flip the device up out of the way and provides that critical link.
- The Head Harness or Helmet: This is the foundation everything attaches to. It could be a basic “skull crusher” harness or a ballistic helmet, but its job is to provide a stable platform to keep the optics steady.
A well-built head mount does more than just hold the monocular. It balances the weight and aligns the optic perfectly with your eye, creating an intuitive experience that feels less like wearing gear and more like a natural ability.
Why Go Hands-Free?
The most obvious benefit of a head-mounted system is that it frees up your hands. This is huge. It means you can hold a rifle, render first aid, or just use your hands to keep your balance on rough ground without losing your vision.
But there’s another, more subtle advantage. A head-mounted monocular leaves your unaided eye free to adapt to the ambient darkness. This helps preserve your natural night vision and, crucially, your depth perception. Instead of your brain constantly switching between a bright, flat image and total blackness, you get a blended, more natural field of view that’s far less disorienting. That combination of enhanced vision and natural perception is the key to truly owning the night.
Choosing Your Ideal Night Vision Head Mount System
Picking the right head mount system for your night vision monocular can feel like wading through a sea of technical jargon. Let’s break it all down into simple, practical steps so you can build a setup that fits exactly what you need without breaking the bank.
Think of it like building a custom rifle. The mount and helmet are your stock and chassis—they provide the stable platform. The monocular itself is the optic—it’s what actually does the work. Both parts need to work together perfectly to get the job done right.
Decoding the Head Mount Hardware
The first big decision is how you’re going to wear the device. This really comes down to what you’ll be doing, how stable the image needs to be, and your budget. There are two main paths you can take.
The most basic option is a simple harness system, which many in the community affectionately call a “skull crusher.” It’s essentially a set of straps that goes directly on your head, no helmet required. They’re cheap and light, but they aren’t the most rigid, which can cause the image to wobble when you’re moving around.
For a much more solid setup, you’ll want a helmet-mounted system. This involves attaching a special bracket, called a shroud, to the front of a tactical helmet. The mount arm then clicks into this shroud. This creates an incredibly stable platform, which is absolutely essential for professional use or anything dynamic like hunting on the move or playing airsoft.
The stability of your mount is non-negotiable. A high-performance monocular is useless if the image shakes with every step. Investing in a solid helmet and mount combination is the foundation of a reliable hands-free system.
To help you visualize the trade-offs, here’s a quick comparison of the most common head mounting systems.
Comparison of Head Mount Types
| Mount Type | Primary Use Case | Stability | Adjustability | Cost |
|---|---|---|---|---|
| Skull Crusher Harness | Stationary observation, budget setups | Low | Moderate | Low |
| Bump Helmet Mount | Training, airsoft, high-movement activities | High | High | Moderate |
| Ballistic Helmet Mount | Law enforcement, military, professional use | Very High | Very High | High |
Ultimately, a helmet provides a far superior foundation, but a harness can be a good entry point if you’re just starting out or primarily observing from one spot.
The Great Debate: Dovetail vs. Bayonet Mounts
Once you’ve decided on a harness or a helmet, the next piece of the puzzle is how the monocular’s J-arm physically connects to the mount. The two industry standards you’ll run into are the bayonet (or “horn”) mount and the dovetail mount.
- Bayonet Mounts: This is the older design, but it’s still out there. It uses a horn-shaped piece that locks into the mount. It works, but these mounts are notorious for having a bit of “slop” or wobble, which can be really distracting when you’re trying to focus.
- Dovetail Mounts: This is the modern gold standard. It features a trapezoidal rail that slides snugly into the mount, creating a much tighter, more secure lock-up with virtually no play. Mounts like the wildly popular Wilcox L4 G24 use a dovetail interface and are trusted for their rock-solid stability and fine-tuned adjustments.
For anyone serious about their gear, the dovetail system is the clear winner. Just make sure the mount you choose is compatible with the J-arm on your monocular!
Selecting the Right Monocular
With your mounting platform sorted out, it’s time to focus on the optic itself. The night vision market is booming, and consumer-grade monoculars are selling like hotcakes thanks to some pretty advanced features. In fact, market data shows that devices in the $50 to $200 price range are incredibly popular online, often packing features like 8x zoom, video recording, and helmet-mount compatibility.
However, if you need professional-grade performance, you have to look beyond the basic specs. The biggest difference is between traditional analog image intensification tubes and modern digital night vision. Analog devices are classified by “Generation” (Gen), which tells you how advanced the core technology is.
- Generation 2 (Gen 2): This is a huge leap in performance over the old Gen 1 stuff. Gen 2 gives you much clearer images and works far better in low light, making it a great middle-ground for serious hobbyists.
- Generation 3 (Gen 3): This is military and law enforcement-grade equipment. Gen 3 tubes offer incredible clarity and range, performing exceptionally well in near-total darkness. If you need the best, this is it.
Another term you’ll hear is Figure of Merit (FOM). It’s a simple calculation: the tube’s resolution (lp/mm) multiplied by its signal-to-noise ratio. A higher FOM number means you get a cleaner and sharper image. For a much deeper look into these specs, check out our guide on the top features to look for in a quality night vision monocular.
By taking the time to choose a stable mounting system and pairing it with a monocular that meets your real-world needs, you can build a hands-free setup that truly turns night into day.
Getting Your Head Mount System Assembled and Dialed In
A high-end night vision setup is only as good as its weakest link, and that link is often the assembly. You can have the best monocular on the market, but if it’s not properly mounted and balanced, you’ll be fighting a wobbly, unstable image all night. Think of it like a precision rifle—the scope is useless without a rock-solid mount. Your head mount is the foundation for your night vision.
This isn’t just a mechanical process. We’re going to walk through how to correctly install your gear, but more importantly, we’ll cover the fine-tuning that makes a collection of parts feel like a true extension of your senses.
Step 1: Locking the Mount to the Helmet
Everything starts with the helmet. The connection between your helmet and the mount arm needs to be completely bomb-proof. Most modern tactical helmets come with a built-in shroud, which is that mounting plate right on the front.
Your first move is to attach the mount arm to that shroud. For common mounts like the Wilcox L4 G24, this is dead simple. You’ll press a release button, line it up with the shroud, and slide it in until you hear and feel a solid click.
Now, give it a good, firm wiggle. There should be absolutely no play or movement. None. If you feel even the slightest bit of looseness, reseat the mount. A wobbly mount is the number one cause of an unstable image, and it will drive you crazy in the field.
The infographic below shows how the decisions you make early on—about your intended use and budget—all lead up to this final assembly stage.
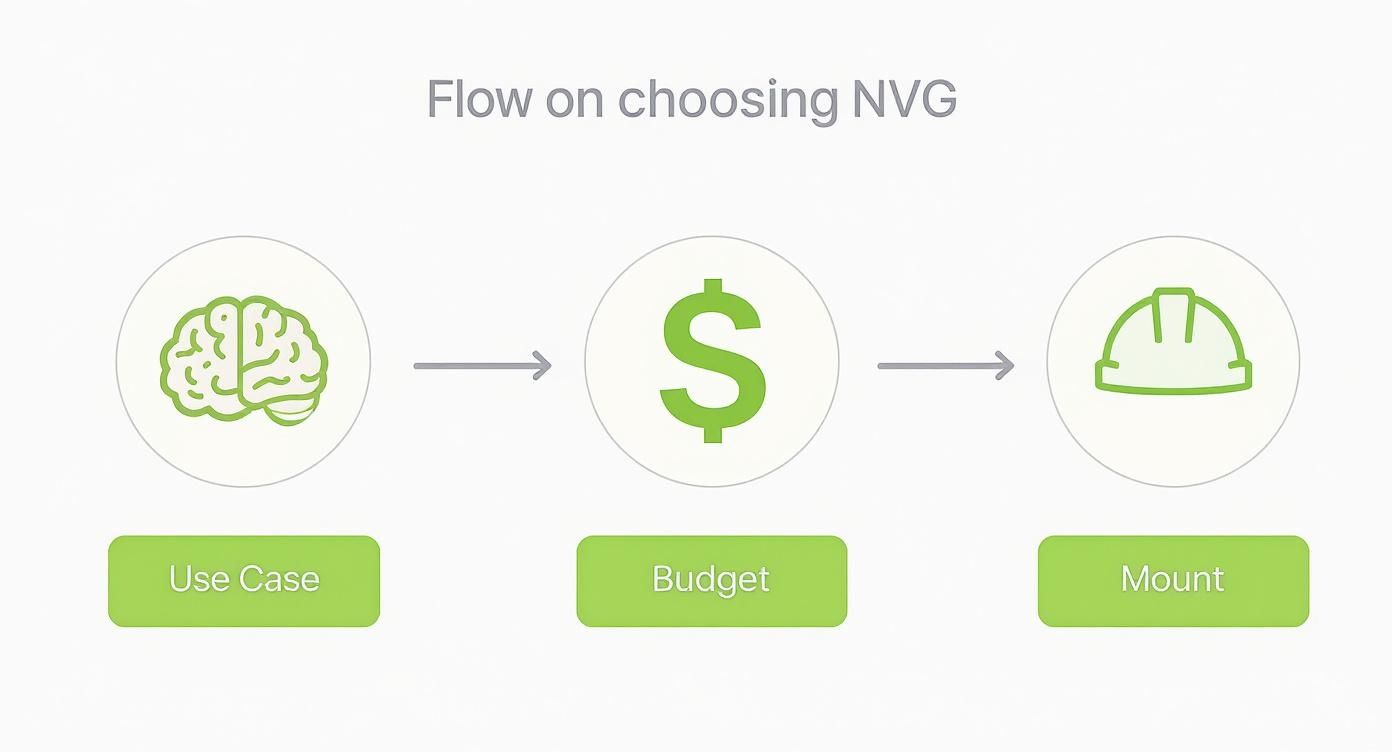
As you can see, your gear choices are all interconnected, so it pays to plan ahead before you start putting things together.
Step 2: Connecting the J-Arm and Monocular
With the mount arm solid, let’s get the J-arm and monocular connected. The J-arm is that L-shaped piece that bridges the gap between your optic and the mount. It’s a crucial little part, often letting you swap the monocular between your left and right eye.
Most monoculars, like the ubiquitous PVS-14, have a threaded port for the J-arm. Gently screw the J-arm in until it’s snug. Do not overtighten it! You can easily damage the threads on your very expensive optic. It should feel like one solid piece.
Next, attach the J-arm assembly to the mount itself. How this works depends on whether you have a dovetail or bayonet-style interface. With a dovetail system, the J-arm slides right into the mount’s receiver and locks in tight. If you want to go deeper on this, you can learn all about the advantages of dovetail mounts for night vision goggles in our complete guide.
The end goal here is a completely rigid connection, from the helmet all the way to the monocular. Any slop in the J-arm, mount, or shroud gets amplified when you’re moving, which makes for a disorienting, headache-inducing experience.
Step 3: Nailing the Eye Relief and Balance
This is where the magic happens. Proper adjustment is the difference between a setup you forget you’re even wearing and one that gives you a headache in five minutes. We’re chasing two things here: perfect eye relief and perfect balance.
Getting Your Eye Relief Just Right
- Helmet On: Get the helmet on your head and cinch down the chin strap. It shouldn’t be able to shift around.
- Flip Down the NVG: Engage the mount and swing the monocular down in front of your dominant eye.
- Adjust Fore/Aft: Use the knobs on your mount to slide the monocular closer or further away from your eye. You’re looking for a full, clean, circular image with no black crescents or shadows on the edges (what’s known as “scoping”).
- Tune the Height and Tilt: Now, adjust the vertical height and tilt until the monocular is perfectly aligned with your eye’s natural line of sight. You shouldn’t have to crane your neck or squint to see through it.
Once the eye relief is set, you have to deal with the balance. Your monocular adds a hefty chunk of weight to the front of your helmet, which will constantly try to pull it down over your eyes. This gets old, fast, and puts a lot of strain on your neck.
The fix is a counterweight. This is basically a pouch of lead weights that attaches to the back of your helmet. A good starting point is a weight that roughly equals your monocular and mount setup—usually around 1 to 1.5 lbs. The goal is for the helmet to feel neutral, not pulling you forward or backward. A balanced rig is a comfortable rig, and that means you can wear it for hours without fatigue.
Mastering Your Hands-Free Night Vision Setu
Alright, you’ve got your gear assembled and your head mount is perfectly balanced. Now, the real training begins. Getting comfortable moving with a night vision monocular is the leap that separates someone who just owns the gear from someone who truly uses it effectively. The goal is to make it feel less like a gadget strapped to your head and more like a natural extension of your sight.
The secret to making this work is learning to see with both eyes at once—your aided eye and your unaided eye. Your monocular opens up a window into the dark, but your other eye is what gives you crucial peripheral vision and keeps your depth perception from going completely haywire. Getting your brain to merge these two different inputs is the key to moving confidently without feeling disoriented or getting locked into tunnel vision.
Getting Your “Night Legs”: Movement and Navigation
The very first thing you need to master is simply walking. I know, it sounds almost silly, but navigating uneven ground when one eye is seeing a glowing green world can really throw you off. Your sense of depth will feel a little wonky at first—that’s completely normal.
Find a safe, open area with some varied terrain and just start moving. Focus on how your brain is processing the two different images. Over time, you’ll naturally learn to judge distances and spot obstacles with much greater ease.
A classic drill to practice is the “flip-up, flip-down.” As you walk, get used to smoothly flipping the monocular up out of your vision with one hand and then bringing it back down. This needs to become muscle memory, letting you switch between your natural and enhanced vision without breaking your stride.
The whole point is to make it seamless. An experienced operator can flip their monocular down, scan an area, and stow it again in one fluid motion. This kind of efficiency means less time fumbling with gear and more time paying attention to what’s around you.
Staying Aware with Eye Discipline
True situational awareness means keeping one eye naturally adapted to the dark while the other uses the monocular. This learned skill is often called eye discipline, and it’s what keeps you from becoming totally reliant on the device. It helps you pick up on subtle cues in your environment that the monocular might otherwise miss.
Here are a few tips to help you build this skill:
- Scan with a System: Don’t just stare through the monocular. Use it to perform slow, deliberate scans—left, right, up, and down. Then, flip it up and let your natural vision take over for a moment.
- Stop, Look, and Listen: When you pause, don’t forget about your other senses. Operating at night is as much about what you can hear and feel as what you can see.
- Trust Your Naked Eye: Let your unaided eye handle the immediate work—watching your footing and keeping tabs on your periphery. It’s your best early-warning system for anything right beside or in front of you.
This kind of discipline is non-negotiable in any scenario, whether you’re hunting or running a tactical operation. It ensures you never lose sight of the bigger picture.
Advanced Skills for Peak Performance
Once you’ve got the basics down cold, it’s time to add some advanced tools and techniques. First up: the infrared (IR) illuminator. Think of it as a flashlight that’s completely invisible to the naked eye but acts like a high-powered spotlight for your night vision device.
When you’re in total darkness—like inside a building with no windows—your monocular has no light to amplify. An IR illuminator solves that problem by flooding the area with infrared light, making the scene pop with brightness and clarity through your optic. Learning to use one effectively means you can operate in true, absolute darkness.
Making on-the-fly adjustments is another hallmark of a pro. You should be able to tweak the focus and gain without having to look at the device. Practice reaching up and finding the controls by feel until you can sharpen an image or adjust its brightness based on changing light conditions without a second thought.
This push toward greater user skill is part of a larger trend. The head-mounted night vision market is projected to swell to $1.1 billion by 2033, thanks to growing adoption by professionals and serious outdoor enthusiasts alike. You can find more details on this market’s growth and trends. By mastering these skills, you ensure your night vision setup is a powerful asset, not just a clumsy liability.
Essential Maintenance for Your Night Vision Gear
Your night vision setup is a piece of precision engineering. Just like any high-performance tool, it needs regular, proper care to stay reliable. If you skip maintenance, you’re not just being lazy—you’re setting yourself up for poor performance, or worse, a costly failure when you need it most.
Think of it this way: you wouldn’t buy a race car and then skip the oil changes. A few minutes of routine care after every use will go a long way in protecting your investment and making sure your gear is always ready to go.
Protecting the Heart of the System: The Monocular
The monocular is the most valuable and fragile part of your entire kit. The magic happens inside, with delicate components like the image intensifier tube, and it all demands careful handling. Job one is always protecting the optics.
The cardinal rule of night vision is simple: never point the objective lens at a bright light source when the power is on. This can permanently burn the intensifier tube, leaving you with permanent dark spots in your vision. When you’re not actively using it in the dark, that daytime lens cap needs to be on. No exceptions.
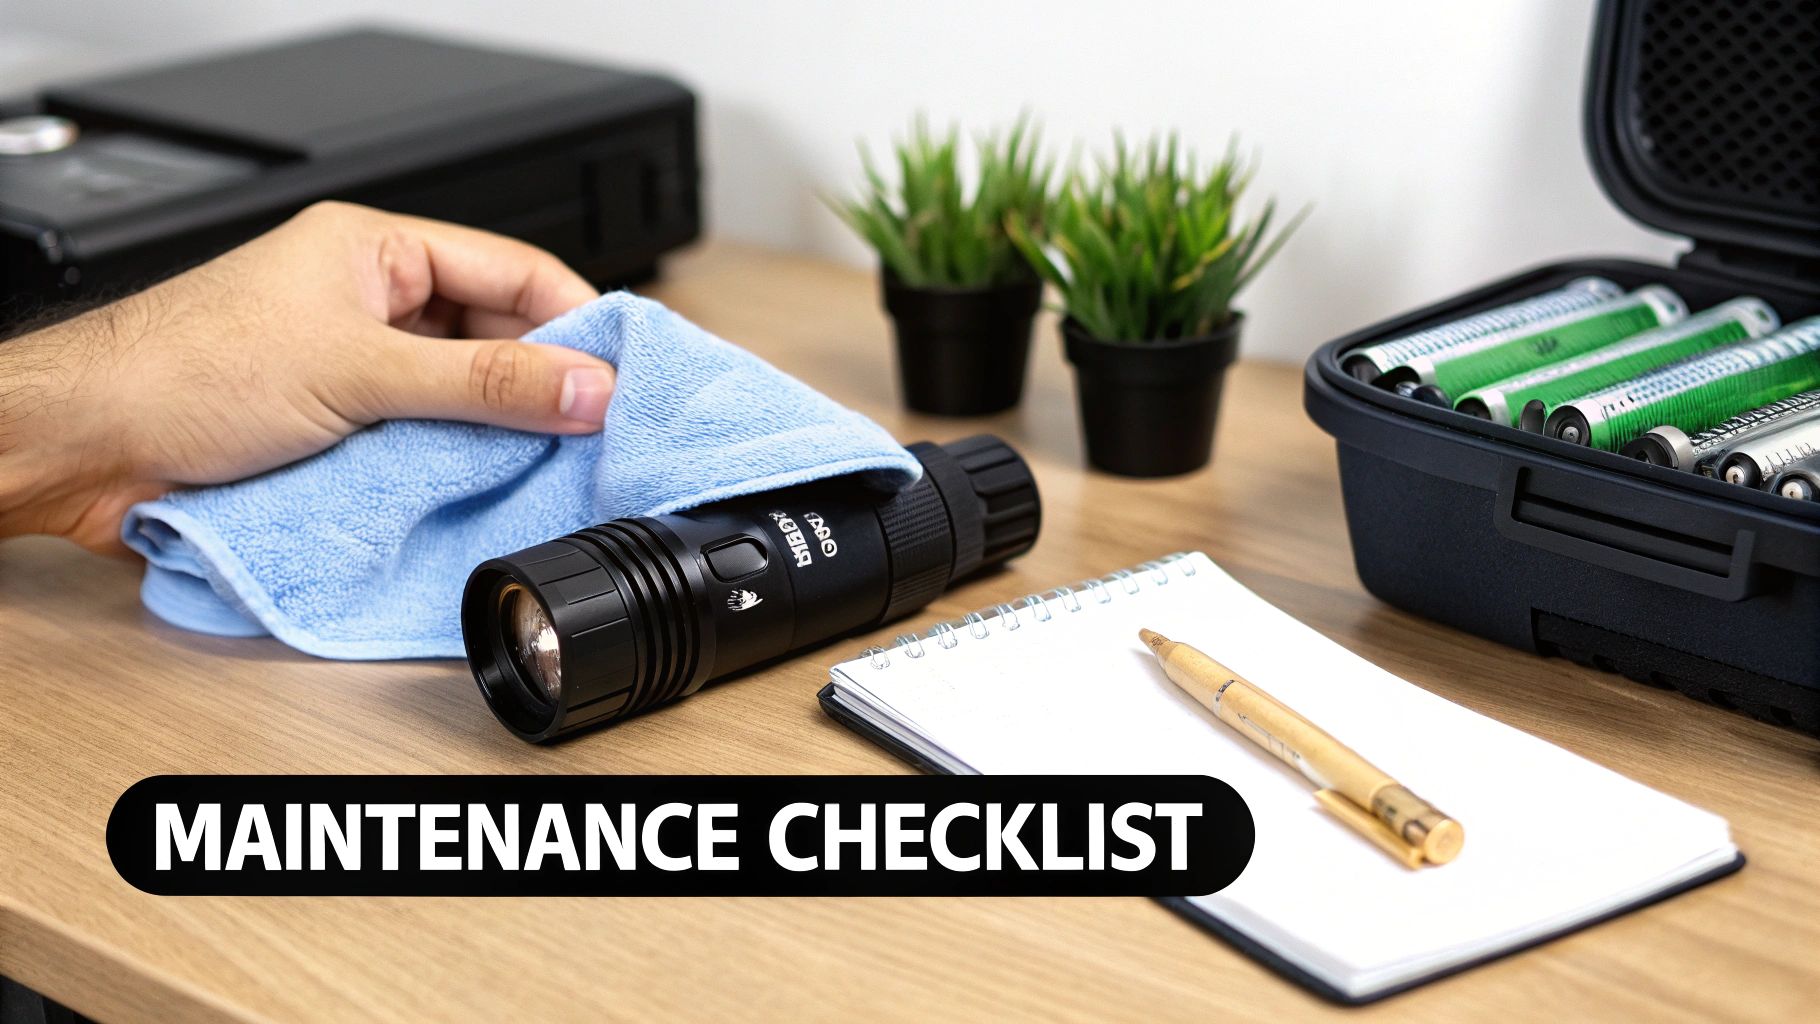
When it comes to cleaning the lenses, gentle is the only way to go.
- Step 1: Blow Away Debris: First, use a lens blower or a can of compressed air to get rid of any loose dust and grit. If you wipe a gritty lens, you’re just grinding those particles into the delicate coatings.
- Step 2: Brush It Off: Next, grab a lens pen and use its soft brush to gently sweep away any stubborn particles you missed.
- Step 3: Wipe It Clean: Finally, use the carbon-tipped end of the lens pen or a fresh microfiber cloth. Wipe in a circular pattern, starting from the center and spiraling outward. And please, never use Windex or any other household chemical cleaners on your optics.
Proper lens care isn’t optional. Scratches and damaged coatings on the lenses will permanently screw up your image quality, cutting down on clarity and light transmission. Treat your glass with respect.
Keeping Your Mount and Harness in Check
The monocular might be the star of the show, but the night vision monocular head mount and harness are the unsung heroes providing stability. A single loose screw or a frayed strap can make your entire setup worthless at the worst possible time, so a quick inspection is crucial.
After you get back from the field, give the mount and harness a quick once-over. Check that all screws are tight, especially at the articulation points. Look closely where the J-arm meets the mount and where the mount clicks into your helmet shroud—these spots take a lot of stress and can work themselves loose.
Don’t forget about the batteries. Always take them out before putting your monocular away for any length of time. This tiny step prevents a leaking battery from corroding and destroying the electronics. For a deep dive on a specific unit like the PVS-14, check out this comprehensive maintenance and care guide here. Following these steps will keep your entire system mission-ready, from the power source to the helmet.
Troubleshooting Common Problems and Solutions
Sooner or later, even the best gear runs into a snag. A shaky image or a mount that just won’t stay put can ruin a night out in the field. But here’s the good news: most issues you’ll encounter with a night vision head mount are surprisingly easy to diagnose and fix on the spot.
Think of this as your field-expedient repair guide. We’ll walk through the most common headaches, from wobbly optics to painful pressure points, and give you clear, no-nonsense steps to get your setup running smoothly again.
Diagnosing and Fixing Image Wobble
Image wobble is, without a doubt, the number one complaint. It’s that annoying, vision-blurring shake that happens every time you move, and it’s a fast track to a headache. In almost every case, the culprit is a loose connection somewhere in the chain from your helmet to your monocular. The trick is to find that weak link.
Start with your fully assembled rig, but keep the power off. Hold the helmet firmly in one hand and gently try to wiggle the monocular with the other. Pay close attention—where is the movement coming from?
- At the Helmet Shroud: Does the entire mount arm wiggle where it connects to the helmet? If so, the problem is the primary interface. Detach the mount completely and then reseat it, pushing firmly until you hear and feel a solid click. Make sure no dirt or debris is getting in the way.
- At the J-Arm Connection: Is the J-arm loose where it clicks into the mount? This often points to a worn-out interface or a compatibility problem. It’s a particularly common issue with older bayonet-style mounts. The best long-term solution here is often upgrading to a more secure dovetail system.
- At the Monocular: Does the optic itself feel loose on the J-arm? The fix is usually as simple as tightening the thumbscrew. But be careful not to overtighten it—you can easily strip the threads on your expensive monocular. Snug is good; cranked down is bad.
A rock-solid, stable image is the whole reason for running a head-mounted system in the first place. Hunting down and eliminating every tiny bit of “slop” or looseness is the most critical step you can take to make sure your gear works like it’s supposed to.
Addressing Uncomfortable Pressure Points
If your helmet feels like it’s digging into your forehead or the back of your skull, the issue is almost always a simple matter of bad balance. A front-heavy setup makes you crank down on your chin strap to keep it from tipping forward, which leads directly to those painful hot spots and serious neck fatigue over a few hours.
The fix is a counterweight. By adding a bit of weight to the back of the helmet, you perfectly offset the weight of your monocular pulling everything forward. This lets the helmet balance naturally on your head, almost like it’s floating, without needing to be cinched down like a vise. A good starting point is a counterweight that’s roughly the same weight as your monocular and mount combined; from there, you can fine-tune it until it feels just right.
The growing demand for these kinds of setups shows just how effective they are. In fact, the market for head-mounted night vision is expected to grow at a Compound Annual Growth Rate (CAGR) of about 12% through 2033, largely because of these improvements in usability and comfort. You can find more details about this rapidly expanding market and its trends. When you get your gear properly balanced, you’ll immediately understand why this hands-free approach is becoming so popular.
A Few Common Questions
Even after going through a full guide, you’re bound to have a few specific questions pop up. It’s just the nature of working with specialized gear like night vision. Let’s tackle some of the most common ones I hear from people just getting started.
Can Any Monocular Fit Any Head Mount?
That’s a definite no. Think of it like trying to fit a Ford part on a Chevy—they just aren’t designed to work together. The secret is making sure the connection point on your monocular’s J-arm matches the receiver on your mount.
The two big players here are the classic bayonet style (sometimes called a “horn”) and the more modern dovetail style. You absolutely cannot attach a dovetail J-arm to a bayonet mount, or vice-versa. Always double-check that both pieces speak the same language before you buy, or you’ll end up with a wobbly, unusable setup.
Is a Counterweight Really Necessary?
Technically, you can run without one, but I strongly advise against it for any serious use. Strapping a monocular to the front of your helmet makes the whole thing front-heavy, and after an hour or two, your neck will be screaming at you. The helmet will constantly want to tip forward.
A good counterweight system is a game-changer. It perfectly balances the load, making the helmet feel almost weightless and keeping it planted right where it needs to be. You’ll avoid a ton of fatigue and won’t have to keep messing with your gear to get the optic back in front of your eye.
What Is the Difference Between a J-Arm and a Mount?
This one trips a lot of people up, but it’s simple once you see how they work together. They are two separate, but equally important, parts of the puzzle.
- The Mount: This is the big articulating arm that connects directly to the shroud on the front of your helmet. It’s the part that lets you flip the whole system up and out of the way and fine-tune the distance from your eye.
- The J-Arm: This is the smaller, L-shaped adapter that acts as the middleman. It connects your actual monocular to the mount. It’s also usually the piece that lets you swap the monocular from your right eye to your left.
Bottom line: you need both a mount and a J-arm that are compatible with each other to get a monocular properly set up on a helmet.
Ready to build the perfect hands-free night vision system? At Superior Tactical LLC, we offer a curated selection of high-performance monoculars, mounts, and helmets to get you mission-ready. Explore our complete collection and get expert advice at https://superiortac.com.