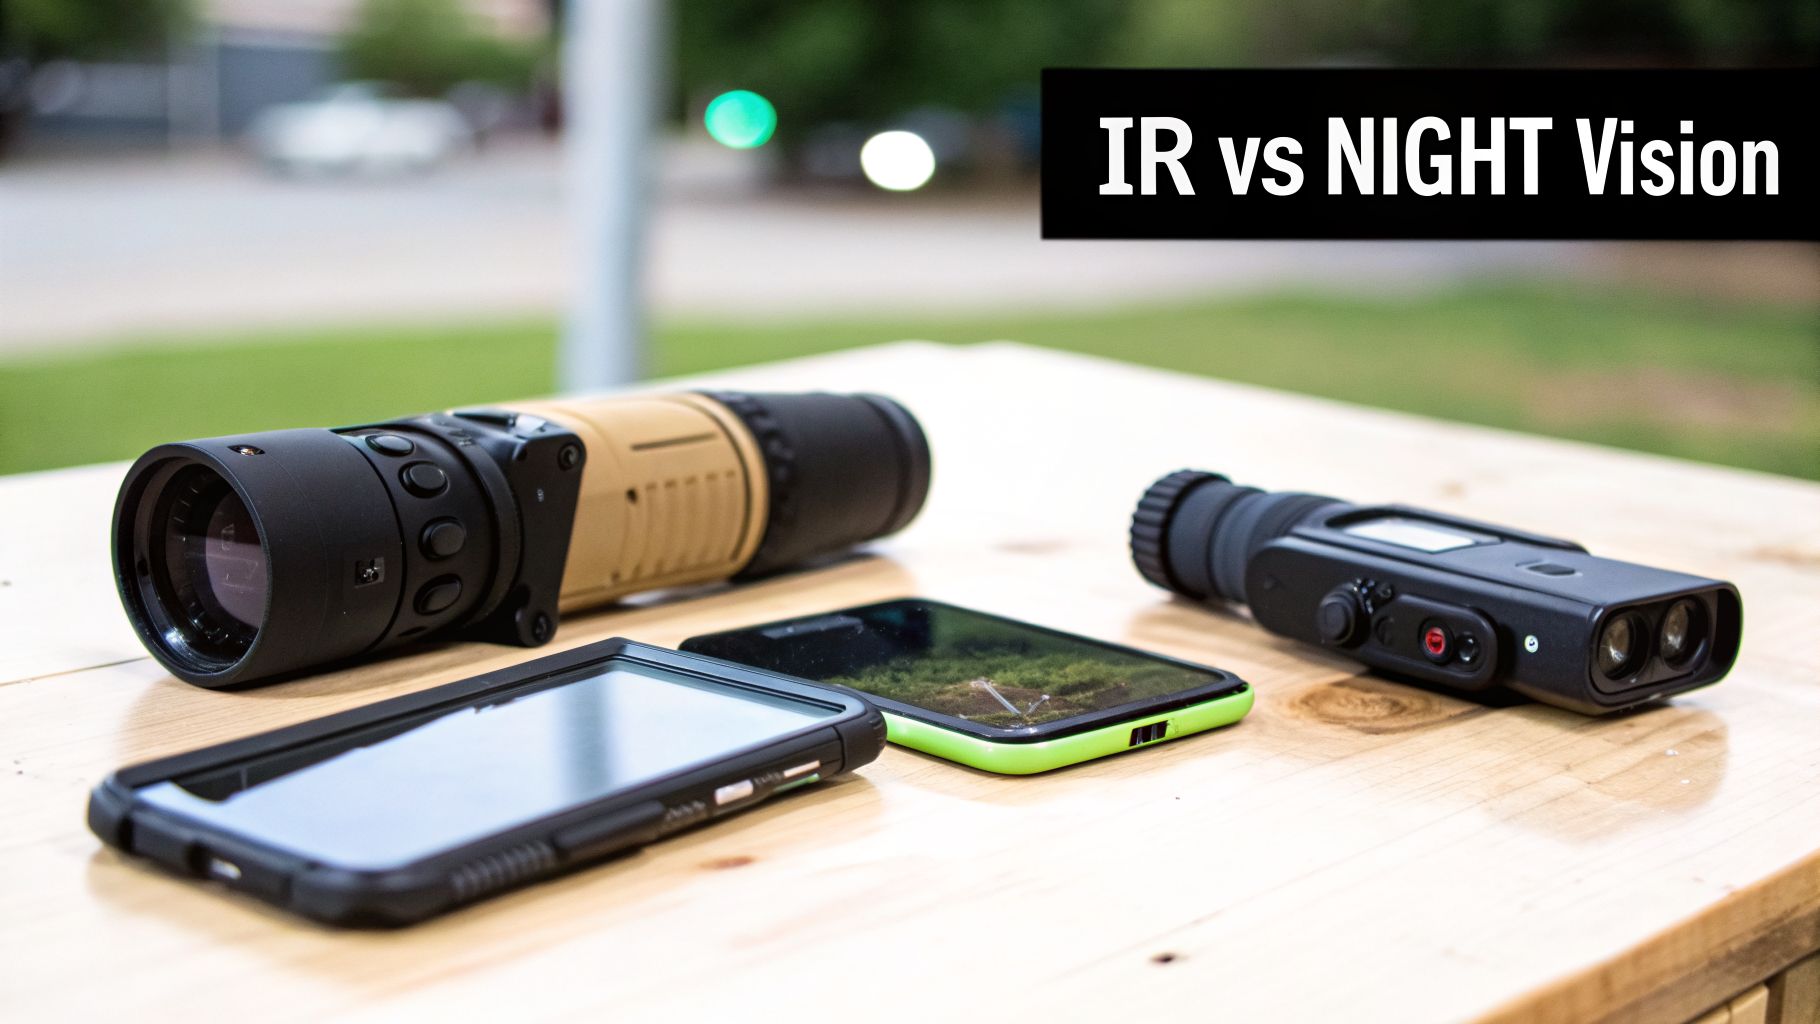
IR vs Night Vision The Definitive 2026 Tactical Comparison
When people talk about seeing in the dark, they often lump "IR" and "night vision" together. The truth is, they're not the same thing, and understanding the distinction is the first step to choosing the right gear. The IR vs night vision debate really comes down to this: traditional night vision amplifies existing light, while an active IR (infrared) system creates its own invisible light.
Then there’s thermal imaging, which is a completely different beast—it sees heat, not light. Getting this straight is critical before you spend your hard-earned money.
Understanding Your Options For Seeing In The Dark
For anyone operating in low light—whether you're in law enforcement, on a hunt, or running tactical drills—your choice of optic can make or break the mission. The market is flooded with terms like image intensification, active IR, and thermal, and it's easy to get lost. The most important thing to remember is that these technologies are specialists, each with a unique job and a different way of seeing the world.
Core Technology Quick Comparison
Before we dive deep, let's get a high-level overview. This table breaks down the fundamental principles of each technology so you can see exactly what they do and what they need to function.
| Technology | Operating Principle | Primary Function | Requires Ambient Light? |
|---|---|---|---|
| Night Vision (Image Intensification) | Amplifies tiny amounts of visible and near-infrared light from sources like the moon or stars. | To create a detailed, recognizable image for identification and navigation. | Yes, requires at least minimal ambient light. |
| Active IR Illumination | Projects infrared light (invisible to humans) onto a target, which a night vision device can then see. | To provide a light source in absolute darkness, enabling night vision devices to function. | No, it creates the light source. |
| Thermal Imaging | Detects temperature differences (heat signatures) emitted by objects and living things. | To detect heat sources, especially through environmental obscurants like smoke or fog. | No, operates independently of light. |
As you can see, night vision is a light amplifier, an IR illuminator is a light projector, and thermal is a heat detector. They are three distinct tools for three different ways of perceiving the environment.
Key Takeaway: Think of night vision as having superhuman hearing that needs some sound to work, while an IR illuminator is like shouting in a frequency only the night vision device can hear. Thermal imaging ignores sound entirely and just looks for body heat.
How They Work Together
The relationship between standard night vision and an IR illuminator is what really unlocks performance. A quality night vision device, like a PVS-14 monocular, works brilliantly on its own when there's some moonlight or starlight to work with. It gathers that faint light and intensifies it, giving you a surprisingly clear image for identifying targets and moving around.
But what happens when you step inside a pitch-black building or move into a forest with heavy cloud cover? Suddenly, there’s no ambient light to amplify. Your night vision device is effectively blind.
That's where an active IR illuminator comes in. You switch it on, and it floods the area with infrared light. To your naked eye, nothing happens, but your night vision device sees it as if you just hit the area with a powerful searchlight. This combination is often called "IR night vision," and it's the gold standard for operating in zero-light conditions while maintaining the ability to identify what you're looking at.
How Each Technology Actually Works
To really get a handle on the IR vs. night vision discussion, you have to look under the hood. While all these tools help you see in the dark, they get there using completely different physics. Knowing how each one operates is the only way you'll be able to choose the right gear for the job.
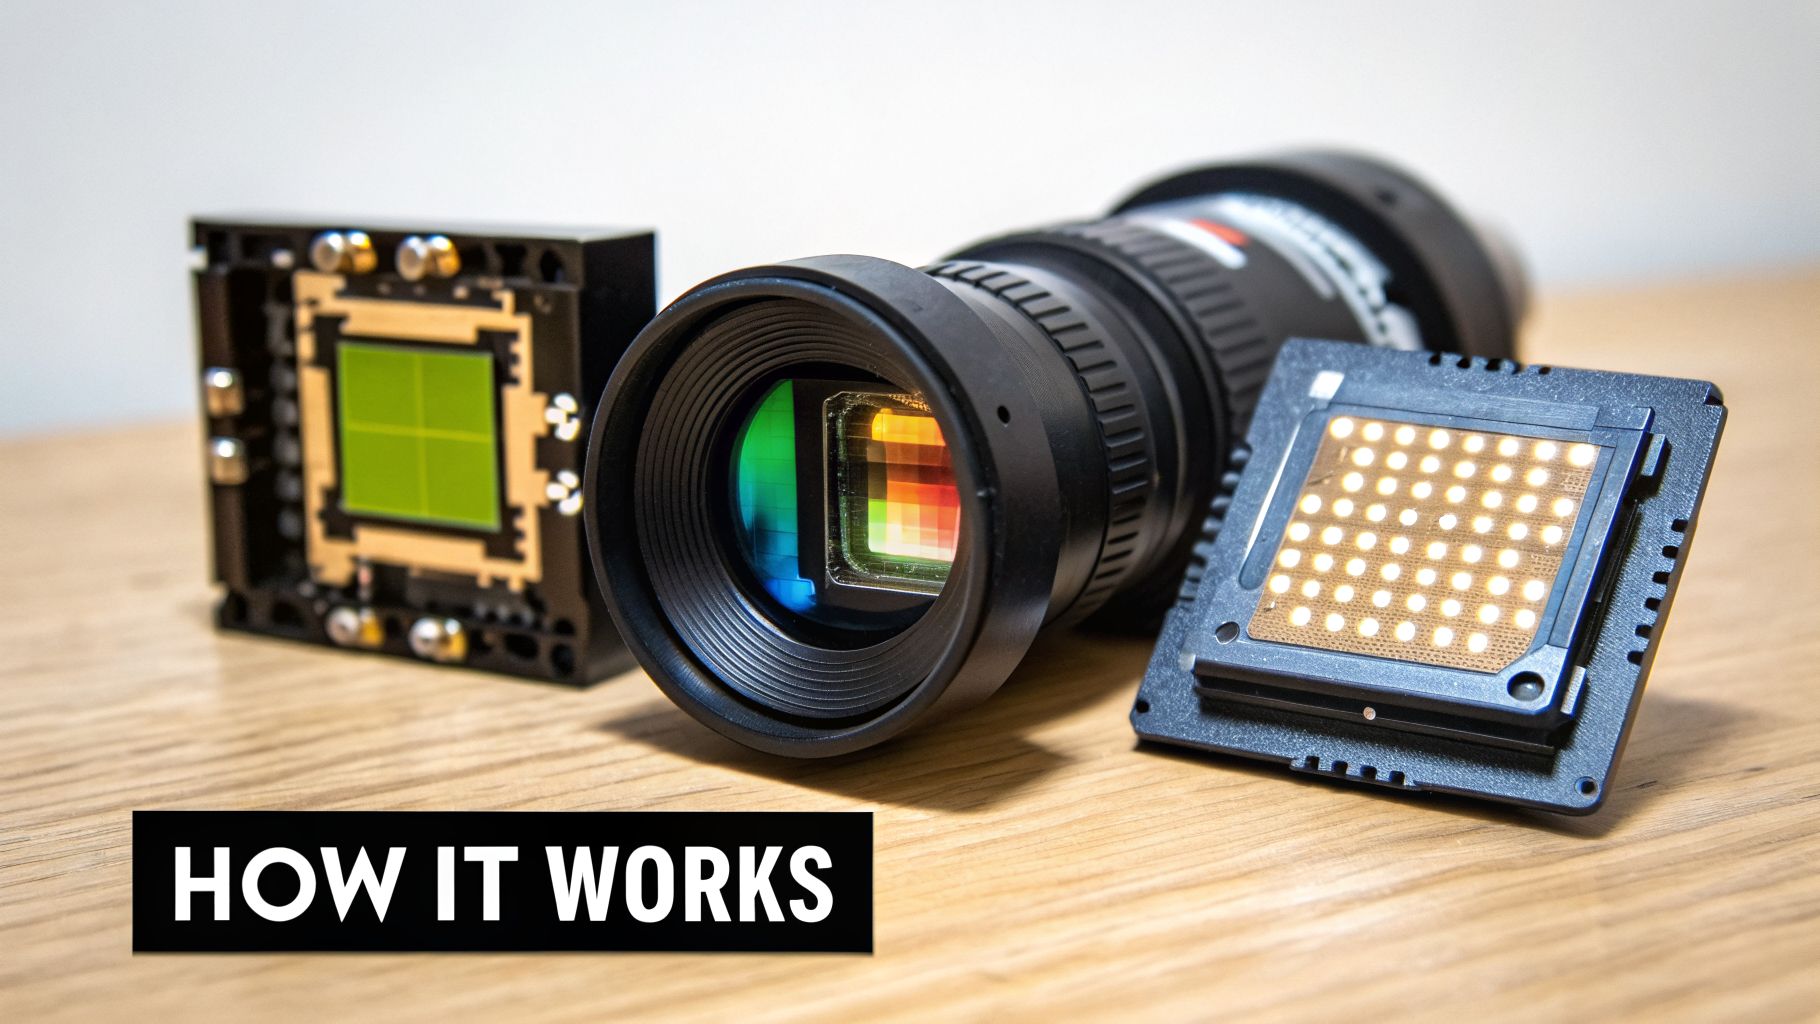
The Science Of Night Vision Image Intensification
Classic night vision, what we call image intensification (I²), is all about amplifying tiny amounts of ambient light. It's basically a light multiplier. You’re taking whatever light is available—starlight, moonlight, distant city glow—and cranking up the volume.
It starts when photons (particles of light) hit the objective lens and travel to a photocathode. This specialized plate converts those incoming photons into electrons, turning light into an electrical signal.
From there, the electrons are funneled into a microchannel plate (MCP), which is the real magic of the system. The MCP is a tiny disc packed with millions of microscopic tubes. As a single electron enters a tube, it bounces off the walls, knocking loose thousands of other electrons in a chain reaction. This is the "intensification" stage, where the signal gets amplified exponentially.
Finally, this supercharged cloud of electrons slams into a phosphor screen. The screen glows where the electrons hit it, creating the familiar green or white image you see. The big leap from Generation 2 to Generation 3 technology came from major upgrades to the photocathode and MCP, giving users a much brighter, cleaner picture with less static.
Active IR Illumination The Invisible Flashlight
While I² devices passively gather light, active IR illumination does the opposite—it actively creates its own. It's not finding light; it's making it. An IR illuminator, using either LEDs or a laser, shoots out a beam of infrared light that's totally invisible to the naked eye.
This beam of IR works just like a flashlight, but on a wavelength we can't see. The light travels out, bounces off whatever is downrange, and reflects back to your night vision device. Because night vision is sensitive to this near-infrared spectrum, it picks up the reflected IR light just like it would visible light. Suddenly, a pitch-black room looks like it's been floodlit.
Active IR effectively turns your passive night vision into an active system, letting you see in true, absolute darkness. This is what people are talking about when they say "IR night vision"—they mean pairing an image intensifier with an IR illuminator.
Thermal Imaging Seeing Heat Not Light
Thermal imaging is in a league of its own. It doesn't see light at all; it sees heat. Every object that isn't at absolute zero gives off thermal energy, and a thermal imager is built to detect the tiny differences in these heat signatures and paint a picture from them.
The heart of a thermal scope is a sensor called a microbolometer. Each pixel on this grid measures the temperature of what it's looking at. The device then processes this thermal data, assigning different colors or shades to different temperatures to build an image, often called a thermogram.
This is exactly why thermal cuts through things that stop normal night vision cold. Smoke, fog, heavy brush, and camouflage can easily block visible and near-infrared light, but they can't hide a heat signature. A warm engine, a just-fired barrel, or the body heat from a person or animal radiates thermal energy, making them stick out like a sore thumb no matter the lighting conditions. For a deeper dive, check out our article explaining the nuances of night vision technology.
Let's move past the spec sheets and talk about what really matters: how these optics perform when the pressure is on. Theory is fine, but field performance is everything. How a device works in a high-stakes situation isn't an academic question—it's the only one that counts.
The whole IR vs. night vision and thermal debate really gets interesting when you look at what they do in the real world. They aren't competing for the same job; think of them as specialized tools. Your choice comes down to a simple mission requirement: do you need to spot something far away, or do you need to positively identify it up close?
Detection Range: How Far Can You See?
Seeing a potential target at a distance is your first line of defense. This is where thermal and night vision operate on completely different playing fields, and it dramatically impacts how far you can effectively see.
Thermal is the undisputed king of long-range detection. Since it reads heat signatures, a decent thermal optic will pick up the body heat from a person or animal well over a thousand yards out. It shows up as a clear, often bright white or black blob against the cooler background. Best of all, it needs zero light to do this, making it an incredible tool for scanning wide-open country on the darkest nights.
Night vision, even with a powerful IR illuminator, has a much shorter detection range. Its performance is entirely dependent on light.
- With Ambient Light: On a clear night with a good moon, a quality Gen 3 tube lets you spot a human-sized figure out to several hundred yards.
- With Active IR: In complete darkness, you're limited by your IR illuminator's power. A small, built-in illuminator might get you 100-150 yards. A powerful, weapon-mounted IR laser, like a PEQ-15, can push that effective range out to several hundred yards.
Key Insight: The old saying is true: Thermal detects, night vision identifies. A thermal scope will tell you something is out there at 1,200 yards, but a night vision device will tell you what it is at 200 yards.
Resolution and Identification: Seeing the Details
Once you've detected something, you have to figure out what it is. Is it a threat? A friendly? A coyote? This is where image intensification—standard night vision—leaves thermal in the dust.
Night vision works by amplifying reflected light, creating an image full of texture, shadow, and contrast that looks familiar to our eyes. That detail is what allows for positive identification. You can:
- Identify Facial Features: Tell one person from another.
- Read Text: Make out lettering on a sign or a license plate.
- Assess Intent: See with certainty if someone is holding a rifle, a phone, or has empty hands.
Thermal, on the other hand, is terrible for identification. It creates a flat, two-dimensional picture based purely on heat. You can easily make out the shape of a person, but you won't see their face, their clothing, or what they're holding unless that object is a completely different temperature than their hands.
Here’s how that plays out in the field:
| Scenario | Night Vision Performance | Thermal Performance |
|---|---|---|
| Suspect in a dark alley | You can see the suspect's face, confirm they're holding a handgun, and read the street sign behind them. | You see a person-shaped heat signature. You can't tell who it is or what they're holding. |
| Spotting a downed hog | In thick brush, the hog is camouflaged and blends in, making it very difficult to distinguish from the foliage. | The hog's body heat glows like a lightbulb, making it immediately visible even through dense undergrowth. |
This difference is critical. A police officer clearing a house absolutely needs night vision to identify occupants and see threats. A hunter trying to find a downed animal in the dark needs thermal to spot a heat signature that night vision would completely miss.
Ultimately, the best setup involves using both. Many pros run a thermal monocular for scanning and detection, paired with a helmet-mounted night vision PVS-14 for navigating and identifying targets once they're located.
Matching The Optic To The Mission
The best optic isn't always the most expensive one on the shelf. It’s the one that gives you a real-world advantage in your specific environment. When it comes to night vision versus thermal, it’s never about which is "better" overall, but which tool is right for the job you have to do right now. The easiest way to get your head around this is to walk through a few practical scenarios.
This decision tree breaks down the core choice: are you trying to spot something or identify exactly what that something is?
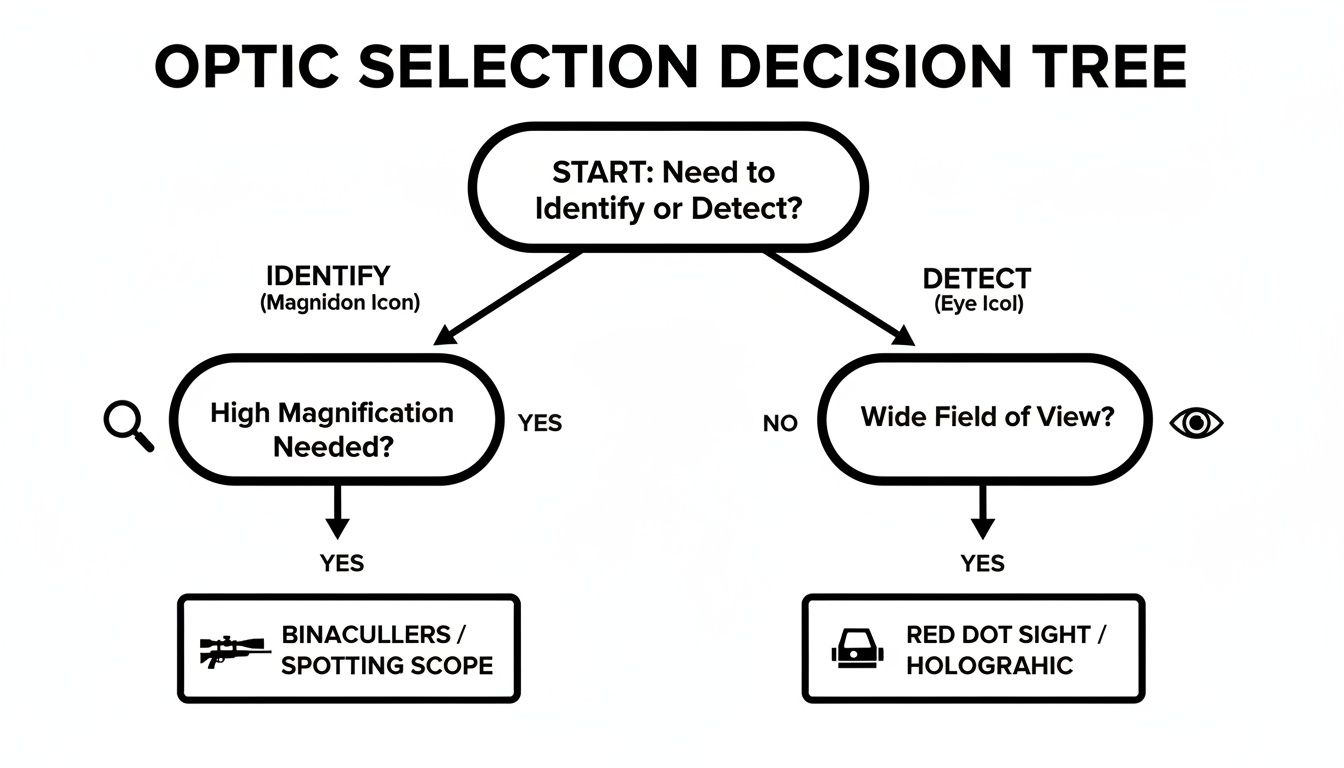
As you can see, your main objective—detection or identification—is the first and most critical fork in the road when choosing your gear.
Law Enforcement Operations
For cops, the mission always dictates the loadout. A patrol officer checking out a suspicious person call has entirely different needs than a SWAT operator clearing a building.
Picture this: a suspect bails on foot and runs into a large, dark city park. A thermal monocular is the perfect tool for this situation. It will immediately light up the suspect’s heat signature against the cold ground, even if they’re hiding in dense bushes or ducking behind a car hundreds of yards away. The mission here is all about detection and tracking.
Now, let's put that same officer on a tactical team making entry into a pitch-black warehouse. This calls for a helmet-mounted night vision monocular, like a PVS-14, paired with a good IR illuminator. In here, the officer absolutely must be able to positively identify people, tell the difference between a phone and a firearm, and move through a cluttered, dangerous space. Thermal would just show fuzzy heat blobs, creating a massive and unacceptable information gap.
Key Takeaway: For law enforcement, thermal is for finding people across distances. Night vision is for identifying threats and moving safely up close. Using the wrong optic is a gamble you can't afford to take.
For The Modern Hunter
Hunters face a similar decision-making process, shaped by game laws and ethical hunting practices. Your first challenge is finding the game, and the second is making a positive ID before you even think about pulling the trigger.
A hog hunter scanning a massive Texas field after sundown gets a huge leg up with a thermal scanner. The power to spot a sounder of hogs at 800+ yards is something night vision just can't deliver. It lets a hunter efficiently cover a huge area from one spot.
Once that heat signature is found, however, the hunter has to confirm the target. Most states require positive identification. This is where a high-quality weapon-mounted scope or traditional night vision earns its keep. While a thermal scope can spot game, you can dive deeper into how they stack up in our detailed thermal vs. night vision scope comparison. A dedicated night vision scope gives you the clarity needed to be 100% sure of your target and avoid mistaking it for livestock or a non-target animal.
Tactical And Security Use Cases
For military or security operators, whether on perimeter security or a direct action mission, the best setup is often a fusion of both technologies. Early warning is everything.
A team watching a wide-open perimeter can use tripod-mounted thermal optics to detect an approach long before it’s an immediate threat. Thermal punches right through camouflage and light brush, giving you a powerful early warning system that's incredibly hard to sneak past.
Once a threat is detected and starts closing the distance, operators will switch to their helmet-mounted night vision for movement and engagement. Dual-tube goggles offer crucial depth perception for moving fast, while an IR laser and illuminator on their rifle allows for precise, unseen aiming. This layered strategy plays to the unique strengths of each technology, maximizing both situational awareness and lethality.
Building A Cohesive Low Light System
So, you've got your hands on a night vision device. That’s a fantastic start, but it's really just the starting line. A high-end optic is only one piece of the puzzle; to truly own the night, you need to build a complete system where every single accessory—from illuminators and lasers to mounts and power sources—works together seamlessly.

The first thing to get right is the partnership between your night vision unit and its IR illuminator. In absolute darkness with zero ambient light—think a windowless basement or a cave—your image intensifier tube is effectively blind. An active IR illuminator becomes your invisible flashlight, and picking the right one is absolutely mission-critical.
Pairing IR Illuminators and Lasers
Not all infrared light is the same. The biggest difference comes down to the beam pattern, and you need to match the right beam to the job at hand.
- Flood Beams: These throw a wide, soft cone of IR light, perfect for illuminating your immediate surroundings. This is what you use for navigation and general awareness, letting you move through an area without tripping over unseen obstacles.
- Spot Beams: In contrast, a spot beam projects a tight, concentrated jet of IR light over a much greater distance. You'll use this for getting positive target identification or aiming at range, as it focuses all that invisible energy right where you need it.
Many of the best all-in-one units, like the military’s PEQ-15 or its civilian-legal counterparts, give you the best of both worlds. They typically combine a wide-angle flood illuminator with a co-aligned IR aiming laser, letting you switch instantly from navigating a dark hallway to precisely aiming at a target hundreds of yards out. If you want to go deeper on this, check out our guide to choosing an infrared illuminator for night vision.
Key Insight: Your IR setup needs to support what you're doing moment-to-moment. A wide flood is for moving and seeing your environment. A tight spot beam or laser is for aiming and identifying. A well-thought-out system gives you both on demand.
Critical Helmet and Mounting Compatibility
How you wear your gear is just as important as the gear itself. For anyone who needs to operate hands-free—whether you're in law enforcement or tracking hogs at night—a stable and comfortable helmet rig is non-negotiable. This comes down to a few key components.
Mounting Interfaces
Your night vision optic has to connect to your helmet mount, and you need to ensure they use the same interface. The two standards you'll see are:
- Bayonet Mount (J-Arm): This is the classic interface for most monoculars like the PVS-14. It's a simple, proven system that clicks into place on a compatible mount.
- Dovetail Mount: This is the go-to standard for most modern dual-tube goggles and some premium monoculars. It provides a far more secure, wobble-free connection and allows for fine-tuning the interpupillary distance.
Helmet Setup Essentials
A functional helmet isn't just a brain bucket with a night vision device slapped on the front. It's a balanced system designed to fight neck strain and provide rock-solid stability.
- Shroud: This is the bracket on the front of the helmet where the mount itself attaches. A quality metal shroud is a must-have for a secure, dependable connection.
- Mount: This is the arm connecting your optic to the shroud. Premium mounts from manufacturers like Wilcox or G&G offer incredible sturdiness and smart features like an auto-shutoff when you flip the optic up.
- Counterweights: A night vision device makes your helmet extremely front-heavy. A counterweight pouch on the back, filled with spare batteries or a dedicated weight, is essential for balance and long-term comfort.
- Power Solutions: Many dual-tube systems can run off an external battery pack. This not only dramatically increases runtime but also doubles as a perfect counterweight, shifting battery weight from the front of your face to the back of your head.
Ultimately, building a low-light system is about creating a personal ecosystem. When your illuminator, mounting hardware, and power solutions are all compatible and balanced, you stop thinking about the individual parts and start using them as one intuitive, reliable tool for dominating the dark.
A Practical Buyer's Guide to Night Optics
We've covered the tech, but now comes the hard part: turning all that information into a smart purchase. When you're weighing IR vs night vision or trying to justify a thermal, remember this: the best gear is the gear that solves your problem. Your mission dictates the gear.
Forget about which technology is "superior." The real question is what you need to accomplish in the dark. To show you what I mean, let's look at how these choices play out for three very different users.
Recommendations for the Patrol Officer
On patrol, your world can change in a heartbeat. One minute you're on a quiet traffic stop, the next you're clearing a pitch-black warehouse. Versatility and sharp situational awareness are everything.
- Primary Optic: A high-quality Gen 3 PVS-14 monocular on a helmet mount is the gold standard here. The monocular setup is key—it leaves one eye free and adapted to ambient light. This prevents you from getting disoriented when moving between bright and dark areas, like stepping out from behind your cruiser's headlights.
- Essential Accessory: An IR laser/illuminator, like a PEQ-15, mounted on your duty rifle. This gives you hands-free navigation and, more importantly, a way to aim precisely in total darkness without giving away your position with a white light.
This combination provides the best mix of positive identification, mobility, and flexibility for the unpredictable nature of law enforcement.
A patrol officer absolutely needs to identify threats, not just detect shapes. This makes image-intensified night vision non-negotiable for close-quarters work, where distinguishing a cell phone from a firearm is a life-or-death judgment.
Recommendations for the Dedicated Hunter
A hunter has two distinct jobs: finding game and then making a clean, ethical shot. This almost always calls for a system using two different technologies.
- For Scanning: Nothing beats a handheld thermal monocular. It lets you slice through the dark, scanning huge fields or thick treelines with incredible efficiency. You'll pick up heat signatures at distances where night vision wouldn't see a thing.
- For Identification and Shooting: Once you’ve detected a heat source, you need to know what it is. A quality Gen 3 weapon-mounted night vision scope or a traditional scope paired with a clip-on night vision device is essential. This gives you the visual detail required to confirm the species and sex of the animal and ensure your backstop is clear—a non-negotiable part of ethical hunting.
Recommendations for the Tactical Operator
For a tactical team member, it’s all about depth perception, seamless gear integration, and dominating the information battle. The equipment must work as a single, lethal system that enhances team coordination.
- Primary Optic: Dual-tube night vision goggles (like the DTNVS or PVS-31s) are the professional standard. Having vision in both eyes provides true stereoscopic vision, which is critical for judging distances and moving quickly and safely over uneven terrain. Gen 3 white phosphor tubes are the preferred choice, as many find they reduce eye strain over long periods and can offer better contrast in certain urban or mixed-light environments.
- System Integration: A PEQ-15 style IR laser/illuminator is a must-have for aiming, target designation, and signaling to teammates. The entire system is run from a helmet, properly balanced with a counterweight and often powered by an external battery pack to maximize runtime and improve comfort.
Finally, a word on budget and support. While a top-tier Gen 3 white phosphor unit is an incredible tool, don't discount a quality Gen 2+ green phosphor device—it's still a massive leap in capability. Whatever you choose, prioritize a solid warranty and reliable customer service. Investing in a company like Superior Tactical, which stands behind its products with a 10-year warranty and in-house servicing, ensures your gear will be mission-ready for years to come.
Common Questions About Tactical Optics
Even with a solid grasp of the tech, some questions pop up time and time again. These are the details that can make or break a mission or a hunt. Let's tackle the ones we hear most often to clear up any lingering confusion between IR, night vision, and thermal.
Can Thermal Vision See Through Walls or Glass?
That’s a hard no. A thermal imager reads the surface temperature of whatever it's pointed at. It sees the heat coming off the wall itself, not the heat signature of a person on the other side. The material is simply too dense to let that infrared radiation pass through.
The same goes for most glass. Standard glass acts like a mirror for thermal energy. If you point a thermal scope at a window, you're not going to see what's inside—you'll see a blurry, heat-based reflection of yourself.
Is Night Vision the Same as Thermal?
Not even close. They operate on completely different principles. Night vision, or image intensification, works by gathering tiny amounts of ambient light (like starlight or moonlight) and amplifying it thousands of times so you can see. It needs some light to work.
Thermal imaging is different; it sees heat. It detects the infrared energy that all objects, people, and animals emit, creating an image based on temperature differences. It doesn't need any light at all.
The Bottom Line: Night vision lets you see in the dark, much like your own eyes but better. Thermal lets you detect heat signatures in the dark.
Can You Use Night Vision During the Day?
Using a traditional analog night vision device, like a PVS-14, in broad daylight is a fast way to ruin it. The intense light will overload and permanently damage the image intensifier tube, causing burns on the screen. While many modern tubes are "auto-gated" to protect against sudden bright flashes, they are not meant for prolonged daylight exposure. Don't risk it.
Digital night vision is another story. These devices often work just fine during the day, essentially functioning as a standard digital camera. But always, always check the manufacturer's manual before you try it.
Is an IR Illuminator Visible to the Naked Eye?
That depends entirely on the wavelength of the infrared light it produces.
- 850nm IR: This is the industry standard. It gives you the best illumination range and power, but it has a trade-off: the emitter itself gives off a faint, dull red glow. If someone is looking right at you, they might spot it.
- 940nm IR: This is your "covert" or "stealth" option. The light it produces is completely invisible to the human eye. The price for this stealth is a significant drop in performance—you can expect about 25-40% less illumination range compared to an 850nm illuminator.
Ready to build out your own low-light setup? Superior Tactical has everything from battle-proven PVS-14s and advanced dual-tube goggles to the mounts and IR lasers needed to run them effectively. Check out our curated selection of professional-grade optics, all backed by a 10-year warranty, at https://superiortac.com.