The Ultimate Guide to IR Night Vision Scope Technology
An IR night vision scope essentially gives you a superpower: the ability to see in near-total darkness. It achieves this in one of two ways. The first, known as image intensification, is like having an eye that's thousands of times more sensitive to light, gathering and amplifying faint traces of moonlight or starlight. The second method, active infrared (IR) illumination, involves the scope projecting its own invisible flashlight beam that only it can see.
How an IR Night Vision Scope Lets You See in the Dark
Think about how your eyes adjust to a dark room. After a few minutes, you start to make out shapes as your pupils dilate to capture every available photon. A night vision scope does the exact same thing, but it takes this principle to an entirely different level. It's a light-gathering powerhouse, capturing invisible light and converting it into a crisp image you can see.
This isn't magic, though it certainly feels like it. It's a rapid, precise process that starts the moment light particles—whether from distant stars or a built-in IR illuminator—enter the scope's objective lens. This front lens is just the first step, funneling that scarce light toward the component that does all the heavy lifting.
The Heart of the System The Image Intensifier Tube
Once focused, the light is channeled into the image intensifier tube. This is the engine of your night vision optic. When the collected photons hit a specialized surface called a photocathode, they're instantly converted into electrons.
From there, these electrons are pulled toward a microchannel plate (MCP), which is an incredibly thin disc perforated with millions of microscopic tubes. As an electron enters a tube, it ricochets off the walls, starting a chain reaction that releases a cascade of thousands more electrons. This is the amplification step—turning a whisper of light into a roar. A single photon can be multiplied by 50,000 times or more.
An image intensifier tube doesn't create light out of thin air. It takes the tiny amount of existing light and multiplies it exponentially, turning a few stray photons into a flood of electrons strong enough to create a visible image.
This massive cloud of electrons then speeds toward the back of the tube, where it strikes a phosphor screen. The screen glows brightly wherever an electron hits, instantly painting the familiar, green-hued picture we associate with night vision. You see this final, bright image when you look through the eyepiece. For a more technical breakdown of the physics involved, you can learn more about how night vision works on our in-depth page.
The diagram below shows how these critical parts work together inside the scope housing.
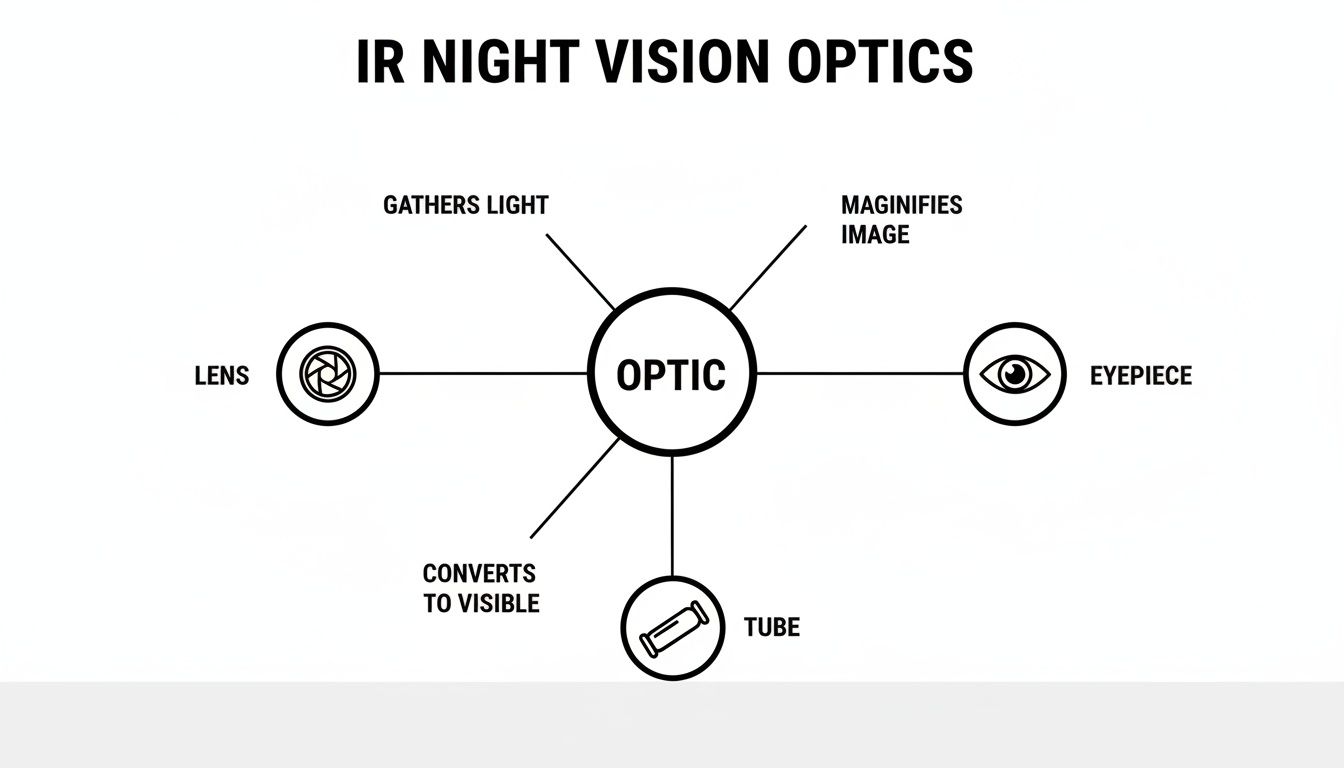
As you can see, the lens, intensifier tube, and eyepiece form a system. Each part plays a vital role in taking invisible light from the environment and transforming it into the clear picture you rely on in the field. Grasping this flow is the first real step to mastering your gear.
Decoding the Specs That Matter Most
Stepping into the world of IR night vision scopes can feel like learning a new language. You’re immediately hit with a wall of technical terms like "lp/mm," "SNR," and "FOM," and it’s easy to feel overwhelmed. But figuring out what these specs actually mean is the single most important part of choosing a scope that works in the field, not just one that looks good on paper.
Think of it like buying a truck. You wouldn't pick one based on the paint job alone; you’d look at the horsepower, torque, and towing capacity to see what it can actually do. The specs on a night vision optic are the same—they tell you the raw truth about its power, clarity, and performance when the lights go out. Once you crack this code, you can see past the marketing hype and make a smart decision based on real-world capability.
The Critical Role of Night Vision Generations
The biggest factor driving a scope's performance is its Generation, or "Gen." Each new generation marks a massive leap in technology, kind of like the difference between an old, grainy flip-phone camera and a modern 4K cinema rig. This isn't just a marketing gimmick; it's the fundamental classification of the image intensifier tube's power.
- Gen 1: This is your entry point. These scopes are affordable and perfectly fine for casual use, like watching critters in the backyard. The trade-off is that they often produce a "noisy" or distorted image and really need a good IR illuminator to be effective.
- Gen 2: Here's where things get serious. Gen 2 offers a much cleaner, brighter picture with far less distortion. It's a fantastic middle ground for dedicated hunters, ranchers, and security professionals who need solid performance without a top-tier budget.
- Gen 3: This is the gold standard. Used by military and law enforcement units across the globe, Gen 3 tubes deliver the cleanest, brightest, and most reliable images possible, even in near-total darkness. The performance gap between Gen 2 and Gen 3 is, quite literally, night and day.
The constant push for better performance is driving the whole market forward. Thanks to image intensification tech that can amplify ambient light more than 50,000 times, the night vision device sector is expected to jump from $6.1 billion in 2020 to $9.6 billion by 2026. This explosive growth shows just how much demand there is for top-tier optics. You can dig into the numbers yourself in this comprehensive market analysis.
Resolution and Image Clarity
Right after Generation, Resolution is the spec everyone talks about. It's measured in line pairs per millimeter (lp/mm), and it simply defines how much detail the scope can show you. The higher the lp/mm number, the better you can distinguish small objects at a distance.
Here’s a practical example: a scope with low resolution might show a blob at 200 yards. Is it a coyote or a stump? You can’t be sure. A high-resolution scope (64 lp/mm or better) will clearly define its ears, tail, and posture, giving you positive identification.
Key Takeaway: Resolution is what turns a questionable shadow into a clearly identifiable target. For a hunter needing to make a clean, ethical shot or an officer needing to confirm a threat, high resolution isn't a luxury—it's a necessity.
Tied directly to this is the Signal-to-Noise Ratio (SNR). This spec tells you how "clean" the image is by comparing the light signal to the background electronic static, or "noise." A high SNR gives you a crisp image with very little of that sparkling or "crawling ants" effect you see in cheaper units. When it gets really dark, a high SNR scope still provides a usable picture, while a low SNR unit just gets washed out by grain.
For a deeper look at how these specs come together in different tubes, our guide on understanding night vision generations breaks it down even further.
Other Key Performance Indicators
While Generation, resolution, and SNR are the big three, a few other specs are vital for matching an IR night vision scope to your specific needs.
| Specification | What It Means for You | Practical Impact |
|---|---|---|
| Field of View (FOV) | How wide of an area you can see at once, usually measured in degrees. | A wide FOV (like 40°) is great for scanning and situational awareness. A narrow FOV is better for magnified, long-range targeting. |
| Magnification | How much the scope zooms in on the target (e.g., 3x, 5x). | Higher magnification is essential for identifying targets at a distance but shrinks your field of view and makes tracking moving targets tougher. |
| IR Illuminator Power | The strength of the built-in or add-on infrared flashlight. | A powerful IR illuminator is a must-have for Gen 1 and incredibly useful for all gens on moonless nights or inside dark buildings. |
Looking at these specs together gives you the full story. A hog hunter in thick woods might want a powerful IR illuminator and moderate magnification. A security professional guarding a large perimeter would probably value a wide field of view more than anything. By learning to read the numbers, you give yourself the power to choose the right tool for the job.
Choosing the Right Scope for Your Mission
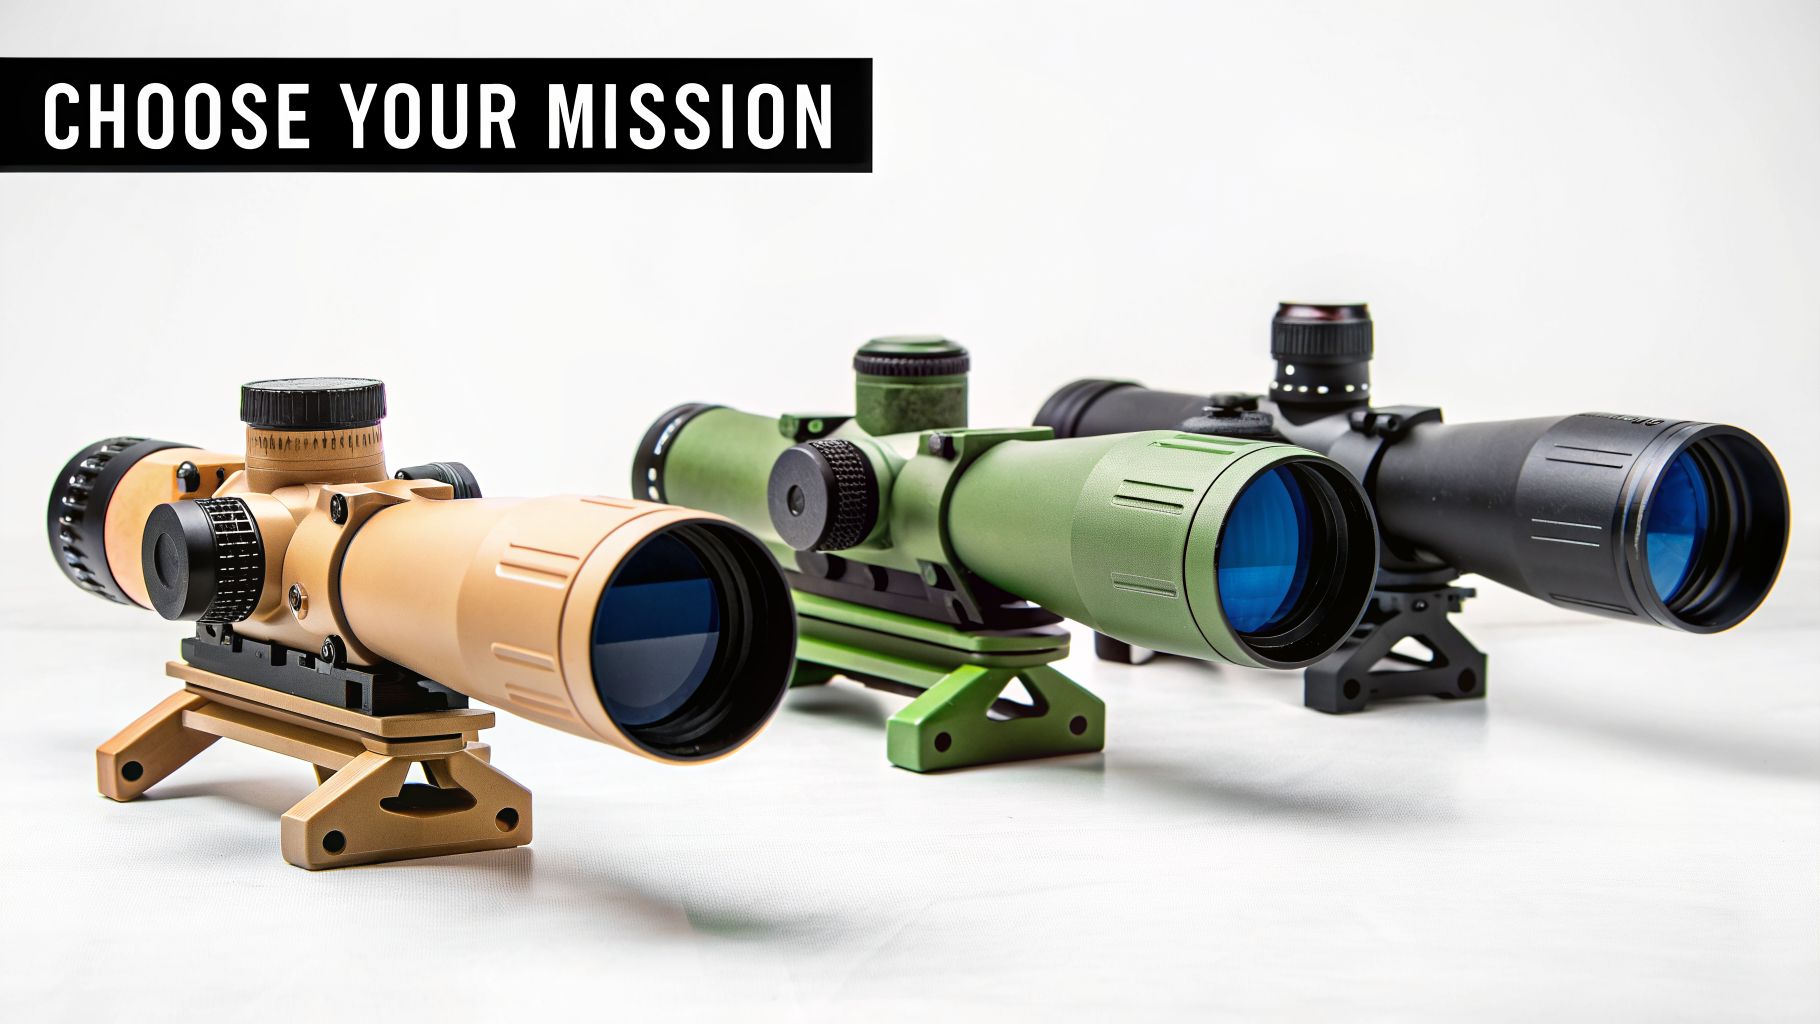
Everyone wants to know, "What's the absolute best IR night vision scope?" The honest answer? There isn’t one. The "best" scope is the one that’s a perfect match for what you’ll be doing with it. A fantastic scope for a coyote hunter shooting across a field might be a terrible fit for a SWAT officer clearing a building.
The key is to stop thinking about specs on a sheet and start thinking about what they do for you in the real world. It's about translating things like resolution and field of view into a real-world advantage for your specific job. This is how you end up with a tool that actually helps you succeed, not just one that has an impressive-looking price tag.
Mission Profile: Hunting
For anyone hunting after dark, the name of the game is making a clean, ethical shot. This means your scope needs to have a very specific set of skills. First and foremost, it has to be tough enough to survive being knocked around in the field and handle whatever weather gets thrown at you.
More than anything, though, you need a smart balance between detection range and identification. It’s one thing to spot a flicker of movement at 300 yards, but it's another thing entirely to know for sure that it's the right animal and that you have a clear shot. On a moonless night or in thick woods, a powerful IR illuminator is your best friend—it makes positive identification possible when ambient light is non-existent.
Key Hunting Scope Attributes:
- Sufficient Magnification: A 3x to 5x magnification range is typically the sweet spot. It's enough to identify game at distance without making your field of view so narrow that you can't find your target.
- High-Power IR Illuminator: A strong illuminator is a must. It will punch through the darkness and brush, turning a fuzzy, unidentified shape into a confirmed target.
- Durability and Recoil Rating: Your scope has to be built to handle the elements and the repeated shock from your rifle's recoil.
Mission Profile: Law Enforcement and Security
When we talk about law enforcement, military, and security work, the priorities change completely. These are dynamic, often unpredictable environments where the right gear can mean the difference between life and death. Long-range ID is still useful, but situational awareness is king.
Speed is everything. In a close-quarters scenario, the ability to scan a room or an alley in a split second is far more valuable than being able to zoom in on a distant target. That's why a wide field of view (FOV) is so critical—it lets the operator see more of their environment at once, helping them react faster to threats.
For professional use, ruggedness is not just a feature—it's a lifeline. An IR night vision scope must be able to endure impacts, drops, and continuous use in harsh conditions without ever losing its zero or failing.
The other non-negotiable is extreme durability. This isn't just another piece of gear; it's a life-saving tool that absolutely cannot fail. It has to be tough enough to take abuse that would shatter consumer-grade optics and keep working perfectly when the stakes are highest. Understanding how an IR night vision scope compares to other tools is also vital; for a deeper dive, our guide on the differences between night vision and thermal scopes breaks down how each technology fits specific professional needs.
Mission Profile: Tactical Enthusiast
The tactical enthusiast or preparedness-minded citizen is often trying to get as close to professional-grade capability as possible without a government-sized budget. For this user, versatility and modularity are the most important factors.
One of the most effective setups is to pair a night vision monocular, such as a PVS-14, with a holographic or red dot sight. This gives you the option for passive aiming (looking through the monocular at your day optic) and can be reconfigured in seconds. You can use the monocular for handheld scanning, then clip it onto your rifle when it’s time to shoot. This approach gives you high-end Gen 3 performance in a flexible package that's often more affordable than a top-tier, dedicated night vision scope.
Mounting, Zeroing, and Essential Upgrades
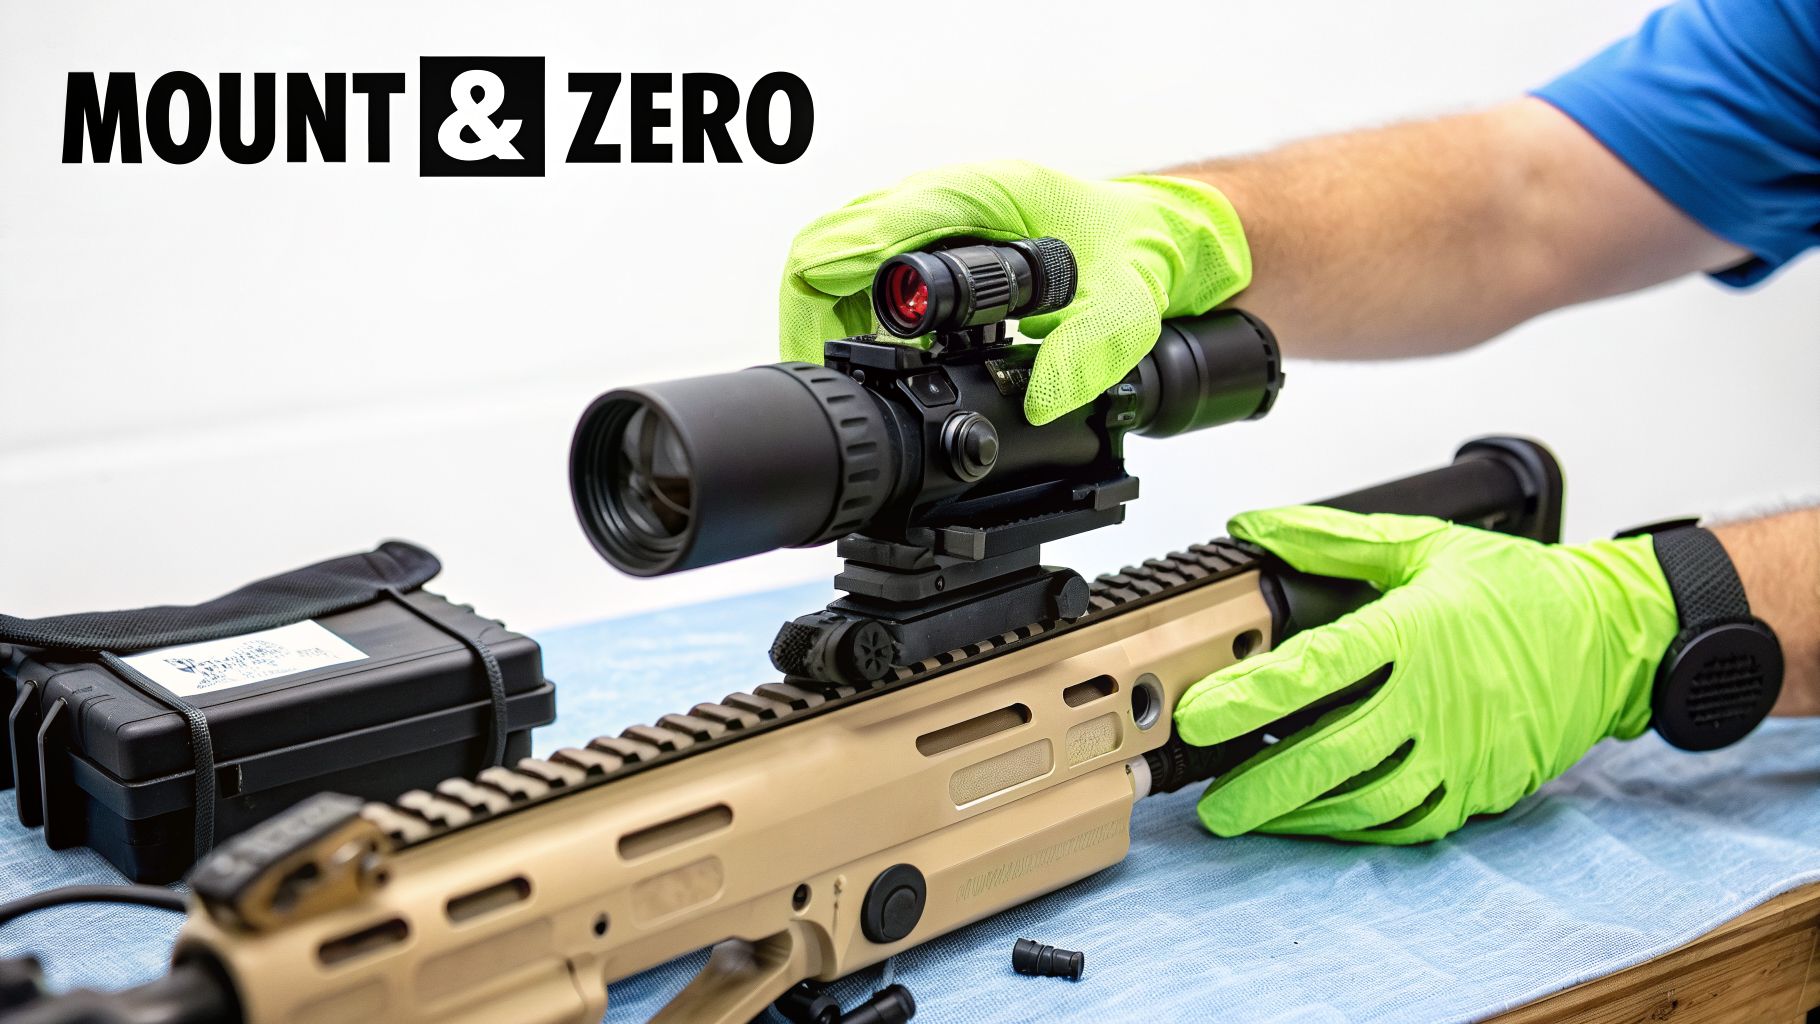
Cracking open the box on a new IR night vision scope is a great feeling, but that’s just the first step. The true test of your optic isn’t what it can do in theory, but how it performs in the field. And that all comes down to a proper setup.
Getting the mounting and zeroing right is what turns a high-tech gadget into a dependable tool. This is where the rubber meets the road—the hands-on work that ensures your scope holds true, feels right, and delivers the performance you paid for.
Securing Your Optic: The Right Mount
The connection between your rifle and your scope is the most critical link in your entire setup. Trust me, a cheap, flimsy mount is a surefire way to chase your zero all night. Even the world's best scope is useless if it’s wobbling on its base. You've basically got two paths to go down.
Permanent Mounts: These are your rock-solid, set-it-and-forget-it options. They're designed to be torqued to spec and left alone, offering the absolute best rigidity for a dedicated night-hunting rifle where you won't be swapping optics.
Quick-Detach (QD) Mounts: A quality QD mount lets you pull your scope off and pop it back on without losing your zero. This gives you incredible flexibility, allowing you to switch between your daytime glass and your IR night vision scope in a matter of seconds.
For most people, a reputable QD mount is the way to go. It offers the versatility to adapt your rifle to any condition without giving up the stability you need to make an accurate shot.
Zeroing Your IR Night Vision Scope
Sighting in a night vision scope isn't quite like zeroing a standard optic in broad daylight. You can't just expose most image intensifier tubes to the sun, so you have to work in low light or get a little creative. The "one-shot zero" feature on many digital scopes makes this easier, but a methodical approach is still your best bet.
Boresight in the Dark: Before you burn through ammo, use a laser boresighter inside your garage or a dim room. This will get your reticle in the ballpark of your barrel's alignment and ensure your first shots are actually on the paper.
Make Your Target Glow: At the range, use a big target with a simple, high-contrast bullseye. A neat trick is to tape a small chemical light stick or a piece of reflective tape to the center. When you turn on your IR illuminator, that aiming point will flare up, making it impossible to miss.
Shoot and Adjust: Start close, maybe at 25 or 50 yards, to get a confirmed impact. Fire a small group, see where you’re hitting, and then make your windage and elevation adjustments from there.
Confirm at Distance: Once you're on the money up close, move your target out to your final zero distance, like 100 yards, and fine-tune it with another group.
Remember: Always base your adjustments on the center of a 3-shot group, not just one flyer. This averages out any small shooter errors or ammo inconsistencies and gives you a much more solid and reliable zero.
Essential Upgrades That Unlock Performance
A stock IR night vision scope is a powerful tool right out of the box, but a couple of key accessories can take it from good to truly exceptional. These aren't just bells and whistles; they’re practical upgrades that solve common problems and dramatically extend your capabilities in the dark.
High-Power External IR Illuminator
If you make only one upgrade, make it this one. The illuminators built into most scopes are decent, but they’re often dialed back to conserve battery life. A powerful external IR illuminator is like adding a massive, invisible spotlight to your rifle.
It will light up targets hundreds of yards away, cutting through the deepest darkness and turning a questionable shot into a sure thing. This is what gives you a real-world identification range.
Other Critical Accessories
- Extended Battery Packs: Night vision optics are thirsty for power. An external battery pack means you can run your scope all night long without worrying about it dying at the worst possible moment or having to swap tiny batteries in the dark.
- Sacrificial Lenses: The objective lens is the most expensive and vulnerable part of your scope. A simple, inexpensive sacrificial lens screws over the front to protect it from branches, dirt, and accidental bumps. Think of it as cheap insurance for a multi-thousand-dollar investment.
Real-World Uses and Operational Limits
Owning the night—that’s the real promise of an IR night vision scope. But to truly get the most out of this gear, you have to understand its strengths and, just as importantly, where it falls short. It’s not just about flipping a switch and seeing in the dark; it's about knowing how to turn that vision into a successful hunt or a secure perimeter.
Think about a rancher trying to protect his livestock from predators. With a quality IR scope, he can clearly identify a coyote at 200 yards in total darkness and make a clean, ethical shot. That’s something you simply can’t do with the naked eye or a standard flashlight.
The same principle applies to a security professional watching over a large, unlit property. From a hidden spot, they can spot movement and identify a potential intruder long before that person has any idea they’ve been seen. This isn't just surveillance; it's about taking control of the situation before it escalates.
Navigating Operational Constraints
As incredible as this technology is, it isn’t magic. Knowing the operational limits is crucial to avoid getting into a bad spot because you overestimated your gear. One of the first things you'll run into is a phenomenon called "blooming."
Blooming happens when a bright light—like a security light or sudden headlights—flashes into your field of view. The scope's tube gets overwhelmed in that spot, creating a bright, washed-out halo that hides everything behind it. Modern autogated tubes in Gen 3 scopes recover almost instantly, but even a momentary white-out can be a problem.
Weather is another huge factor. Night vision works by amplifying tiny amounts of light, so anything that blocks or scatters that light is going to hurt performance.
An IR night vision scope can see through darkness, but it can't see through a wall. Heavy fog, pouring rain, or a thick blizzard essentially creates a wall your scope can't penetrate, slashing your effective range down to nearly nothing.
The Invisible Giveaway and Legal Borders
Here’s something you must never forget: your active IR illuminator is a dead giveaway to anyone else with night vision. To your naked eye, it’s invisible. But to another user, you might as well be waving a giant spotlight that screams, "I'm right here!"
The key is to use your illuminator smartly. Flash it on for a few seconds to confirm a target, then turn it off. Leaving it on constantly is a rookie mistake that can give your position away to other hunters or anyone else out there in the dark.
Finally, you have to be aware of the legal side of things. High-end night vision, particularly Gen 3 equipment, is heavily regulated under the International Traffic in Arms Regulations (ITAR). The U.S. government keeps a tight leash on this technology for national security reasons.
ITAR restrictions generally mean:
- You must be a U.S. citizen to purchase many high-performance night vision devices.
- Taking this equipment out of the country without a proper license is a serious federal offense.
- You cannot legally sell or transfer controlled items to non-U.S. persons.
Always buy from a reputable dealer who is transparent about these regulations. Knowing the rules keeps you out of trouble and lets you focus on using the powerful advantages your IR night vision scope offers.
Keeping Your Gear in the Fight: Night Vision Care
You've invested in a serious piece of gear, and like any high-end optic, your IR night vision scope needs some basic care to keep it running at 100%. Think of it less as maintenance and more as ensuring your advantage in the dark never wavers. A few simple habits will protect your scope and make sure it’s ready to go the second you need it.
The two things you need to protect above all else are the lenses and the image intensifier tube inside. These are the heart and soul of your unit. A little know-how is all it takes to keep them safe from the kind of damage that can end a mission before it starts.
Proper Cleaning and Handling
Those special coatings on your objective lens and eyepiece are what pull in every last bit of available light. If you scratch them with grit or strip them with harsh chemicals, you're permanently dimming your scope's performance. Always be deliberate when cleaning your glass.
- Get the Grit Off First: Before you even think about wiping, use a can of compressed air or a soft lens brush to blow away any loose dust or dirt. Wiping a gritty lens is like taking sandpaper to it.
- Use the Right Tools: A couple of drops of a good lens cleaning solution on a clean microfiber cloth is all you need.
- Wipe Smart: Start in the center of the lens and use a gentle, circular motion, spiraling your way out to the edge. This pushes any leftover residue away from your field of view instead of smearing it around.
The Golden Rule of Night Vision: Never, ever point your scope at the sun or any other bright light source while it's turned on. This will instantly burn permanent black spots into the image tube, and in severe cases, kill it completely. Keep the daylight cap on unless you're in the dark.
Battery Care and Long-Term Storage
Believe it or not, one of the most common ways night vision electronics get fried is from a forgotten, leaking battery. It’s a slow, silent killer of sensitive components, but it’s also completely avoidable.
If you’re putting your IR night vision scope away for more than a few days, just pop the batteries out. It’s that simple. That single action removes any risk of a leaky battery corroding the contacts and ruining the internals. For longer-term storage, put the scope (without batteries) back in its case and stash it somewhere cool and dry.
Diagnosing Common Issues
You'll probably notice a few tiny black specks in the image. We call these "blems", and they’re microscopic imperfections in the image tube that occur during manufacturing. A few small, scattered blems are perfectly normal and won't affect performance.
But if you suddenly see a bunch of new spots pop up, or if the image seems noticeably dimmer than it used to be, that could be a sign of a real problem. That’s when it’s time to let a professional take a look. Our in-house repair program includes free diagnostics to pinpoint what’s wrong, giving you a safety net for your investment and keeping your gear ready for action.
Your IR Night Vision Scope Questions Answered
Stepping into the world of night vision brings up a lot of questions. Let's tackle some of the most common ones I hear from folks who are getting ready to buy their first serious IR night vision scope.
What Is the Real-World Difference Between Gen 2 and Gen 3?
This is probably the most frequent question, and the best way I can explain it is with a simple analogy. Think of a Generation 2 scope as giving you a solid, workable view on a night with a half-moon. It's a massive improvement over older tech and gets the job done.
A Generation 3 scope, on the other hand, is like having a brilliant full moon overhead, even on the darkest, most overcast nights.
The practical difference is that a Gen 3 IR night vision scope produces a dramatically brighter, sharper, and cleaner image. It performs exceptionally well in extremely low-light conditions, meaning you'll rely far less on your IR illuminator.
For hunters or tactical operators, this translates to better target identification at longer ranges and a significant operational advantage when stealth is key. It's why Gen 3 is the gold standard for professionals.
Can I Use My IR Scope During the Day?
For almost all traditional tube-based scopes, the answer is a hard no. The image intensifier tubes inside Gen 1, 2, and 3 units are incredibly sensitive to light. Pointing one at a bright light source or, even worse, the sun, will instantly and permanently damage the tube. This can result in large black spots appearing in your view or complete failure.
The only exception here is for digital night vision scopes. Their camera-like sensors are built to handle both day and night conditions without risk. For any traditional scope, always, always keep that daylight lens cap on until it's dark outside.
How Far Can I Actually See?
"How far" is a loaded question because it completely depends on what you're trying to do. In the night vision community, we break it down into three distinct categories: detection, recognition, and identification.
- Detection: You might spot a heat signature or movement that looks like a man-sized target at 800 yards.
- Recognition: At 400 yards, you can confirm that the shape is, in fact, a person and not a deer or a stump.
- Identification: At 200 yards, you can positively identify details—is it a friend or a foe? What are they holding?
These distances are just a baseline. Your actual performance will vary quite a bit based on your scope's generation, the quality of its optics, the weather, and how much ambient light (from stars or the moon) is available.