Your Definitive Guide to IR Night Vision Technology
Infrared night vision, often called IR night vision, is the technology that lets you see in what looks like total darkness. It works by detecting and amplifying light from the infrared spectrum—a part of the light spectrum that is completely invisible to the human eye. This turns a pitch-black environment into a clear, usable image for anyone in tactical, hunting, or security fields.
How IR Night Vision Turns Night into Day
Imagine having the power to operate in complete darkness as if it were the middle of the day. This isn't just a cool gadget; for professionals and serious enthusiasts, it’s a game-changing capability that completely redefines what’s possible after sunset.
For a law enforcement team clearing a dark warehouse or a hunter tracking nocturnal game, the ability to see without being seen provides a decisive, almost unfair, advantage. We’re going to break down exactly how this technology works, demystifying the science and explaining the practical differences between high-end professional gear and basic consumer devices.
Beyond Simple Light Amplification
It’s a common mistake to think night vision just "makes things brighter." While that's technically true, the real magic is far more sophisticated. True IR night vision operates in a world your eyes can't perceive, pulling images from the infrared spectrum.
At its core, this technology transforms a hidden, dark environment into a clear visual landscape. It's the answer to the fundamental challenge of how to own the night, giving an operator total situational awareness when it matters most.
Understanding this principle is the first step. Think of it less like turning up the volume on a faint sound and more like hearing a dog whistle you never knew was there. To dig deeper into these fundamentals, you can check out our complete guide to infrared night vision.
What You Will Learn
This guide is designed to walk you through every critical aspect of IR night vision so you can make smart, informed decisions. We'll be covering:
- The Science: A straightforward look at how image intensifiers and thermal imaging actually work.
- The Generations: What Gen 1, Gen 2, and Gen 3 really mean for on-the-ground performance.
- The Specs: How to decode technical terms like FOM, SNR, and resolution to judge quality.
- The Applications: Real-world use cases in law enforcement, hunting, and professional security.
By the time you're finished, you won't just know what IR night vision is. You'll understand how to choose it, use it, and maintain it for peak performance in the field.
The Science Behind Seeing in the Dark
To really get a grip on IR night vision, you have to first understand that what we see with our own eyes is just a tiny fraction of the world around us. We're constantly surrounded by light from across the electromagnetic spectrum, but our vision is tuned only to a narrow band called "visible light." Just past the red light we can see, there’s a whole other world of information in the infrared (IR) spectrum.
Night vision technology isn't magic. It's science, designed to grab that invisible infrared light and turn it into a picture our brains can process. There are two main ways to do this: image intensification and thermal imaging. People often lump them together, but they work on completely different principles.
Image Intensification: The Light Amplifier
Image intensification, or I², is what most people picture when they think of night vision—that classic, glowing green view. The easiest way to think of it is as a super-powered light amplifier. It scoops up whatever tiny bits of ambient light it can find—from the moon, the stars, or even the faint glow of a distant city—and multiplies them thousands of times over.
This all happens inside an image intensifier tube in a few key steps:
- Gathering Light: Faint particles of light, called photons, are collected by the objective lens and focused onto a special surface called a photocathode.
- Converting to Electrons: When photons hit the photocathode, it instantly releases a corresponding stream of electrons.
- Multiplying the Signal: These electrons then fly into a microchannel plate (MCP), a tiny wafer packed with millions of microscopic tubes. As an electron zips through and bounces off the channel walls, it knocks loose thousands of other electrons in a massive chain reaction.
- Creating the Image: This powerful flood of electrons finally strikes a phosphor screen, which lights up at every point of impact. The result is the bright, clear image you see when you look through the eyepiece.
So why the green color? That comes from the P43 phosphor traditionally used on the screen. Our eyes are incredibly sensitive to shades of green, which makes viewing easier and reduces eye strain over long periods. More modern units often use P45 white phosphor, creating a black-and-white image that many users feel provides better contrast and detail.
Thermal Imaging: Seeing Heat Itself
While I² technology is all about amplifying light, thermal imaging sees something entirely different: heat. Everything that has a temperature above absolute zero—from people and animals to the warm engine of a truck that just drove away—gives off thermal energy as long-wave infrared radiation. Thermal devices are built to detect these heat signatures.
Unlike image intensification, thermal imaging needs zero ambient light. It works in absolute, pitch-black darkness by picking up on tiny differences in temperature and displaying them as a picture. A warm human body will glow brightly against a cool landscape, no matter how dark it is.
This makes thermal incredible for detection. You can instantly spot a person hiding in thick brush or a recently parked car just by its heat. But because it doesn't "see" in the visible spectrum, thermal has its limits. It can't be used to read a sign, and it can't see through glass, which effectively blocks the long-wave IR energy it relies on.
Active vs. Passive IR Night Vision
Finally, it’s important to know the difference between passive and active systems. The vast majority of I² devices are passive, meaning they just work by collecting whatever ambient light is already there. They do their best work when there's at least a little bit of moonlight or starlight to amplify.
But what about a situation with absolutely no light, like the inside of a sealed building or a deep cave? That’s where an active system shines. This simply means adding an IR illuminator to the mix. Think of it as a special flashlight that shoots out a beam of infrared light, totally invisible to the naked eye but brilliant to an IR night vision device. It paints the scene with light that only the user can see, turning a passive device into a powerful active one.
The different user groups who rely on these technologies all have their own unique needs and applications.
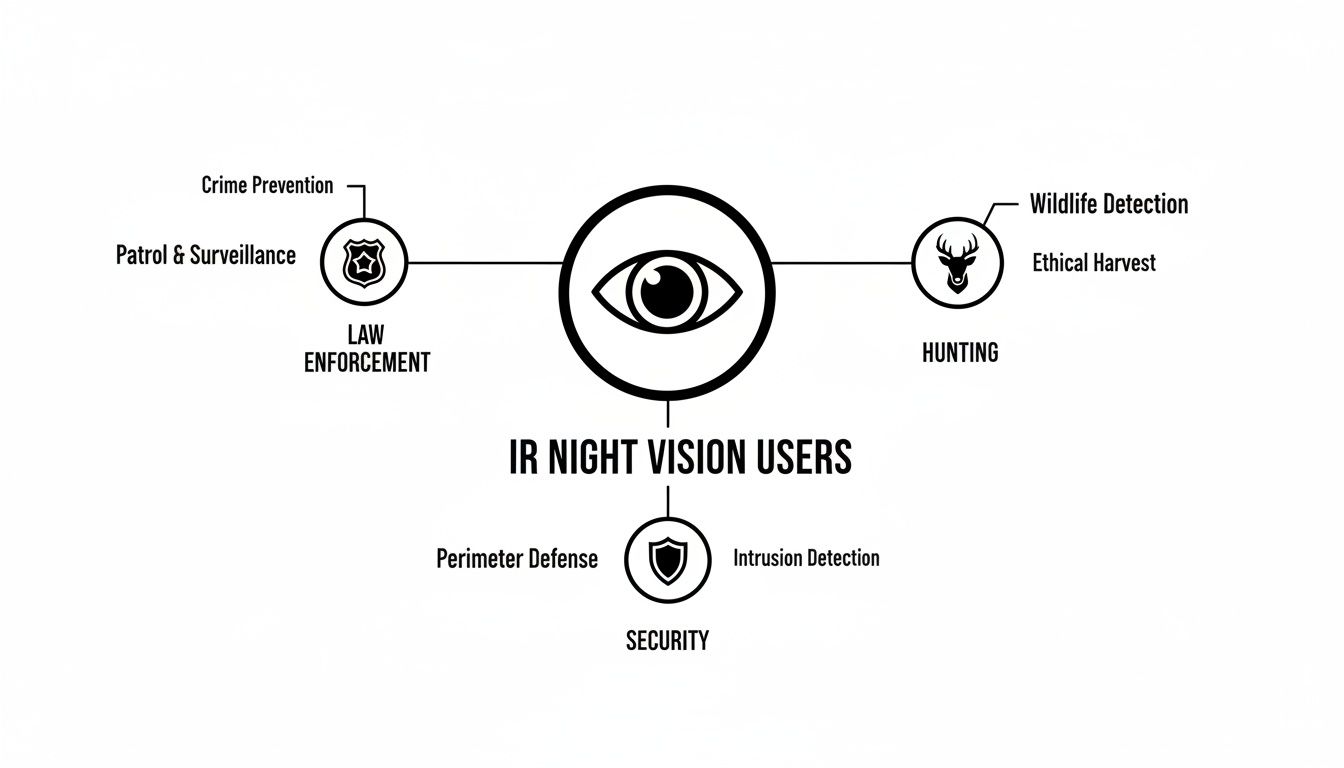
As you can see, law enforcement, hunters, and security teams all depend on infrared to gain a critical advantage in the dark. To dig even deeper into the physics, check out our full guide on how night vision works.
Tracing the Evolution of Night Vision Generations
When you're shopping for professional-grade IR night vision, the single most important term you'll encounter is "generation." This isn't just marketing fluff; each generation represents a fundamental leap in technology that directly impacts how well a device performs, how clear the image is, and ultimately, how effective you'll be in the dark. Getting a handle on this evolution is the first step to choosing the right gear for the job.
It all started with Generation 0 (Gen 0), the original night vision systems cooked up during World War II. These were "active" systems, meaning they needed a huge, power-hungry infrared illuminator to work. Think of it like a giant, invisible flashlight. While revolutionary at the time, they were clunky, had poor range, and lit up the user like a Christmas tree to anyone else with night vision.
The First Passive Systems: Generation 1
The 1960s ushered in a game-changer: Generation 1 (Gen 1). For the first time, these devices were passive, meaning they could amplify ambient light from the moon and stars without needing that big IR spotlight. This was a massive tactical advantage, finally giving operators the ability to see in the dark while staying hidden.
Still, Gen 1 technology has some serious limitations you can spot right away. They only amplify light by about 1,000x, and the image quality is far from perfect. Common issues include:
- Geometric Distortion: A "fish-eye" lens effect that makes straight lines appear curved, especially at the edges.
- Blooming: Bright lights, like a streetlamp or muzzle flash, create a bright halo that washes out the rest of the image.
- Short Lifespan: The tubes in Gen 1 devices simply don't last as long as their modern counterparts.
Despite the quirks, Gen 1 was a pivotal development. During the Vietnam War, systems like the AN/PVS-2 Starlight scope proved their worth, turning night from a liability into an asset for U.S. forces. You can get a closer look at the history by reading about the evolution of night vision technology.
The Rise of Gen 2 and Gen 3
The real leap forward for modern IR night vision arrived with Generation 2 (Gen 2). The key innovation here was the Microchannel Plate (MCP), a tiny glass wafer that multiplies electrons by the thousands. Placing an MCP inside the tube dramatically increased the gain, or brightness, and cleaned up the image significantly.
With a light amplification of around 20,000x, Gen 2 devices produced a brighter, sharper picture with far less distortion and blooming. This is the point where night vision went from a niche tool to a truly practical and reliable asset for serious use.
The introduction of the Microchannel Plate in Gen 2 was the moment night vision went from a flawed novelty to a reliable and widely adopted tactical asset. It set the new standard for image clarity and performance.
Then came Generation 3 (Gen 3), which remains the gold standard for military, law enforcement, and dedicated civilian users today. The secret sauce for Gen 3 is its Gallium Arsenide (GaAs) photocathode. This material is incredibly sensitive and efficient at converting light particles (photons) into electrons, especially in near-total darkness.
The result is a device that delivers stunning performance even on moonless, overcast nights. With light amplification hitting 50,000x or even more, Gen 3 offers the brightest, crispest, and cleanest images possible. Its effectiveness was proven during Operation Desert Storm in 1991, where U.S. military leaders famously credited Gen 3 technology as their single greatest combat advantage.
To dig deeper into the technical specifications, our guide on night vision generations breaks down the differences in even greater detail.
Here’s a simple way to think about it:
- Gen 1 is a classic car. It was amazing for its time and fun to own, but it's full of quirks and can't compete with modern engineering.
- Gen 2 is a reliable daily driver. It's efficient, effective, and gets the job done well in most conditions.
- Gen 3 is a high-performance supercar. It's built with the best materials for uncompromising performance in the most demanding environments where every ounce of capability matters.
Decoding the Specs That Define Performance

While night vision "generations" give you a ballpark idea of capability, the real story is always in the spec sheet. Learning to read these numbers is like a mechanic understanding an engine’s horsepower and torque—it’s how you get to the truth of what a device can actually do. Moving past the generational labels is what separates casual users from serious operators who know exactly what they're paying for.
The first, and arguably most important, spec you’ll see is the Figure of Merit (FOM). It’s a single number designed to give you a quick, at-a-glance rating of an image intensifier tube’s overall performance.
FOM is simply a product of two other key specs: the tube's resolution and its Signal-to-Noise Ratio. Think of it as the total output of your night vision unit. A higher FOM almost always translates to better performance, especially when conditions get really dark.
Resolution: The Measure of Image Sharpness
Resolution in an IR night vision device is measured in line pairs per millimeter (lp/mm). This spec tells you exactly how much detail the tube can resolve. The higher the number, the sharper and crisper the image will be, which is critical for picking out fine details from a distance.
It's just like the jump from an old standard-definition TV to a modern 4K screen. The SD TV shows you the basic picture, but the 4K display reveals textures, distant shapes, and subtle details you’d completely miss otherwise. In a real-world scenario, that high resolution can be the difference between identifying a stick or a rifle.
A higher lp/mm score delivers:
- Sharper Edges: Objects have crisp, well-defined borders instead of looking soft or blurry.
- Better Target ID: You can more reliably identify threats, tell people apart, and even read signs from much farther away.
- Reduced Eye Strain: A clearer, more detailed image is far less fatiguing to look through for hours on end.
Most quality Gen 3 devices you'll encounter will have a resolution of 64 lp/mm or better. For anyone who needs to make precise identifications in the dark, this number is non-negotiable.
Signal-to-Noise Ratio: The Quest for a Clean Signal
If resolution is about sharpness, Signal-to-Noise Ratio (SNR) is all about clarity. Every night vision device produces a bit of background "scintillation," which looks like the static or "snow" on an old analog TV with a bad signal. SNR is the measurement of the visual signal (the image you want to see) versus that distracting background noise.
A perfect analogy is tuning a radio. A low SNR is like trying to hear a faint station through a wall of static—you might catch a word here or there, but the message is lost. A high SNR, however, is a crystal-clear broadcast with zero interference.
In IR night vision, a high SNR is what lets you see deep into the darkest shadows and corners. It enables the device to render a clean, defined image even when there’s barely any ambient light to work with, making it a crucial metric for low-light performance.
For any professional-grade tube, an SNR above 30 is considered excellent. This ensures you can pull a usable image from an extremely dark environment without having it washed out by distracting noise.
Understanding Gain: Your Brightness Control
Finally, we have Gain. In simple terms, gain is the level of light amplification, and it directly controls the brightness of the image you see. Most modern, military-spec devices feature an automatic gain control that adjusts brightness on the fly, protecting the tube from sudden bright lights.
However, many high-end systems also offer manual gain adjustment. This gives you direct control, letting you turn the brightness up or down like a dimmer switch. Cranking the gain up can make an incredibly dark scene visible, but it comes at the cost of amplifying more noise, making the image grainier. Conversely, turning it down can improve contrast and reduce the "blooming" effect around light sources.
For an experienced operator, mastering manual gain allows you to fine-tune the device for the perfect balance of brightness and clarity in any situation.
Tactical Applications in the Real World
It’s one thing to talk about specs like gain and resolution, but where the rubber really meets the road is in the field. This technology isn't just for door-kickers in a warzone; it gives a decisive edge to anyone whose work—or passion—truly begins after sunset.
Take law enforcement, for example. A SWAT team clearing a pitch-black warehouse can’t afford to give away their position with flashlights. With night vision, they move like ghosts, maintaining total situational awareness while a hidden suspect is left completely in the dark. It’s a massive force multiplier that keeps officers safer and operations cleaner.
Gaining the Edge in Hunting and Security
The same principles apply to serious hunters, especially those after nocturnal animals like hogs and coyotes. An ethical hunt requires a quick, clean shot, and that's next to impossible when you can barely see your own hands. With IR night vision, you can spot game, observe its behavior, and pick the perfect shot from a safe distance, long after sundown.
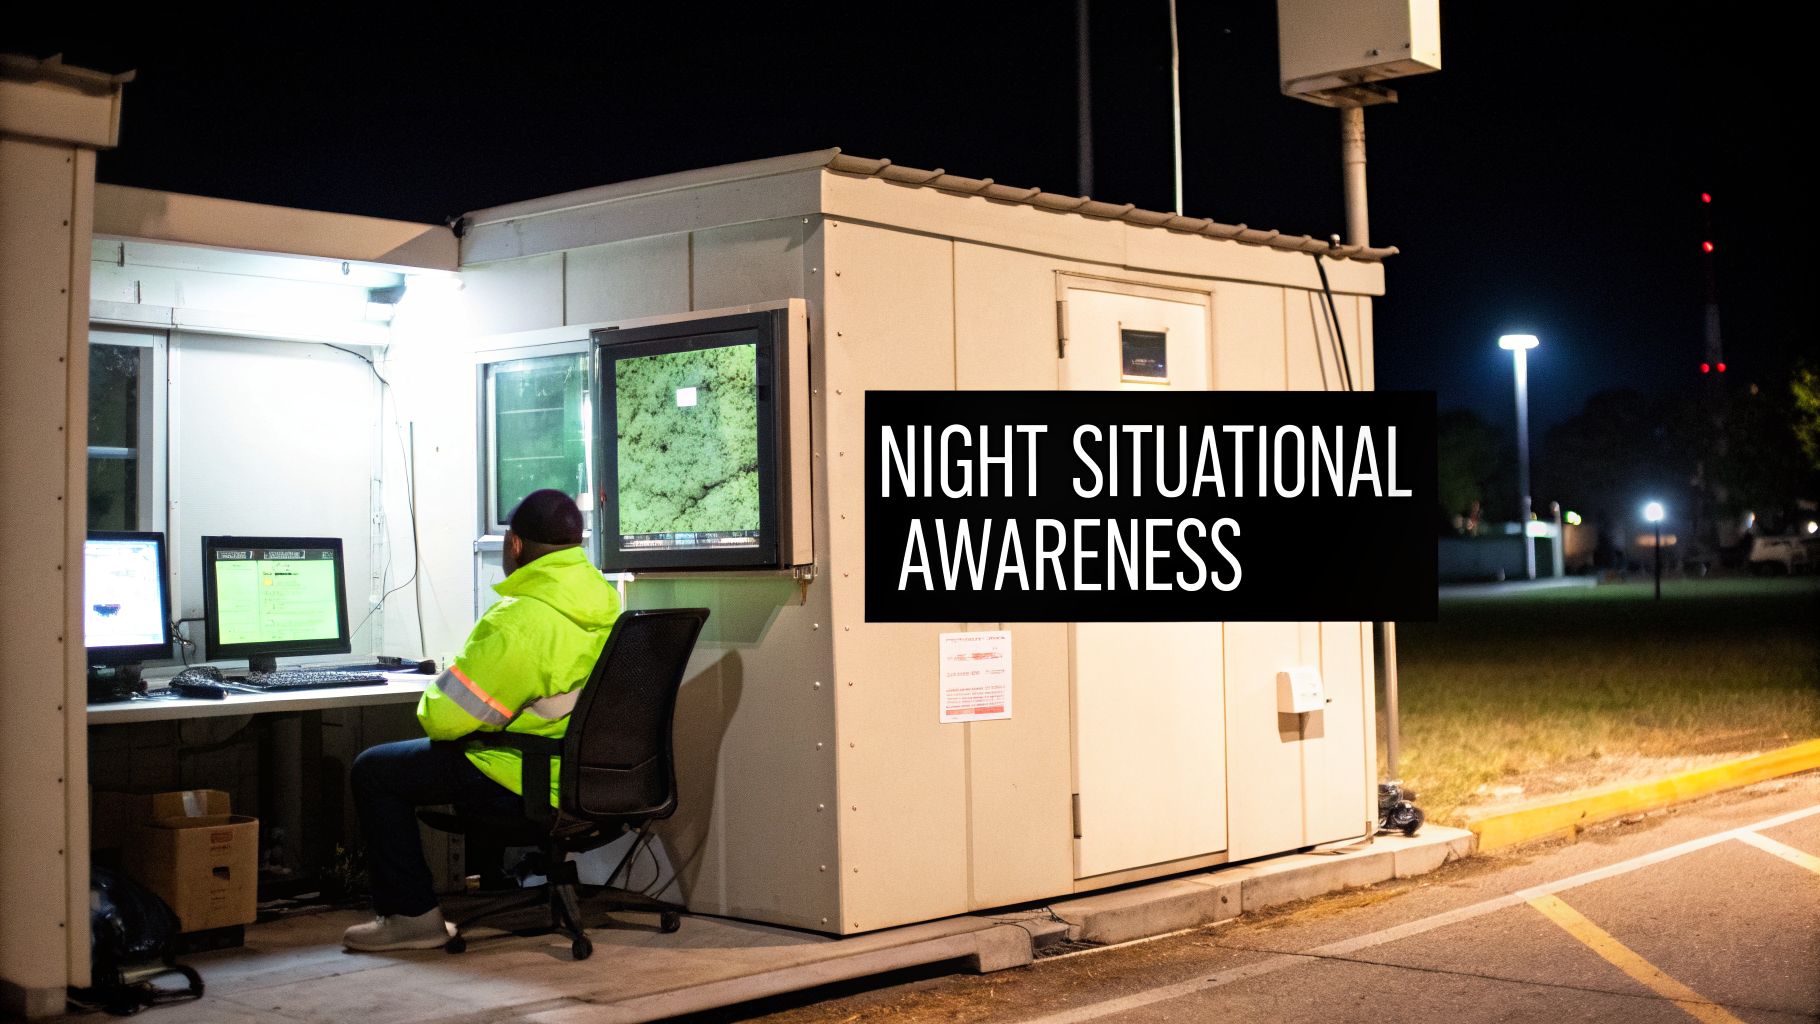
Professional security teams live and die by this capability. When you're tasked with guarding a large, unlit property, your job is to see trouble before it sees you. A guard with a good NVD can scan a fence line or a dark alley for intruders without ever tipping them off.
In every one of these cases, the core benefit is the same: the power to gather information and make a move while staying invisible. Darkness stops being a liability and becomes your greatest asset.
Of course, this advantage only comes from building a complete system with the right gear.
Matching the Gear to the Mission
There’s no "one-size-fits-all" night vision device. The mission dictates the gear, and knowing the trade-offs is what separates the pros from the amateurs.
-
PVS-14 Monocular: Think of this as the Swiss Army knife of night vision. It's incredibly versatile. An officer can mount it to a helmet for hands-free movement, clip it behind a red dot sight for aiming, or just use it as a handheld spotter. Its adaptability is why it's a staple for anyone who needs to do a little bit of everything.
-
Dual-Tube Goggles: When depth perception is non-negotiable, you need duals. Period. Think of helicopter pilots or operators driving a vehicle in blackout conditions—they need the true stereoscopic vision that two tubes provide. It's the most immersive and natural way to see at night, dramatically cutting down on disorientation and making it easier to move quickly.
These devices are only part of the equation. To be truly effective, they need to be part of a larger system. A quality helmet and mount from a company like Wilcox or Norotos are essential for going hands-free. Pair that with an infrared laser aiming module on your rifle, and you have a slick, integrated system for aiming while looking through your NVD.
Whether you're running security patrols or just doing some serious night hiking, the right combination of equipment is what truly lets you own the night.
Protecting Your Night Vision Investment
Dropping several thousand dollars on a quality IR night vision device is a serious purchase—we're often talking the price of a decent used car. And just like any other precision instrument, that gear needs the right care if you expect it to perform when it matters and last for the long haul.
If there’s one rule to burn into your brain, it’s this: never, ever expose the unit to bright light while it’s on. The image intensifier tube at the heart of your device is incredibly sensitive. A sudden blast from a flashlight, car headlights, or even flipping on a room light can permanently scorch the tube. This leaves a "burn-in"—a permanent black spot that effectively ruins your view. Always, always keep the daylight lens cap on when you aren't operating in the dark.
Essential Care and Field Practices
Beyond basic light discipline, a few simple maintenance habits will make a huge difference in the clarity and lifespan of your optics. These aren't complicated, but they're critical.
-
Lens Cleaning: Whatever you do, don't wipe a dusty lens with your t-shirt. You’re just grinding dirt and grit into the delicate lens coatings, causing scratches that can't be fixed. Start with a lens pen, a soft brush, or a puff of compressed air to get the loose stuff off. Only then should you gently wipe it with a proper microfiber cloth and a dedicated lens cleaning solution.
-
Battery Management: Stick to high-quality lithium batteries. They deliver more consistent power and are far less likely to leak acid all over the sensitive electronics inside your unit. If you're putting your NVDs into storage for a while, always take the batteries out first to prevent any chance of corrosion.
-
Sacrificial Lenses: For any kind of field use, a sacrificial lens is not optional—it’s essential. This is just a cheap, clear filter that screws over your main objective lens. It takes all the scratches, mud, and dings so your expensive, factory-coated lens doesn't have to. It's the cheapest insurance policy you'll ever buy.
Think of a sacrificial lens as the screen protector for your smartphone. It’s an inexpensive, replaceable layer that absorbs all the daily abuse so the critical component underneath remains pristine.
Long-Term Maintenance and Repair
While you can handle the daily upkeep, some things require a professional touch. Over time, your device might need to be purged with dry nitrogen to remove internal fogging, or it could need a full recalibration. This is where dealing with a reputable company really pays off.
At Superior Tactical, we know this gear is a lifeline for our customers. That’s why we back our Gen 3 systems with a solid 10-year warranty. We also have an in-house team that handles repairs and offers free, no-obligation diagnostics. If you run into a problem, you can send your device to us. Our techs will figure out exactly what’s wrong and walk you through the options before you ever commit to a repair. We want to make sure your investment in IR night vision is protected for its entire service life.
Frequently Asked Questions About IR Night Vision
Alright, we've covered the tech, the specs, and how these tools are used in the field. But I find that before anyone commits to a serious investment in night vision, a few final, practical questions always come up.
Let's tackle those head-on. These are the details that bridge the gap between theory and what it’s actually like to own and operate this gear.
Is It Legal for Civilians to Own IR Night Vision?
Absolutely. In the United States, it is 100% legal for a civilian to buy, own, and use even professional-grade Gen 3 IR night vision. You don't need any special permits or federal licenses to have one in your kit.
The big legal boundary you need to know about is the International Traffic in Arms Regulations (ITAR). Think of these as strict "do not export" rules for sensitive defense technology. You can't legally take, ship, or even let a non-U.S. person use your high-end NVD outside the country without a government license. As long as you're buying from a reputable U.S.-based dealer, you're good to go.
What Is the Difference Between Green and White Phosphor?
The color you see—that classic green or a crisp black-and-white—comes down to the phosphor screen used in the image intensifier tube. Neither is definitively "better," but they offer different experiences.
-
Green Phosphor (P43): This is the iconic night vision look. Our eyes are incredibly sensitive to shades of green, which can make long observation sessions feel less strenuous and may help in picking out subtle details.
-
White Phosphor (P45): This newer tech produces a black-and-white image. Many users feel it offers better contrast and a more natural view, making it easier to identify shapes and judge distances in a complex environment.
Ultimately, this is a user-preference call. White phosphor is incredibly popular for its perceived clarity, but some seasoned pros still swear by the utility of green. The best choice is what works for your eyes and your mission.
How Long Does a Night Vision Tube Last?
The image intensifier tube is the heart of your device, and its lifespan is measured in hours of use. Modern Gen 2 and Gen 3 tubes are built to last, with most rated for 10,000+ hours of operation.
To put that in perspective, for the vast majority of civilian owners, that’s years—or even decades—of service. The real enemy of a tube isn't running it, but damaging it. The most common killer is sudden exposure to bright light, which can permanently "burn in" spots on the screen. Good light discipline is everything when it comes to protecting your investment.
Why Is Some Night Vision So Much More Expensive?
The price tag on an IR night vision device is almost entirely determined by the quality of the image intensifier tube inside. It's that simple.
Manufacturing a top-tier, unfilmed Gen 3 tube with a high Figure of Merit (FOM), flawless resolution, and zero distracting blemishes is an incredibly precise and difficult process. That complexity and low yield drive the cost. Cheaper units use older-generation tubes (Gen 1 or 2) or lower-spec Gen 3 tubes that don't perform as well in very low light and have more visible imperfections.
When you pay more, you're paying for unparalleled clarity, low-light performance, and the durability needed for any serious tactical use.
At Superior Tactical LLC, we provide the high-performance gear you need to own the night, backed by a 10-year warranty and expert in-house support. Explore our full range of IR night vision systems and accessories.