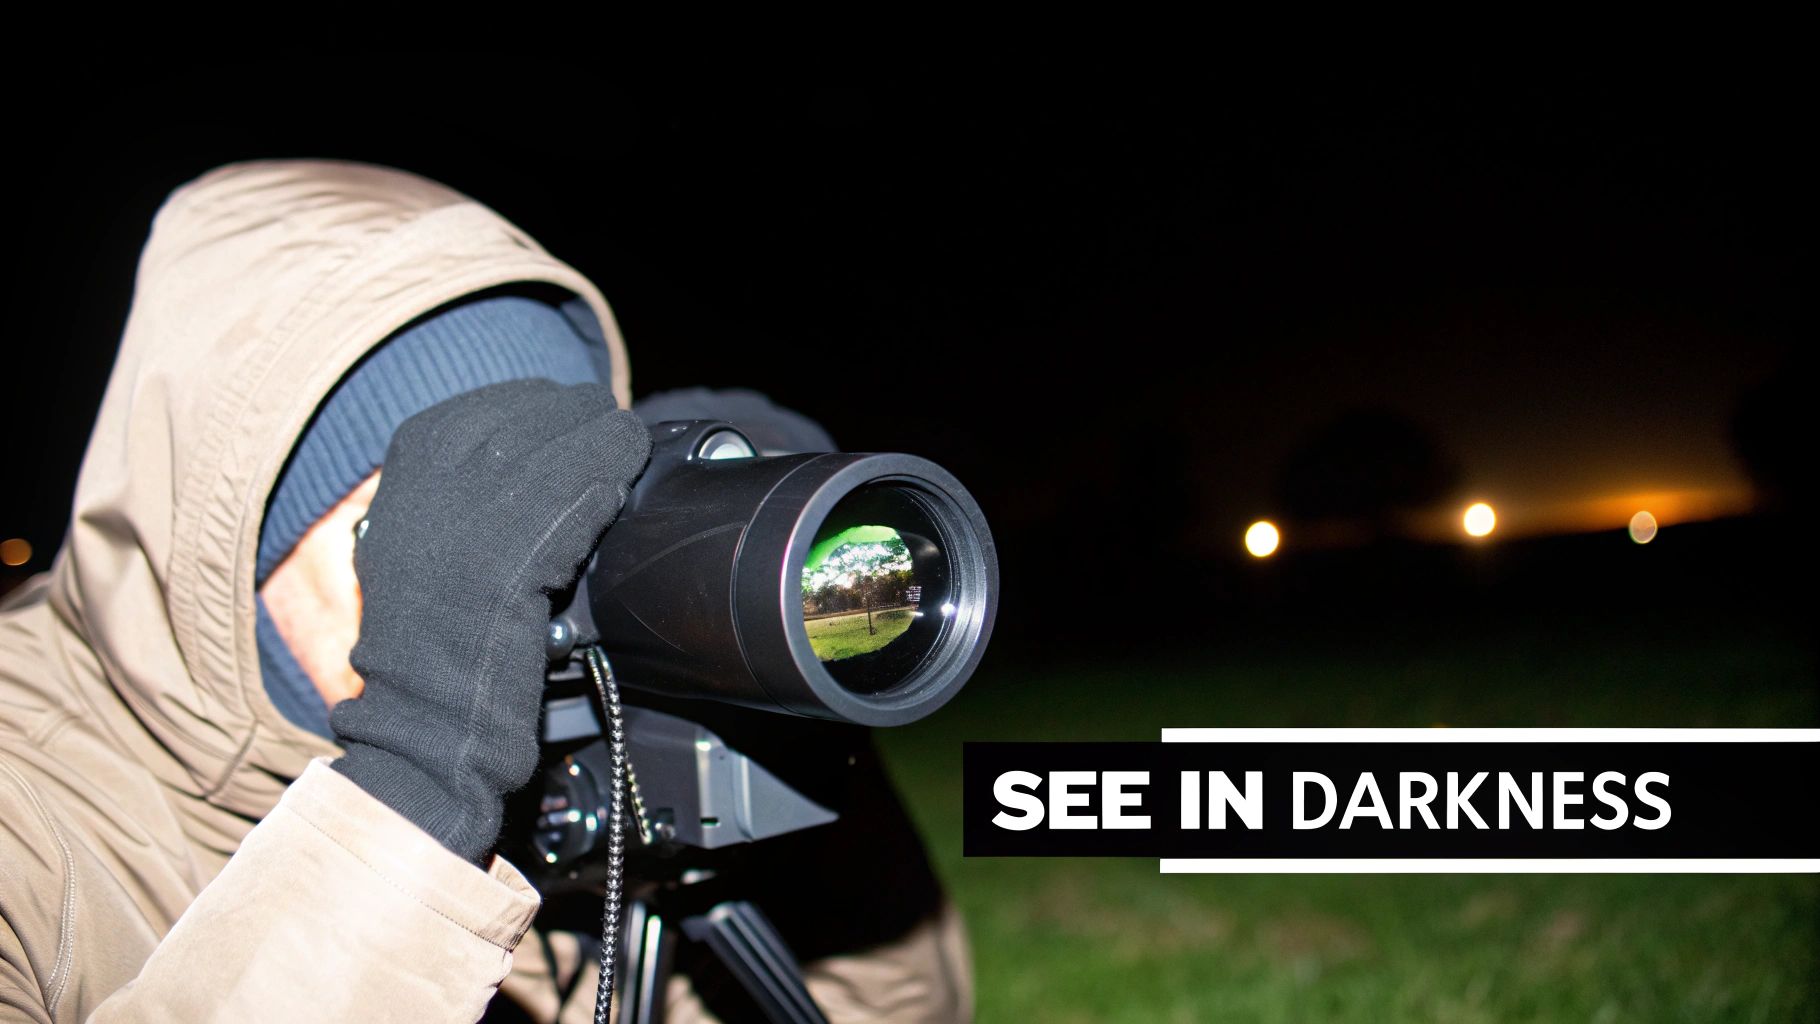
IR Illuminators for Night Vision Explained
At its core, an IR illuminator is a specialized flashlight. But instead of throwing a beam you can see, it projects light in the infrared spectrum—invisible to the naked eye, but brilliantly clear to your night vision device. Think of it as painting the darkness with a light source that only you can see.
This makes an IR illuminator an essential piece of kit. It’s what transforms a pitch-black environment from a no-go zone into a crystal-clear operational area, especially when there’s zero ambient light to work with.
How IR Illuminators Turn Darkness Into Daylight
Picture yourself in a room with no windows, lights, or even a crack under the door. It’s pure, absolute black. No matter how sensitive your eyes are, you can’t see what isn’t there. Your night vision device (NVD) faces the same problem.
While NVDs are incredible at amplifying tiny amounts of ambient light—from stars, the moon, or distant city glow—they aren’t magic. They can’t create light out of thin air. This is precisely where an IR illuminator steps in to save the day.
It’s All About Active Illumination
We’ve all used a regular flashlight. The IR illuminator works on the same principle, but its beam is in the infrared part of the spectrum, which is just beyond what our eyes can detect. To your night vision gear, though, that invisible beam is like a high-powered spotlight, flooding the scene with light it can use.
This is what we call active night vision. Instead of passively gathering faint, existing light, you’re actively throwing your own covert light source downrange. Your NVD then picks up the reflections from that IR beam, turning a grainy, useless image into one that’s bright, sharp, and full of detail.
An IR illuminator doesn’t just help you see better in the dark; it fundamentally changes what’s possible. It’s the difference between guessing what’s in the shadows and getting positive, undeniable identification.
Why This is a Game-Changer
Grasping this concept is key, because it shows that an illuminator isn’t just another accessory—it’s a force multiplier for your entire night vision system. For anyone who’s serious about working in zero-light conditions, having the right illuminator is absolutely non-negotiable.
This capability is critical in so many scenarios:
- Law Enforcement: An officer clearing a dark warehouse can light up entire rooms without alerting suspects who don’t have night vision.
- Hunters: A tight, focused IR beam provides the clarity needed for positive target identification at long distances, ensuring a safe and ethical shot.
- Search and Rescue: A team can sweep a vast, dark field or mountainside, making it far easier to spot a missing person.
In short, an illuminator gives your NVD the fuel it needs to perform at its peak, guaranteeing you have a clear picture when the lights go out. It turns a reactive tool into a proactive one.
Understanding The Science Of Invisible Light
Before you can really master your gear, you need to get a feel for the “why” behind it. Let’s pull back the curtain on the science of IR illuminators for night vision without getting bogged down in a college physics lecture.
Think of all the light in the universe as a huge spectrum. The colors we see every day are just a tiny slice in the middle. Just past the red light we can see lies a whole other world: infrared (IR) light. Our eyes can’t perceive it, but your night vision device certainly can. An IR illuminator is essentially a specialized flashlight that projects a beam of this invisible light, painting the darkness so your gear can see.
When you’re in the market for an illuminator, one of the first and most critical choices you’ll make is the wavelength, measured in nanometers (nm). This decision all comes down to a fundamental trade-off: do you need raw power or total stealth?
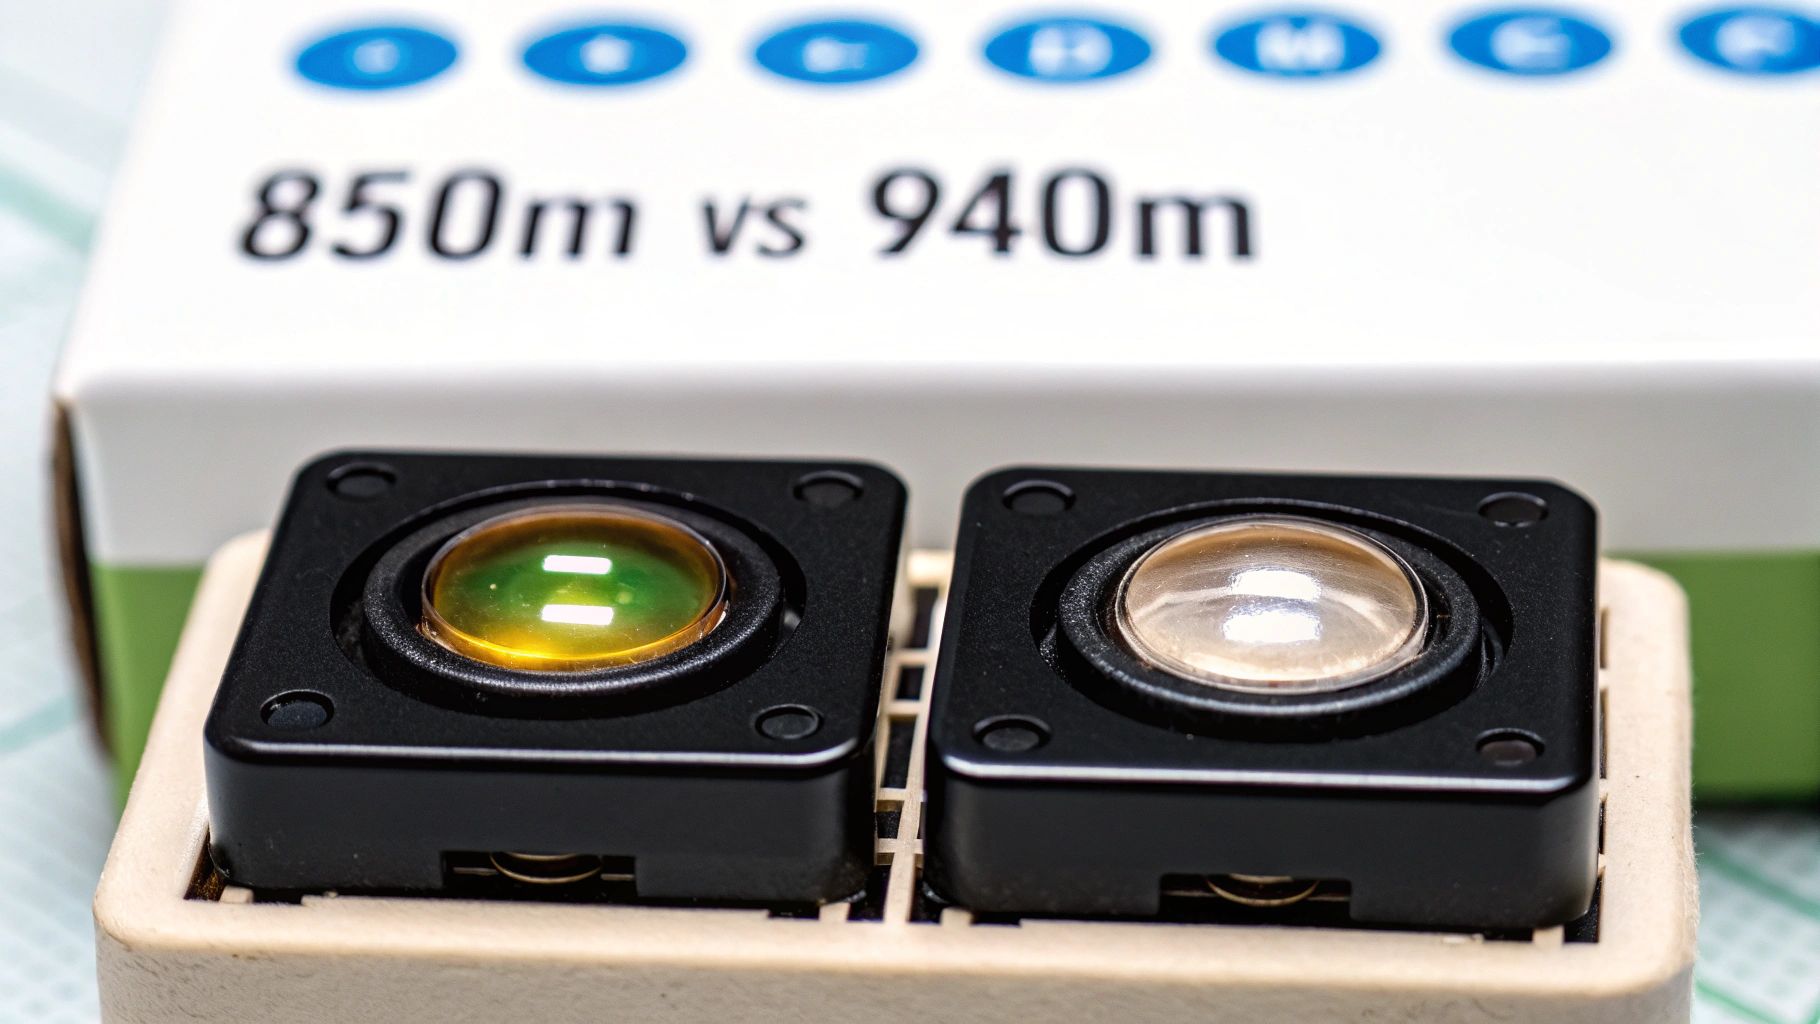
The 850nm Workhorse: Maximum Power and Range
The 850nm wavelength is the industry standard for a reason. It’s the powerhouse. Think of it as a high-beam floodlight for your night vision, capable of throwing a massive amount of usable IR light way downrange. This gives you the brightest, crispest image possible.
If you’re operating in open country or need to positively identify a target at a distance, 850nm is your go-to. The only catch? This power comes with a tiny signature. A running 850nm illuminator gives off a faint, dull red glow right at the diode. It’s not a glaring beam by any means, but it is visible to someone looking right at you, and some sharp-eyed animals can spot it.
The 940nm Ghost: Total Covert Operation
For situations where being seen is not an option, there’s the 940nm wavelength. This is the choice for true covert work. Because it sits further along the infrared spectrum, its source is almost completely invisible to the naked eye.
When your mission demands absolute discretion—think sensitive law enforcement operations or hunting easily spooked game—940nm is the clear winner. But that stealth comes at a price. Night vision devices are inherently less sensitive to 940nm light, which means you’ll see a performance drop of about 30-40% compared to a similar 850nm unit. Your effective range will be shorter, and the image won’t be quite as bright.
The real question isn’t which wavelength is “better.” It’s about which one is right for the job. You have to weigh the need for maximum visual data against the need for total invisibility.
To help clarify this crucial choice, it’s best to see how they stack up directly. Your decision here has a ripple effect on your entire night vision system’s performance. If you want to learn more about the mechanics behind different NVDs, be sure to read our complete guide explaining night vision technology.
Comparing 850nm vs 940nm IR Illuminators
This table breaks down the core differences, helping you align the right tool with your mission.
| Characteristic | 850nm Illuminator | 940nm Illuminator |
|---|---|---|
| Visible Signature | Faint red glow at the source | Almost completely invisible |
| Illumination Range | Maximum effective distance | Reduced distance (approx. 30-40% less) |
| Image Brightness | High brightness and clarity | Lower brightness, softer image |
| Best Use Case | Long-range target ID, open terrain | Covert operations, hunting wary animals |
| Stealth Level | Moderate | High |
Ultimately, grasping this “power vs. stealth” concept is the most important first step in picking the right IR illuminator.
An 850nm unit feeds your night vision device the most light it can handle, pushing its performance to the absolute limit. In contrast, a 940nm unit prioritizes keeping you hidden, accepting a shorter effective range as the cost of staying off the radar. By thinking through your typical environment and what you need to accomplish, you can confidently choose the wavelength that gives you the advantage.
How Night Vision Generations Impact Your Choice
Not all night vision is created equal, and the “Generation” of your device is the single biggest factor in how it plays with an IR illuminator. This evolution in technology—from the clunky, power-hungry systems of the past to the sleek, hyper-sensitive tubes of today—directly impacts how much extra light you need to throw to own the night.
Getting a handle on this progression is key. It’s the difference between understanding why an illuminator is a must-have for one unit and just a nice-to-have for another. It helps you set real-world expectations for your gear and pick a light that works with your NVD, not against it.
Generation 0: The Birth of “Active” Night Vision
The idea of using IR illuminators for night vision isn’t some new-fangled trick; it’s literally where it all started. The earliest systems, dating back to World War II, were completely “active,” meaning they were useless without a dedicated IR light source.
Germany’s “Vampir” system, for example, bolted a massive IR spotlight to a rifle, giving snipers a terrifying new capability. These “Generation 0” devices could amplify light by about 1,000 times, but they were entirely dependent on that illuminator. If you want to dive deeper, you can explore the fascinating early development of night vision technology that laid the groundwork for everything we use today.
Without its illuminator, a Gen 0 unit was just a heavy, useless scope. The optic and the light were two inseparable halves of a single system.
Generation 1: Affordable, But Thirsty for Light
Generation 1 (Gen 1) was the first real step into passive night vision, bringing the technology to the commercial market at an affordable price. While they can amplify ambient light far better than Gen 0, they come with some serious strings attached.
Gen 1 tubes are notorious for image distortion, especially that “fish-bowl” effect around the edges. They’re also not very sensitive. On a dark night under a thick forest canopy, a Gen 1 device will struggle to give you a picture you can actually use.
This is where the IR illuminator becomes your best friend. For a Gen 1 user, an illuminator isn’t just an accessory—it’s a non-negotiable part of the kit needed to get a sharp image in anything but bright moonlight.
- Dependency: Gen 1 absolutely needs supplemental IR to deliver clarity and usable range.
- Performance: A quality illuminator can make a budget Gen 1 unit punch way above its price tag.
- Bottom Line: If you’re running a Gen 1 NVD, a powerful IR illuminator should be the very next thing you buy.
Generation 2: The Tactical Sweet Spot
Generation 2 (Gen 2) changed the game by introducing the Micro-Channel Plate (MCP). This innovation was a quantum leap, dramatically boosting light amplification, sharpening the image, and making the tubes much more durable.
A good Gen 2 unit can often work just fine on its own under starlight, giving you a solid image without any help. But when the lights go out completely—think a windowless basement or a deep cave—it will still need a hand.
For Gen 2 users, an IR illuminator is a gap-filler. You don’t need it all the time, but it’s the tool you grab to punch through absolute darkness and see what’s on the other side.
Think of it like shifting gears in a truck. You can cruise along in passive mode most of the time, but when the terrain gets nasty (or the ambient light vanishes), you flip on the illuminator to power through and keep a crystal-clear view.
Generation 3: The Peak of Performance
Generation 3 (Gen 3) is the current gold standard for analog night vision. It brings incredible light sensitivity and resolution to the table, thanks to a more advanced photocathode that is ridiculously efficient at collecting and amplifying the faintest photons.
A high-spec Gen 3 tube can paint a bright, crisp image on a cloudy, moonless night where your own eyes see absolutely nothing. Because they are so sensitive, Gen 3 NVDs need an IR illuminator far less often than any previous generation.
So, do you even need one? Yes, and here’s why. Even the best Gen 3 tube can’t create light out of thin air. Step from a dark field into a pitch-black concrete bunker, and your image will disappear. An illuminator provides that on-demand light, instantly flooding the area and restoring a perfect picture. It’s also a critical tool for extending your identification range well beyond what passive viewing allows—an absolute must for law enforcement and hunters who need positive ID before acting.
Choosing the Right Illuminator for Your Mission
Picking out an IR illuminator isn’t about grabbing the one with the biggest numbers on the box. It’s about matching the tool to the job. Reading a spec sheet can feel like trying to decipher a foreign language, with manufacturers throwing around terms and figures that don’t always tell the whole story. Let’s cut through that noise and focus on what actually matters, so you can find the right illuminator for your night vision, your rifle, and your mission.
Think of it like choosing tires for a truck. You wouldn’t put highway tires on a rig built for mudding, and you wouldn’t put massive mud-boggers on a daily driver. The “best” tire is the one that fits the application. IR illuminators are no different.
Decoding Output Power
The first spec you’ll probably see is Output Power, measured in milliwatts (mW). This is the raw horsepower of the illuminator—a straightforward measure of how much infrared light it can pump out. A higher milliwatt rating generally means a brighter beam that can punch out to greater distances.
But more power isn’t always the answer. Cranking a high-powered illuminator at close quarters, like inside a building, will cause massive “splashback.” That intense IR light will bounce off the walls and overwhelm your NVD’s tube, effectively blinding you with your own light. The real goal is having just enough power for your typical engagement range, without washing everything out when you’re up close.
Mastering the Beam Pattern
Just as critical as raw power is the Beam Pattern—the actual shape of the light coming out of the device. Any decent illuminator will let you adjust the beam, usually between two main settings.
- Flood Beam: Think of this as a wide, soft wash of light, like a security floodlight. It’s perfect for lighting up a big area, giving you incredible situational awareness. A flood beam is what you want for scanning a treeline, navigating dark terrain, or clearing a room.
- Spot Beam: This is the opposite—a tight, focused beam like a spotlight. It concentrates all the illuminator’s energy into a narrow cone, letting you reach out and positively identify things at a serious distance.
The ability to snap the beam from a wide flood to a tight spot in an instant is a game-changer. It lets you scan your environment for anything that looks out of place, then immediately punch in for a positive ID once you spot a potential threat.
Mounting Systems and Platforms
How and where you mount your illuminator has a huge impact on how you’ll use it. The three most common setups each have their own pros and cons, and the best one for you depends entirely on your operational needs.
You can find a great selection of illuminators and compatible lights and lasers can be found here, with options to fit just about any mounting setup.
Mounting Options Breakdown
| Mount Type | Pros | Cons | Best For |
|---|---|---|---|
| Weapon-Mounted | Your light is always slaved to your muzzle, which is exactly what you want for engaging targets. | Awkward for just looking around, since you have to point your weapon at everything you want to see. | Hunters, law enforcement, tactical shooters. |
| Helmet-Mounted | The beam follows your gaze, making it incredibly natural for navigation and general observation. | The light source is right next to your NVD, which can increase splashback and potentially light you up. | General navigation, search and rescue, hands-free tasks. |
| Handheld | Total flexibility. You can aim the light anywhere without pointing your head or your weapon at it. | Ties up one of your hands, which is a major drawback when you need to shoot, climb, or work. | Spotting for a team, specialized search patterns. |
The Power Source Dilemma
Finally, you have to think about what keeps the lights on. In the tactical world, the battery debate almost always comes down to two options: CR123A and 18650.
CR123A batteries are the old standby. They’re known for an incredible shelf life (often 10 years) and they work great in the freezing cold. You can find them almost anywhere, but they’re disposable, and the cost adds up.
Rechargeable 18650s, on the other hand, pack more juice. This translates to longer runtimes and often lets the illuminator hit a higher peak output. While you have an upfront cost for the charger and batteries, they pay for themselves over time. The trade-off? They don’t last as long on the shelf and their performance can dip in the cold.
By weighing these factors—output, beam, mounting, and batteries—you’re no longer just buying a flashlight. You’re choosing a critical piece of your system. This deliberate, spec-driven approach ensures you get an illuminator that works with you, not against you, turning darkness into your unfair advantage.
Getting Your IR Illuminator Dialed In for Peak Performance
Owning a top-tier IR illuminator is one thing, but getting it set up and aligned correctly is where the magic really happens. Think of it this way: an unaligned illuminator is like a high-end rifle with a scope that isn’t zeroed. All the power in the world won’t help if it’s not pointed in the right direction. Let’s walk through how to get your gear configured so it performs flawlessly when you need it most.
The whole point is to get your IR beam to perfectly co-witness with your night vision device’s field of view. You want the light hitting the same spot you’re looking at, creating a clean, evenly lit image. If it’s off, you’ll get annoying dark spots or, even worse, the beam will be completely off-target, leaving you just as blind as you were without it.
This flowchart boils it down to the key things you need to consider before you even start the alignment process.
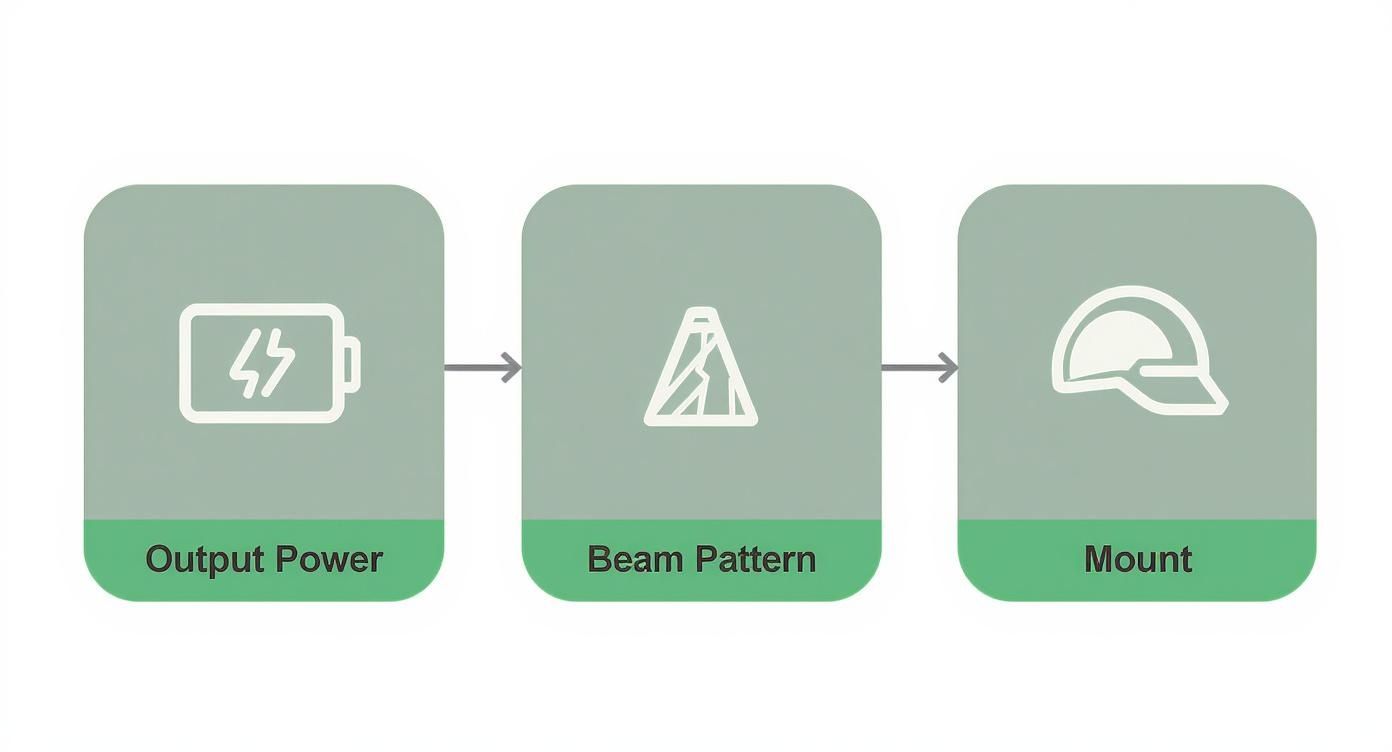
As you can see, getting the output, beam pattern, and mount right from the start lays the foundation for a successful setup.
Fine-Tuning Your Beam Alignment
A proper alignment ensures every last milliwatt of power is working for you, not against you. It eliminates wasted light and gets rid of those frustrating dark patches in your sight picture. The objective is simple: make the center of the IR beam match the center of your optic.
Here’s a no-fuss way to get it done:
- Start Close. Don’t try to be a hero and zero it at 200 yards right out of the box. Begin by aiming at something about 25-50 yards away. This makes it way easier to see the whole beam and make big adjustments quickly.
- Light It Up. Power on your NVD and the IR illuminator. Look through your optic and find the “hotspot”—the brightest part of the beam. See where it’s landing in relation to your reticle or the center of your view.
- Adjust Windage and Elevation. Just like a rifle scope, your illuminator will have adjustment dials or screws. Use them to move the beam left and right (windage) and up and down (elevation) until that hotspot is perfectly centered.
- Push It Out. Once you’re dead-on at close range, back up to your typical engagement distance, whether that’s 100 or 200 yards. Now you can make those tiny, final tweaks to get the alignment perfect.
The single biggest mistake people make is trying to align their beam at long range right from the get-go. Start close, establish a solid baseline, and save yourself a ton of time and headache.
Mastering Beam Focus for Any Situation
Beyond getting it pointed straight, the most useful feature on any quality illuminator is its adjustable focus. This is what lets you switch between a wide “flood” for seeing everything around you and a tight “spot” for reaching out to identify something specific.
- Flood Setting: A wide beam is your best friend when you’re moving on foot or scanning a large field. It illuminates your peripheral vision, which helps you avoid the “tunnel vision” you get from a super-tight beam.
- Spot Setting: When you need to positively identify a target, read a sign, or check out a potential threat way out there, you crank the focus down. This concentrates all that IR energy into a tight, intense spotlight for maximum reach.
One thing to watch out for is “splash.” This happens when your beam is too wide or too powerful up close, and the IR light bounces off nearby walls, trees, or the ground. That reflected light can hit your night vision tube and “gate” it, washing out the image completely.
Get in the habit of feathering your beam’s focus and power to fit the environment. Use just enough light to see what you need to see, and no more. For a deeper dive into getting all your equipment working together, take a look at these expert tips on choosing night vision accessories. A proper setup makes the entire system sing.
Common Questions About IR Illuminators
When you start digging into IR illuminators for night vision, a few questions always seem to come up. It makes sense—this gear sits at the intersection of physics, real-world use, and your specific needs, so there’s bound to be some confusion.
Think of this as your go-to guide for clear, straight-up answers to the things we hear most often. Getting these details sorted out is the key to buying the right tool for the job and actually getting the performance you expect out of it.
Can I Use an IR Illuminator with a Thermal Scope?
This is easily the most common question we get, and the answer is a hard no. An IR illuminator and a thermal optic are fundamentally incompatible because they operate in completely different ways.
Your night vision device is a light amplifier. It takes whatever ambient light is available—starlight, moonlight, or the invisible light from your illuminator—and multiplies it thousands of time. Thermal imaging, on the other hand, doesn’t see light at all. It sees heat. It builds a picture by detecting tiny differences in the heat signatures of objects in the environment.
Since an IR illuminator puts out light (not heat), its beam is completely invisible to a thermal device. It adds absolutely nothing to the image, making it a useless accessory for a thermal setup.
Will an 850nm Illuminator Spook Animals?
For hunters, this is a huge deal. The short answer is: yes, it definitely can. The vision of many animals, especially predators like coyotes and hogs, extends deeper into the near-infrared spectrum than ours does.
That means they can often see the faint, dull red glow coming from the emitter of an 850nm illuminator. It won’t look like a spotlight to them, but it’s often just enough of an unnatural light source to make them nervous, change their behavior, or send them running for the hills.
When stealth is non-negotiable, a 940nm illuminator is the only way to go. You’ll give up a bit of range, but its near-total invisibility to the naked eye—and to most animals—drastically lowers your chances of getting busted.
How Is the Effective Range of an Illuminator Determined?
The range printed on the box and the range you get in the field are two very different things. The real-world performance of your illuminator isn’t just about its raw power; it’s about how it works with your entire night vision system and the environment you’re in.
A few key factors will make or break your effective range on any given night:
- Your Night Vision Device: This is the biggest piece of the puzzle. A high-spec Gen 3 unit will see much farther with the same illuminator than a budget Gen 1 device ever could. Better light amplification means more reach.
- Atmospheric Conditions: A clear, dry night is your best friend. Humidity, fog, rain, and even heavy dust will scatter and absorb that IR light, slashing your effective distance. A beam that hits 800 yards on a perfect night might struggle to reach 200 in the fog.
- Target Reflectivity: A light-colored animal or a reflective sign will pop at a much greater distance than a dark hog standing in a muddy field.
The only way to truly know your system’s limits is to get out and test it in the conditions you plan to operate in. That’s how you build confidence and learn what your gear can really do.
Are High-Power IR Illuminators Dangerous?
Yes, absolutely. They demand the same respect as a loaded firearm. High-output LED and especially laser-based IR illuminators for night vision come with serious safety considerations, primarily because their light is invisible.
Think about it: your eye has a built-in safety feature—the blink reflex. When you look at a dangerously bright light, you instinctively squint, shut your eyes, or look away. That reflex doesn’t work with infrared light. You can stare straight into a beam powerful enough to cause permanent retinal damage and feel zero pain or discomfort until it’s too late.
Always handle your illuminator with strict discipline:
- Never point it at a person’s face unless you’re in a tactical situation where they are a designated threat.
- Be constantly aware of reflective surfaces like windows, water, or mirrors that can bounce the beam back at you or others.
- Know the safety classification of your device, particularly if it’s a laser illuminator.
Treating your illuminator with this level of care ensures it remains an incredible tool, not a dangerous liability.
Ready to own the night? The team at Superior Tactical has spent over a decade equipping professionals and serious enthusiasts with the right gear for the mission. Explore our curated selection of night vision, illuminators, and tactical accessories—all backed by expert guidance and a 10-year warranty on Gen 3 systems. Equip yourself with the best at https://superiortac.com.