A Complete Guide to Infrared Night Vision Technology
Here's the rewritten section, designed to sound like an experienced human expert.
Imagine having the upper hand in complete darkness. That's the tactical advantage modern infrared night vision delivers. It takes a spectrum of light we can't see and turns it into a sharp, usable image, giving you a critical edge. We're not talking about the grainy green glow you see in old movies; today's digital IR systems produce a crisp, black-and-white picture that cuts right through the shadows.
Seeing in the Dark with Infrared
To really get a grip on how this works, we need to go back to the basics of how we see anything: light. Our eyes are only built to pick up a tiny fraction of the light that exists, what scientists call the visible spectrum. But right next to the red light we can see is a huge band of invisible light called infrared (IR). Infrared night vision gear is engineered to tap into this unseen world and show it to us.
Think of it this way: your IR device is like a special camera that sees a "color" your eyes are completely blind to. It’s not just making a dim scene brighter, like old-school "starlight" scopes. Instead, it works more like a covert flashlight. It blasts an area with its own beam of IR light that only the device's sensor can pick up.
The Two Halves of the IR System
Every active IR night vision system is built around two core components working together. Once you understand what each one does, the whole concept clicks into place.
- The IR Illuminator: This is the workhorse. It’s essentially a high-powered flashlight that projects a beam of near-infrared light, usually at a wavelength of 850nm or 940nm. To our eyes, and the eyes of most animals, it's completely invisible.
- The IR-Sensitive Sensor: This is the "eye" of the operation. It's a digital sensor, similar to what’s in a DSLR camera, but it's specifically designed to be extremely sensitive to the exact frequency of light the illuminator is putting out.
So, you hit the switch, and the illuminator floods the area with invisible light. That light bounces off everything in front of you—trees, a target, a trail—and reflects back to your device. The sensor grabs that returning IR energy, and the processor inside instantly converts it into the black-and-white image you see on the screen.
Here's the most important thing to remember: infrared night vision sees reflected light, not heat. This is the key difference between IR and thermal imaging. Because it relies on reflected light, an IR system can show you details, textures, and patterns that a thermal scope would completely miss.
Understanding The Science Behind Seeing The Unseen
Think of infrared night vision as a kind of technological superpower. It gives you the ability to see a specific type of light that’s completely invisible to the naked eye, effectively turning pitch-black darkness into a visible, detailed landscape. It's not magic, just a clever application of physics.
Our eyes are only built to see a very small slice of the light spectrum—what we call "visible light." Just beyond the red light we can perceive, there’s a whole unseen world called infrared. Near-infrared (NIR) is the section closest to our visible range, and it’s the secret ingredient that makes this whole system work.
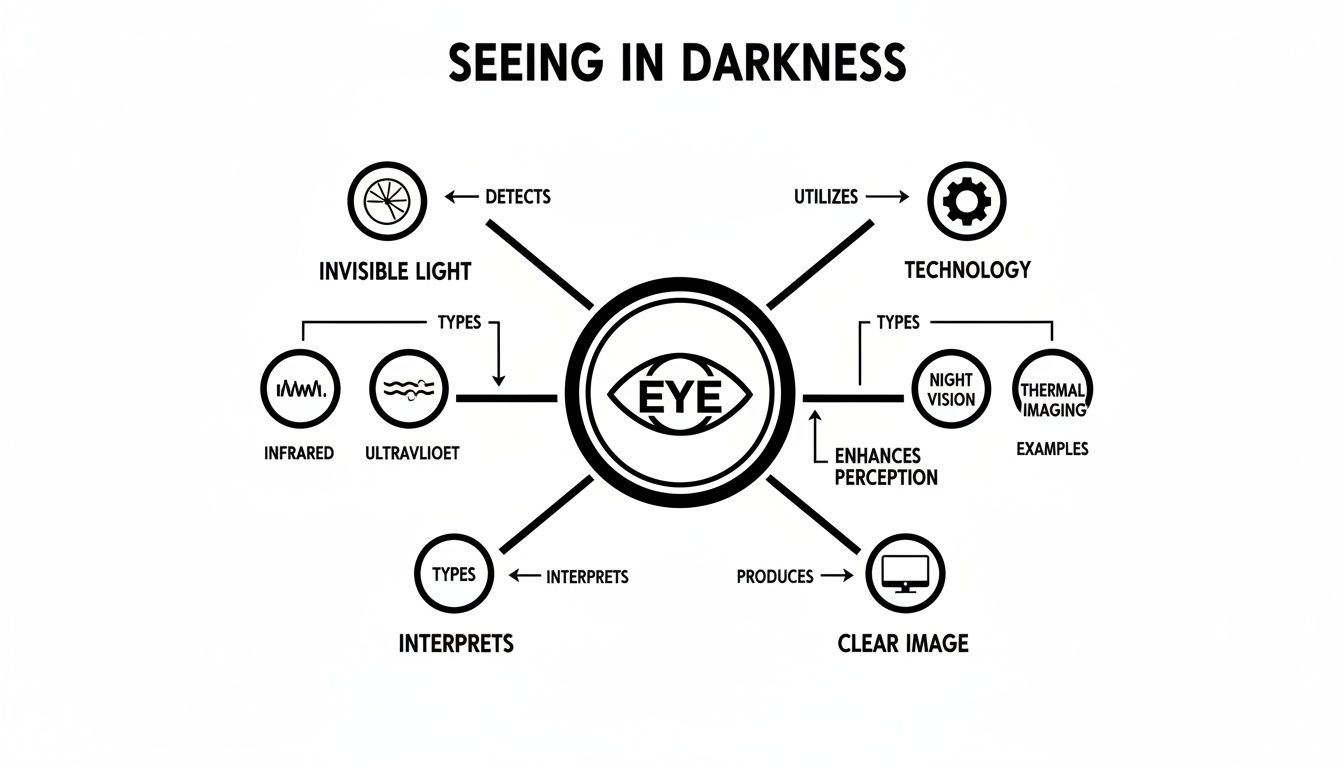
This mind map shows how technology taps into that invisible light to give you a clear picture, turning total darkness into a tactical advantage.
The Two Pillars of Infrared Vision
At its heart, every active digital infrared night vision device is a partnership between two key components. Once you understand how these two work together, the technology becomes surprisingly simple.
- The IR Illuminator: This is the engine of the whole operation. Think of it as a powerful flashlight that's completely covert. Instead of shooting out a beam of visible light, it projects focused near-infrared energy that’s undetectable to humans and most animals.
- The IR-Sensitive Sensor: This is the device’s specialized “eye.” It’s a digital sensor, similar to what you’d find in a high-end camera, but it's specifically engineered to be highly sensitive to the exact wavelength of light produced by the illuminator.
The process is straightforward and incredibly effective. When you turn on your device, the IR illuminator bathes your target area in this invisible light. That light bounces off everything in its path—a distant treeline, a game trail, or a potential threat—and reflects back to your scope or monocular. The IR-sensitive sensor captures that returning energy, and its internal processor instantly translates the invisible pattern into the crisp, black-and-white image you see on your screen.
It's About Reflected Light, Not Heat
This brings us to one of the most important distinctions in night vision tech—the difference between infrared and its famous cousin, thermal imaging. Getting this right is critical to choosing the right gear for your mission.
Crucial Takeaway: Digital infrared night vision works by seeing reflected light. It needs its own light source (the illuminator) to bounce off a target. In contrast, thermal imaging detects emitted heat energy and needs no external light source at all.
Because an infrared system builds an image from reflected light, it can show you an incredible amount of detail. You can make out textures, read signs, identify specific markings on a vehicle, and even recognize a person's face.
Thermal imaging is fantastic for detection—spotting a warm body against a cool backdrop—but it can't give you that kind of granular detail. It tells you something is there; infrared night vision tells you exactly what is there.
To help clarify these differences, here’s a quick breakdown of how the three main night vision technologies stack up.
Infrared Night Vision vs Thermal Imaging vs Image Intensification
| Technology Type | How It Works | Best For | Limitation |
|---|---|---|---|
| Digital Infrared NV | An IR illuminator "paints" an area with invisible light; a digital sensor captures the reflection. | Identification, detail recognition (reading text, facial features), use in total darkness. | Active system; the IR illuminator can be seen by other night vision devices. |
| Thermal Imaging | A sensor detects differences in heat (infrared radiation) emitted by objects. | Detection of living things, seeing through smoke/fog, long-range observation. | Cannot see detail, cannot "see" through glass, struggles in environments with uniform temperature. |
| Image Intensification | Amplifies tiny amounts of ambient light (starlight, moonlight) thousands of times. | Passive observation (no emitted light), classic "green" night vision, excellent clarity. | Requires some ambient light to work; can be damaged by bright light sources. |
As you can see, each system has a distinct role. You can explore the nuances between these technologies even further in our detailed night vision comparison guide.
This fundamental difference has huge real-world implications. For example, an IR device can see through a glass window because its infrared light passes through, reflects off what's inside, and comes back to the sensor. A thermal imager is stopped cold because glass reflects heat, making it look like a mirror.
By remembering that infrared night vision is an active system that "paints" the environment with its own invisible light, you’ll be much better equipped to predict its performance and use it to its full potential.
The Evolution of Night Vision from WWII to Today
To really get a feel for the compact, powerful infrared night vision we have today, it's worth taking a look back at where it all started. The journey from clunky, power-draining contraptions to the lightweight tactical tools in our hands is a story of battlefield needs pushing innovation for decades. Seeing in the dark isn't a new idea, but the tech has come a very, very long way.
In many ways, modern digital infrared night vision is the ultimate refinement of a concept that first hit the battlefield during World War II. Those early systems were a world apart from what we use now. They were monstrously big, awkward to handle, and sucked down power like nothing else, often needing heavy battery packs and massive searchlights just to work.
We now call these pioneering devices Generation 0 (Gen 0). They were "active" systems, which means they had to blast out their own powerful beam of infrared light to "paint" a target. Only then could their primitive sensors pick up the reflection.
The Dawn of Night Vision in WWII
The first real-world use of this tech showed up in the late 1930s and early 1940s. Germany was at the forefront, developing the first Gen 0 active infrared systems that fundamentally changed warfare by letting soldiers see in total darkness for the first time.
A famous example was the Zielgerät 1229 "Vampir," mounted on the StG 44 assault rifle. It used a near-infrared (NIR) searchlight—often a 200-watt bulb—to light up targets as far as 100 meters away. The reflected light was then captured and converted into a visible image by a tube that amplified the signal about 1,000 times. You can dive deeper into this history by exploring the technological evolution of night vision on Binockshop.com.
As groundbreaking as they were, Gen 0 systems had one giant tactical weakness. That powerful IR searchlight was basically a giant "shoot me" sign for anyone else with an IR detector. Using one instantly gave away your position, a huge gamble in a firefight. It was obvious a stealthier solution was needed, which paved the way for the next big leap.
The Shift to Passive "Starlight" Systems
That breakthrough came during the Vietnam War with the invention of image intensification technology. Unlike the active Gen 0 systems, this new generation was completely passive. They didn't need a huge, obvious illuminator. Instead, they worked by gathering and amplifying the tiniest amounts of ambient light—from the moon, the stars, whatever was available—by tens of thousands of times.
This "Starlight" tech gave us Gen 1, Gen 2, and eventually Gen 3 devices. Each new generation was a major step up from the last:
- Gen 1: A massive improvement over Gen 0, but the images were often distorted, and you still needed some moonlight to get a decent picture.
- Gen 2: The introduction of the microchannel plate (MCP) was a game-changer. It massively boosted light amplification, cleaned up the image, and worked in much darker conditions.
- Gen 3: Switched to a gallium arsenide photocathode, which delivered a huge jump in sensitivity and clarity. This became the gold standard for military forces around the world.
The whole point of "Starlight" scopes was to be completely passive and undetectable. This changed nighttime tactics forever, making it possible to move and observe in total stealth without sending out a giant infrared flare.
The Return to Active Systems with Digital Technology
It's funny how things come full circle. Today's modern digital infrared night vision has actually gone back to the original Gen 0 idea of using an active IR illuminator. The difference is, the modern execution is light-years ahead.
Instead of heavy, power-hungry searchlights, we now have hyper-efficient, tiny LED illuminators. Instead of fragile, analog image tubes, we have rugged, high-resolution digital sensors. This pairing gives us crystal-clear black-and-white images, often with extra perks like video recording and digital zoom, all packed into a device that's a tiny fraction of the size and weight of its WWII ancestors.
They’ve essentially perfected that original vision, giving us an incredibly reliable and powerful tool for owning the night.
Decoding Different Infrared Night Vision Systems
Not all infrared gear is created equal. As you start digging into infrared night vision, you'll immediately come across terms like "active" and "passive." Getting a solid grip on this difference is the first real step to picking the right equipment for your mission.
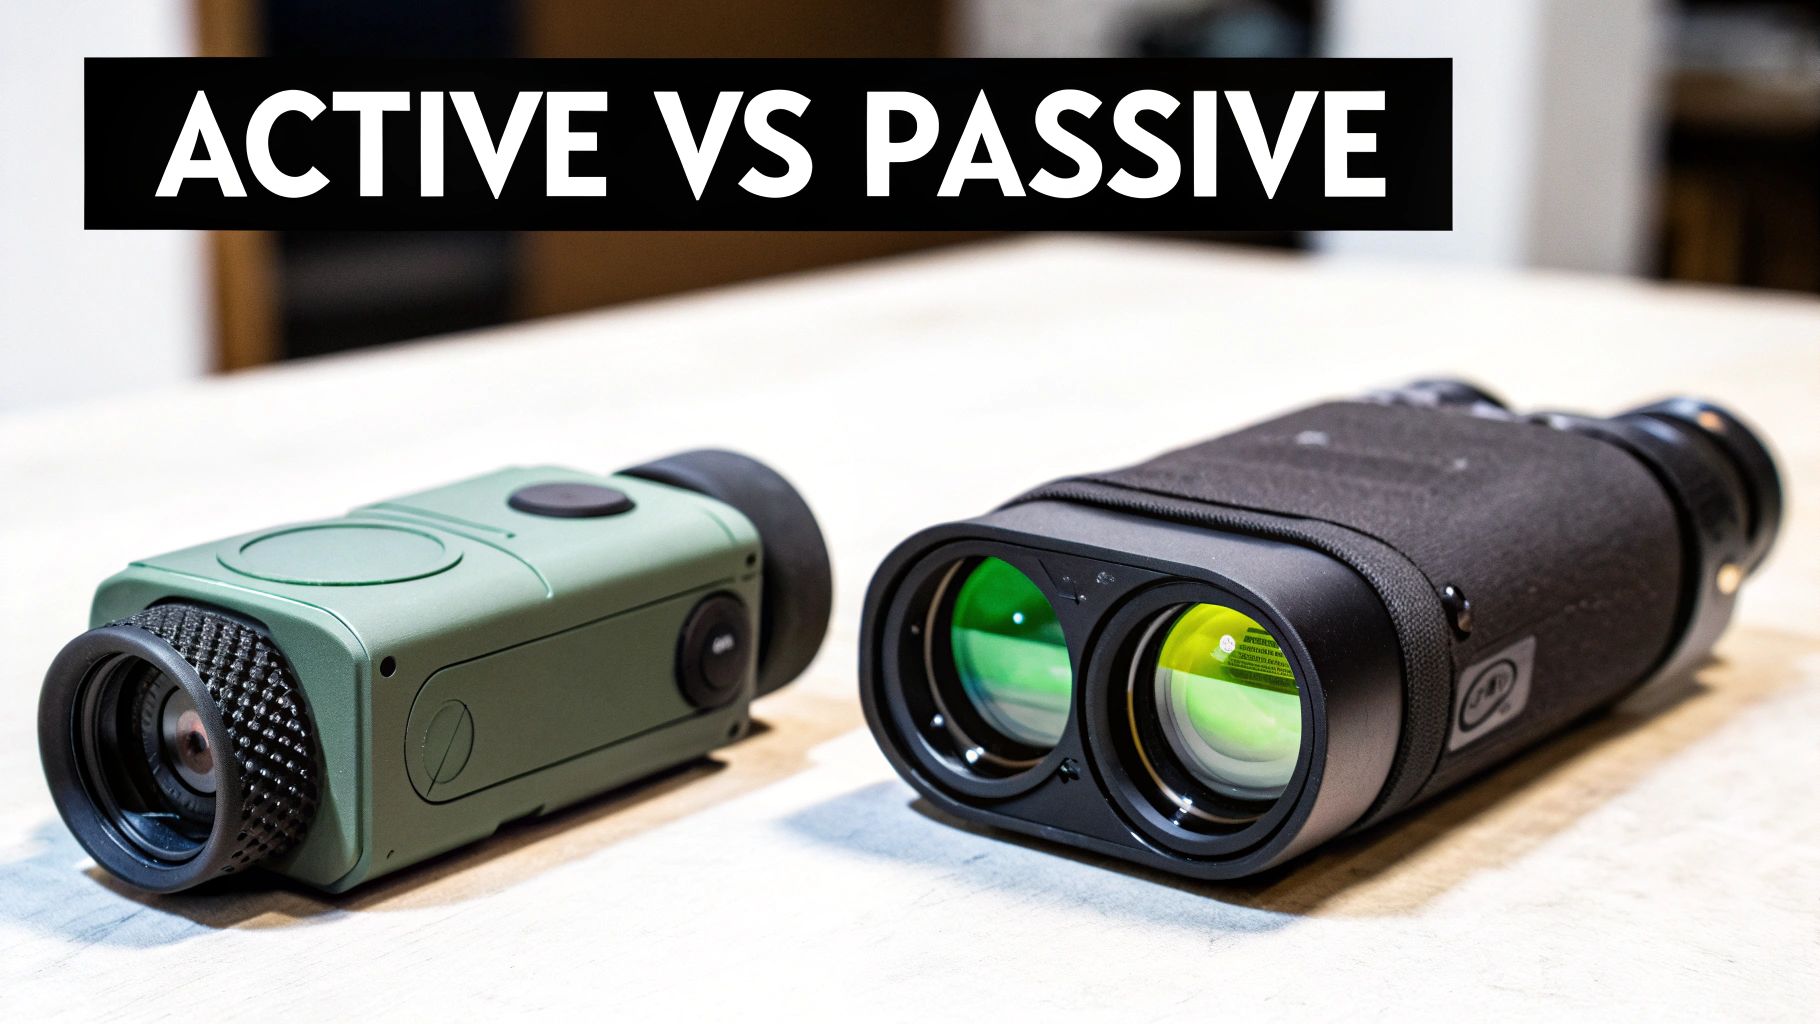
The whole thing boils down to one simple question: Does the device make its own light, or does it work with what’s already there? That single factor changes everything—how the gear performs, where it excels, and what its tactical weaknesses are.
Active vs Passive Systems Explained
Think of an active system as completely self-sufficient. It brings its own invisible flashlight—the IR illuminator—to the job. This makes it incredibly effective in pitch-black environments where there’s zero ambient light, like inside a windowless building or down in a cave. Digital infrared night vision is the textbook example of an active system.
A passive system, on the other hand, is a master light-gatherer. It operates by collecting and amplifying whatever faint light it can find from the moon, stars, or even the distant glow of a city. The classic image intensification tubes, famous for their iconic green-hued view, are passive. Their biggest advantage is stealth, since they don't broadcast any energy signature.
The Vietnam War was the proving ground that pushed passive night vision into the military mainstream. By 1967, the U.S. Army had over 20,000 first-generation (Gen 1) passive Starlight Scopes in the field. This tech completely changed jungle warfare, where the enemy used the cover of darkness for 70% of their attacks. These AN/PVS-2 devices could amplify ambient light by up to 1,000x, giving soldiers clear views out to 300 meters without the tell-tale illuminators of older active systems. You can read a lot more about the history of night vision and thermal imaging equipment on X20.org.
The Illuminator Wavelength Trade-Off
When you're dealing with active digital systems, the real decision comes down to the IR illuminator itself. They aren't all the same, and their performance is defined by their wavelength, measured in nanometers (nm). You’ll see two industry standards everywhere: 850nm and 940nm.
Understanding the give-and-take between these two is absolutely critical.
850nm Illuminators: These are the workhorses. They throw a more powerful beam of IR light, which gives you a much longer illumination range and a brighter, sharper image. The catch? The emitter itself gives off a faint, dull red glow that can be spotted by the naked eye up close, especially if you’re looking right at it.
940nm Illuminators: These are the quiet professionals. Their wavelength is pushed further into the infrared spectrum, so their light source is virtually invisible to human and most animal eyes. This is perfect for covert surveillance or hunting spooky game. The trade-off is power; a 940nm illuminator will have about 30-40% less effective range than a similar 850nm model.
This isn't just some minor spec—it's a core feature that dictates how and where you can use the device.
Choosing Your Illuminator Type
So, 850nm or 940nm? The right choice depends entirely on your mission. There’s no single "best" option here, only the right tool for the job.
Go with an 850nm illuminator if:
- Maximum range and image clarity are your top priorities. For spotting targets at a distance, general surveillance, or hunting in wide-open country, the extra punch of 850nm is a huge benefit.
- Absolute stealth isn't a deal-breaker. If your subject is far away or you aren't worried about the faint red glow giving you away, 850nm will deliver a better picture.
Go with a 940nm illuminator if:
- Staying completely undetected is non-negotiable. For law enforcement, close-quarters security work, or hunting animals with sharp eyes, the covert nature of 940nm is a must.
- Your typical engagement distances are on the shorter side. If you’re working within 100-150 yards, a 940nm illuminator gives you plenty of light to see clearly while keeping you off the radar.
At the end of the day, decoding these systems means looking past the marketing jargon and understanding the physics at play. Active systems own the darkness, while passive systems own the stealth. And within active systems, the 850nm vs. 940nm debate is the classic tactical choice: do you need raw power, or do you need complete concealment?
Choosing the Right Gear: Key Performance Factors
Picking the right piece of infrared night vision gear can feel like a shot in the dark, but it really boils down to a few key performance metrics. Once you know what to look for, you can slice through the marketing jargon and find a device that actually works for your mission, whether you're tracking game, securing a perimeter, or just finding your way back to camp.
Investing in quality optics isn't just about the price tag. It's about understanding the specs that make a real difference when you’re out in the field. Let's get into what really matters.
Detection Range vs. Recognition Range
This is probably the single most misunderstood concept in night vision. It’s easy to get wowed by a big number on the box, but you need to know what that number actually represents.
- Detection Range: This is the absolute maximum distance where the device can pick up something. You'll see a hot spot or a flicker of movement, but you won’t have a clue what it is. Is it a coyote or a tree stump? At this range, you just know something’s there.
- Recognition Range: Now we’re talking. This is the distance where you can confidently identify your target. That flicker becomes a deer; that silhouette becomes a person. For any serious tactical or hunting work, this is the number you need to focus on.
A unit might claim a 600-yard detection range, which sounds amazing, but the recognition range could be just 200 yards. Always dig deeper and find that recognition spec.
And remember, these aren't hard-and-fast numbers. They're heavily influenced by weather—fog, rain, and even humidity can slash your effective range. The size of your target matters, too. You’ll be able to recognize a truck much farther out than a raccoon.
Illuminator Power and Sensor Sensitivity
With digital IR night vision, the relationship between the illuminator and the sensor is everything. Your image quality in pitch-black conditions hinges entirely on how well these two work as a team.
Think of the illuminator's power as the strength of your invisible flashlight. A more powerful IR illuminator can "paint" a scene with light much farther away, extending your useful range. The trade-off? It’ll eat through your batteries faster.
But all that light is useless without a good eye to see it. That's where sensor sensitivity comes in. A high-quality sensor can scoop up even the faintest traces of reflected IR light and turn them into a crisp, clean image with minimal graininess. This synergy is what separates cheap gear from professional-grade equipment. To really dive into this, check out our guide on choosing an infrared illuminator.
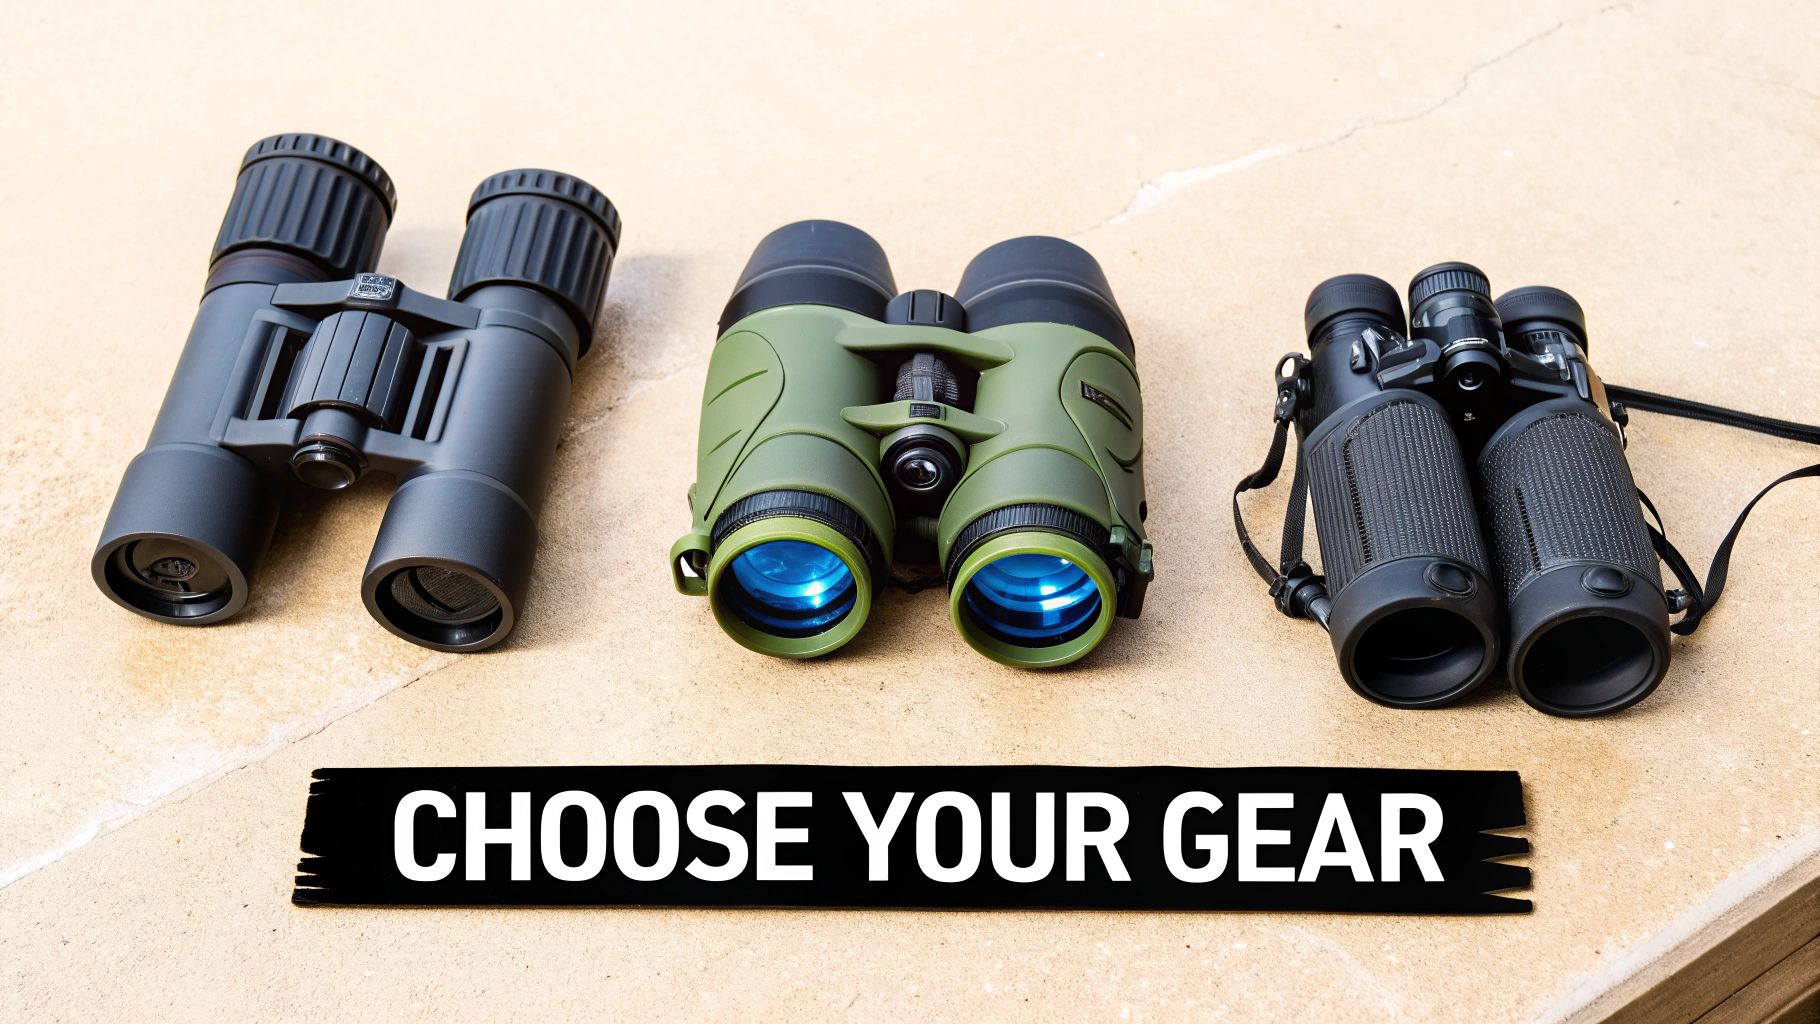
Form Factor: What Suits Your Mission?
Finally, you have to consider the physical design—the form factor. There's no "one-size-fits-all" answer here. The best choice is the one that fits how you plan to use it.
Common Form Factors
| Device Type | Primary Use Case | Key Advantage | Main Drawback |
|---|---|---|---|
| Monocular | Versatile scanning, helmet-mounting | Lightweight, compact, preserves unaided night vision in one eye | Lacks depth perception, can cause eye strain with prolonged use |
| Binocular | Long-range observation, stationary surveillance | Excellent depth perception, comfortable for extended viewing | Heavier, bulkier, requires both hands to operate |
| Scope | Weapon-mounted aiming | Allows for precise targeting in darkness | Dedicated to a single firearm, narrow field of view |
It's all a balancing act. If you need your hands free for navigation, a monocular is your best bet. If you’re glassing a field from a fixed position, the comfort and clarity of binoculars are hard to beat. And for taking a shot in the dark, nothing replaces a dedicated weapon-mounted scope.
Essential Maintenance and Best Practices
Your infrared night vision optics are a serious investment. Like any precision tool, it needs consistent, proper care to keep it performing at its best for years to come. A few simple, vital habits can mean the difference between a reliable device and a costly paperweight.
Skipping routine maintenance is a fast track to problems. You could see anything from a degraded image to a complete system failure. The most delicate parts—the lens and the digital sensor—are especially susceptible to damage from careless handling. The best way to protect your gear is to build a solid maintenance routine from day one.
Protecting Your Optics and Sensor
If you learn nothing else, learn this: protect the sensor from bright light. Firing up a digital infrared device in direct sunlight or pointing it at other intense light sources can permanently fry the sensitive electronics. This can leave you with dead pixels or total burnout. It’s simple: always keep the lens cap on during the day or when the unit is stowed away.
Keeping your lenses clean is just as important for a crisp, clear image.
- Blow, Don't Wipe: Before you touch the lens, use a blower bulb or a lens pen brush to get rid of any loose dust or grit. Wiping dirt across the glass is a surefire way to scratch the delicate coatings.
- Use the Right Gear: Stick to a microfiber cloth and a cleaning solution made specifically for optics. Never, ever use your t-shirt, a paper towel, or harsh chemicals like Windex.
- Go Easy: Use a gentle, circular motion, starting from the center and working your way out. Let the cloth and solution do the work; too much pressure can smear grime and damage coatings.
Smart Battery and Storage Habits
It's amazing how often batteries are the root cause of gear failure. A leaking battery can release acid that eats away at the internal contacts and electronics, often leading to repairs that are anything but cheap. For a deeper dive into common problems, check out our guide on how to identify and repair night vision gear issues.
Critical Tip: Always remove the batteries from your infrared night vision device before putting it away for long-term storage. This one simple step completely eliminates the risk of a forgotten battery leaking and destroying your equipment.
When you're not using it, store your device in a hard, padded case to shield it from drops and moisture. Tossing a desiccant pack in with it is a great way to absorb any ambient humidity, giving the internal components an extra layer of protection. These small steps make a huge difference in keeping your gear ready for whatever you throw at it.
Common Questions We Get About Infrared Night Vision
Even after you get the hang of the basics, some practical questions always pop up. Let's run through some of the most common ones we hear from guys in the field, so you can run your IR gear with total confidence.
Can I Use Infrared Night Vision During the Day?
This is a big one, and getting it wrong can be a costly mistake.
For traditional image intensifier tubes—the kind that gives you that classic green-hued view—the answer is a hard no. Pointing one of those at a bright light source, especially the sun, is a fast way to burn out and permanently destroy the tube.
Digital IR night vision is a different story. Most modern digital units are built with an IR-cut filter that automatically kicks in during the day, letting them work like a regular camera. The daytime image quality won't be as good as your phone's, since they're built for the dark, but it won't fry the sensor.
The golden rule for any high-end night vision device is simple: keep the lens cap on during the day. Unless the manufacturer explicitly says it's daylight-safe, just don't risk it. Protecting your gear is job number one.
What's the Real Difference Between 850nm and 940nm Illuminators?
This all comes down to a classic tactical trade-off: do you need more power or more stealth?
An 850nm IR illuminator is your workhorse. It throws a ton of invisible light downrange, giving your sensor a brighter, clearer picture to work with. The only catch? The emitter itself gives off a faint red glow. It’s not much, but it can be spotted by the naked eye up close, which could give away your position.
A 940nm IR illuminator is the ghost in the machine. Its light is almost completely invisible to human and animal eyes, making it the top choice for truly covert work. The price you pay for that stealth is a shorter effective range, usually about 30-40% less than a similar 850nm unit.
Is Infrared Night Vision the Same Thing as Thermal?
Not at all. They are two completely different tools for two different jobs, and anyone who tells you otherwise doesn't know what they're talking about.
Infrared Night Vision sees by bouncing IR light off of things. Just like a flashlight, it needs a light source to work, but one that's invisible to our eyes. This technology gives you a detailed image, making it perfect for identification—recognizing a face, reading a license plate, or telling a coyote from a stray dog.
Thermal Imaging sees heat. It needs zero light and builds a picture purely from temperature differences. It's built for detection. A thermal scope can spot a warm body hiding in thick brush, through smoke, or in dense fog where an IR device would just see a wall of white.
The simplest way to think about it is this: infrared tells you what you're looking at, while thermal just tells you that something is there.
Are There Any Legal Restrictions on Owning Night Vision?
For most folks in the United States, it's perfectly legal to own and use most infrared and image-intensified night vision. That said, the really high-end, military-spec stuff (think certain Gen 3+ tubes) can have some ownership restrictions.
The biggest thing to know is that exporting this technology is a major no-go. It's heavily regulated under ITAR (International Traffic in Arms Regulations). You should also check your local state laws, especially when it comes to using night vision for hunting. The best advice is always to buy from a reputable, U.S.-based dealer who knows the rules and can keep you compliant.
Ready to gain the tactical advantage of seeing in the dark? The team at Superior Tactical LLC has over a decade of experience outfitting professionals with the right gear. Explore our curated selection of night vision optics and tactical accessories, backed by a 10-year warranty and expert in-house support.