Choosing an Infrared Illuminator for Night Vision
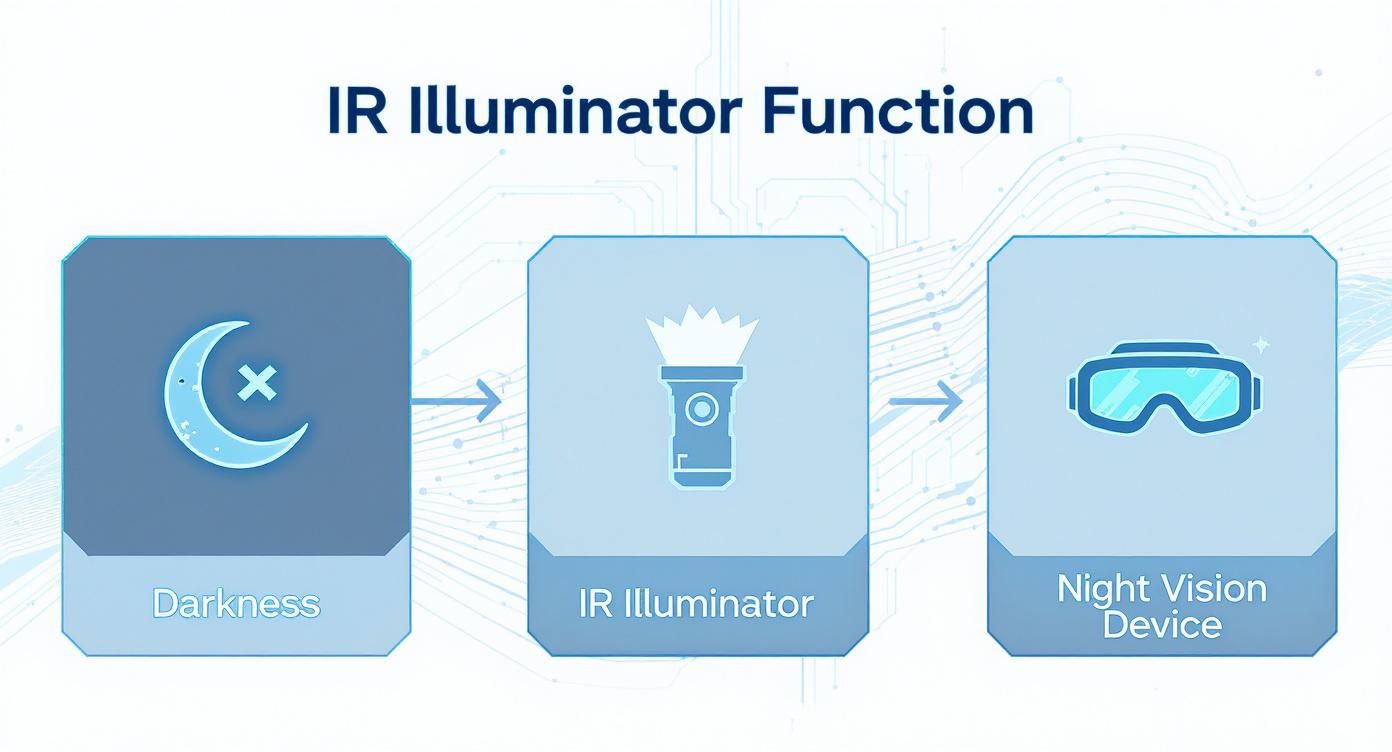
Think of an infrared (IR) illuminator as a special kind of flashlight. Instead of visible light, it shoots out a beam of infrared light that your naked eye can’t see but your night vision device can. It’s the key to turning your night vision from a passive tool that just gathers light into an active system that creates its own.
Seeing in Complete Darkness with an IR Illuminator
Ever tried to find your way through a room with absolutely no light and your ears plugged? It’s impossible. Night vision devices (NVDs) face a similar problem. Even the most advanced gear works by amplifying tiny amounts of existing light. But what happens when there’s zero light to amplify? Think deep inside a windowless building or a moonless, overcast night in the thick woods. That’s when your NVD is useless on its own.
This is exactly where an IR illuminator shines—literally. It paints the scene in front of you with a powerful beam of infrared light, creating a light source that only your NVD can pick up. Suddenly, a pitch-black, useless image transforms into a bright, detailed picture, letting you cut through the deepest shadows.
From Active Requirement to Tactical Advantage
This idea isn’t new. In fact, the very first night vision systems, what we now call Generation 0, were completely dependent on them. Back in World War II, these “active” systems paired a bulky near-infrared (NIR) light source with a scope, allowing snipers to see targets after dark. You can find more on the history of night vision on x26.com.
Of course, technology has come a long way. Those early illuminators were clunky and didn’t have much reach. Modern night vision evolved into “passive” systems that are incredibly good at amplifying faint starlight or moonlight. But that doesn’t make the illuminator obsolete; it just changed its role.
An infrared illuminator doesn’t just help you see in the dark; it gives you control over it. You can create your own light source on demand, guaranteeing your gear works in any situation, from twilight to total blackness.
Today, an infrared illuminator for night vision is a true force multiplier, not just a backup. It gives any user a serious edge:
- Dominate Total Darkness: It’s your ticket to operating in places with zero ambient light where passive-only NVDs would leave you blind.
- Extend Your Identification Range: By flooding the area with IR light, it dramatically increases the distance at which you can positively identify a target.
- Sharpen Your Image: It cleans up the “scintillation,” or sparkling noise, you often see in very low light, giving you a much cleaner and more stable view.
Choosing Your Wavelength: 850nm vs. 940nm
When you’re in the market for an infrared illuminator for night vision, the first and most important decision you’ll make is the wavelength. This number, measured in nanometers (nm), dictates the fundamental trade-off between raw performance and total stealth. The two main players are 850nm and 940nm, and knowing how they differ is the key to matching the right tool to your specific needs.
Think of it this way: an 850nm illuminator is like a powerful stage whisper. It gets the message across loud and clear over a distance but runs the risk of being overheard. A 940nm, on the other hand, is a silent hand signal—completely undetectable but effective only at a closer range. This is the core dilemma you’re solving.
This diagram breaks down how an IR illuminator acts as a covert flashlight, bathing a scene in invisible light that allows your night vision gear to see in pitch-black conditions.
As you can see, the illuminator provides the light source where there is none, which your night vision device then amplifies to create a usable image.
The Powerhouse: 850nm Illuminators
Often called “semi-covert,” the 850nm wavelength is the absolute workhorse of the IR world. Because it sits closer to the visible light spectrum, night vision devices are naturally more sensitive to it. The result? An 850nm unit will produce a significantly brighter image and throw its beam much farther than a 940nm illuminator of the same power.
This massive performance boost makes it the go-to choice when maximum visibility is the top priority.
- Hunters can positively identify game at much greater distances.
- Ranchers get the range needed to scan huge pastures for predators.
- Search and Rescue teams can cover vast, open terrain far more efficiently.
But there’s a catch. This power comes with a small signature. If you look directly at the LED emitter of an active 850nm illuminator, you’ll see a faint, cherry-red glow. It’s not bright, but it’s there. This subtle glow can be spotted by the naked eye in very dark conditions and is easily seen by anyone else using night vision. For most, it’s a small price to pay for superior illumination.
The Stealth Option: 940nm Illuminators
In stark contrast, 940nm illuminators are considered “fully covert.” This wavelength is pushed much further away from the visible spectrum, making its source completely invisible to the human eye. There is zero tell-tale red glow. This quality makes it the non-negotiable choice for any situation where giving away your position is simply not an option.
For police, military, and serious security professionals, a 940nm illuminator is essential. Its total invisibility is what provides a critical tactical advantage when discretion is everything.
Of course, this total stealth comes at a cost. Night vision image intensifier tubes are just not as sensitive to 940nm light. Consequently, a 940nm illuminator will have a noticeably shorter effective range—often 20-40% less—and produce a dimmer image than an 850nm unit with the same power rating. You have to get closer to your subject to get the same results.
To make the choice clearer, here’s a direct comparison of the two wavelengths.
Comparing 850nm and 940nm Infrared Illuminators
| Feature | 850nm Illuminator (‘Semi-Covert’) | 940nm Illuminator (‘Fully Covert’) |
|---|---|---|
| Visibility | Emits a faint, visible red glow at the source. | Completely invisible to the naked eye; no glow. |
| Performance | Higher output and longer range. Night vision is more sensitive to this wavelength. | Lower output and shorter range (20-40% less). Night vision is less sensitive. |
| Best For | Hunting, long-range surveillance, search and rescue, general outdoor use. | Tactical operations, law enforcement, close-quarters security, wildlife observation. |
| Primary Pro | Maximum illumination range and image brightness. | Complete stealth and undetectability. |
| Primary Con | The visible red glow can reveal your position. | Reduced range and image brightness requires more power for same effect. |
This table shows there’s no single “best” option—only the best option for your mission.
The market for night vision and IR technology is booming, with projected annual growth of 7-10%. This expansion is driven by both professional demand and increasing civilian interest, where these wavelength choices are more critical than ever. As technology improves, high-end illuminators can now project useful light past 1,000 meters. You can get more background on the technology from the global night vision device market page on Wikipedia.
Ultimately, the decision is simple. Do you need to see a coyote across a 400-yard field, or do you need to remain completely invisible while securing a perimeter? Your answer will point you straight to the right wavelength.
Matching an Illuminator to Your Night Vision Device
Pairing the right IR illuminator with your night vision device is a bit like matching an amplifier to a good set of speakers. It’s all about creating a balanced system that works in harmony. You don’t just grab the most powerful illuminator on the shelf; you pick the one that complements the sensitivity and technology of your specific night vision device (NVD). Getting this wrong can lead to subpar performance, washed-out images, or just plain wasting money on power you can’t even use.
Think of the different night vision generations like microphones. A Gen 1 device is like a cheap, old microphone from the 70s. It’s not very sensitive and needs a loud, powerful sound source—in our case, a strong IR illuminator—to pick up a clear signal. Without a ton of infrared help, its performance is pretty limited, often giving you a grainy, dim picture.
On the other hand, a modern Gen 3 or high-end digital NVD is like a professional studio microphone. It’s incredibly sensitive and can amplify the faintest whispers of ambient light all on its own. But even this high-tech gear benefits from a clean, focused source of IR light to get perfect clarity, especially when you’re in a place with absolutely zero ambient light.
Illuminators for Gen 1 and Digital Devices
Generation 1 NVDs are almost completely dependent on a good infrared illuminator. Their image intensifier tubes offer pretty low light amplification—around 1,000x—so they really struggle to pull a usable image from starlight alone. A powerful 850nm illuminator isn’t just nice to have; it’s a requirement, acting like a high-beam headlight that floods the area with the light your device desperately needs to see.
For Gen 1 and entry-level digital night vision, a quality illuminator isn’t just an accessory. It’s a fundamental component that actually unlocks the device’s core function.
It’s a similar story for most digital night vision devices. While their sensors are getting better all the time, they just don’t have the same light-gathering superpower as analog tubes. A strong illuminator is essential for them to work well in true darkness, giving a massive boost to their range and image quality. Without one, you might be limited to seeing just a few dozen yards out.
Illuminators for Gen 2 and Gen 3 Systems
Once you step up to Gen 2 and Gen 3 devices, the illuminator’s role changes. It goes from being a primary necessity to a strategic tool. These systems are far more sensitive and can do a lot with just a little moonlight, but an illuminator still gives you a massive tactical advantage.
- Extending Identification Range: A Gen 3 unit might let you detect a shape at 300 yards on its own. But a focused IR beam helps you identify it, turning that blurry figure into a clear target.
- Cutting Through Total Darkness: In places with zero ambient light, like a deep cave or a sealed building, even the best Gen 3 device is blind without an illuminator.
- Improving Image Quality: A good illuminator can help “burn through” atmospheric haze and reduce the sparkling effect known as scintillation, giving you a much crisper, clearer picture.
If you look at how night vision evolved from the 1960s through the late 80s, you can see how illuminators adapted. Early Gen 1 devices in Vietnam needed heavy IR support, while the much-improved Gen 2 systems of the 1980s could operate more independently. By the Gulf War, Gen 3 devices, with incredible light gains of 30,000 to 50,000 times, were using illuminators to push their already impressive capabilities out to 300 meters and beyond. For a deeper dive, you can find a solid overview of night vision technology that covers this progression.
In the end, it all comes down to understanding your gear and creating the right pairing. If you’re still figuring out which NVD is right for you in the first place, take a look at our guide on how to choose the right night vision device for your needs. It’ll help you build the most effective system from the ground up.
Understanding Key Performance Specs and Features
So, you’ve picked your wavelength. That’s a great start, but it’s only half the story. To really know how an infrared illuminator for night vision will perform out in the field, you have to dig deeper than just the nanometer rating. Think of it like a high-performance engine—horsepower numbers are great, but how that power is delivered to the wheels is what truly matters.
Getting these details right is the difference between an illuminator that’s a seamless extension of your gear and one that’s a constant source of frustration. Let’s break down the three most critical specs you need to get a handle on: beam pattern, power output, and what those “effective range” numbers really mean.
This image perfectly illustrates the difference between a wide flood beam and a tight spot beam—the two most important patterns you’ll get from a quality adjustable illuminator.
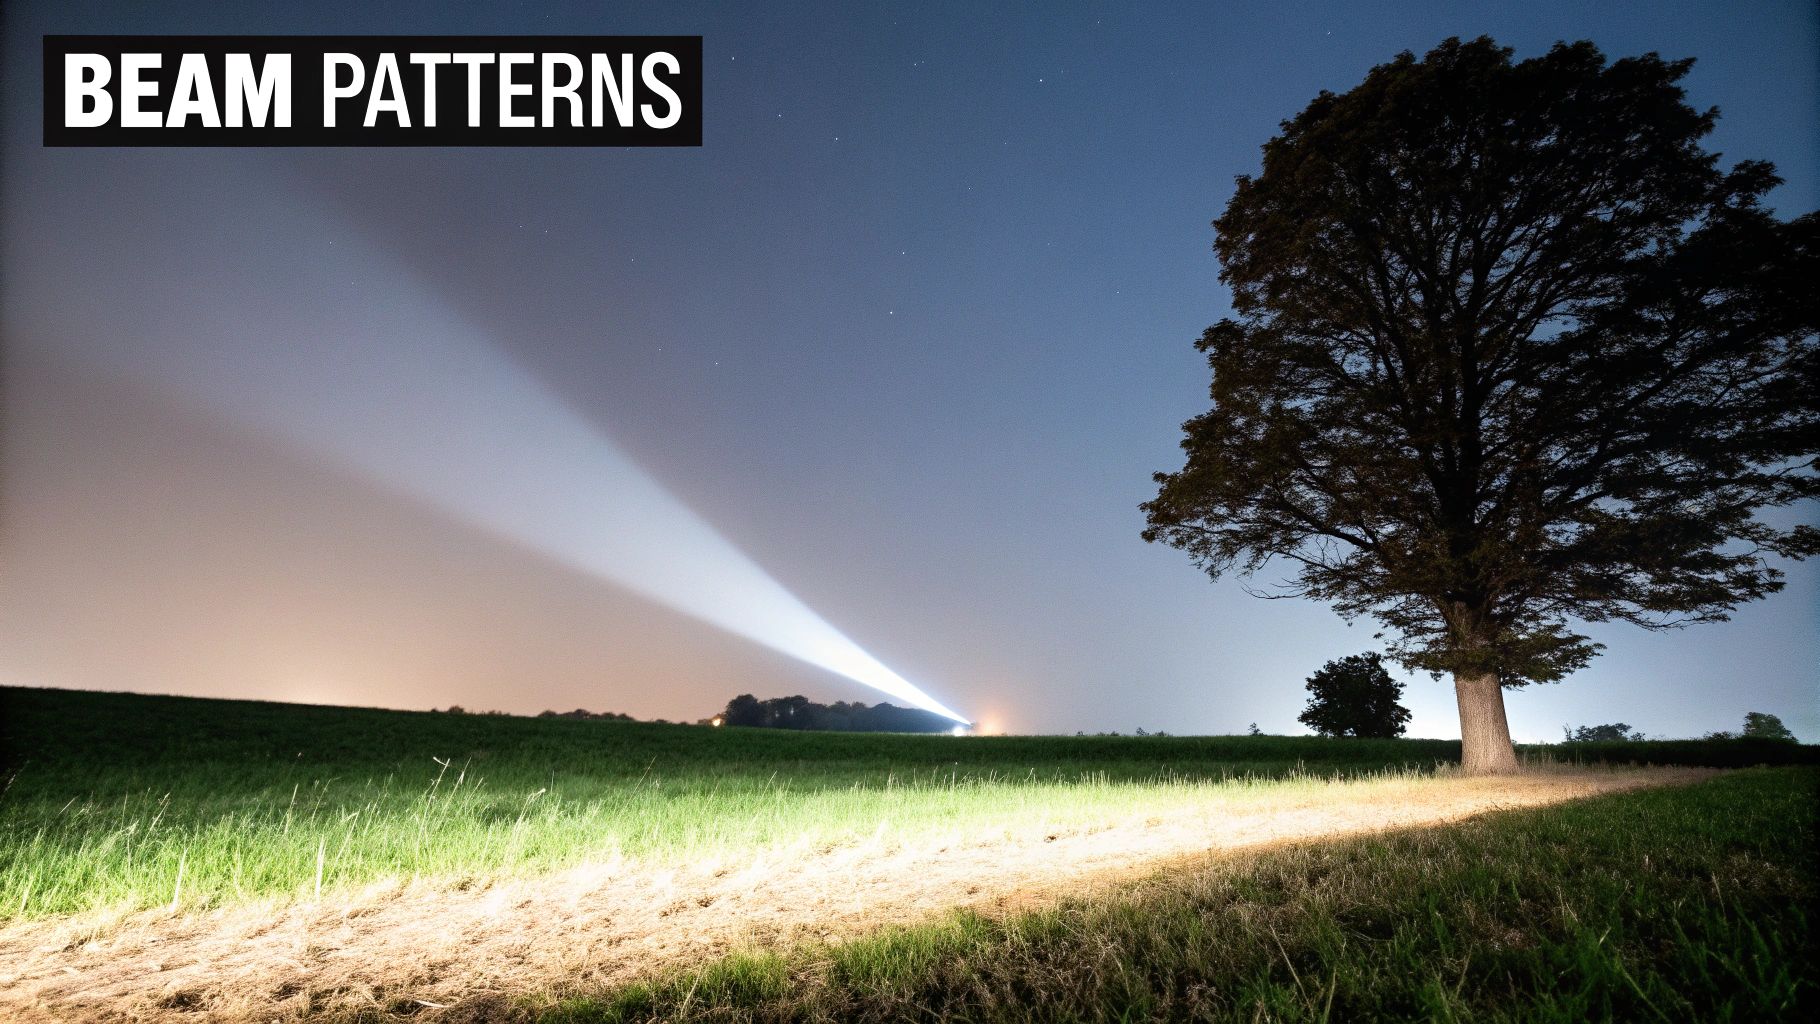
Knowing when to use each pattern is key to adapting to whatever situation you find yourself in.
Beam Pattern: Flood vs. Spot
An illuminator’s beam pattern is all about the shape of the light it projects. I’d argue this is just as important, if not more so, than its raw power. The best analogy is a nozzle on a garden hose: you can have a wide, gentle spray for the whole lawn, or you can twist it to a tight, powerful jet to blast mud off the driveway.
- Flood Beam: This gives you a wide, soft circle of IR light that’s perfect for lighting up your immediate surroundings. It’s exactly what you want for general situational awareness, navigating on foot, or scanning a broad treeline up close. The trade-off? That light energy is spread thin, so it doesn’t reach very far.
- Spot Beam: This is the opposite. It focuses all the illuminator’s energy into a tight, intense beam. A spot beam is your tool for long-distance work, letting you positively identify a target hundreds of yards out. The downside is that you get a serious case of tunnel vision, seeing only a tiny portion of the landscape.
Thankfully, the best infrared illuminators don’t force you to pick just one. Top-tier models have an adjustable focus, often called a “zoomable” or “focusable” head. This lets you smoothly transition from a wide flood to a tight spot and back again. This versatility is a total game-changer, allowing you to scan a field with a flood and, once you detect movement, instantly tighten the beam to see exactly what’s out there.
Power Output and What It Means
Next up is power output, which you’ll usually see measured in milliwatts (mW). This number tells you how much infrared energy the illuminator’s LED is actually producing. As you’d expect, a higher mW rating generally means a brighter beam and more potential range.
But more power isn’t always the answer. In fact, an overpowered illuminator can cause some major headaches, especially with high-end night vision or when working at close quarters. It can create a “blooming” or “washout” effect, where the center of your view is so intensely bright that all the detail just disappears. It’s like staring into a car’s high-beams from ten feet away—the glare is blinding.
Power is a balancing act. You need enough to reach your targets, but not so much that it obliterates your image quality or torches your batteries in minutes.
Many of the better illuminators solve this with adjustable power settings. This lets you dial the output up or down to perfectly match the environment and your NVD’s sensitivity. It’s a crucial feature that gives you fine-tuned control, ensuring you get the best possible image while making your batteries last.
The Truth About Advertised Range
Finally, let’s have a frank discussion about range. Manufacturers love to slap impressive numbers on the box—500, 800, even 1,000 yards. You absolutely must understand that these are best-case-scenario numbers, almost always achieved in perfect, lab-like conditions. Your real-world, usable range is going to be different.
Several factors will always dictate how far your illuminator can truly reach:
- Atmospheric Conditions: This is a big one. High humidity, fog, rain, and even heavy dust in the air will scatter and absorb that IR light, slashing your effective range.
- Target Reflectivity: You’ll be able to spot an animal with light-colored fur and reflective eyes much farther away than a dark hog that just soaks up the IR light.
- NVD Sensitivity: The quality of your night vision device itself is a massive variable. A high-spec Gen 3 unit is incredibly sensitive and can “see” faint IR light at incredible distances. A Gen 1 device, on the other hand, needs a much brighter splash of IR to form a clear image. Our guide on the top features in a quality night vision monocular dives deeper into why device sensitivity is so critical.
Once you grasp these specs, you can look at a product sheet and understand what those numbers actually mean for you and your specific needs. You’ll be able to choose an illuminator based on its real-world capabilities, not just on flashy marketing claims.
Getting Your Gear Set Up: Mounting, Aiming, and Power
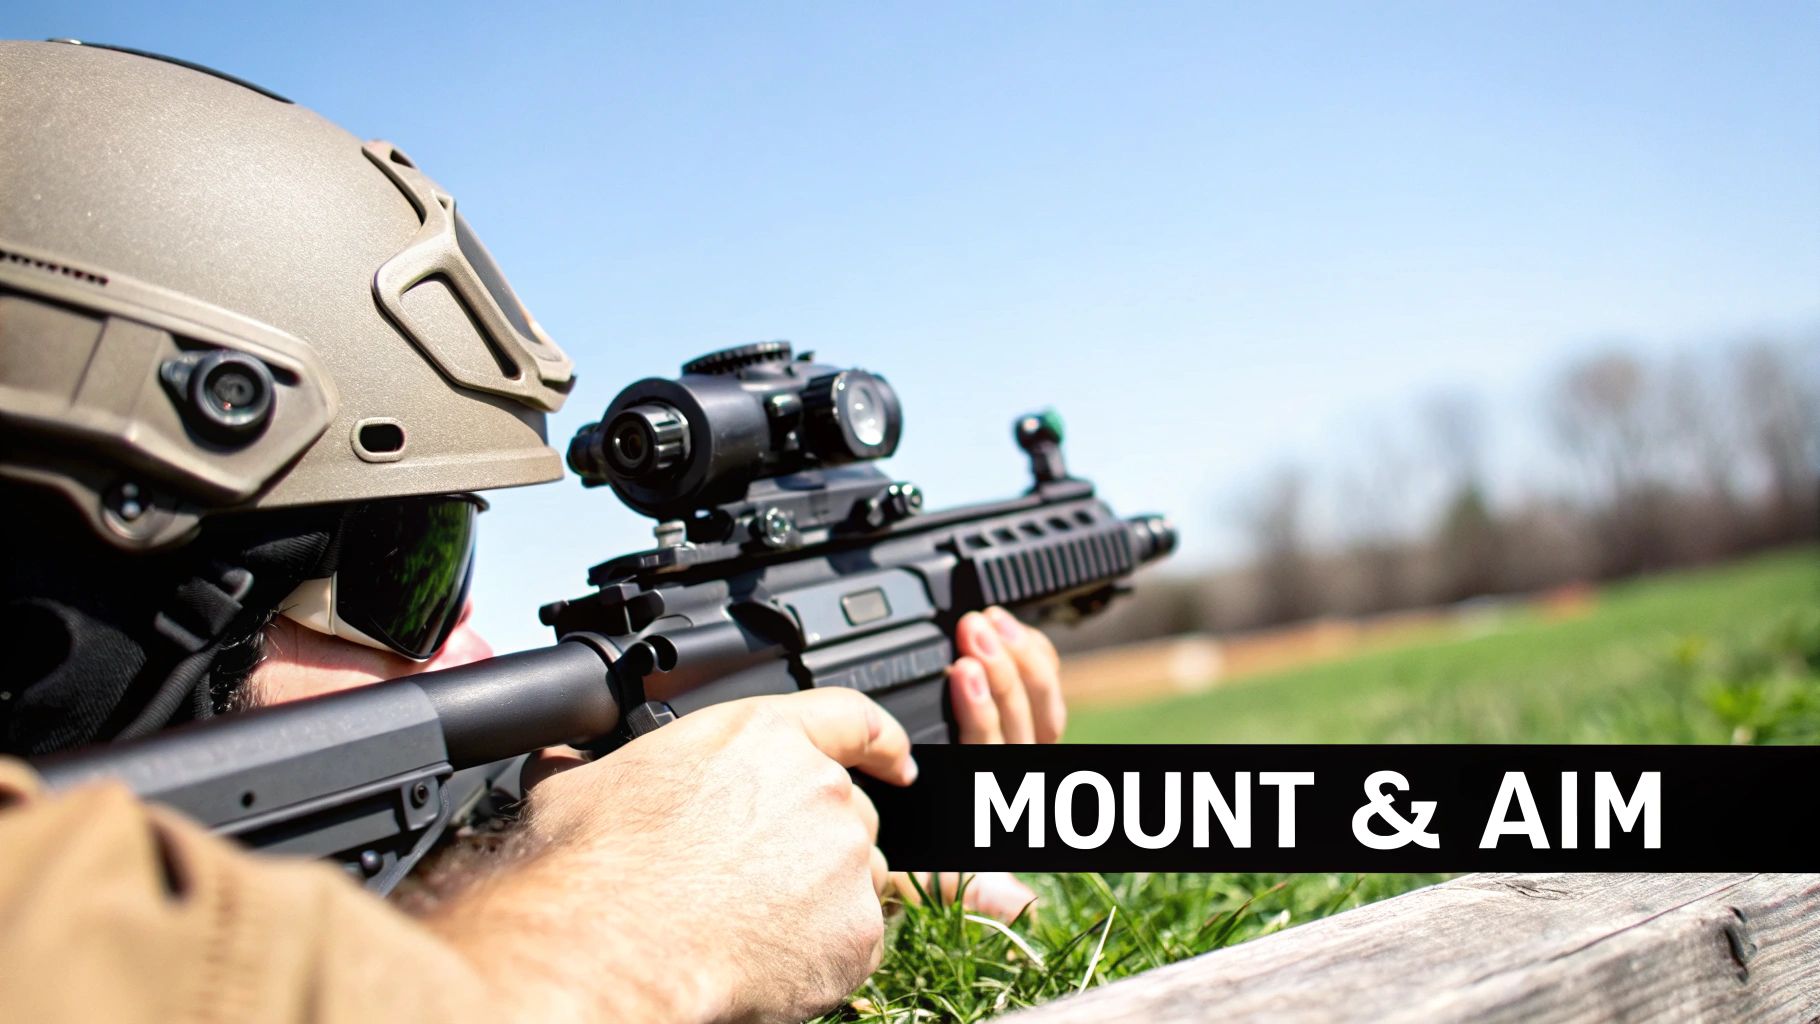
Owning a great IR illuminator is just the first step. To really make it count, you have to get it mounted and aimed correctly. An illuminator that’s poorly attached or pointing in the wrong direction is more of a liability than a tool, so let’s get hands-on.
The go-to method for most people is a standard Picatinny rail. It’s a rock-solid, universal platform you’ll find on almost every modern rifle and even some helmets. A good rail mount prevents any wiggle or shift, which is absolutely critical for keeping your light zeroed, especially with the jarring force of recoil.
For walking around or general awareness, a helmet mount is the way to go. It keeps the IR beam pointed exactly where you’re looking, making navigation a breeze. And of course, you can always just hold it. A handheld illuminator gives you total freedom to scan and spot without being tied to a specific rig.
Aligning Your Illuminator for Peak Performance
This is the single most important part of the setup. The whole point is to get the illuminator’s beam perfectly centered in your night vision device’s field of view. If you get this wrong, you’ll end up with frustrating dark spots or a bright hotspot that’s way off to the side of where you’re actually looking.
Here’s a simple process to get it dialed in:
- Lock It Down: First, mount the illuminator securely to your rifle or helmet. Make sure it’s tightened down and not going anywhere.
- Pick a Target: Head out at night and find a plain, flat surface, like the wall of a barn or building, about 50-100 yards out.
- Light It Up: Turn on both your NVD and the illuminator. Look through your NVD and see where the center of the IR beam is hitting the wall.
- Center the Beam: Using the adjustments on the illuminator’s mount, move the beam until that bright hotspot is dead center in your vision.
Once aligned, your light will always be focused right where you’re aiming, which makes identifying targets fast and instinctive. Getting your gear to work together seamlessly is key, and the right hardware can make all the difference. If you’re building a system from scratch, our guide on dovetail mounts for night vision goggles is a great place to start exploring your options.
Choosing the Right Power Source
Last but not least, let’s talk about power. Your illuminator is only as good as its batteries, and you have a real choice to make between disposable and rechargeable cells. This isn’t just about convenience; it’s about performance.
The right battery isn’t just about making the light turn on; it’s about ensuring consistent power output, which directly affects the illuminator’s brightness and range throughout its use.
You’ll mostly run into two types: CR123As and 18650s.
- CR123A Batteries: These are the workhorses of the tactical world. They’re disposable lithium batteries famous for their incredibly long shelf life—often 10+ years—and they perform exceptionally well in extreme cold. They are perfect for gear you might stow in a go-bag or truck kit for emergencies.
- 18650 Batteries: These are rechargeable lithium-ion cells and are a favorite for anyone who uses their gear a lot. They cost more upfront, but being able to recharge them hundreds of times saves a ton of money in the long run. They also tend to provide a more stable voltage as they drain, keeping your light brighter for longer.
So, which one is for you? If you’re an occasional user or prepping for a worst-case scenario, the grab-and-go reliability of CR123As is tough to beat. But for regular training, professional duty, or frequent night hunts, the cost savings and steady performance of 18650s make them the smarter investment.
Choosing the Right Illuminator for Your Mission
All the technical specs in the world are just numbers on a page until you put them to work. Picking the right infrared illuminator for night vision isn’t about buying the most expensive or powerful model you can find. It’s about matching the tool to the job.
The setup a coyote hunter needs is worlds apart from what a police officer requires to safely clear a dark building. This is where the rubber meets the road. By breaking down a few common scenarios, you’ll see exactly how wavelength, beam pattern, and power come together to create a system that truly works for you.
For the Predator Hunter
When you’re hunting, the game is all about positive target identification at a distance. You need to be 100% sure of what you’re looking at before you even think about taking a shot, and that means you need an illuminator that can really reach out there.
For this job, an 850nm illuminator is the undisputed king.
- Recommended Wavelength: 850nm. Don’t worry about the faint red glow; you need maximum range and brightness to see clearly hundreds of yards away.
- Ideal Beam Pattern: A focusable beam is non-negotiable. You’ll scan a field with a wide flood to catch a pair of eyes, then crank it down to a tight spot to make a positive ID.
- Key Consideration: Power is everything. You also need a tough, recoil-rated mount that ensures your illuminator holds its aim, shot after punishing shot.
For Law Enforcement and Security Professionals
In a tactical environment, giving away your position can be fatal. Whether you’re clearing a room or running surveillance, staying invisible is your top priority. This is precisely why a completely covert 940nm illuminator is standard-issue equipment.
You’ll trade some distance for absolute stealth, but that’s a trade you have to make.
For anyone working in high-risk situations, the ability to see without being seen is a life-saving feature. When total discretion is the mission, 940nm is the only real choice.
An officer sweeping a room needs a broad flood of light for situational awareness, not a tight spotlight that induces tunnel vision.
- Recommended Wavelength: 940nm for total invisibility to the naked eye.
- Ideal Beam Pattern: A wide flood beam is crucial for maintaining peripheral vision and awareness in tight, close-quarters situations.
- Key Consideration: The unit must be rugged, waterproof, and easily mounted to a helmet for hands-free use.
For the Home Security Enthusiast
If you’re keeping an eye on your own property, versatility is the most important factor. One minute you might be scanning the whole backyard, and the next you need to zoom in on a strange noise at the far end of the fence. A balanced, adaptable illuminator is your best bet.
Your needs sit somewhere between the long-range hunter and the stealthy professional, so you need a tool that can do a little bit of everything.
- Recommended Wavelength: Either 850nm or 940nm can be a great fit. Go with 850nm for better performance on larger properties, or choose 940nm if you want more discreet monitoring.
- Ideal Beam Pattern: An adjustable focus that goes from flood to spot is a must-have feature.
- Key Consideration: Look for models with adjustable power levels. This lets you dial it down so you don’t white-out your security cameras up close, but still gives you the punch to see the back corners of your land.
Recommended IR Illuminator Setups by User
To make it even simpler, here’s a quick-reference table that boils it all down. Find your profile and see what features will serve you best.
| User Profile | Primary Need | Recommended Wavelength | Ideal Beam Pattern | Key Consideration |
|---|---|---|---|---|
| Predator Hunter | Long-Range Target ID | 850nm | Focusable (Spot) | High power & recoil-rated |
| Law Enforcement | Covert Operations / CQC | 940nm | Wide (Flood) | Durability & helmet mount |
| Security Pro | Surveillance & Patrol | 940nm | Adjustable | Discretion & battery life |
| Home Security | General-Purpose Monitoring | 850nm or 940nm | Adjustable | Variable power settings |
| Night Vision Hobbyist | Exploration & Observation | 850nm | Adjustable | Portability & ease of use |
Ultimately, this chart is a starting point. The best way to find the perfect illuminator is to clearly define your primary mission and then choose the tool with the features that directly support that goal.
Common Questions and Field Answers
When you’re getting started with IR illuminators, a few questions always seem to come up. Let’s tackle some of the most common ones I hear from people in the field so you can get the most out of your gear.
Can an IR Illuminator Hurt My Eyes?
Absolutely, yes. You should never, ever look directly into the lens of an active IR illuminator.
Just because you can’t see the infrared light doesn’t mean it’s harmless. That beam is highly concentrated and can cause damage. My advice is simple: treat it with the exact same caution you’d use with a high-powered tactical flashlight.
Will My Illuminator Work with Any Night Vision Device?
For the most part, yes, but how well it works is the real question. Every generation of night vision—from Gen 1 and digital all the way up to high-spec Gen 3—can see infrared light. The difference lies in their sensitivity.
A good illuminator is practically essential for making a Gen 1 or digital unit useful. For a sensitive Gen 3 device, it’s more of a powerful boost, letting you punch through deep shadows or see details at extreme distances.
Why Does My Image Look Blown Out or Washed Out?
If your image is blindingly bright and you’re losing all the detail, you’re experiencing what we call “washout” or “blooming.” This almost always means your illuminator is just too powerful for your current situation or for the sensitivity of your night vision device.
The go-to fix for washout is an illuminator with adjustable power settings. Being able to dial back the intensity is crucial for close-quarters work or when you’re around reflective surfaces like windows or wet pavement. This control is what gives you a clear, usable image every time.
Another quick fix is to widen your beam into a “flood” pattern. Spreading that light over a bigger area immediately drops its intensity at any single point and can often clear up washout instantly. Having that flexibility is what separates a good setup from a great one.
Ready to see what your night vision is truly capable of? The team at Superior Tactical LLC lives and breathes this stuff. We can help you pair the right illuminator with your setup for whatever your mission is. Check out our hand-picked selection of top-tier gear at https://superiortac.com and start owning the dark.