Your Definitive Guide to the Helmet Flashlight Mount
A helmet flashlight mount is a purpose-built piece of kit that locks a tactical flashlight right onto your helmet. It’s a simple concept, but it's a genuine force multiplier, giving you hands-free illumination exactly where you need it and freeing you up for more important tasks.
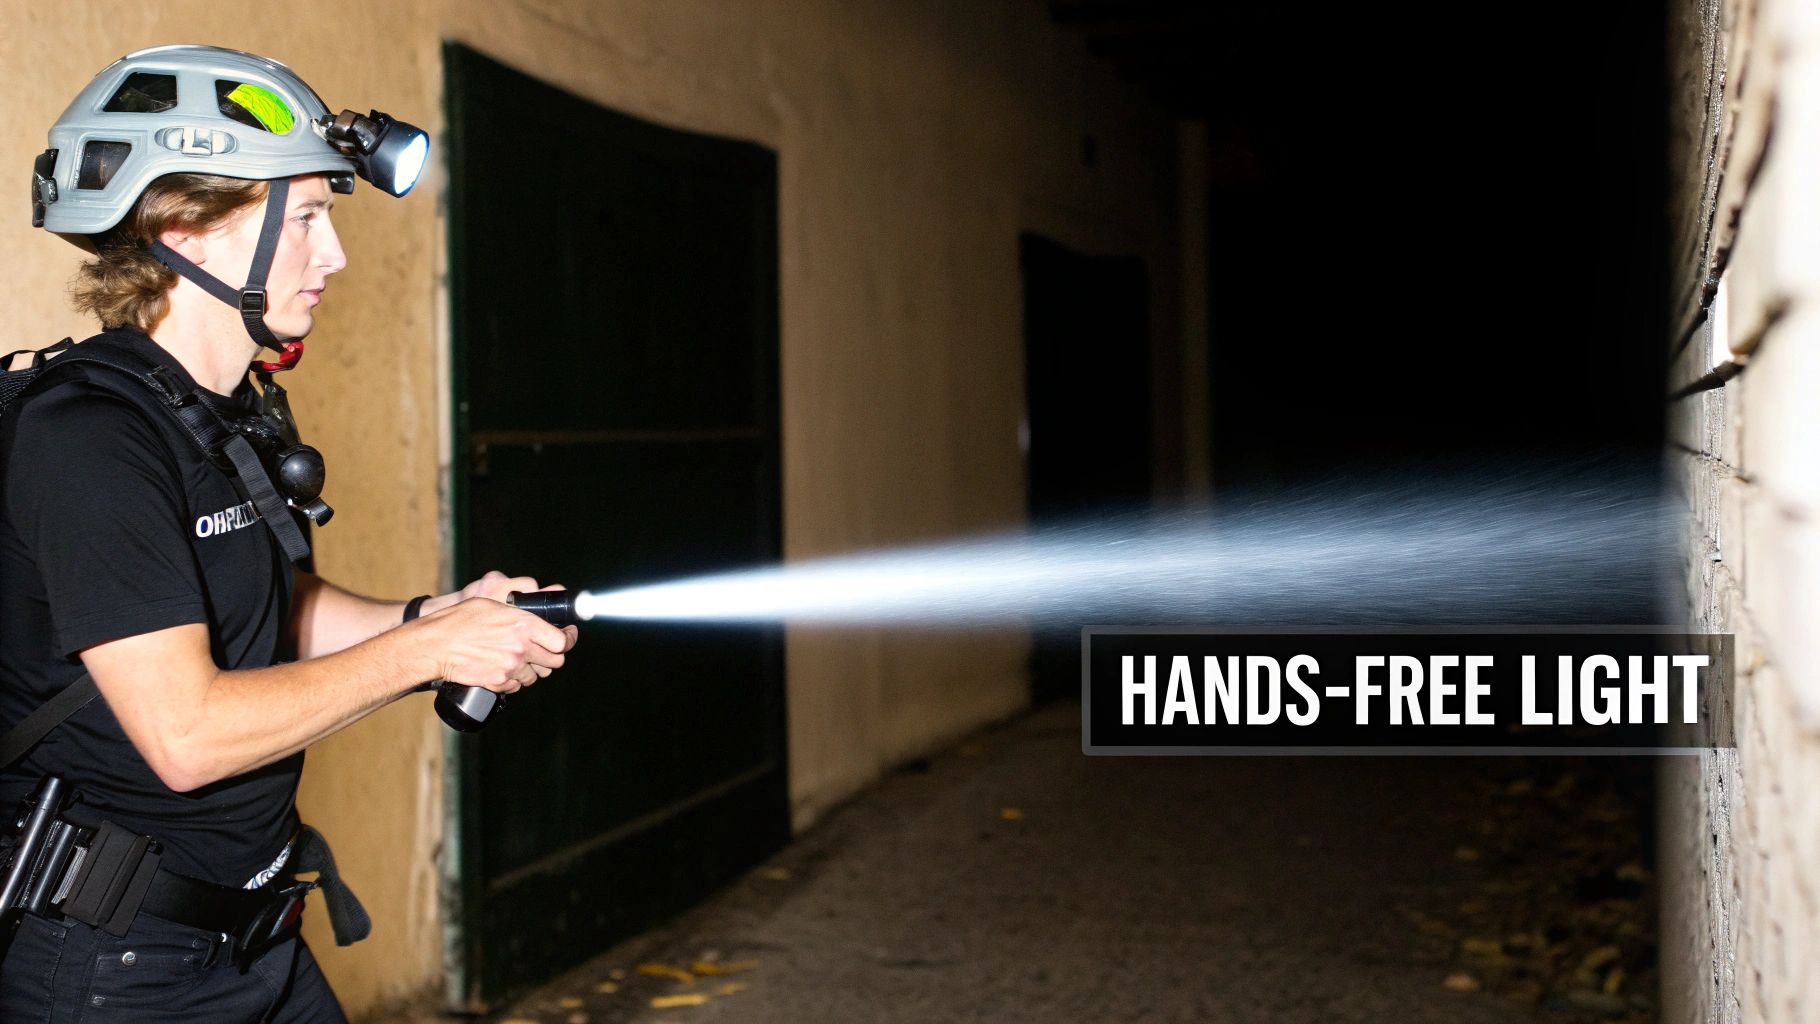
Why Hands-Free Illumination Is a Game Changer
Picture this: you're navigating a pitch-black trail after sunset or clearing an unlit building. In moments like those, your hands are your most valuable assets. Tying one up to hold a flashlight is a major handicap, limiting your ability to use a tool, keep your balance, or communicate with your team. This is where a solid helmet flashlight mount completely changes the game.
It's not just about convenience; it’s a fundamental upgrade to your effectiveness. By mounting the light directly to your headgear, it becomes a natural extension of your vision. The beam instinctively follows your line of sight, cutting out the clumsy, slow coordination you get with a handheld light.
Enhancing Situational Awareness
When your light is attached to your helmet, you can process what's happening around you much faster. There’s no lag time between catching something in your peripheral vision and actually putting light on it. This seamless link between sight and light gives you some serious advantages:
- Faster Reaction Times: You can spot a potential threat or an obstacle instantly without ever having to fumble for a light.
- Improved Navigation: Moving through tricky terrain gets a whole lot safer and more efficient when your path is always lit.
- Full Use of Hands: Both of your hands stay free for tools, gear, or just keeping yourself stable, which is absolutely crucial in dynamic situations.
You’re essentially moving from a clunky, two-part system (your eyes plus a separate light) to one fluid, intuitive unit.
A good helmet flashlight mount does more than just hold a light; it makes illumination instinctual. You can light up a room or a trail without a second thought, keeping your mind completely on the mission.
From Accessory to Essential Equipment
For anyone in law enforcement, the military, or even serious hunters and outdoorsmen, a helmet-mounted light is no longer a "nice-to-have"—it's a must-have. It makes a ton of tasks easier, and some possible, that would be a nightmare while juggling a flashlight. Think about an operator rendering aid to a teammate in the dark or a hunter field dressing an animal after dusk. Both need a powerful, focused beam of light right where they're working.
At the end of the day, adding a reliable helmet flashlight mount to your setup is one of the highest-impact upgrades you can make. It boosts your personal safety, supercharges your operational efficiency, and gives you a clear tactical edge when the lights go out. This guide will walk you through picking the perfect mount for whatever you're up against.
Breaking Down the Different Mount Systems
Picking the right helmet flashlight mount is a lot like choosing the right tool for a job. You wouldn't use a sledgehammer to hang a picture, and you definitely wouldn't trust a flimsy strap system during a high-stakes operation. The truth is, not all mounts are created equal, and understanding the core designs is the first step toward building a hands-free lighting setup that works for you, not against you.
Think of it this way: a rail mount is like a high-end camera's universal adapter, giving you a rock-solid, versatile connection for any accessory you can imagine. A simple strap mount, on the other hand, is more like a bungee cord. Sure, it’s flexible and fits almost anything, but it just doesn't have the rigid stability you need when things get dynamic. Each system has its place, and knowing their strengths and weaknesses will help you match the hardware to your mission.
Rail Mounts: The Modern Standard
For modern tactical helmets, rail mounts are the undisputed king. They attach directly to the accessory rails—like the industry-standard ARC (Accessory Rail Connector) system—that are bolted right onto the sides of the helmet shell. This direct link creates an incredibly stable platform, killing any annoying wobble or vibration from your light, even during intense movement.
You'll generally run into two types of rail systems out in the field:
- ARC Rails: First cooked up by Ops-Core, ARC rails have become the go-to for most military and law enforcement helmets. Their classic dovetail design makes it a breeze to quickly slide on and secure a huge range of gear, including the most bomb-proof helmet flashlight mount options available.
- M-LOK Rails: A big name in the firearms world, M-LOK has also carved out a niche on certain helmets, like those from MTEK or some Team Wendy models. These mounts use a clever T-nut system that locks directly into rectangular slots for a super secure, low-profile fit.
Bottom line? The sheer stability of a rail mount makes it the top choice for anyone who can't afford equipment failure when it counts.
NVG Shroud Mounts: A Smart Use of Space
That mounting point right at the front of your tactical helmet? That's the NVG (Night Vision Goggle) shroud, and its main job is to hold your night vision gear. But this prime piece of real estate can also pull double duty as a spot for your flashlight. Specialized mounts are designed to clip right into the shroud, putting your light dead center.
This is a brilliant solution for guys who need to keep their side rails clear for other essentials, like comms headsets or ear pro. It gives you a perfectly centered beam that follows your gaze. The only thing to watch for is making sure your light doesn't get in the way of your primary optic if you're also running NVGs.
A shroud-mounted light gives you a streamlined, symmetrical setup. By using hardware that's already there, it keeps your helmet’s profile clean and balanced without chewing up rail space needed for other mission-critical gear.
The demand for hands-free illumination is exploding. The U.S. flashlight market was valued at USD 546.83 million in 2024 and is projected to climb to USD 777.65 million by 2032. Helmet lights and headlamps are a big part of that, making up a growing 15% share of the market as they become standard issue with tactical helmets.
Universal Strap and Adhesive Mounts
What if your helmet doesn't have rails or a shroud? Don't worry, you're not out of luck. Universal mounts are the flexible problem-solvers here. These systems rely on high-strength straps, Velcro, or powerful adhesives to stick a flashlight onto almost any helmet surface, from an industrial hard hat to a climbing helmet.
- Strap Systems: These are the most versatile of the bunch, using adjustable straps that can wrap around the helmet or snake through its vents. They're perfect for search and rescue teams or outdoor adventurers needing to add a light to their non-tactical headgear.
- Adhesive Mounts: These use industrial-strength sticky pads to create a semi-permanent home for your light. They are surprisingly tough, but you'll need to prep the surface carefully, and they don't offer the swap-and-go modularity of other systems.
While they'll never be as rigid as a proper rail mount, these universal options are a practical way to get hands-free lighting on just about any helmet out there.
Comparing Helmet Flashlight Mounts at a Glance
Feeling a bit overwhelmed by the options? Don't be. This quick reference table breaks down the most common mount types to help you compare them based on how they attach, how adjustable they are, and who they're really built for.
| Mount Type | Attachment Method | Best For | Key Advantage |
|---|---|---|---|
| ARC/M-LOK Rail | Slides or locks onto helmet side rails | Tactical, Military, Law Enforcement | Maximum stability and modularity |
| NVG Shroud | Clips into front night vision shroud | Users needing free side rails | Centralized light beam, clean profile |
| Strap/Adhesive | Straps, Velcro, or adhesive pads | Non-tactical helmets (SAR, industrial) | Universal compatibility with any helmet |
Ultimately, the best mount comes down to your helmet and your mission. For serious tactical use, nothing beats a rail mount. But for everything else, a shroud or universal mount can be a perfectly solid choice.
Getting the Perfect Fit: Matching a Mount to Your Helmet
There's nothing more frustrating than getting a new piece of gear, like a helmet light mount, only to find out it won't fit your helmet. It's a costly and completely avoidable mistake. Compatibility isn't just some minor detail; it's the absolute foundation for a reliable hands-free lighting system. This is precisely where a lot of well-intentioned setups fall apart before they even get started.
Think of it like buying a scope for a rifle. You wouldn't just grab one off the shelf without knowing if you have Picatinny or dovetail rails, right? The same logic applies here. The specific features on your helmet—from its side rails to the front shroud—determine which mounting solutions will even work. Getting a handle on these systems is the first critical step to building a secure, effective, and balanced rig.
This visual guide breaks down the three main attachment points you'll find on most modern helmets.
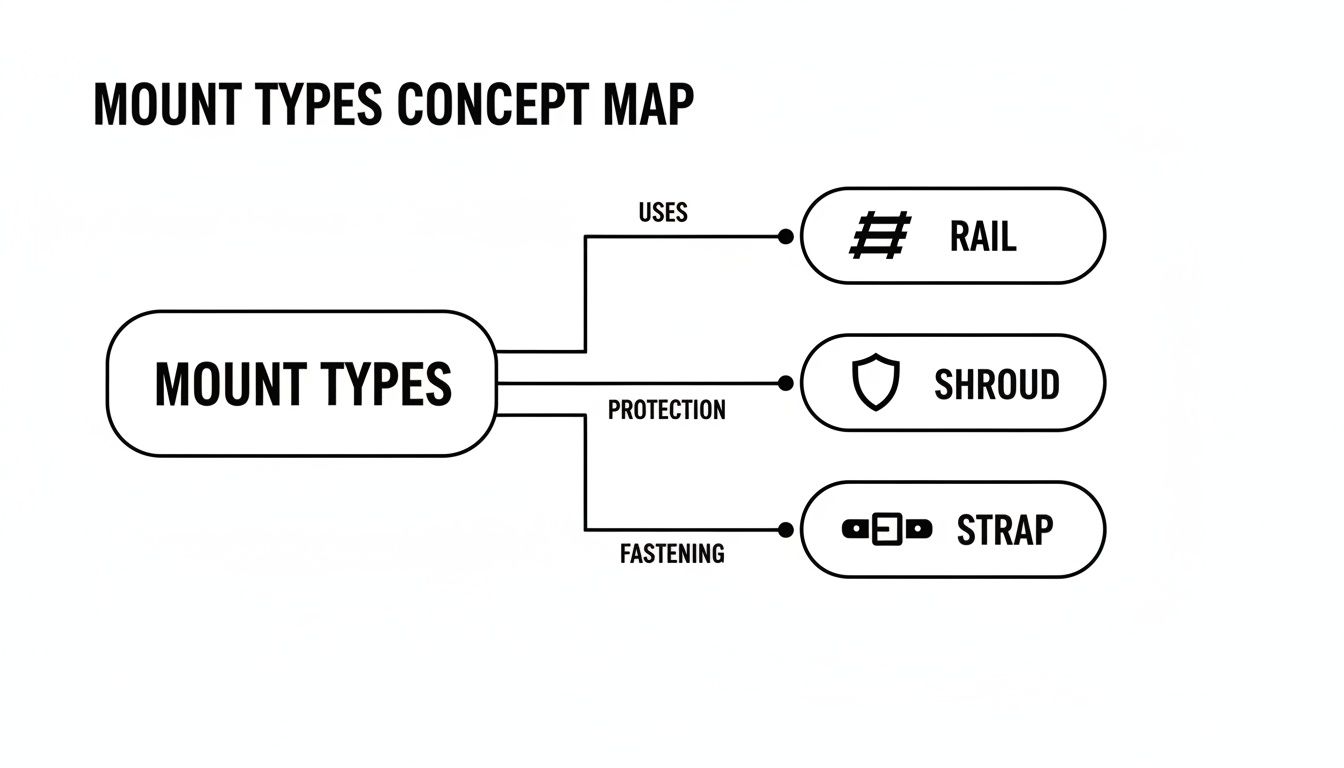
As you can see, Rail, Shroud, and Strap systems each offer a different path to mounting a light, and each one is suited for different helmets and what you need to do with them.
ARC Rails: The Industry Gold Standard
When it comes to adding accessories, the ARC (Accessory Rail Connector) rail system is pretty much the undisputed king of the hill. First cooked up by Ops-Core, this dovetail-style rail is now on a massive range of tactical helmets from makers like Crye Precision, Gentex, and Galvion. If your helmet has ARC rails, congratulations—you've got access to the widest variety of quality mounts out there.
These rails give you an incredibly rigid and stable platform, making sure your light doesn't wobble or shift when you're moving around. Mounts designed for ARC rails just slide on and lock down, usually with a set screw to make them extra secure. This makes it a breeze to add, remove, or reposition your helmet flashlight mount as the mission changes.
Some helmets, especially those from Team Wendy or MTEK, might use M-LOK rails instead. While not as common on helmets as ARC, M-LOK is just as secure, offering a low-profile attachment that locks in directly with T-nuts. Always, always double-check which rail system your helmet uses before you click "buy" on a mount.
Leveraging the NVG Shroud
That bracket on the very front of your helmet? That's the NVG shroud, and its main job is to hold night vision devices. But because it's so robust and perfectly centered, it's also prime real estate for a flashlight mount. This is a go-to option for guys who need to keep their side rails clear for comms gear or ear protection.
A shroud mount puts the light right in the middle of your field of view. This gives you a nice, symmetrical beam that follows your gaze perfectly and creates a streamlined, snag-free profile on your helmet.
Running a light right next to your night vision, like a PVS-14 monocular, demands some careful thought. You have to avoid "splash"—that blinding glare you get when the flashlight beam reflects off a wall or doorframe and completely washes out your night vision image. An offset or articulating mount is often the solution here, pushing the light forward and away from your NVG's objective lens to preserve your ability to see in the dark.
What About Non-Tactical Helmets?
So, what do you do if your helmet is bare—no rails, no shroud? This is common for a lot of industrial, climbing, or search-and-rescue helmets. For these lids, universal solutions like strap or adhesive mounts are your best bet.
These systems use things like adjustable straps, heavy-duty Velcro, or industrial-grade adhesives to stick a mounting base onto almost any smooth helmet surface. They may not offer the rock-solid stability you get from a direct-rail attachment, but they provide a perfectly functional and versatile way to get hands-free lighting on non-standard headgear.
- Check Your Gear: Before you buy anything, put your hands on your helmet. Identify if you have ARC rails, M-LOK slots, an NVG shroud, or just a plain shell.
- Match the Mount: Read the mount's product description carefully and cross-reference it with your helmet's system. Good manufacturers are crystal clear about what their mounts fit.
- Plan Your Layout: Think about what other gear you'll be running. If your side rails are already packed with a headset and a camera, a shroud mount is probably the smarter play to keep things balanced and uncluttered.
Ultimately, getting that perfect fit just comes down to knowing your equipment. By correctly identifying your helmet’s mounting system and understanding how your light will play with your other accessories, you can build a setup that's both bomb-proof and perfectly tuned to your needs.
Getting Your Mount Dialed In for Peak Performance
Attaching a flashlight mount to your helmet is about more than just cranking down some screws. It's about building an integrated system that’s balanced, won't snag on anything, and performs when you need it. A sloppy install means a wobbly light, distracting glare, or worse—a failure at a critical moment. Get it right, and your helmet becomes a truly seamless tool.
The process starts with thinking through the placement. You want to position the light so its "spill"—the softer light around the main beam—is useful without splashing back into your weapon optic or completely washing out your night vision. It’s a game of inches where the goal is to make the light work with you, not against you.
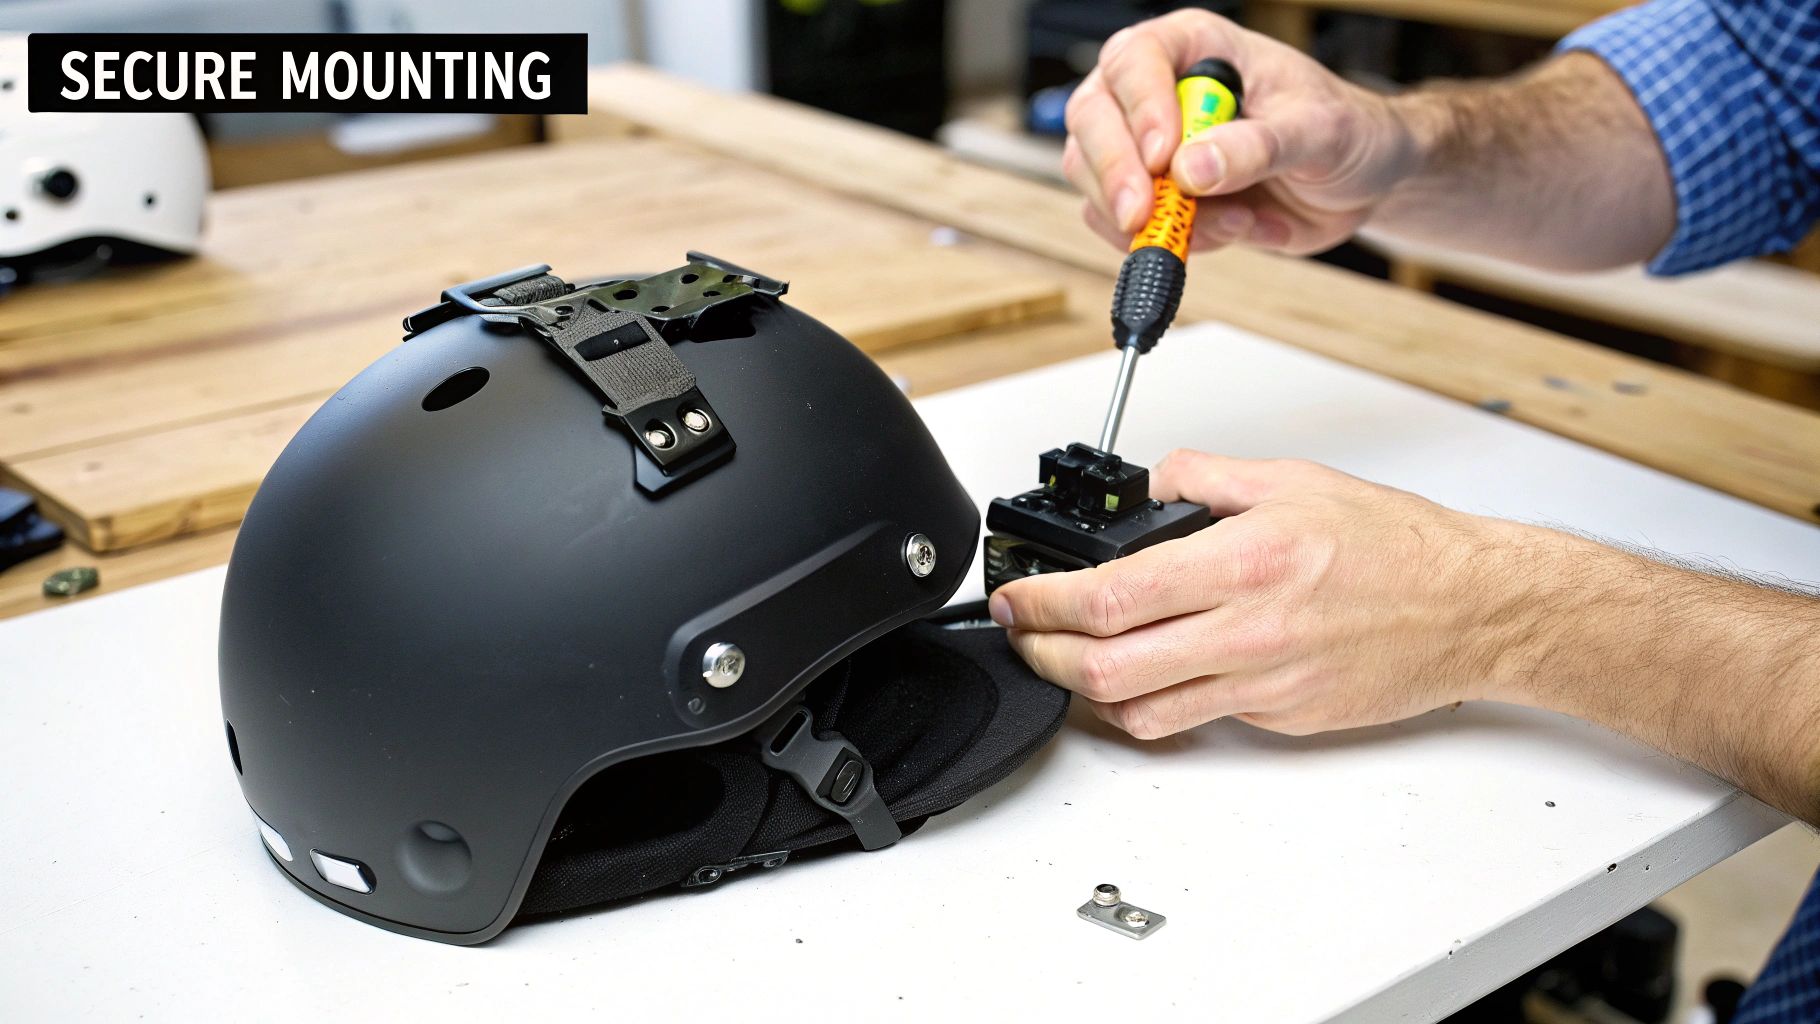
Locking Down the Hardware
The first rule of bolting gear to your helmet is making sure it stays there, no matter what. Vibrations from running, driving, or shooting will work screws loose over time. That’s why using a bit of thread locker and proper torque isn't optional; it's mandatory.
- Add Thread Locker: Put a small drop of a non-permanent thread locker, like blue Loctite, on the screw threads before you install them. This stuff is cheap insurance against vibration.
- Torque It Right: Tighten the screws to what the manufacturer recommends. Too tight, and you risk stripping threads or cracking the mount. Too loose, and you're back to square one with a wobbly light.
- Give It a Wiggle: Once it's on, grab the mount and give it a solid shake. It should feel like it’s part of the helmet shell, with absolutely no play or movement.
This kind of attention to detail is what makes modern tactical gear so reliable. Helmet-mounted lights have completely changed night operations. The market for these systems is projected to hit USD 8.29 billion by 2031, and since standardization began in 2003, over 1.2 million units have been issued worldwide. That alone tells you how critical this piece of kit has become. You can find more data on this trend over at Mordor Intelligence.
Nailing the Light Alignment
Proper alignment is everything. It's the difference between a useful tool and a major liability. Bad alignment can cause your light to reflect off your rifle's suppressor or front sight, creating a blinding glare right in your line of sight.
The sweet spot for a helmet flashlight mount is generally high and forward on the rail. This gets the beam's source up and over most of your weapon-mounted gear, cutting down on annoying shadows and bounce-back.
This is where offset or articulating mounts really shine. They push the light forward and out, which is especially critical if you're running night vision. As you build out your helmet, you have to think about how all the pieces work together, which is something we cover in our guide on helmet night vision mounts. A well-placed light won't wash out the image in your PVS-14, letting you use both systems effectively.
Taming Cables and Balancing the Rig
If you're running a remote pressure switch, you've got one last critical step: cable management. A loose wire is a snag monster just waiting to grab onto a branch, a car door, or your own gear, potentially ripping your light or switch right off your helmet.
- Route and Secure: Tuck your wires under the helmet cover, run them through rail channels, or lock them down with zip ties, ranger bands, or dedicated clips. The goal is a clean, tight setup with zero slack.
- Balance the Load: Remember, a flashlight and mount add weight to one side of your head. To keep from getting a sore neck, you need to balance it out with a counterweight or other gear (like a battery pack) on the opposite side. A well-balanced helmet feels much lighter and is far more comfortable for long-term wear.
Taking the time to install, align, and balance your setup correctly from the start ensures your light will be there for you, providing clear, hands-free illumination right where and when you need it.
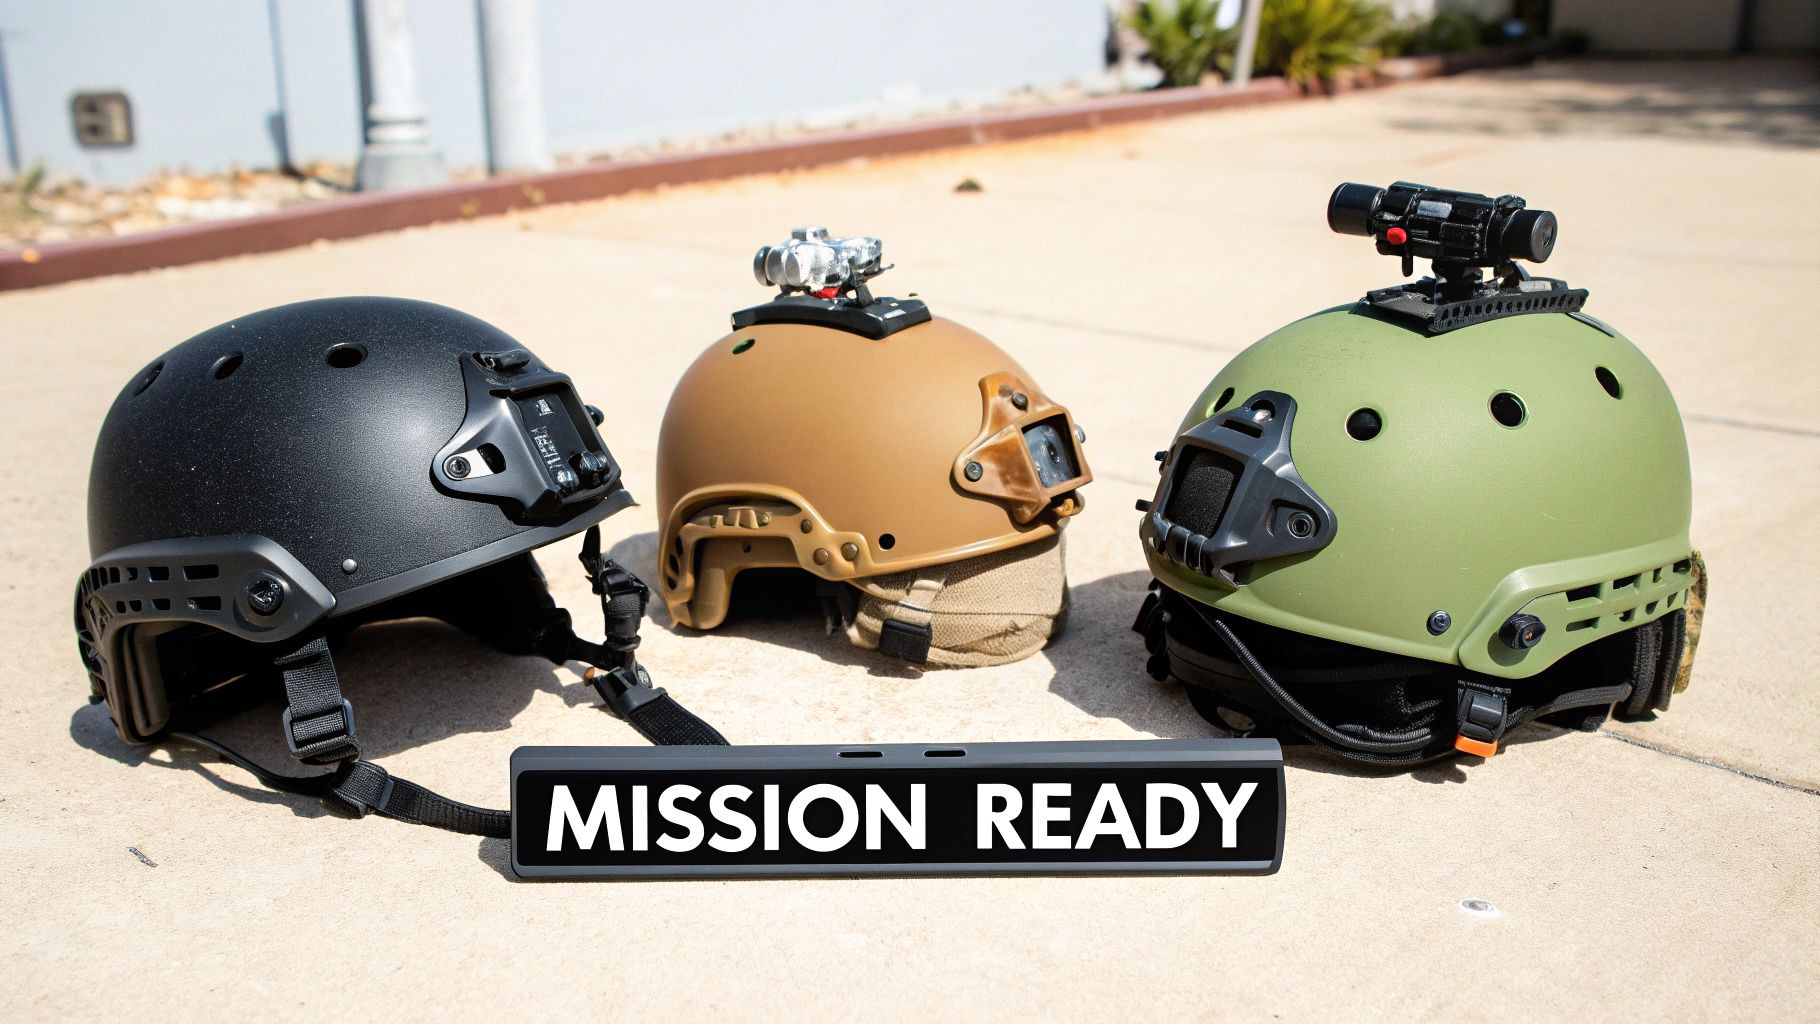
Picking the Right Mount for the Mission
There's no single "best" helmet flashlight mount. The best setup is the one that gives you an edge in your world, whether that's a dark alleyway, a dense forest, or a hostile compound. Choosing the right gear means thinking critically about how you'll actually use it.
A cop on a midnight patrol has completely different lighting needs than a hunter glassing a hillside at dawn. Their equipment should reflect that reality. Let's break down a few common scenarios to help you figure out what works for you, not against you.
For Law Enforcement Patrol and SWAT
For cops, gear has to be tough, intuitive, and versatile. An ARC rail mount is the undisputed champion here, providing a bomb-proof platform that won’t quit during a critical incident. Add quick-detach (QD) functionality, and now an officer can pop a light on or off in seconds as the situation changes.
On patrol, a simple, powerful white light on a solid mount gets the job done. For a SWAT team, things get more complicated. An offset mount becomes non-negotiable, letting you run a dual-spectrum light like a SureFire Vampire alongside an IR laser without one getting in the way of the other. It's all about rugged simplicity and the ability to adapt on the fly.
For the Modern Hunter
A hunter’s biggest enemies are weight and snags. You need a setup that won’t catch on every branch as you move through the timber. A low-profile M-LOK or ARC rail mount is perfect for this, hugging the flashlight tight to the helmet.
Every ounce matters on a long stalk, so a lightweight polymer mount paired with a compact light is key to saving your neck. Many hunters also lean towards lights with red or green modes to protect their night vision and not spook game. Most importantly, the mount has to be solid enough to take a rifle's recoil without your beam wandering off target.
A hunter's lighting system should be almost unnoticeable until it's needed. The right helmet flashlight mount provides illumination without adding unnecessary bulk or creating snag hazards that could ruin a stealthy approach.
For Tactical and Military Professionals
On the battlefield, a helmet is real estate for a whole ecosystem of gear—comms, IFF strobes, and night vision. The flashlight mount can't just be an afterthought; it has to integrate perfectly. This is where you see advanced offset and articulating mounts, like the S&S Precision M-AX, become mission-essential.
These sophisticated mounts give an operator the ability to:
- Position a light to completely avoid splashback and glare in their NODs.
- Angle the beam up for "umbrella lighting" to flood a room with soft, indirect light, preventing team members from being blinded.
- Run IR illuminators and visible lights in tandem, switching between them instantly.
The market reflects this reality. The global Helmet Mounted Lighting Market was valued at roughly US$ 200 million in 2024 and is projected to climb past US$ 350 million by 2031, according to market analysis from The Insight Partners. This explosive growth shows just how vital integrated lighting has become.
By thinking through your specific needs, you can choose a mount that truly enhances your capabilities and works seamlessly with your other critical ballistic helmet accessories.
Common Questions About Helmet Light Mounts
Let's cut through the noise. When you're putting together a helmet setup, especially one with night vision, you're bound to have questions. Getting the right answers from the start can save you a lot of headaches—and money—down the road.
We get these questions all the time from law enforcement, hunters, and serious enthusiasts. Here are the straight answers you need to build a hands-free lighting system you can actually depend on.
What Is the Best Mount for a PVS-14 Setup?
If you're running a PVS-14 or any similar monocular, your best bet is almost always going to be an offset rail mount. This type of mount pushes the flashlight out to the side and forward, which is a game-changer for avoiding splashback.
"Splashback" is that blinding glare you get when your flashlight beam hits a nearby wall or doorframe, completely whiting out your night vision. An offset mount is your best defense against it.
By getting the light away from your NVG's objective lens, you keep your sight picture clean. A shroud mount can work in a pinch if your rails are already packed, but you have to be absolutely sure the beam doesn't spill into your field of view.
Can I Use Any Flashlight with Any Mount?
Absolutely not. This is a common mistake that can lead to a lot of frustration. Compatibility is king. Most tactical mounts are built for very specific flashlight body diameters, usually 1-inch, or a specific mounting system like the SureFire Scout footprint. Don't ever assume it's a one-size-fits-all situation.
Always read the specs on both the light and the mount. A mount designed for a simple tube-style flashlight won't work with a pistol light, and vice versa. Good manufacturers will tell you exactly which models their mounts are designed for.
How Do I Stop My Mount from Coming Loose?
A wobbly mount is a classic problem, but thankfully, it's easy to fix. The main enemy here is vibration. Every step you take, every movement you make, can slowly work the screws loose.
Here’s how you lock it down for good:
- Use a Thread Locker: Put a small drop of a non-permanent thread locker (like blue Loctite) on the screw threads before you tighten them down.
- Torque It Right: Tighten the screws to the manufacturer’s specs. Don't go overboard—cranking down too hard can strip the threads or damage polymer components.
- Do Regular Checks: Make checking your gear a habit. A quick pre-mission inspection of your mount’s hardware will catch any loosening before it becomes a problem in the field.
At Superior Tactical LLC, we provide the high-quality mounts and tactical accessories you need to build a reliable, mission-ready helmet system. Find the perfect helmet flashlight mount for your setup today.