A Complete Guide to Generation 2 Night Vision Technology
Generation 2 night vision marked the single biggest jump in capability the industry has ever seen. It’s where professional-grade performance became accessible, offering a potent mix of capability and value. The secret sauce was the Microchannel Plate (MCP), an innovation that completely changed the game, leaving older tech in the dust.
Think of Gen 2 as the true sweet spot for serious night operations, but without the eye-watering price tag of Gen 3.
The Quantum Leap in Night Vision Technology
Before Gen 2 came along, night vision was a pretty clumsy affair. Early devices were thirsty for light, needing a bright moon or a clunky infrared illuminator just to produce a grainy, distorted image. Users had to deal with a frustrating "fish-eye" effect that warped the picture, making it hard to trust what you were seeing.
Generation 2 changed all of that, setting a new benchmark for performance in the dark.
At the heart of this leap was the Microchannel Plate. The easiest way to picture the MCP is as an electron supercharger. It's a wafer-thin glass disc, no bigger than a quarter, but it's honeycombed with millions of microscopic channels. When the faint ambient light from the night sky enters the tube and gets converted into electrons, the MCP multiplies them on a massive scale.
A single electron goes in, and a cascade effect turns it into thousands coming out the other side. This incredible amplification is what gives you the bright, crisp image that generation 2 night vision is known for.
The Birth of Modern Night Vision
This game-changing tech first hit the scene in the 1970s, making the Gen 1 devices from the Vietnam era look like ancient history. The MCP cranked up light amplification to around 20,000 times, a staggering increase from Gen 1's meager 1,000x gain. Suddenly, clear vision out to 200 yards was possible.
Even better, it got rid of the annoying image distortion around the edges, delivering a much cleaner and more dependable sight picture. If you want to dig deeper into how we got here, check out our guide on the evolution of night vision.
The arrival of the MCP completely redefined nighttime tactics for law enforcement, hunters, and private security. For the first time, operators had a compact, passive system that could truly perform.
Because of its balanced capabilities, Gen 2 became the true sweet spot in the night vision world. It delivers a significant portion of Gen 3's performance for a fraction of the cost, making it the most practical choice for a wide range of users.
To put it all into perspective, here’s a quick rundown of how the different night vision generations stack up against each other.
Night Vision Generation Quick Comparison
This table gives you a high-level look at the key differences in performance, lifespan, and cost across the main generations.
| Feature | Generation 1 | Generation 2 | Generation 3 |
|---|---|---|---|
| Key Technology | Basic Intensifier Tube | Microchannel Plate (MCP) | Gallium Arsenide Photocathode |
| Image Quality | Distorted Edges, Grainy | Clear, Minimal Distortion | Very Sharp, High Resolution |
| Lifespan (Hours) | ~1,500 | ~5,000 | ~10,000+ |
| Cost | Low | Medium | High |
As you can see, Gen 2 provides a massive boost in both image quality and tube life over Gen 1, positioning it as a durable and reliable tool for serious use.
How Light Becomes Sight Inside A Gen 2 Device
To really get what makes Generation 2 night vision tick, you need to follow the incredible journey a single particle of light takes once it enters the device. It’s a lightning-fast, four-stage process that turns a world you can't see into a sharp, visible image almost instantly.
Think of it as a microscopic relay race: light becomes electricity, that electricity gets a massive boost, and then it’s turned back into a much, much brighter picture for your eye.
This infographic lays out the evolution from the fuzzy, distorted images of Gen 1 to the crisp sight picture you get with Gen 2 and later generations.
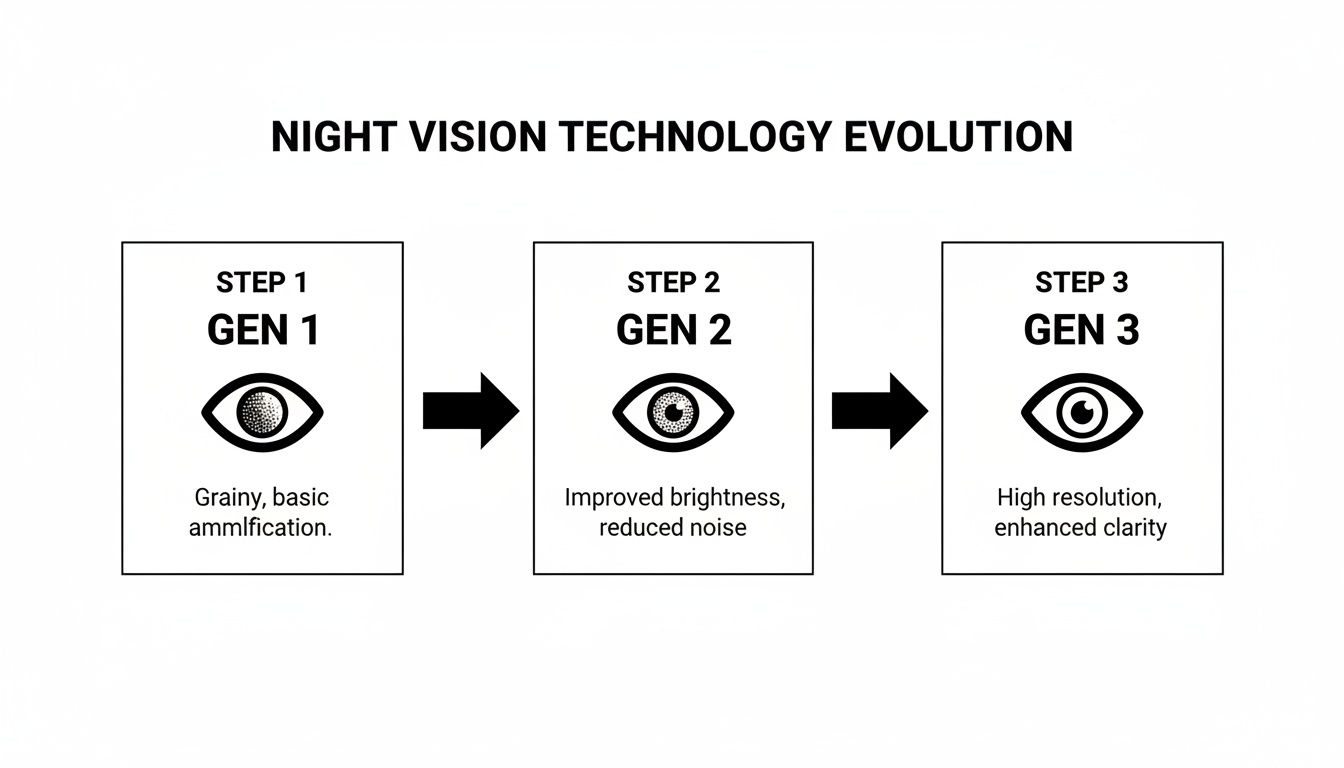
Honestly, the leap from Gen 1 to Gen 2 was the single biggest jump in clarity and performance in the history of night vision. Let’s walk through exactly how that magic happens.
Stage 1: The Photon-to-Electron Conversion
It all starts at the objective lens. This front lens gathers whatever faint, ambient light it can find—starlight, moonlight, maybe the glow from a town miles away. This light is made up of tiny particles called photons.
Once the lens focuses these photons, they hit a special surface right at the front of the image intensifier tube called the photocathode. The photocathode’s job is simple but absolutely critical: it acts like a high-tech solar panel, instantly converting the energy from incoming light (photons) into electrical particles (electrons). For every photon that strikes it, an electron is set free, creating an invisible electronic blueprint of the dark scene in front of you.
Stage 2: Entering the Electron Supercharger
Once those electrons are loose, they're zapped with a high-voltage field, pulling them toward the single most important component in any Gen 2 device: the Microchannel Plate (MCP). This is the technology that completely separates Gen 2 from anything that came before it. If you want to know where the real amplification happens, it's right here.
This MCP is a razor-thin glass disc, but it's an absolute engineering marvel. It's packed with millions of microscopic, hollow tubes, almost like a honeycomb built to multiply electrons. As the initial trickle of electrons enters these channels, the real work begins.
The Microchannel Plate is the heart of Generation 2 technology. It's a massive electron multiplier, turning a faint electronic signal into a powerful flood. Without the MCP, the clear, bright images we expect from modern night vision just wouldn't be possible.
Stage 3: The Cascade Effect
Inside each of those tiny channels, things get wild. It’s like a pinball machine for electrons. As a single electron flies down a channel, it smacks into the wall, knocking several more electrons loose. This new, bigger group of electrons then accelerates and hits the wall again, releasing an even larger group.
This chain reaction is called a cascade effect, and it happens thousands of times inside every single channel. The result is an incredible amplification.
- One electron enters a channel.
- It strikes the wall, releasing three or four more.
- Those hit the wall, creating dozens more.
- This continues until that single starting electron has become a cloud of thousands.
This process happens across millions of channels all at once, perfectly preserving the pattern of the original image while cranking its intensity up by over 20,000 times.
Stage 4: Creating the Visible Image
The final leg of the journey is turning this amplified cloud of electrons back into light you can actually see. After exiting the MCP, the massive flood of electrons slams into a phosphor screen at the back of the tube. This screen is coated with a material that glows brightly whenever it's hit by an electron.
As the multiplied electrons impact this screen, they create millions of tiny flashes of light. Your eye blends these individual flashes into a single, cohesive image. That’s the familiar green picture you see through the eyepiece, giving you a clear window into the darkness.
Understanding The Specs That Truly Matter
Jumping into Gen 2 night vision can feel like you're trying to learn a whole new language. You get hit with a wall of acronyms and numbers on a spec sheet that, honestly, don't mean much without some context. But once you crack the code, you can see past the marketing hype and judge a device's real-world performance before you spend your hard-earned money.
Think of a spec sheet as the report card for the image intensifier tube at the heart of the unit. It tells you exactly how it’s going to perform when the lights go out. Let’s break down the big three metrics that separate a solid piece of gear from a paperweight.
H3: Resolution: The Sharpness of Your View
The easiest spec to get your head around is Resolution. It's measured in line pairs per millimeter (lp/mm), and it’s a direct measure of image sharpness. A higher number means you can see finer details from further away. Simple as that.
Let’s use an analogy. A low-resolution tube is like an old standard-definition TV from the 90s. Sure, you can make out the picture, but everything is a bit blurry and lacks those crisp edges. A high-resolution Gen 2 tube, however, is much closer to a modern 1080p HD screen. You can actually distinguish individual leaves on a distant tree or positively identify a target.
- Standard Gen 2 Resolution: Most units you'll see are in the 45-54 lp/mm range. This is perfectly usable for most things, like hunting or keeping an eye on your property.
- High-Performance Gen 2+: The really good stuff, often called Gen 2+, can push resolution to 64 lp/mm or even higher. These tubes start to seriously rival the clarity you'd expect from some Gen 3 devices.
But resolution is just one part of the story. A super sharp image that's drowning in static is pretty useless, which leads us to the most important spec of all.
H3: Signal-to-Noise Ratio: The Cleanliness of Your Image
If I could only give you one number to judge a night vision device by, it would be the Signal-to-Noise Ratio (SNR). This tells you how "clean" the image is by comparing the amount of good stuff (the light signal) to the bad stuff (the electronic noise). That noise is what we call "scintillation" or, more commonly, "snow."
Imagine you're trying to tune into a radio station late at night. A high SNR is like getting a crystal-clear broadcast—all music, no static. A low SNR is like trying to find a station in the middle of nowhere, where the hissing and popping static almost completely drowns out the song. In night vision, that static is visual noise that covers up crucial details, especially when it gets really dark.
Signal-to-Noise Ratio (SNR) is the single most important factor for low-light performance. A tube with a higher SNR will produce a cleaner, more defined, and less grainy image when there is very little ambient light available.
A device with amazing resolution but a terrible SNR will just give you a high-definition view of TV static. On the flip side, a tube with decent resolution but a stellar SNR will provide a much more usable and coherent image when you need it most. For tasks like threat ID or navigating rough terrain, you’ll take the clean image every single time. To get deeper into the hardware that drives these numbers, check out our guide comparing thin-filmed and unfilmed image intensifier tubes.
H3: Gain: The Brightness of Your Image
Last but not least is Gain. This one’s pretty straightforward: it’s how much the device amplifies the available light. Think of it as the brightness knob. It's measured as a multiplier, and a typical Gen 2 device has a gain somewhere around 20,000x.
Gain is what transforms a moonless, starlit night into a scene that looks like it's illuminated by a full moon. But here's the catch—it's a balancing act. If you crank the gain way up on a tube with a poor SNR, you're just amplifying the noise along with the light. This is why a balanced tube with a high SNR is so critical. It lets the gain do its job and produce an image that’s both bright and clean, not just bright and snowy.
Understanding these key metrics is the first step toward making a smart purchase. To help you decode those spec sheets, here's a quick reference table.
H3: Gen 2 Performance Metrics Explained
This table breaks down the most important specifications you'll encounter when looking at Gen 2 night vision. Think of it as your cheat sheet for evaluating how a device will actually perform in the field.
| Metric | What It Measures | Why It Matters | Typical Gen 2 Range |
|---|---|---|---|
| Resolution (lp/mm) | Image sharpness and the ability to resolve fine details. | Higher resolution means a clearer, more detailed image, which is critical for target identification at a distance. | 45-64 lp/mm |
| Signal-to-Noise (SNR) | The ratio of light signal to background electronic noise. | This is the most important spec for low-light performance. A higher SNR results in a cleaner, less "snowy" image. | 16-24 |
| Gain (System) | The level of light amplification, or image brightness. | Gain makes dark scenes visible, but without a good SNR, high gain can just amplify noise and wash out the image. | ~20,000x |
| Photocathode Sensitivity | How efficiently the tube converts photons (light) into electrons. | A more sensitive tube performs better in extremely low light, gathering more initial signal for the tube to amplify. | 350-700 µA/lm |
By focusing on Resolution for sharpness, SNR for image clarity, and Gain for brightness, you'll be able to confidently assess any Gen 2 device and find one that truly meets your needs.
Gen 2 Versus Gen 3: A Practical Comparison
When you’re looking at night vision, the big debate always seems to circle back to Gen 2 versus Gen 3. But here’s the thing: asking "which is better?" is the wrong question. The real question you should be asking is, "which one is the right tool for my mission and my budget?" This isn't about crowning a king; it's about making a smart, informed decision based on your specific needs.
The fundamental difference between them is buried deep inside the image intensifier tube—it's all about the photocathode. Gen 3 devices are built with a gallium arsenide (GaAs) photocathode. This material is incredibly efficient at converting photons into electrons, far more so than the multialkali material you'll find in generation 2 night vision.

Here's a good way to think about it: imagine two different kinds of solar panels. The Gen 3 photocathode is like a high-end, super-efficient panel that can still generate a ton of power on a cloudy day. The Gen 2 photocathode is more like a standard panel—it works great when the sun is out but struggles a bit in the shade. That superior sensitivity is what gives Gen 3 a real edge in truly dark, starlight-only conditions.
The Performance Gap in the Field
So, what does that technical difference actually translate to when you're looking through the eyepiece? In environments with a decent amount of ambient light—think a suburban neighborhood or a field under a half-moon—the performance gap can be surprisingly small. A high-quality Gen 2+ unit can deliver a crisp, bright image that is more than capable for most tasks.
It's when you push into the darkest corners of the night that Gen 3 really starts to pull away.
- Deep Woods: On a moonless, overcast night, a Gen 3 tube will give you a visibly brighter and cleaner image with less of that background "snow" or static.
- Long-Range Identification: Gen 3's higher sensitivity and better Signal-to-Noise Ratio (SNR) mean you can positively identify what you're looking at from farther away.
- Handling Bright Lights: Most Gen 3 tubes have autogating, a feature that rapidly dials the brightness up or down. This is a game-changer for reducing the "halo" effect from streetlights or muzzle flash, keeping you from getting temporarily night-blind.
That said, never judge a tube just by its generation number. A top-tier Gen 2+ unit from a solid manufacturer can absolutely run circles around a low-spec, bargain-bin Gen 3 device. The generation is just the starting point, not the final word.
A Clear Look at the Cost-Benefit Analysis
This is where generation 2 night vision really makes its case. For a huge number of users, the performance leap to Gen 3 simply doesn't justify the massive price jump. A good Gen 2 device can often give you 80% of Gen 3's performance for about 50% of the cost.
For law enforcement, dedicated hunters, and preparedness-minded civilians, Gen 2 often represents the smartest money. It delivers serious operational capability without demanding a military-sized budget, putting professional-grade night vision within reach.
This incredible value is the single biggest reason Gen 2 has remained so popular. It hits that perfect sweet spot, giving you the clarity and reliability you need for real-world use while leaving room in the budget for other critical gear like helmets, mounts, and IR illuminators.
Durability and Lifespan
When it comes to how long these devices will last, both generations are tough, but there are some key differences. Gen 3 tubes have an ion barrier film that protects the photocathode, which generally gives them a much longer operational life.
- Gen 2 Lifespan: Typically rated for around 5,000 hours of runtime.
- Gen 3 Lifespan: Often rated for 10,000+ hours, largely thanks to that protective ion barrier.
For the average civilian who might use their unit for a few hours a week, a 5,000-hour tube still translates into years and years of solid service. The extended life of Gen 3 is most valuable for military and LE teams who are putting hundreds of hours on their gear every year.
By weighing these practical differences—the environments you'll be in, your budget, and how much you'll use it—you can confidently pick the generation that truly fits your mission.
How Gen 2 Holds Up in the Real World
Specs on a datasheet are one thing, but how gear actually performs when you're out in the field is what really matters. When the sun goes down and you're relying on your equipment, that’s the true test. This is exactly where generation 2 night vision comes into its own, offering serious performance for a huge range of real-world jobs.
It’s all about matching the tool to the task. Whether you're a cop clearing a building or a hunter stalking hogs, Gen 2 gives you the critical visual data you need to make good decisions. It’s the difference between being blind in the dark and owning the night.
For Law Enforcement and Security
Picture this: an officer gets a silent alarm call to a massive, dark warehouse. The job is to move through the space, find any threats, and do it all without giving away your position with a flashlight. Top-tier Gen 3 is great, but let's be realistic—department budgets are always tight.
This is the perfect scenario for Gen 2. An officer with a helmet-mounted Gen 2 monocular can glide through those dark aisles, picking up on movement or identifying potential cover from a safe distance. The image is plenty clear to tell the difference between a stack of boxes and a person hiding behind them, and it doesn't come with the $4,000+ price tag of a premium Gen 3 tube.
For a lot of local and regional departments, quality Gen 2 gear is simply the smartest way to spend their money. It's a massive upgrade in capability that makes night operations safer and more effective, all without draining the entire annual budget.
For The Serious Hunter
Now, let's head out to the woods. Imagine you’re hunting hogs deep in East Texas, miles from any town. The only light is a sliver of moon trying to punch through the trees. Your goal is to spot, identify, and take down an animal that's tearing up the local land.
In a situation like this, a good Gen 2 unit is a game-changer. It lets a hunter:
- Scan a field or food plot from a distance, spotting a whole sounder of hogs without spooking them.
- Move through rough country without tripping over roots or falling into a ditch you can't see.
- Get positive identification on a target, making sure you can take a clean, ethical shot inside that typical 100-150 yard range.
Sure, Gen 3 might give you a slightly sharper picture in the absolute darkest corners of the timber, but a solid Gen 2 device has more than enough horsepower for what most nighttime hunters need. It gives you the clarity to get the job done right.
For Home Defense and Being Prepared
The utility of generation 2 night vision isn't just for professionals. It’s a powerful tool for civilians, especially for home defense or just being ready for the unexpected. Think about a grid-down power outage that leaves your whole neighborhood pitch black. You hear something strange outside and need to figure out what it is without lighting yourself up like a Christmas tree with a flashlight.
With a Gen 2 monocular, you can quietly look out a dark window and see everything. You can check your fence line, see what made the noise, and just generally know what's going on around your property. That kind of situational awareness is priceless, giving you a real sense of security and a major tactical edge when things get weird. Its blend of solid performance and reasonable cost makes it the most practical choice for any citizen building out a preparedness kit with serious night vision.
A Practical Guide to Owning Gen 2 Night Vision
So, you've decided to pull the trigger on generation 2 night vision. Great choice. But getting the box is just the beginning. To turn that purchase into a tool you can bet your life on, you need to know how to inspect it, mount it properly, and keep it running for the long haul.
Think of it like any other piece of high-performance equipment. You wouldn't skip the pre-flight check on an aircraft, and you shouldn't skip it on your NODs. Proper setup and routine care are what make your gear reliable when it counts.

Let's walk through the essential steps to make sure your equipment is mission-ready, year after year.
Your Pre-Flight Inspection Checklist
Whether you're unboxing a factory-fresh unit or checking out a second-hand deal, a thorough once-over is your first line of defense. Find a dark room, power it up, and take a good look through the eyepiece.
Here's a quick checklist to get you started:
- Hunt for Blems: Look for any permanent black spots in the image. We call these "blems," and they're just cosmetic imperfections from the manufacturing process. A few tiny specks are normal, but big ones right in the center of your view can be a real problem.
- Test the IR Illuminator: Pop the lens cap on or cover the front lens with your hand, then hit the IR illuminator button. You should see the image get significantly brighter. If it doesn't, your onboard IR isn't working.
- Inspect the Body and Glass: Give the housing a good look for any cracks or serious damage. Check the objective and ocular lenses for deep scratches—surface swirls are one thing, but a deep gouge can mess with your image.
- Check Power and Controls: Make sure the battery compartment is clean, with no signs of fuzzy green corrosion. Test the power switch and any gain adjustment knobs. They should feel solid and function without a hitch.
This whole process takes less than five minutes, but it can save you a world of trouble later on.
Mounting and Compatibility
Getting your Gen 2 device securely attached to a helmet or rifle is critical. The two main mounting systems you'll run into are the bayonet (often called a "J-Arm") and the dovetail.
The bayonet is an older, military-style mount you'll find on many PVS-14s. It gets the job done, but it’s known for having some wobble. The dovetail is the modern standard, offering a much more rigid and stable lockup. For any serious use, it's the only way to go.
A stable mount is just as important as a clear tube. An unstable or wobbly interface can cause image shift and make passive aiming nearly impossible, undermining the effectiveness of your entire system.
Essential Maintenance and Care
Good habits are what keep your investment from turning into a paperweight. A few simple routines can add thousands of hours to the life of your tube and ensure your device performs flawlessly every time you flip it on.
Maintenance Best Practices:
- Lens Care: Always use a real lens pen or a clean microfiber cloth. Start by using the brush end to get rid of any dust or grit, then gently wipe the lens in a circular motion. This prevents you from grinding dirt into the glass and scratching it.
- Battery Discipline: If you’re storing the unit for more than a couple of days, take the batteries out. A leaky AA can corrode the electronics and kill your device, turning a ten-cent mistake into a thousand-dollar repair.
- Respect the Sun: Never, ever turn on your night vision in daylight without the lens cap on. The pinhole in the cap lets just enough light in for testing. Exposing the tube to direct sunlight for even a few seconds can cause permanent burn damage.
These three rules will protect your gear from the most common and costly mistakes. For a deeper dive, check out our complete guide on maintaining your PVS-14 night vision monocular.
Common Questions About Gen 2 Night Vision
Even after you get the hang of the tech specs, a few key questions always come up. We've fielded these from countless customers over the years, so let's clear up some of the most common points about generation 2 night vision.
Can Gen 2 See In Complete Darkness?
This is a classic question, and the answer is a firm no—for any image intensification device. Think of a Gen 2 tube as an incredible amplifier, not a magic lamp. It needs some light to work with, even if it's just faint starlight or the glow from a city miles away.
If you're in a situation with absolutely zero ambient light, like a windowless basement, you'll need an infrared (IR) illuminator. It's essentially a flashlight that projects light completely invisible to the naked eye, but your night vision device sees it clear as day.
What Do Gen 2 Plus or Gen 2 HD Mean?
You'll see these terms thrown around a lot, especially with high-end tubes from European manufacturers like Photonis. It's important to know these are marketing terms, not official military classifications. They're used to describe Gen 2 tubes that push the performance envelope well beyond the standard.
A "Gen 2+" or "Gen 2 HD" tube will usually feature a much better Signal-to-Noise Ratio (SNR) and higher resolution. This results in a cleaner, sharper image that can sometimes rival the performance of lower-spec Gen 3 devices.
Is Generation 2 Technology Obsolete?
Absolutely not. It's easy to think newer is always better, but that's not the whole story here. While more advanced generations exist, a modern, high-quality generation 2 night vision unit offers fantastic performance for a massive range of real-world uses.
The technology strikes a perfect balance between performance, durability, and cost. It's why it remains a go-to choice for law enforcement, serious hunters, and prepared civilians. Gen 2 is a proven workhorse that gets the job done without the premium price tag of the latest and greatest.
Ready to own the night with proven technology? The team at Superior Tactical LLC has over a decade of experience outfitting professionals and enthusiasts with the right gear. Explore our curated selection of high-performance Gen 2 and Gen 3 night vision systems backed by expert support and a 10-year warranty. Find your tactical advantage at https://superiortac.com.