Digital Binoculars Night Vision: Complete Buying Guide
Ever wondered how you can get a crystal-clear view of a deer in a pitch-black forest? The magic behind it is a lot like a super-powered digital camera, but one designed to see light that’s completely invisible to our eyes.
Digital night vision binoculars work by capturing what we miss. They gather every last photon of available light—whether it’s from the moon, distant stars, or even the faint glow of a far-off city—and amplify it electronically.
But here’s the real trick: they also come with a built-in infrared (IR) illuminator. Think of this as a stealth flashlight. It floods the area with a beam of infrared light that animals and other people can’t see, but the binoculars’ sensitive digital sensor picks it up perfectly. This combination is what turns a completely dark landscape into a bright, detailed scene right before your eyes.
A New Way of Seeing in the Dark
Unlike the old-school night vision you see in movies with that classic green-hued view, digital systems are built differently from the ground up. Instead of using analog image intensifier tubes, they convert light into a digital signal, process it with a tiny computer, and display a crisp image on a screen inside the eyepieces.
This digital approach completely changes the game and brings some huge advantages:
- Ready for Day or Night: Digital sensors aren’t harmed by bright light, so you can use the same pair of binoculars around the clock without worry.
- Capture the Moment: Because it’s all digital, most models let you record photos and videos of what you see directly onto a memory card.
- Incredible Clarity: Modern sensors deliver high-resolution images, often in a clean black-and-white view or even full color, a major leap from the blurry green of the past.
It’s no surprise that this technology is taking off. The global market for night vision devices is expected to jump from $8.57 billion to $12.91 billion by 2030, largely because these powerful and versatile digital options are becoming more common. This shift shows just how much people—from wildlife enthusiasts to security professionals—prefer the flexibility and performance of digital.
The Big Idea: Think of digital night vision as a translator for your eyes. It takes faint, invisible light and translates it into a clear, bright picture you can actually see and understand.
To really get a handle on where digital fits in, it helps to see how it stacks up against other night vision technologies.
Digital vs Traditional Night Vision At a Glance
This quick table breaks down the three main types of night vision, so you can see what makes each one unique.
| Technology Type | How It Works | Best For | Price Range |
|---|---|---|---|
| Digital Night Vision | A digital sensor (CMOS) captures light and displays it on a screen. Relies on an IR illuminator for total darkness. | Versatile day/night use, recording media, wildlife observation, and affordability. | $150 – $1,000+ |
| Traditional (Analog) | An image intensifier tube amplifies existing light, creating a classic green-phosphor image. | High-end tactical use, situations with very little ambient light, and when recording isn’t needed. | $500 – $10,000+ |
| Thermal Imaging | Detects heat signatures from objects and creates an image based on temperature differences, not light. | Spotting animals or people through fog, smoke, or dense foliage; search and rescue; and hunting. | $600 – $20,000+ |
As you can see, digital night vision hits a sweet spot, offering impressive performance and modern features like recording at a price point that makes it accessible for all kinds of uses.
The Technology Behind the Image
The best way to get your head around how digital binoculars night vision works is to stop thinking of it as a traditional optic. Instead, picture a highly specialized digital camera built specifically for the dark. It follows a simple, three-step journey to transform a nearly invisible scene into a bright, clear image.
It all starts with the large objective lens at the front of the binoculars. This lens has one crucial job: to scoop up every last bit of available light—whether it’s from the moon, the stars, or the faint glow of a distant town—and focus it perfectly onto an electronic sensor.
This infographic breaks down that three-part process, showing how faint light becomes a visible picture.
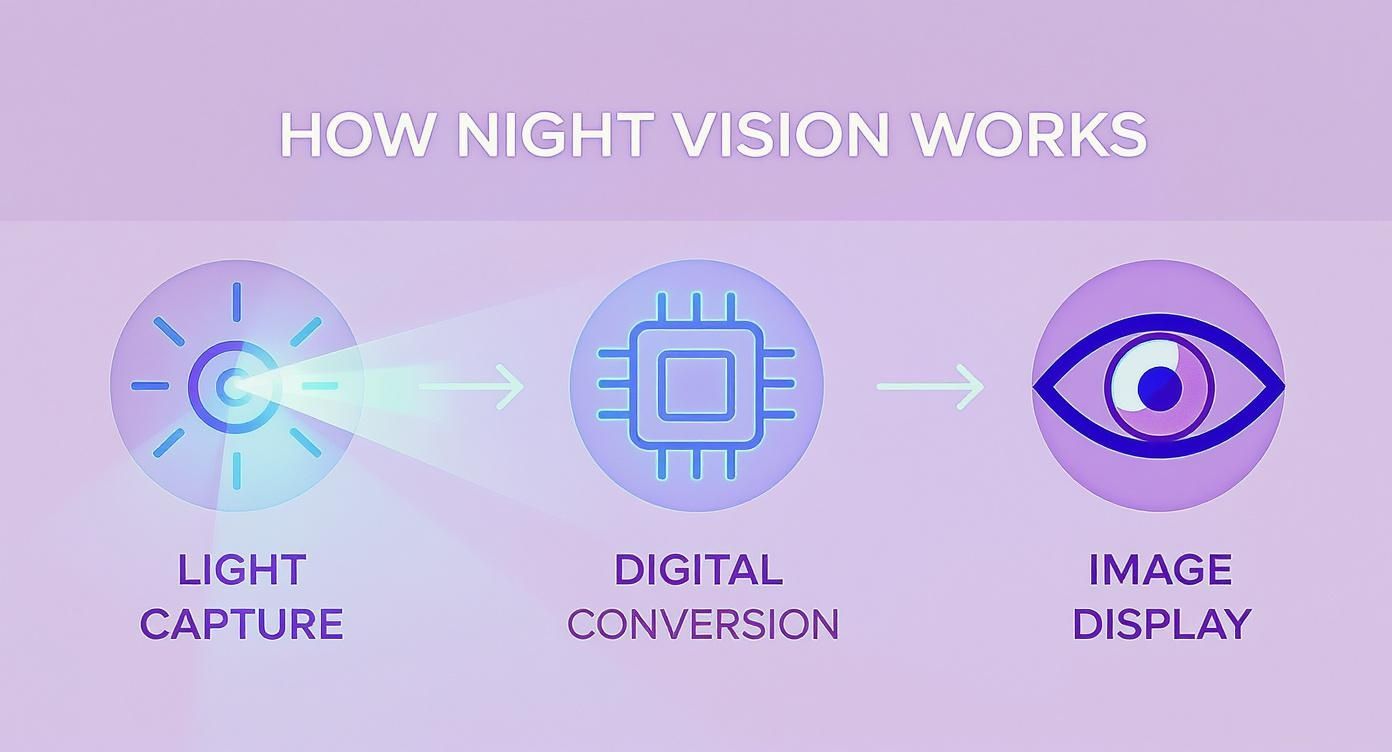
As you can see, it’s a straightforward path: light comes in, gets converted and processed, and is then displayed for your eyes.
The Digital Heart of the System
At the core of any digital night vision device, you’ll find a CMOS (Complementary Metal-Oxide-Semiconductor) sensor. This is essentially the same technology that’s in your smartphone or digital camera, but it’s been engineered for extreme low-light sensitivity.
When the light gathered by the objective lens hits this sensor, the real magic begins. The CMOS sensor converts those tiny particles of light (photons) into an electrical signal. A powerful internal processor then amplifies this signal thousands of times over. This is how a few stray photons from a dark landscape get turned into a bright, usable image.
The real trick to digital night vision is its ability to electronically amplify existing light. Older analog systems physically intensify light, but a digital system treats it like data. This gives it far more flexibility and makes it much more durable.
The Power of the IR Illuminator
So, what do you do when there’s no ambient light at all? Think of a moonless, overcast night in a dense forest. This is where the Infrared (IR) Illuminator steps up to save the day.
Think of it as a stealth flashlight. It throws out a powerful beam of infrared light that’s completely invisible to the naked eye—both human and animal—but shows up bright as day to the device’s CMOS sensor. This IR light bounces off everything in the area, allowing the binoculars to see perfectly in what would otherwise be total blackness.
The type of illuminator used is a big deal when it comes to performance.
- 850nm Illuminators: These are the most common type. They’re powerful and offer the longest detection range, but they do produce a faint red glow at the source that a sharp-eyed animal might spot.
- 940nm Illuminators: These are the “stealth” option. They are completely invisible, with no tell-tale glow. The trade-off? Their effective range is a bit shorter than the 850nm models.
From Pixels to Picture
Once the CMOS sensor has done its job of capturing and amplifying the light (either from the environment or the IR illuminator), there’s just one step left: showing you the picture. The processed digital signal is sent to a tiny, high-resolution LCD or OLED screen inside the eyepiece.
What you’re actually looking at isn’t the real world directly, but a live video feed on this internal display. This is also why digital night vision can do things traditional optics can’t, like record video, snap photos, and even switch to a full-color view during the day. The entire process—from light hitting the lens to the image appearing on the screen—happens almost instantly, giving you a real-time view into the night.
If you’re curious about how this stacks up against other methods, our guide on the differences between thermal, digital, and analog night vision technologies digs into how each one tackles the challenge of seeing in the dark.
Decoding The Features That Truly Matter
Knowing how the technology works is the first step, but figuring out what to look for when you’re ready to buy is where the real power lies. Let’s be honest, staring at a list of technical specs for digital binoculars night vision can be intimidating. This guide is here to cut through the noise and focus on what actually makes a difference when you’re out in the field.
Think of it like buying a new camera. You wouldn’t just pick one because it looks cool; you’d dig into the specs—the lens quality, the sensor size, the zoom capabilities. The same exact logic applies here. The right features directly control how far you can see, how sharp the image is, and how the device holds up when you need it most.
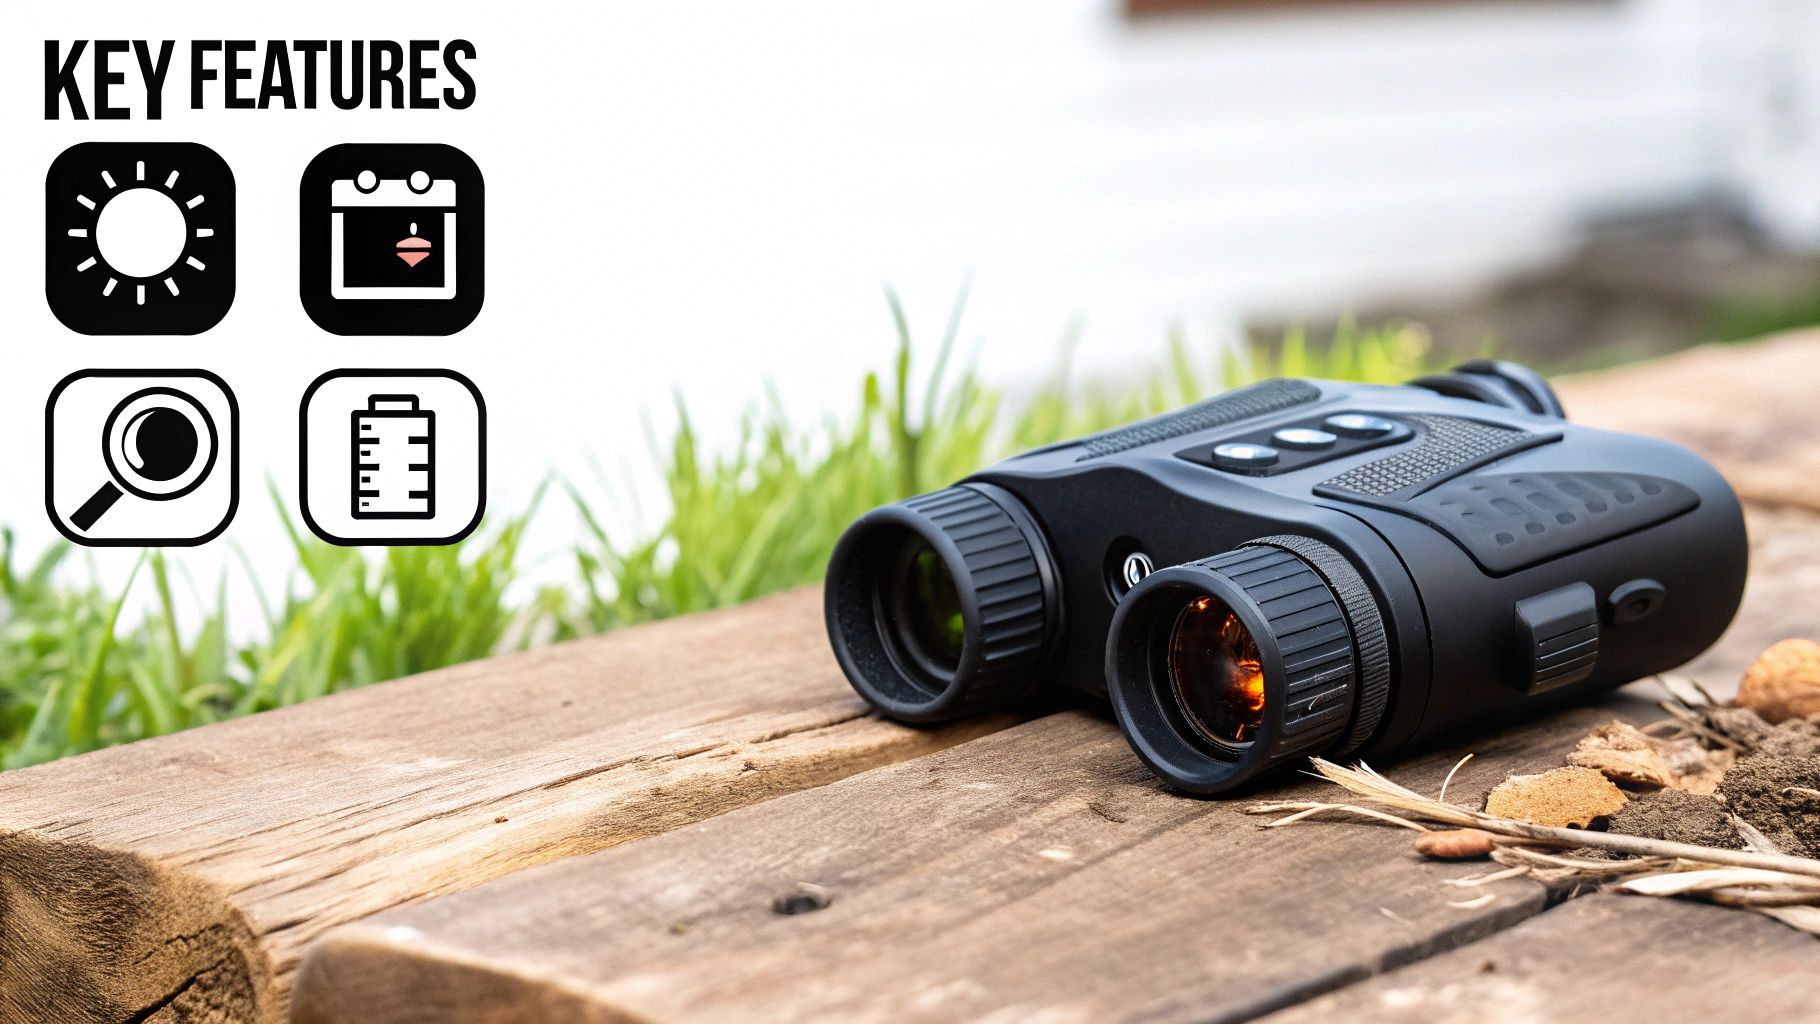
The market for this gear is booming, with everyone from hunters to wildlife enthusiasts and security pros looking for an edge. It’s no surprise that top-sellers now pack some serious punch, like 12x magnification, IR that can light up targets 1,312 feet (400 meters) away, and the ability to record high-quality photos and video. These aren’t just novelties anymore; they’re becoming the standard.
Optical Power: Magnification And Objective Lens
When you look at any pair of binoculars, you’ll see numbers like 7×50. These aren’t just random specs; they represent the two most fundamental features of the optic. Nailing this combination is your first step to great performance.
- Magnification (the first number, 7x): This tells you how much closer your subject will appear. With 7x magnification, an animal 100 yards away will look like it’s only about 14 yards from you. It’s tempting to go for the highest number possible, but be careful. More zoom narrows your field of view and amplifies every little handshake, making a tripod almost essential for a stable image.
- Objective Lens Size (the second number, 50mm): This is the diameter of the big lenses at the front, measured in millimeters. For night vision, this is absolutely critical. A larger objective lens is like a bigger bucket for catching light. A 50mm lens will gather far more ambient light than a 30mm one, resulting in a significantly brighter and clearer image when darkness falls.
Understanding Viewing Range
The advertised viewing range is one of the most misunderstood—and often exaggerated—specs out there. Manufacturers love to boast about huge distances, but you need to know what they really mean.
Key Takeaway: There’s a huge difference between ‘Detection Range’ and ‘Recognition Range.’ Detection is the max distance where you can spot a flicker of movement or a vague shape. Recognition is the much closer distance where you can actually identify what that shape is—like telling a deer from a person.
For any practical use, ignore the detection range and focus on the recognition range. Seeing a blob at 1,000 feet is useless if you can’t tell what it is until it’s only 300 feet away.
IR Illuminator Strength And Levels
As we covered, the IR illuminator is your built-in, invisible flashlight for pitch-black conditions. Its power and adjustability are non-negotiable for a good experience. Most quality digital night vision binoculars give you multiple IR levels to choose from.
- Low Settings: Perfect for close-up work, like watching wildlife less than 100 feet away. Using a low setting prevents the intense IR light from bouncing back and completely washing out your view.
- High Settings: This is what you need to punch through the darkness and illuminate subjects at the maximum effective range of your binoculars.
Having these adjustable levels gives you incredible flexibility. You can get a perfectly clear image whether you’re observing something in a nearby clearing or scanning a field hundreds of feet away.
Recording Quality And Usability Factors
Beyond the core optics, a few other features will make or break your experience with a pair of digital binoculars.
Video And Photo Resolution
If you plan to document your nocturnal adventures, resolution is king. A device that can record in 1080p (Full HD) will give you crisp, detailed footage that a 720p model just can’t match. This becomes even more important if you want to zoom in on your recordings later without everything turning into a pixelated mess.
Battery Life
There’s nothing worse than your gear dying right when things get interesting. Nighttime stakeouts and wildlife watches can last for hours. Look for models that offer a solid 6-10 hours of runtime or use common batteries like AAs that you can easily swap out. Some modern units even support external USB power banks, giving you virtually unlimited field time.
Weather Resistance (IP Rating)
Mother Nature doesn’t always cooperate. An IP (Ingress Protection) rating tells you exactly how well your gear is sealed against the elements, specifically dust and water.
- IPX4: This means it’s splash-resistant. It can handle a light rain shower without any issues.
- IP67: This is a big step up. It’s completely dust-tight and can even be submerged in up to a meter of water for a short time.
If you’re a serious outdoors person, a high IP rating isn’t a luxury; it’s a must-have for ensuring your investment lasts. While we’re talking about binoculars here, these core principles hold true for other night vision devices, too. You can learn more by checking out the top features to look for in a quality night vision monocular and see how the concepts carry over.
Feature Impact on Performance and Price
Choosing the right digital night vision binoculars is all about balancing features with your budget and intended use. The table below breaks down how different specification levels for key features affect both performance and cost, helping you decide where to invest your money.
| Feature | Entry-Level Spec | Mid-Range Spec | High-End Spec | Impact on Use |
|---|---|---|---|---|
| Magnification | 3x-5x | 5x-8x | 8x-12x+ | Higher magnification is great for distance, but can reduce field of view. |
| Objective Lens | 20mm-30mm | 30mm-50mm | 50mm+ | A larger lens gathers more light, resulting in a brighter, clearer image. |
| IR Illuminator Range | Up to 300 ft | 300-800 ft | 800-1300+ ft | Determines how far you can see in total darkness. |
| Video Resolution | 480p / 720p | 1080p (Full HD) | 4K UHD | Higher resolution means sharper, more detailed recordings. |
| Weather Resistance | None / IPX4 | IP54 / IP56 | IP67 | A higher IP rating provides better protection against dust and water. |
As you can see, shelling out for high-end specs in every category might be overkill for casual use. But for serious applications like surveillance or long-range hunting, investing in better optics and a more powerful IR illuminator pays off with superior performance when it counts.
Putting Night Vision Into Practice
All the tech specs in the world—magnification, IR range, recording resolution—don’t mean much until you see what they can do in the real world. That’s where digital night vision really shines, transforming how we see and interact with the world after the sun goes down.
Let’s move past the theory and drop into a few common situations. Seeing how these devices perform in the field will help you connect the dots between the features on the box and your actual passion.
The Hunter Tracking Nocturnal Game
Imagine you’re tucked into a blind hours before sunrise. The forest is dead silent and completely black. With standard optics, you’re flying blind, relying only on your hearing. But with a good pair of digital night vision binoculars, the entire landscape opens up in sharp detail. You can scan the tree line, and the powerful IR illuminator cuts right through the gloom, making the field look like it’s bathed in invisible daylight.
Suddenly, you catch movement 200 yards out. A deer is cautiously making its way into the clearing. This is where high optical magnification becomes critical. You can zoom in, and the high-resolution sensor lets you clearly identify the animal without making a sound or flashing a light that would send it running. By seeing so clearly from a safe distance, you can track its behavior and make a patient, ethical decision. It’s a level of stealth and awareness that traditional methods just can’t match.
The real game-changer for a hunter is the ability to observe without being observed. Digital night vision, paired with a strong and adjustable IR illuminator, flips the script. Darkness becomes your shield, not a barrier.
The Wildlife Observer Uncovering Nature
For a wildlife enthusiast, the goal might be different, but the tool is just as powerful. Picture yourself set up near a meadow, hoping for a rare glimpse of a barn owl on the hunt or a family of foxes playing. Flick on a flashlight, and the show’s over—you’ve disrupted their natural behavior and scared them off.
This is where digital night vision truly excels. You can sit quietly and watch the nocturnal world come to life as if you weren’t even there. A wide field of view is a massive plus here, letting you soak in the entire scene. The moment a fox kit pokes its head out of the den, you can hit the record button and capture crisp 1080p footage to look back on later. Because the IR illuminator is completely invisible to them, the animals remain undisturbed, giving you an authentic and incredible window into their hidden lives.
The Homeowner Securing Property
Think about a homeowner who hears a strange noise in the backyard late at night. The last thing you want to do is step outside with just a flashlight into a potentially dangerous situation. With digital night vision, you can survey your entire property from the safety of an upstairs window.
A few key features really come into play here:
- Detection Range: A long IR range lets you check the far corners of your yard, reaching areas your porch light could never touch.
- Photo Capture: If you spot an intruder or an unfamiliar vehicle, you can snap a clear photo for evidence in an instant.
- Ease of Use: A lightweight, comfortable design is important so you can hold the binoculars steady while you figure out what’s going on.
This simple tool shifts the dynamic entirely. Instead of being a potential victim, you become a proactive observer, gathering intel from a position of safety and control.
The Boater Navigating Dark Waters
Finally, let’s head out on the water. Navigating a boat at night is fraught with hazards. Unlit channel markers, floating logs, and other boats can pop up out of nowhere. Radar helps, but there’s no substitute for actually seeing what’s in front of you.
Digital night vision is perfectly suited for this. Unlike traditional image intensifier tubes, a digital sensor won’t be fried by the sudden glare of another boat’s navigation lights. A solid, weather-resistant build with an IP67 rating is also a must-have to protect the electronics from sea spray and moisture. By periodically scanning the water ahead, a captain can spot a submerged log or a small buoy well before it becomes a collision risk, making any nighttime voyage significantly safer for everyone aboard.
How to Choose Your First Pair
Alright, you’ve got a handle on the tech and the key features. Now for the exciting part: picking the right pair of digital night vision binoculars for you. This isn’t about chasing the most expensive model on the market, but about finding the one that perfectly fits what you plan to do.
Think of it as matching the tool to the job. By asking a few honest questions about your needs, you can cut through the marketing noise and choose a device that you’ll be happy with for years to come.
What Is Your Primary Activity?
This is the big one. How you plan to use your binoculars will shape every other decision. The perfect setup for watching deer in your backyard is completely different from what a hunter tracking coyotes across a field needs.
- Wildlife Observation: You’ll want a wide field of view to scan the environment. Look for moderate magnification, maybe 5x to 7x, and a stealthy 940nm IR illuminator that won’t send animals running for cover.
- Hunting: Here, range is king. Prioritize higher optical magnification (8x or more) and a powerful 850nm IR illuminator to light up distant targets. Image quality is also critical for positive identification.
- Security and Surveillance: A good all-around performer is your best bet. You’ll need a solid detection range, reliable video recording, and a tough, weather-resistant body to handle an overnight watch.
How Far Do You Realistically Need to See?
It’s tempting to get lured in by specs that promise visibility at over 1,000 feet. But be realistic. Most of the time, you’ll be looking at things much, much closer. There’s no sense in paying a premium for extreme range if your environment won’t even allow for it.
If you’re in a dense forest, your maximum line of sight might only be 100 yards. In that case, a wider field of view is more valuable than raw distance. But if you’re scanning open farmland, then investing in a unit with a more powerful IR illuminator and higher-end optics is absolutely the right move.
Pinpoint your typical viewing distance first, then choose a model with an effective recognition range that comfortably exceeds it. This ensures you’ll have clear, identifiable images where and when you need them most.
Balancing Budget and Performance
Digital night vision binoculars come in at all different price points, and generally, you get what you pay for. Setting a budget from the start helps you focus on the features that truly matter for your specific needs.
- Entry-Level (Under $300): Perfect for casual backyard use or short-range observation. You’ll get the basics, including simple recording and a modest IR range.
- Mid-Range ($300 – $600): This is the sweet spot for most people. These units typically offer full HD recording, better lenses, more powerful IR illuminators, and a more durable build.
- High-End ($600+): For the serious enthusiast or professional. These models boast top-tier sensor quality, high optical magnification, better batteries, and rugged, weatherproof construction.
There’s a reason the digital binoculars market is on the rise. It was valued at around $0.72 billion and is projected to climb to $0.92 billion by 2032, largely because it offers powerful features like video recording and clear LCD screens at prices people can actually afford. You can read more about the trends in the digital binoculars market to see where the technology is headed.
Ergonomics and Ease of Use
Don’t forget to consider how the binoculars will actually feel in your hands. A device can have incredible specs, but if it’s heavy, clunky, or has a confusing menu system, you’ll never end up using it.
Look for a model with an intuitive button layout and a comfortable grip, especially for those long nights of observation. If you plan on hiking or covering a lot of ground, weight becomes a huge factor. Sometimes, a slightly less powerful but lighter unit is the smarter choice.
For more helpful pointers, check out our guide on how to buy night vision binoculars online safely, which dives deeper into making a smart and secure purchase.
Answering Your Top Questions About Digital Night Vision
Alright, you’ve got the basics down on the tech and features, but some practical questions always pop up. Let’s tackle the most common ones I hear from people who are ready to choose their first—or next—pair of digital night vision binoculars. Think of this as the final check to make sure you’re buying and using your gear with total confidence.
I’ll give you direct, field-tested answers to the questions that really matter when you’re out there.
Can I Actually Use These Things During the Day?
You bet. In fact, this is one of the biggest selling points for going digital. Unlike old-school “tube” night vision, the digital CMOS sensor inside these binoculars can’t be damaged by sunlight. This dual-use capability is a complete game-changer.
Most models have a dedicated “day mode” that flips on a color filter, turning your night vision device into a perfectly functional pair of daytime digital binoculars. This means you can scout a field in the afternoon and track game in the same spot after dark, all with a single piece of gear. It’s incredibly versatile.
What’s the Real Difference Between Digital and Optical Zoom?
This one is crucial—getting it wrong can lead to a lot of disappointment in image quality. The two types of zoom are worlds apart in how they work, and one is vastly better for getting a clear picture.
- Optical Zoom: This is the real deal. It uses the actual glass lenses inside the binoculars, physically moving them to magnify the image. You get true magnification while keeping the full resolution and detail of what you’re looking at.
- Digital Zoom: This is basically just software trickery. The device takes the image from the sensor, crops into it, and blows up that smaller section to fill your screen. While the target looks bigger, you always lose quality. The result is often a blurry, pixelated mess.
Here’s the bottom line: always, always prioritize higher optical magnification. A unit with 5x optical zoom will give you a far crisper image than one that boasts about high digital zoom but only has 3x optical. Treat digital zoom as a nice-to-have, not a core feature.
How Much Does the IR Illuminator Wavelength Matter?
The wavelength of the built-in infrared (IR) illuminator, measured in nanometers (nm), is a huge deal if you’re trying to stay hidden. The two you’ll see most often are 850nm and 940nm, and they represent a classic trade-off between power and stealth.
An 850nm illuminator is the workhorse of the industry. It throws a powerful beam of IR light that reaches impressive distances, making it fantastic for spotting things far away. The catch? It produces a faint, dull red glow at the lens that a sharp-eyed animal—or another person—can spot if they’re looking right at you.
A 940nm illuminator, on the other hand, is built for stealth. Its light is completely invisible to the naked human or animal eye, making it truly covert. The price for this invisibility is a little less power. A 940nm beam just doesn’t have the same reach as an 850nm one.
For most wildlife observation, 850nm is more than enough. But if you’re hunting animals that are easily spooked or need to remain completely undetected for security reasons, the 940nm illuminator is without a doubt the way to go.
Are Digital Night Vision Binoculars Waterproof?
How well your binos handle water can vary wildly between models, so you have to check the specs. Look for the IP (Ingress Protection) rating, which gives you a standardized measure of how sealed the unit is against dust and water.
Here’s a quick guide to what the numbers mean:
- No Rating: Don’t get it wet. Seriously. Keep it out of the rain and away from moisture.
- IPX4: This means the device can handle water splashes from any direction. It’ll be fine in a light rain or some morning mist.
- IP67: Now we’re talking serious protection. A device with an IP67 rating is totally sealed against dust and can even be dunked in a meter of water for 30 minutes.
If you know you’ll be out in heavy downpours, on a boat, or in generally tough conditions, don’t even think about it—get a model with at least an IP67 rating. It’s a small investment to make sure your gear survives the mission and lasts for years.
At Superior Tactical LLC, we’re all about providing the highest quality night vision optics and tactical accessories to keep you ready for anything. Our team is here to offer real, straightforward guidance and gear we trust, backed by years of experience and a serious commitment to our customers.
Check out our curated selection of night vision and thermal imaging solutions today at https://superiortac.com.