Mastering Coyote Hunting With Night Vision A Complete Guide
If you want to be successful at hunting coyotes, you need to wrap your head around one simple truth: they own the night. Sure, you might spot one during the day, but they really come alive after the sun goes down. Tapping into that behavior is the secret sauce for consistent success, and this guide will show you exactly how to do it.
The Nocturnal Advantage: Why Night Vision Changes Everything
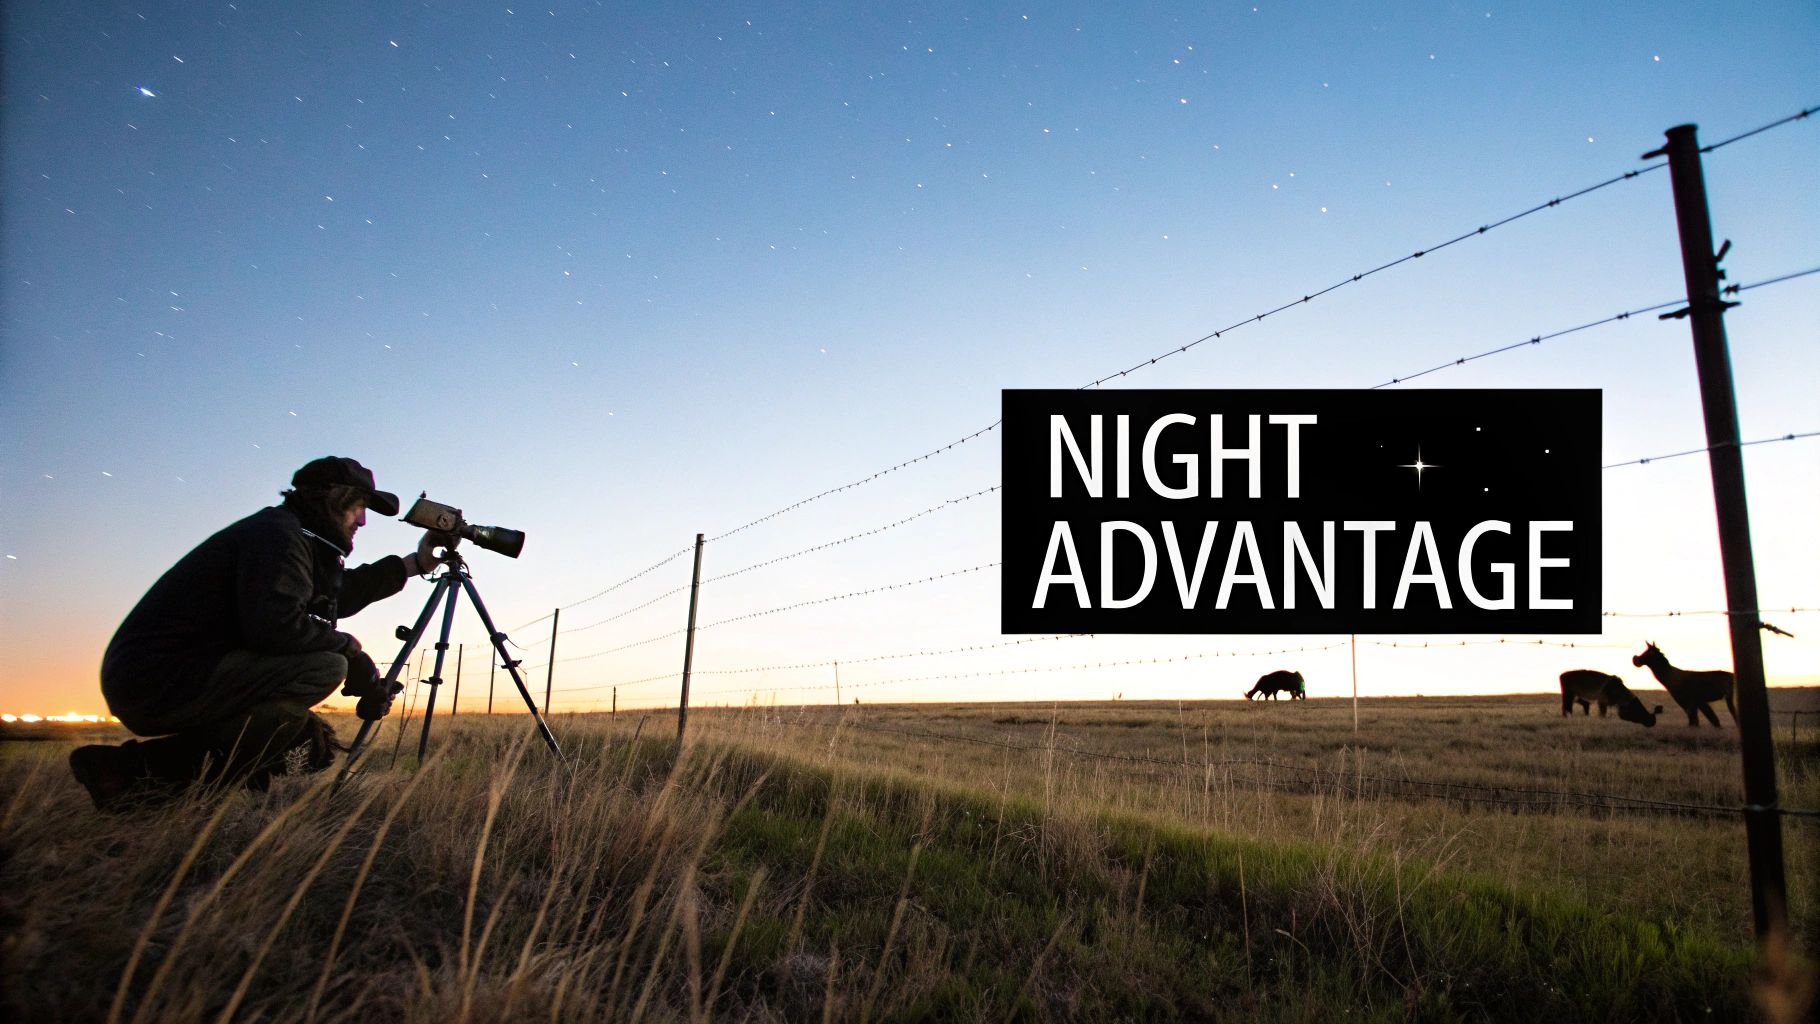
The biggest reason to get into night hunting gear is that you're finally meeting the coyote on its home turf, in its preferred element. Once the sun sets, a coyote’s natural paranoia seems to fade. Their instinct to roam, hunt, and respond to calls kicks into high gear, giving you a tactical window that daytime hunting just can't match.
Under the cover of darkness, coyotes get bold. They move with more confidence, which makes them more predictable and a lot more likely to fall for a well-placed calling sequence. That same distressed rabbit call that gets ignored at high noon can be absolutely irresistible to a hungry coyote at midnight.
A Whole New World of Activity
This isn't just a hunch; the difference in coyote behavior from day to night is stark. GPS collar studies have shown that coyotes travel much farther after dark. We're talking 7 kilometers or more after sunset, compared to just 2-3 kilometers during the day. That's a massive 2.3 to 3.5-fold increase in movement, which translates directly to more hunting opportunities for anyone with the right gear.
All that extra movement means more coyotes are on their feet and within earshot of your calls. Instead of sitting around hoping a single, skittish coyote shows itself in broad daylight, you can now intercept multiple animals as they make their nightly rounds.
The core idea behind night hunting is simple: you’re stacking the deck in your favor. By taking away the coyote's biggest advantage—the darkness—you turn it into your own.
This guide is built on over a decade of firsthand experience in the field. I'm going to walk you through the whole process so you have the confidence to hunt effectively, ethically, and safely. The payoff is huge:
- Higher Success Rates: It’s simple math. More active coyotes mean more encounters.
- Bolder Animal Behavior: Coyotes are way less shy about investigating sounds after dark and will often commit and come in closer.
- Effective Population Management: For landowners and conservationists, night hunting is an incredibly efficient tool for managing predator numbers.
Once you truly understand how night vision goggles can improve your hunt, your entire approach will shift from a game of luck to a calculated strategy. The next sections will break down the specific gear, legal know-how, and field tactics you need to master the art of hunting coyotes with night vision.
Know the Law: Navigating the Legal Side of Night Hunting
Before you even think about gearing up, let's talk about the single most important part of hunting coyotes at night: the law. Get this wrong, and your expensive night vision rig could end up in an evidence locker.
The rules are a messy patchwork that changes wildly from state to state, and sometimes even county to county. What’s perfectly legal where your buddy hunts in Texas could be considered poaching just one state over. Don't ever assume.
Ignoring the regulations is the quickest way to end a hunt before it even starts, likely with a hefty fine and a confiscated rifle. One state might welcome hunters with the latest thermal scopes, while its neighbor might ban any form of artificial light. These laws are often old, written long before modern tech, and they’re slow to catch up. That means it’s on you to do your homework every single season.
It's a State-by-State Game
The differences in night hunting laws can be mind-boggling. Some states are wide open, giving you plenty of freedom to manage predators, especially on private land. Others are incredibly restrictive.
You'll find all sorts of weird, specific rules. For instance, a state might be okay with a handheld spotlight but forbid a light mounted on your rifle. Another might allow green-and-black image-intensified night vision but completely ban thermal imaging. These little details are exactly why a quick Google search just won't cut it.
Hunter's Pro Tip: Never, ever trust what you hear from a friend or read on some random forum post from five years ago. Your one and only source for legal info should be the official website for your state's wildlife or fish and game agency. Bookmark it, download the latest regulations handbook, and check it before every season. Laws change.
How to Find the Real Rules
So where do you find this stuff? Head straight to the source: your state's official wildlife department website. That's it. They'll have the most current hunting regulations, usually as a PDF you can download right to your phone.
Once you have the handbook, don't just skim it. You need to look for a few key sections:
- Furbearer & Predator Regulations: This is usually where you'll find the rules for coyotes.
- Shooting Hours: Find the definition of legal shooting light and then look for specific exceptions for night hunting or nocturnal species.
- Artificial Light & Electronics: This is the big one. It will cover everything from spotlights and IR illuminators to the legality of night vision and thermal scopes themselves.
- Permits & Licenses: Sometimes you need a special, separate permit just to hunt at night or to use certain types of gear.
A Good Example of Laws Catching Up
Thankfully, more and more states are recognizing night vision as a legitimate and effective tool for controlling predator populations. Kansas is a perfect example. In 2021, they established a dedicated night vision season for coyotes after landowners pushed for better management options.
The state made it incredibly easy and affordable to get legal, requiring just a simple $2.50 night vision equipment permit. In fact, the Kansas Department of Wildlife and Parks has even recommended extending this season through June 30, 2026. You can read about how Kansas is adapting its coyote management strategies to see how things are evolving.
This is the kind of progress we want to see. By staying on top of the regulations, you're not just keeping yourself out of trouble—you're being a responsible hunter who can contribute to the conversation about modern, ethical wildlife management. Know the law, carry your permits, and be a good ambassador for the rest of us.
Choosing Your Optic: Thermal Imaging vs. Image Intensification
Jumping into night hunting for coyotes is a serious investment, and the first big decision you'll make is whether to go with thermal imaging or a traditional image intensifier (I²). This isn't just about the price tag; it's a choice that shapes your entire approach in the field. The two technologies are fundamentally different, and each one brings its own set of advantages to the hunt.
Simply put, thermal sees heat, and I² sees light.
A thermal scope picks up on the faint heat signature of a coyote, painting it as a bright, high-contrast shape against the cooler background. This makes it the undisputed king of detection. An image intensifier, on the other hand, gathers and amplifies tiny amounts of ambient light from the moon and stars, creating that classic green-and-black view of the world. It’s all about detail, which is absolutely critical for positive target identification.
To help you decide, let's break down how each one performs for coyote hunting.
Thermal vs. Image Intensifier (I²) For Coyote Hunting
This table gives a head-to-head comparison to show you where each technology really shines.
| Feature | Thermal Imaging | Image Intensifier (Gen 3) | Best Use Case |
|---|---|---|---|
| Detection | Unmatched. Detects heat signatures through brush, fog, and darkness. | Good, but relies on ambient light and clear line of sight. | Scanning wide-open fields and spotting targets in cover. |
| Identification | Can be difficult at range; target can appear as a "glowing blob." | Excellent. Provides clear details for positive target ID. | Confirming a target is a coyote and not a non-target animal. |
| Navigation | Poor. Lacks depth perception, making it hard to walk with. | Excellent. Gives a natural view for moving through terrain. | Moving to and from your stand in the dark. |
| Light Conditions | Works in absolute darkness, as it doesn't need any light. | Requires some ambient light (moon, stars) to function well. | Hunting on clear nights with at least a partial moon. |
| Cost | Generally higher initial investment for quality units. | Can be more affordable, especially for helmet-mounted monoculars. | Budget-conscious setups, especially for navigation. |
Ultimately, thermal gives you the power to find coyotes that you would otherwise completely miss, while an I² device gives you the confidence to know exactly what you're looking at before you pull the trigger.
The Power Of Thermal For Detection
When your number one goal is just to find a coyote, nothing comes close to thermal. Because it reads heat, it can spot an animal through light fog, tall grass, and brush that would make it completely invisible to an I² unit. This is thermal's superpower, letting you scan huge fields and dense woodlines with incredible speed.
The performance gap is huge. Real-world testing shows that thermal detection ranges are roughly 3.7 times greater than top-tier Gen 3 night vision for targets the size of a coyote. That’s a massive advantage, allowing you to spot a predator from hundreds of yards farther away and giving you much more time to get ready for a shot.
Thermal cuts through the guesswork. It turns the landscape into a simple binary system of "hot" and "cold," making any living creature stand out like a beacon. If it glows, it's alive.
Of course, there’s a trade-off. While thermal is a rockstar for detection, it can make identification tricky, especially at longer distances. Is that glowing blob a coyote, a fox, or the neighbor's dog? This is where the clarity of an image intensifier becomes invaluable.
The Clarity Of Image Intensification For Identification
Image intensification, what most people think of as "night vision," gives you a much more natural, recognizable view of your surroundings. Instead of a heat map, you see a detailed, monochrome image that allows you to identify an animal with far greater certainty. You can make out the shape of its ears, the length of its tail, and the way it moves—all the details you need to see before taking a shot.
This high-fidelity picture makes I² the better tool for situational awareness and positive target ID. It’s an ethical and legal necessity to clearly distinguish between a coyote and a non-target animal. The downside? It relies on ambient light, so its performance can suffer on overcast, moonless nights or in thick timber where starlight can't reach. Our guide covering the differences between thermal, digital, and analog night vision explains this in more detail.
Before you buy anything, you have to know the laws in your state. Regulations around hunting with night optics can be very specific about what technology is even allowed. This flowchart can help you start the process.
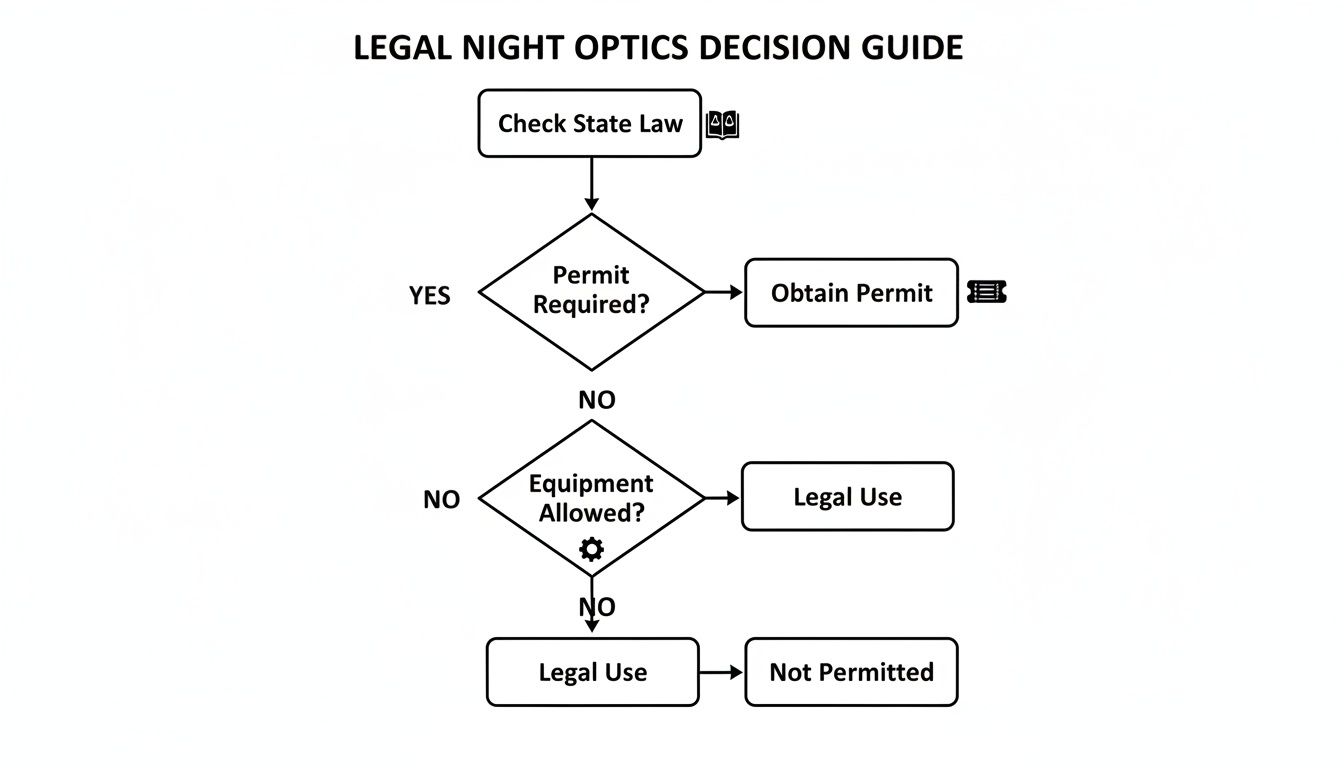
As the chart shows, checking your local wildlife regulations and permit requirements is the critical first step before you even think about gear.
The Pro-Level Hybrid Approach
So, which one should you get? The honest answer from experienced hunters is that it really depends. But for those who want the ultimate advantage and have the budget for it, the answer is simple: use both.
A professional-grade setup combines the strengths of each technology into one seamless system:
- Helmet-Mounted I² Monocular: You wear a device like a PVS-14 on your head for hands-free navigation and scanning. This lets you walk through the dark, read the terrain, and keep your head on a swivel.
- Thermal Weapon Sight: Your rifle gets a dedicated thermal scope. This is your tool for detection and taking the shot.
With this hybrid system, you can scan a dark field with your I² monocular, getting a clear picture of your surroundings. The moment a coyote answers your call, you bring up your rifle. The thermal scope will instantly pick up its heat signature, even if it’s trying to hang up in deep cover. This setup gives you the best of both worlds—superior navigation and ID from the I² and unbeatable detection from the thermal. It’s an incredibly effective combination and the go-to for serious coyote hunters.
Getting Your Rifle and Gear Dialed In for the Dark
Your high-tech optic is the star of the show, but it's just one part of a complete night hunting system. To be truly effective out there, every piece of gear on your rifle needs to work in concert. Building this system correctly from the ground up is the secret to a stable, reliable rig that puts coyotes on the ground.
It all starts with how you attach your optic to your rifle. A cheap, wobbly mount is a surefire way to get frustrated and miss shots. You absolutely need a high-quality, return-to-zero (RTZ) mount. These are built to be taken off and put back on without losing your zero, which is a lifesaver when you're swapping between your day scope and night rig.
Once it’s mounted, you have to zero it. Here's a tip that separates the pros from the amateurs: zero your scope at night. Materials expand and contract with temperature, and a zero you confirmed on a warm afternoon can easily shift when the temperature drops after sunset. For thermal, grab a few hand warmers and stick them to a target. For image intensification, use a target with an IR reflective patch or a small IR beacon.
Building Out Your Support System
Beyond the rifle itself, a few other pieces of gear will make or break your hunt. These aren't just accessories; they're essential tools for anyone serious about night hunting.
If you’re running an image intensifier (I²) like a PVS-14, an infrared (IR) illuminator is non-negotiable. Sure, modern Gen 3 tubes are incredibly sensitive, but they can't make light out of thin air. On a moonless, overcast night or in thick brush, that tube needs help. A good IR illuminator acts like a high-powered, invisible flashlight, bathing the area in light only your device can see and dramatically boosting your detection and identification range.
Even state regulations are catching up to how critical these tools are. For example, North Dakota’s HB 1412 expanded legal night hunting equipment to include not just night vision and thermal scopes, but also artificial light and infrared illuminators with power sources up to six volts. You can read up on the history of North Dakota's night hunting laws and see how these tools have become officially recognized parts of the modern hunter's kit.
Your rifle should be a completely stable and predictable platform. That means a rock-solid mount, a dedicated night zero, and the right support gear to light up your target, whether that's an IR illuminator for your PVS-14 or the passive heat signature your thermal scope picks up.
Your Essential Field Equipment Checklist
With your rifle squared away, it’s time to think about the gear that helps you find and call in the coyotes.
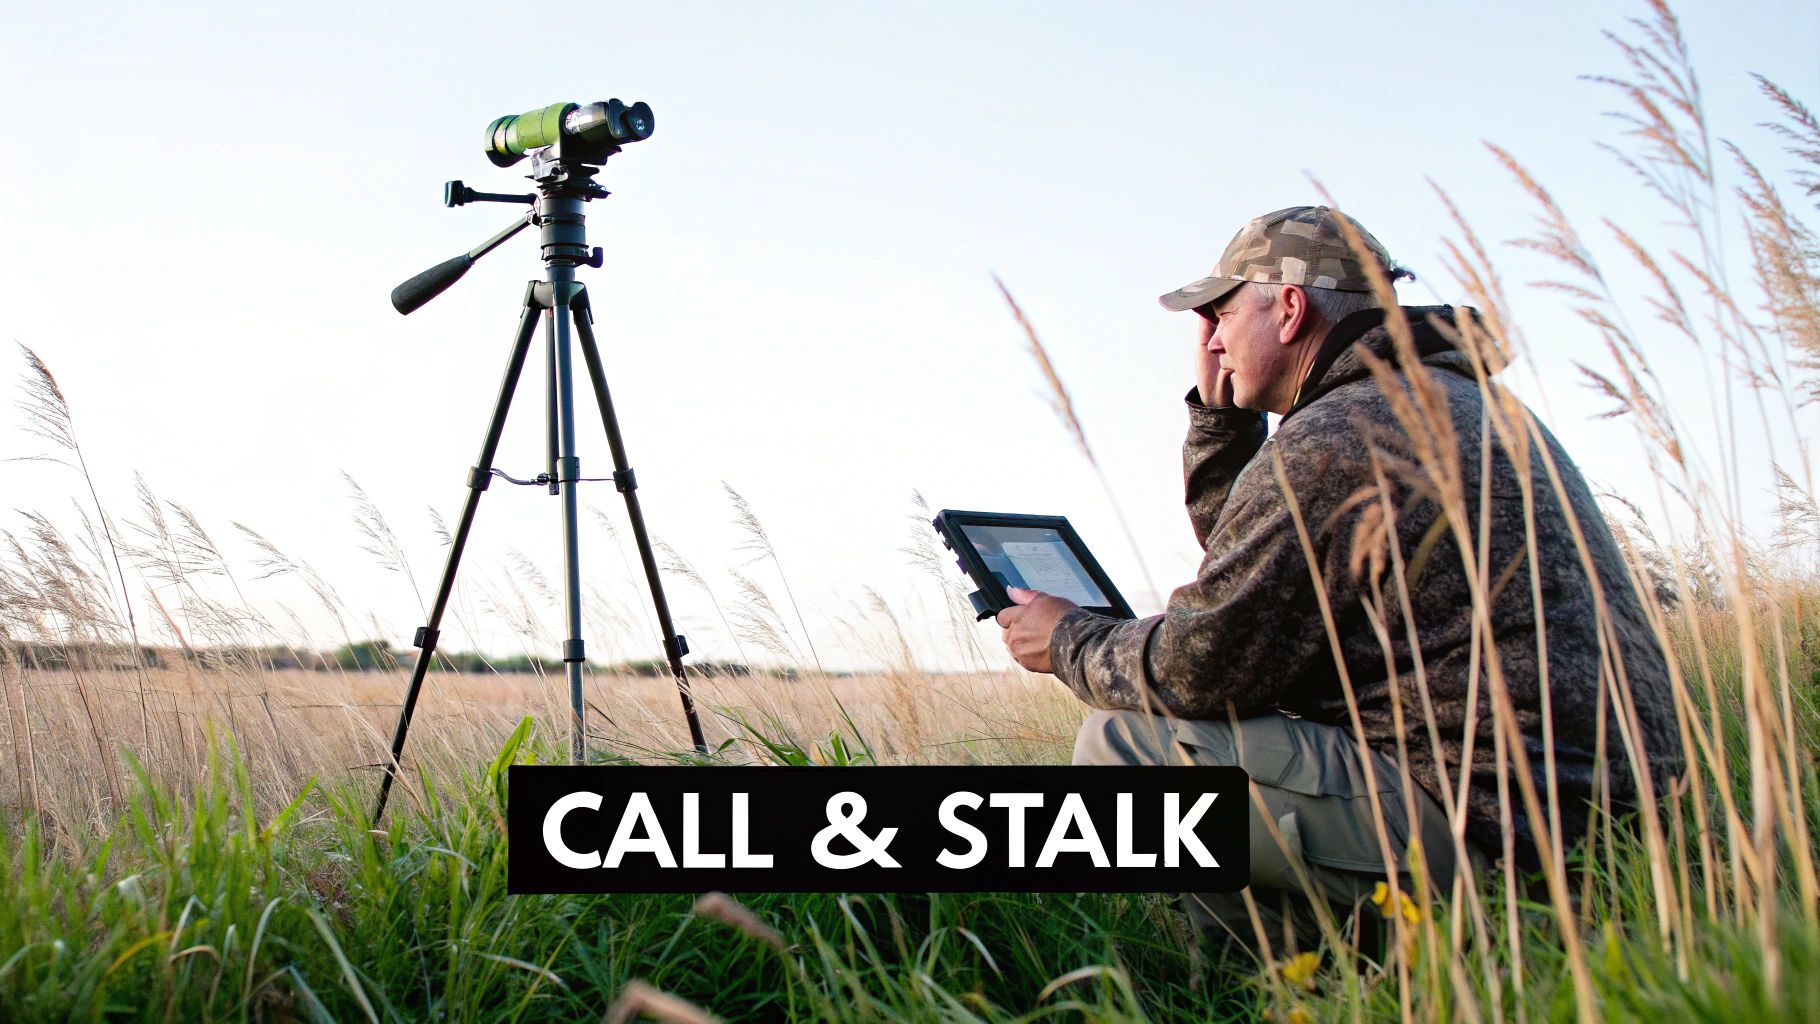
- Electronic Caller & Decoy: A quality e-caller is your best friend for luring in wary predators. You’ll want one with a good library of sounds, from rabbit distress to coyote howls. Pro tip: set your caller 50 to 100 yards away from your shooting position, preferably crosswind. This pulls the coyote's focus away from you. Tossing a motion decoy next to the caller can be the final push a cautious dog needs to commit.
- Tripod or Shooting Sticks: Don't even think about going without a solid shooting rest. Coyotes are small, fast targets, and trying to make a clean, ethical shot off-hand in the dark is a fool's errand. A tripod gives you a rock-solid base, letting you stay on target for long periods without getting fatigued while you scan.
- Handheld Scanner: This is a true game-changer. A handheld thermal monocular lets you scan for heat signatures without having to point your rifle everywhere. It’s lighter, safer, and far more comfortable for glassing fields all night. It prevents you from sweeping everything and everyone with a loaded weapon. The benefits of pairing a PVS-14 with a thermal monocular are huge; it gives you the best of both worlds for detection and identification.
- Headlamp with Red/Green Light: Even with a PVS-14 on your head, you'll need a good headlamp. Whether you're navigating a creek bed in the dark, digging through your pack, or handling a downed animal, you need hands-free light. Using a red or green light setting helps preserve your natural night vision and is less likely to spook an approaching coyote.
Field Tactics: Calling and Stalking Coyotes After Dark
Owning the best gear is just the starting line. Real success in coyote hunting with night vision hinges on solid field tactics. Your hunt actually begins hours before you leave the house, poring over digital maps and e-scouting potential spots. I spend a lot of time on satellite imagery looking for those classic coyote travel corridors—field edges, creek bottoms, and clearings.
Once you’re on the ground, your approach is everything. A noisy, careless entrance will bust a stand before you even get your rifle on the sticks. Always park your truck downwind of where you plan to call from and move with deliberate slowness. In the dead of night, a single snapped twig can sound like a gunshot.
Mastering Your Night Calling Sequence
Calling coyotes after dark is a completely different ballgame than calling during the day. Sound travels much farther in the cool, dense night air, which means subtlety is your best friend. Those loud, aggressive barks and howls that work at noon will often sound unnatural and send coyotes running in the other direction at night.
I always start my calling sequence with something soft and non-threatening. A few lone howls are a great way to take the temperature and see if any coyotes are already in the area. After that, I go silent for several minutes, constantly scanning with my thermal monocular. If nothing shows, I might switch to a low-volume prey distress, like a mouse squeak or a quiet cottontail call.
Keep your calling sequences short—think 30-60 seconds max—and follow them with several minutes of silent, patient scanning. Coyotes are ghosts at night; they can cover a ton of ground without making a sound and often approach with caution. Patience truly is your number one asset.
The biggest mistake I see new night hunters make is over-calling. Your goal is to spark a coyote's curiosity, not scream at it. Let that silence work for you. It's in those quiet moments that a coyote will give itself away.
When you pair the right tactics with this technology, the results can be staggering. We've heard plenty of stories from seasoned hunters bagging as many as 23 coyotes in a single night. It really shows why night hunting has become such an effective predator management tool. You can read more about how night vision is changing coyote hunting and its effect on local ecosystems.
The Ambush: Stand and Call Method
The classic "stand and call" is the most common tactic for a reason: it works. This is an ambush strategy where you hunker down in a spot with a good field of view and use calls to bring the coyotes right to your lap. It’s perfect for open fields, rolling pastures, or clear-cuts where you have visibility out to several hundred yards.
For this method, your setup is critical. You absolutely have to set up with the wind in your face or, at the very least, blowing across your shooting lanes. This forces an approaching coyote to circle downwind to try and scent you, which will hopefully bring it right out into the open.
A good stand-and-call setup looks like this:
- Shooting Position: Get comfortable behind good cover with a solid rest. I like fencelines, brush piles, or the base of a big tree.
- Electronic Caller Placement: Set your e-caller out 50 to 100 yards away from you and crosswind. This tactic pulls the coyote's focus off your position, making it less likely you'll get picked off.
- Scanning Discipline: Be relentless with your handheld thermal. I’m always sweeping, starting from downwind and working my way upwind, since that's where they're most likely to appear.
The Hunt: Mobile Spot and Stalk Approach
While sitting on a stand is effective in open country, the "spot and stalk" approach can be absolutely deadly in terrain with more cover and rolling hills. This is a far more active style of hunting. You’re on the move, using your optics to find coyotes from a distance and then plotting a careful stalk to get within rifle range.
This is where a quality handheld thermal scanner earns its keep. From a high vantage point, you can glass massive areas for heat signatures. The moment you spot a pair of eyes or a warm body, the game is afoot. You'll need to use every dip, ditch, and shadow to close the distance without getting busted.
Spot-and-stalk is definitely a high-risk, high-reward game. It requires a solid understanding of coyote behavior and top-notch fieldcraft. The trick is to move only when the coyote is looking away or distracted, using the terrain to mask your approach. It’s an incredibly thrilling way to hunt and lets you cover a lot more ground, picking off targets of opportunity as you find them.
Answering Your Top Questions About Night Vision Coyote Hunting
Once you've got the gear, figured out the laws, and practiced your tactics, the real-world questions start popping up. This is where the rubber meets the road. I've put together answers to the most common things I hear from hunters who are just getting into the night game. Think of it as a field guide for solving problems before they can ruin a good hunt.
What’s The Best Night To Go Coyote Hunting?
You can hunt coyotes any night you're legally able to, but some nights are definitely better than others. If I could custom-order the perfect conditions, it would be a cold, clear, and calm night with a partial moon.
The cold is your best friend when you're running thermal. It makes a coyote's body heat stand out like a beacon against the frigid ground, giving you a crisp, high-contrast image. A calm, still night is just as important; wind messes with your calls, making it tough for them to carry, and it makes coyotes incredibly wary.
A little bit of moonlight—say, a quarter to a half moon—is the sweet spot. It gives just enough ambient light to really make an image intensifier (I²) tube sing and helps you see your immediate surroundings without needing an illuminator all the time.
On the flip side, I'd stay home during heavy rain, thick fog, or howling winds. Not only is it miserable, but those conditions will cripple the performance of your optics and make calling almost useless.
A lot of guys think a full moon is the ultimate hunting light. The reality is, while it provides a ton of light for I² devices, it also makes you stick out like a sore thumb to a coyote with phenomenal eyesight. That partial moon often strikes the perfect balance between you being able to see and you being able to hide.
How Far Can I Realistically Shoot A Coyote At Night?
This is where ethics and personal capability have to be front and center. Sure, a top-shelf thermal scope might let you detect a heat signature at 1,000 yards or more, but let's be clear: detection distance is not ethical shooting distance.
Your maximum effective range at night is the absolute farthest you can be 100% certain of your target's identity and know you can make a clean, humane shot.
For the vast majority of hunters, even with good gear and a solid tripod for stability, that range is going to be somewhere between 100 and 300 yards. Pushing it much further than that introduces all sorts of variables. Judging distance in the dark is tricky, and placing a perfect shot on a relatively small, moving animal becomes a real challenge.
Always keep these things in mind:
- Optic Quality: A high-resolution thermal sensor or a crystal-clear Gen 3 image intensifier will give you better target identification at longer distances.
- Your Skill: At the end of the day, your own marksmanship is the biggest limiting factor. Be honest with yourself about what you can do.
- The Environment: Haze, humidity, and even dust in the air can significantly reduce how clearly you can see your target.
My advice? Start close. Get comfortable making shots at 100 yards, then work your way out as you build experience and confidence. It's always better to let a coyote walk than to risk a bad hit or, even worse, shoot at something that isn't a coyote.
Will Muzzle Flash Hurt My Night Vision?
Yes, without a doubt. The intense, brilliant flash from an unsuppressed rifle can absolutely cause damage to an image intensifier tube. It can be temporary, causing a "burn-in" on the screen, or in a worst-case scenario, permanent.
Modern I² units have a feature called autogating, which acts like a circuit breaker, rapidly cutting power to the tube to protect it. But even with that protection, it's a massive shock to the system.
This is probably the single best reason to use a suppressor for coyote hunting with night vision. A can does more than just quiet things down; it drastically reduces muzzle flash. This protects your expensive optic and preserves your own natural night vision, which is easily ruined by a bright flash.
If you can't run a suppressor, the next best thing is a quality flash hider specifically designed for flash mitigation. A good three- or four-prong flash hider won't be as effective as a suppressor, but it will make a very noticeable difference compared to a bare muzzle or a standard A2 "birdcage."
Quick Troubleshooting For Common Night Vision Issues
No matter how much you spend, gear can act up in the field. Little hiccups can be frustrating, but they don't have to end your hunt. Here's a quick cheat sheet for fixing the most common issues you'll run into.
Quick Troubleshooting For Common Night Vision Issues
| Issue | Probable Cause | Quick Fix |
|---|---|---|
| Grainy or "Sparkly" I² Image | Not enough ambient light for the tube to amplify. | This is what your IR illuminator is for. Turn it on to give the scene a boost of infrared light. |
| Thermal Image is Blurry | The objective lens focus isn't set for your target distance. | Reach up to the front of the scope and manually adjust the objective focus ring until the image is sharp. |
| "White Out" in Thermal Scope | The sensor needs to recalibrate to the scene's temperature range. | Perform a Non-Uniformity Correction (NUC). Just press the designated button on your scope to reset the sensor. |
| Can't See Through My Scope | The daytime lens cap is still on the objective lens. | Don't laugh, it happens to everyone. Pop off the protective cap that has the tiny pinhole in it. |
Learning how to diagnose and solve these little problems on the fly will save you a ton of frustration. It keeps you in the game and makes your nights out much more successful.
Ready to build your ultimate night hunting rig? At Superior Tactical LLC, we offer a curated selection of top-tier night vision and thermal optics from trusted brands. With over a decade of experience, we provide the straightforward advice and reliable gear you need to own the night. Explore our collection at https://superiortac.com and get mission-ready.