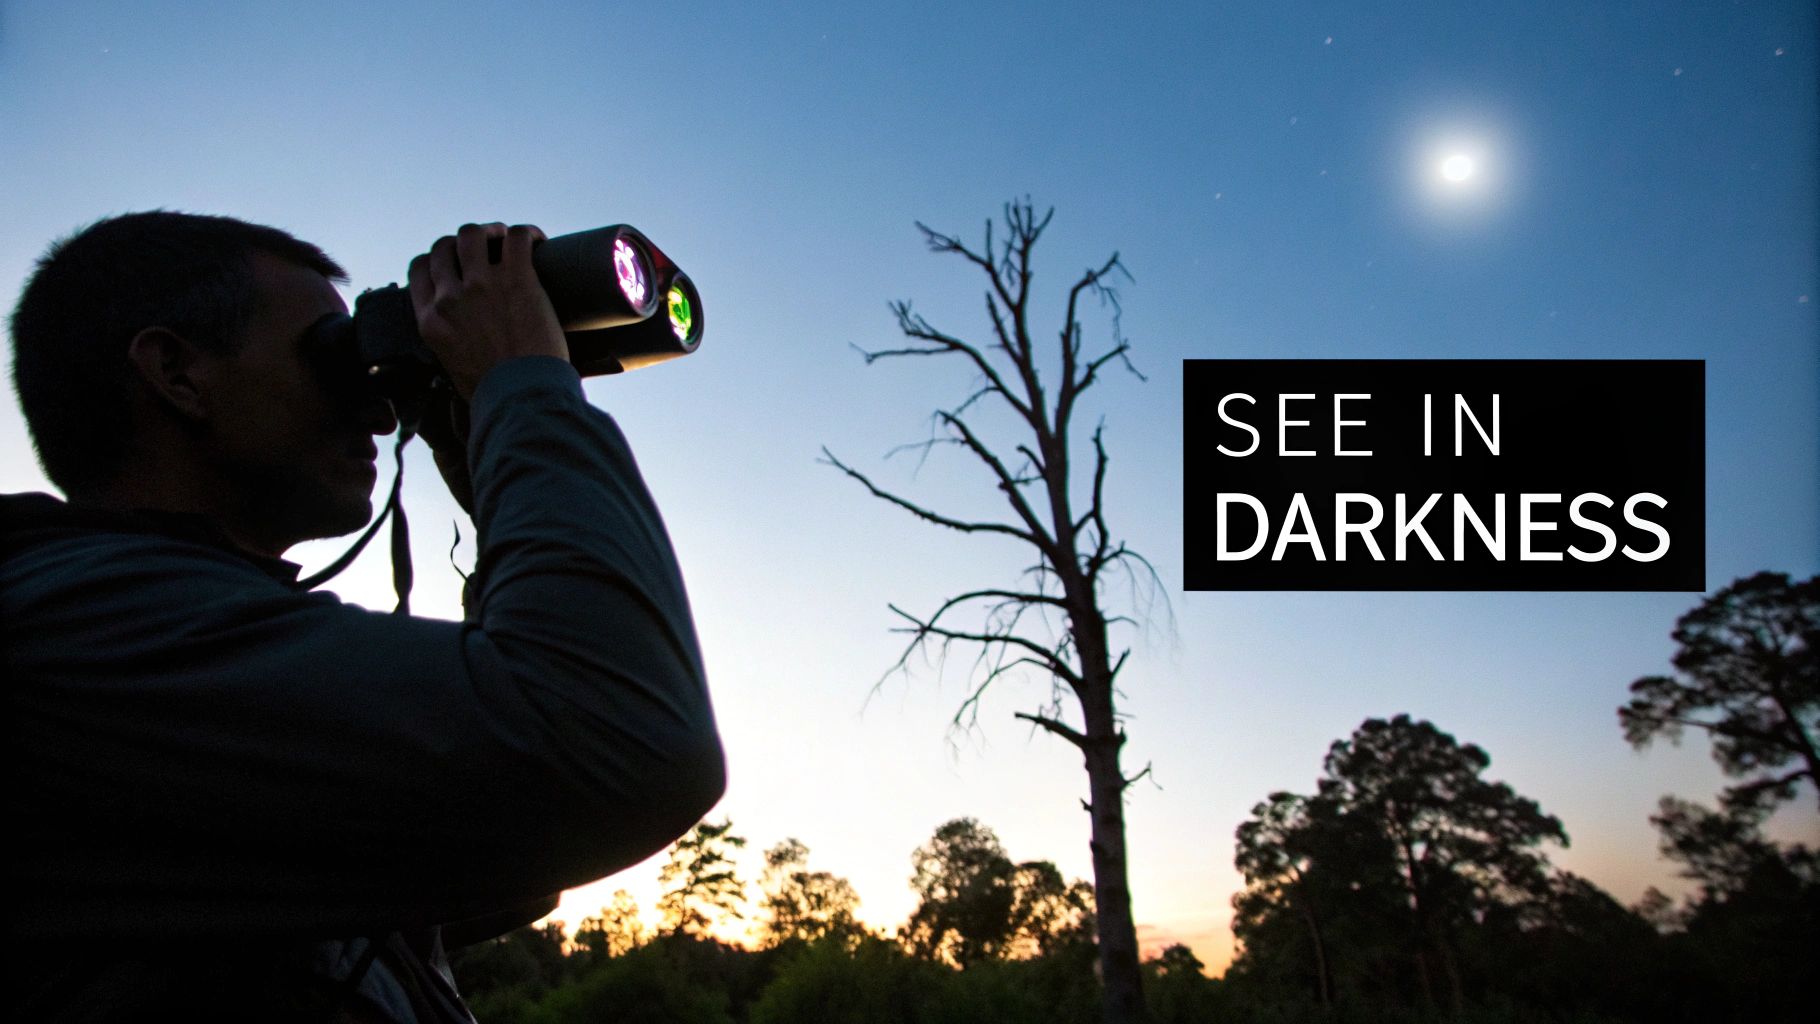
A Practical Guide to Binoculars for Night Vision
Ever stared out into the pitch-black and wished you could peel back the curtain of night? That’s exactly what night vision binoculars do. They’re not just fancy flashlights; they’re powerful tools that amplify what’s already there—either faint light or subtle heat—to let you see what is otherwise completely invisible.
This technology works in one of two ways: it either gathers the tiny, scattered bits of ambient light and cranks up the volume, or it detects the invisible heat signatures that everything around us gives off.
How Night Vision Binoculars Let You See in the Dark
At its heart, night vision isn’t magic. It doesn’t create an image out of thin air. Instead, it translates information our eyes simply can't pick up into a picture we can understand. Getting a handle on this difference is the key to picking the right gear for your needs, whether that’s finding your way through the backcountry or monitoring a perimeter.
The two main technologies are worlds apart but equally effective in their own domains. One works with the visible light spectrum, while the other reveals the hidden world of thermal energy.
Image Intensification: The Light Amplifier
The classic green-hued view you’ve seen in countless movies? That’s Image Intensification (I²). It’s the most common type of night vision, and the best way to think of it is as a massive volume knob for light.
I² devices work by capturing photons—the smallest particles of light—from sources like the moon or stars. These photons pass through an intensifier tube that multiplies them by the thousands, then projects that amplified image onto a phosphor screen. The result is a surprisingly detailed picture that’s perfect for positive identification.
The real strength of Image Intensification is its ability to use existing ambient light. A clear, moonlit night will give you a stunningly sharp image. But in a place with zero light, like a deep cave, it won't see a thing without an assist from an infrared (IR) illuminator.
Thermal Imaging: Seeing the World of Heat
The other side of the coin is Thermal Imaging, and it plays by a completely different set of rules. It couldn't care less about light. Instead, it sees infrared radiation—or what we feel as heat. Every single object, living or inanimate, gives off a thermal signature.
A thermal sensor reads these tiny temperature differences and builds a visual map from them. This "heat map" makes anything warm, like an animal or a person, glow against the cooler background. It’s an incredible advantage. For a deeper dive into the science, check out our guide on how night vision works.
This is what makes thermal unbeatable for pure detection. It cuts right through camouflage, smoke, and fog where an I² device would be blind. It paints a picture based entirely on heat, giving you a serious tactical edge when you just need to know if something is out there.
Night Vision Technologies at a Glance
To make it simple, here's a quick breakdown of how these two core technologies stack up against each other.
| Technology Type | How It Works | Best Use Case | Visual Output |
|---|---|---|---|
| Image Intensification (I²) | Amplifies faint ambient light (moon, stars) thousands of times to create a visible image. | Identification and navigation. Provides detailed, recognizable images for knowing exactly what you are looking at. | Typically a monochromatic green or white phosphor image that shows texture and detail. |
| Thermal Imaging | Detects differences in infrared radiation (heat) and converts them into a visible heat map. | Detection. Excels at making living things and running engines "pop" against their surroundings, even in total darkness. | A high-contrast image showing heat signatures, often with color palettes like "white-hot" or "black-hot." |
Ultimately, choosing between I² and thermal comes down to your primary mission: do you need to identify what you're seeing, or just detect its presence?
Image Intensification vs. Thermal Imaging
When you start shopping for night vision binoculars, you’ll run into a major fork in the road right away: do you need to see by amplifying light, or do you need to see heat? This is the core difference between the two dominant technologies: Image Intensification (I²) and Thermal Imaging. Getting this choice right isn't just a technical detail—it's everything. It determines whether your gear is a perfect fit for your mission or a frustrating limitation.
Think of Image Intensification as taking the world and turning up its brightness dial. It captures the tiniest bits of ambient light—from the moon, stars, or even distant city glow—and multiplies that energy thousands of time. This process creates that iconic green or white phosphor image, packed with enough detail to let you know exactly what you’re looking at.
This is why I² technology is the undisputed king of navigation and positive identification. It lets you see textures, read lettering on a sign, and recognize a face. If you need to truly understand your surroundings, not just see that something moved, I² is the way to go.
The Generations of Image Intensification
But not all I² devices are built the same. The technology has evolved in massive leaps, with each new "Generation" bringing a huge boost in performance, clarity, and overall toughness.
-
Generation 1 (Gen 1): This is where most people start. Gen 1 units are the most affordable, but they come with trade-offs. They offer the least light amplification, often have some "fish-eye" distortion at the edges, and their tubes don't last as long. They’re fine for casual backyard observation but aren't built for serious work.
-
Generation 2 (Gen 2): Here's where things get serious. Gen 2 represents a major step up in every category—clearer, brighter, and far more reliable. It's a fantastic middle ground for hunters and security personnel who need dependable performance without shelling out for top-of-the-line gear.
-
Generation 3 (Gen 3): This is the gold standard. Gen 3 is what military, law enforcement, and dedicated civilian users rely on. It delivers the best light amplification, the sharpest resolution, and an incredible lifespan, often pushing past 10,000 hours of use. The performance in what seems like total darkness is simply on another level, making Gen 3 a must-have for any critical mission.
That generational jump is no small thing. A Gen 1 device might help you spot something on a clear, moonlit night. A Gen 3 unit, on the other hand, will give you a crisp, usable image in a dark forest with heavy cloud cover.
Thermal Imaging: Seeing the Invisible
While I² is all about light, Thermal Imaging plays a completely different game—it sees heat. It doesn’t need a single photon of light to work. Instead, its sophisticated sensors pick up on tiny differences in infrared radiation (heat) that every single object gives off.
The device then translates that thermal data into a picture, creating a "heat map" of your surroundings. Warmer objects, like people, animals, or a car that was just running, glow like a beacon against the cooler background. This is what makes thermal the ultimate detection tool.
Thermal imaging creates a high-contrast image that makes living targets 'pop' from their background, regardless of lighting conditions. It can see through smoke, fog, and camouflage, giving it an incredible advantage for spotting threats or game that I² would miss entirely.
Because thermal sees heat, not light, it works just as well at high noon as it does in a pitch-black cave. The trade-off? You get very little surface detail. You’ll know something is out there, but you won't know who or what it is without getting much closer or using another device.
For a more detailed breakdown, you can explore our comprehensive comparison of thermal imaging vs. traditional night vision, which dives deeper into the specific advantages of each technology.
Detection vs. Identification: The Core Difference
So, how do you choose? It really comes down to one question: is your main goal to detect a presence or to identify a specific target?
| Factor | Image Intensification (I²) | Thermal Imaging |
|---|---|---|
| Primary Use | Identification & Navigation: Seeing details to know what something is. | Detection: Seeing heat signatures to know something is there. |
| How it Works | Amplifies ambient light. | Detects temperature differences. |
| Strengths | High detail, allows for recognition of faces and objects, great for movement. | Works in zero light, cuts through smoke/fog, excellent at spotting live targets. |
| Weaknesses | Requires some ambient light to function; blinded by smoke or fog. | Low detail, difficult to identify specifics, struggles with uniform temperatures. |
In the real world, the pros don't always choose one or the other—they use both. A common tactic is to scan a field with thermal binoculars to spot a heat signature, then flip down a helmet-mounted I² monocular to positively identify the target and navigate the terrain. Understanding this fundamental difference is the key to investing in the right tool for your job.
Decoding the Specs That Actually Matter
Diving into the world of night vision can feel like learning a new language. You’re hit with a barrage of specs like resolution, SNR, and FOV. It's easy to get lost in the numbers, but you don't need an engineering degree to figure out what's important.
Think of it like buying a truck. You don't need to be a master mechanic, but you know to check the horsepower and towing capacity. It's the same here. Once you grasp a few key concepts, you can look at any spec sheet and know exactly what kind of real-world performance you can expect.
Magnification and Field of View
When it comes to night vision, the instinct is often to go for more magnification. But for most serious applications, that’s actually the wrong move. The vast majority of professional-grade, helmet-mounted systems stick to 1x magnification. Why? Because a 1x view is a true-to-life perspective.
This natural view is absolutely critical for moving around in the dark. It keeps your brain and your feet in sync, so you can navigate rough ground or clear a building without the disorienting, "zoomed-in" sensation that makes you trip over your own boots. It’s all about maintaining situational awareness, not just spotting things far away.
Working hand-in-hand with magnification is your Field of View (FOV). Put simply, this is how much you can see from left to right at a given distance, and it's usually measured in degrees.
Think of a wide FOV as looking through a big picture window versus a tiny porthole. You get so much more peripheral vision, which is a game-changer for catching movement on the edges of your vision and just generally knowing what's going on around you.
A common FOV for a quality set of night vision binoculars is around 40 degrees. This gives you a wide, immersive view that cuts down on that "tunnel vision" feeling and keeps you connected to your surroundings.
Resolution and SNR: The Pillars of Clarity
Alright, let's get to the heart of image quality. Two numbers matter more than almost anything else for a crisp, clear picture: Resolution and Signal-to-Noise Ratio (SNR). These two specs work together to turn a murky shape in the shadows into something you can positively identify.
Resolution, measured in line pairs per millimeter (lp/mm), is all about detail. It’s the device's raw ability to distinguish between two objects that are very close together. A higher lp/mm means you can make out finer details from farther away. For example, a unit with 64 lp/mm or more will give you the confidence to tell the difference between a tree branch and a rifle barrel.
But resolution is only half the story. Signal-to-Noise Ratio (SNR) determines how clean that detailed image is, especially when light is scarce.
- Signal is the good stuff—the useful light information that creates the image.
- Noise is the bad stuff—that grainy, static-like "scintillation" or "snow" that can clutter up the view.
A high SNR means the tube can grab every last photon of available light and turn it into a usable picture, even when you can't see a thing with your own eyes. It's arguably the single most important factor for performance in near-total darkness.
This flowchart shows the two main ways night vision devices let us see in the dark—either by amplifying available light or by sensing heat signatures.
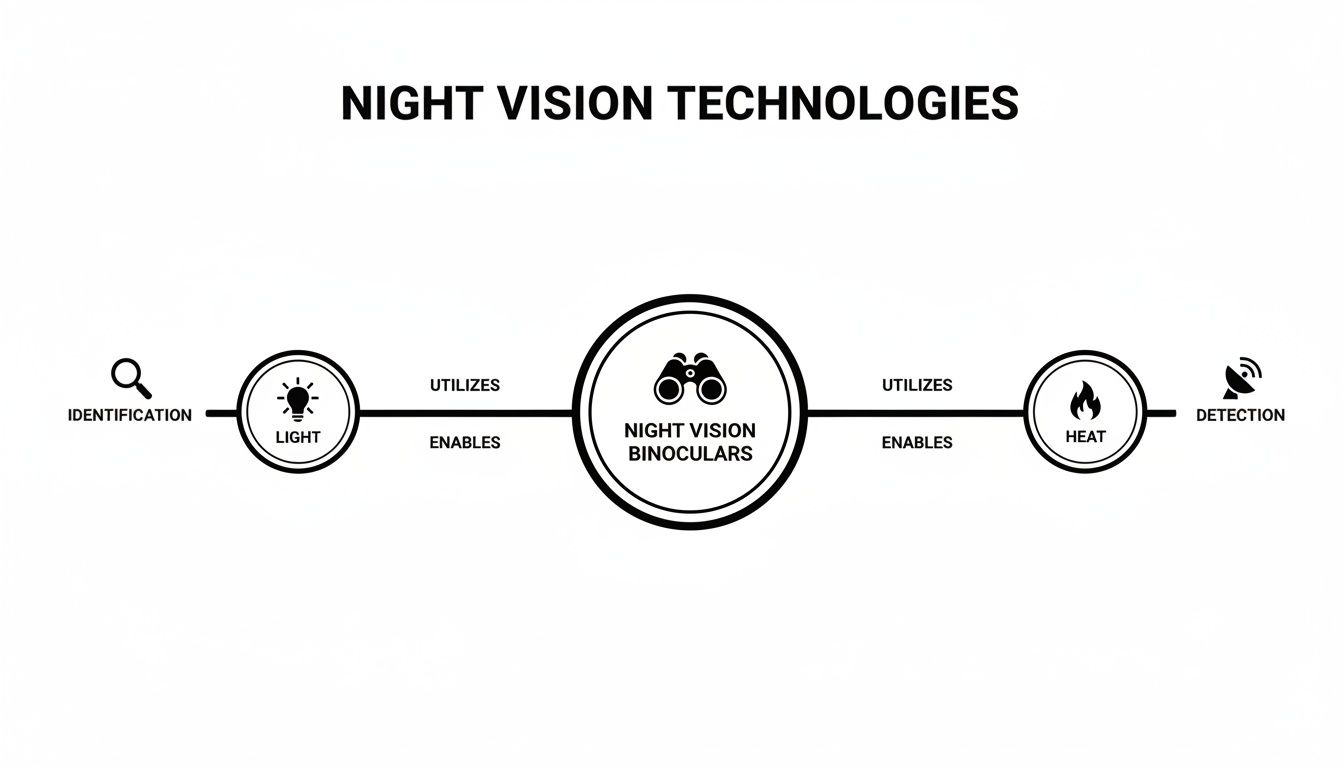
As you can see, image intensification (using light) is geared toward identification, while thermal imaging (using heat) is all about detection. It's a fundamental choice you have to make.
The Power of an IR Illuminator
So what do you do when there's no ambient light at all? I'm talking about a sealed basement or a moonless, overcast night deep in the woods. That's when an Infrared (IR) Illuminator becomes your best friend.
Think of it as an invisible flashlight. It throws out a beam of infrared light that your eyes can't see, but your night vision device sees it perfectly. You are literally painting your target area with light that only you can perceive, creating your own illumination where none exists.
The demand for this kind of capability is growing fast. The market for night vision goggles hit USD 2.7 billion in 2024 and is expected to climb to USD 3.5 billion by 2030. Many hunters and outdoorsmen are choosing binoculars because they are often lightweight (under 2 pounds) and sip power, making them perfect for all-night observation of game at ranges from 100-400 feet. You can dive deeper into the numbers behind these night vision trends at Stratview Research.
Once you have a solid handle on these key specs—magnification, FOV, resolution, SNR, and the role of an IR illuminator—you're ready to cut through the marketing hype and judge a pair of night vision binoculars by what really counts in the field.
Choosing the Right Binoculars for Your Mission
Let's get one thing straight: there's no single "best" pair of night vision binoculars. Anyone who tells you otherwise is selling something. The right choice is never a one-size-fits-all solution; it's about matching the tool to the job. The gear a SWAT operator needs for a high-risk warrant service is worlds apart from what a hunter needs to scan a sprawling cornfield for hogs.
Before you even think about specs, you have to define your mission. Are you clearing rooms and navigating obstacles on foot, or are you glassing a distant treeline from a fixed position? Answering that question is the first step in buying a true force multiplier, not just an expensive paperweight.
For Law Enforcement and Military Operations
When lives are on the line, there’s no room for compromise. For professional operators, Gen 3 image intensification isn't a preference; it's the standard. The clarity and performance of a good Gen 3 tube give you the detail needed for positive threat identification when milliseconds count.
Being able to operate hands-free is just as critical. That means you're looking at dual-tube binocular systems light enough to ride on a helmet without causing fatigue.
Here’s what these operators demand:
- Stereoscopic Vision: Dual tubes give you genuine depth perception. This is absolutely essential for judging distances, navigating cluttered environments, and driving a vehicle under NVGs.
- Rugged Reliability: This gear gets banged around. It needs to be tough enough to handle drops, bumps, and whatever weather you throw at it.
- Seamless Integration: The binos must work perfectly with other kit, like IR aiming lasers and helmet mounts, for a stable, hands-free setup.
The shift toward binocular systems in professional circles is undeniable, driven by the huge tactical advantage of having true depth perception. This isn't just talk; it's backed by serious money. The global night vision market is expected to jump from USD 9.37 billion in 2025 to USD 13.75 billion by 2030. Highlighting this, recent U.S. military contracts, including a USD 139 million order for advanced binocular systems, prove just how much value is placed on seeing in stereo for effective targeting in total darkness. You can dig into the numbers in this night vision industry report from Mordor Intelligence.
For Hunting and Outdoor Exploration
Hunters and outdoorsmen play a different game. For them, it’s all about detection and identification, two very different tasks that often require two different technologies. The modern—and most effective—approach is to use both thermal and image intensification.
Thermal is the undisputed champion of detection. A thermal scanner can cut through brush, fog, and darkness to instantly spot the heat signature of an animal. It’s the perfect tool for answering the question, "Is anything out there?"
The smartest play for a serious hunter is a dual-system strategy. Use a thermal monocular to scan and detect game from a distance. Once you have a heat signature, switch to an I² device—like a helmet-mounted PVS-14 or a dedicated night vision scope—to get positive identification before you even think about pulling the trigger.
This method isn't just effective; it's ethical and often legally required. It ensures you know exactly what you’re targeting. For this user, balancing weight, battery life, and detection range is key to staying effective through long nights in the field.
For Security and Surveillance Professionals
If your job is to watch over a large property, a critical facility, or a long fence line, your number one priority is long-range detection. In this world, thermal imaging is king. A quality thermal binocular can spot a person-sized heat signature from hundreds, even thousands, of meters away.
Unlike image intensification, thermal sees right through camouflage and isn't bothered by smoke or light fog, making it an incredibly dependable surveillance tool. A security professional can post up in an overwatch position and maintain complete situational awareness over a massive area.
Key features for surveillance work include:
- Long Detection Range: The goal is to see them long before they see you.
- Recording Capability: Being able to document activity is often critical for evidence and after-action reviews.
- Tripod Mountable: For long stakeouts, mounting the binos on a tripod is a must. It keeps the image steady and saves you from fatigue.
By matching the specific strengths of the technology to the unique demands of your mission, you ensure your investment pays off when it matters most.
Essential Accessories and Mounting Solutions
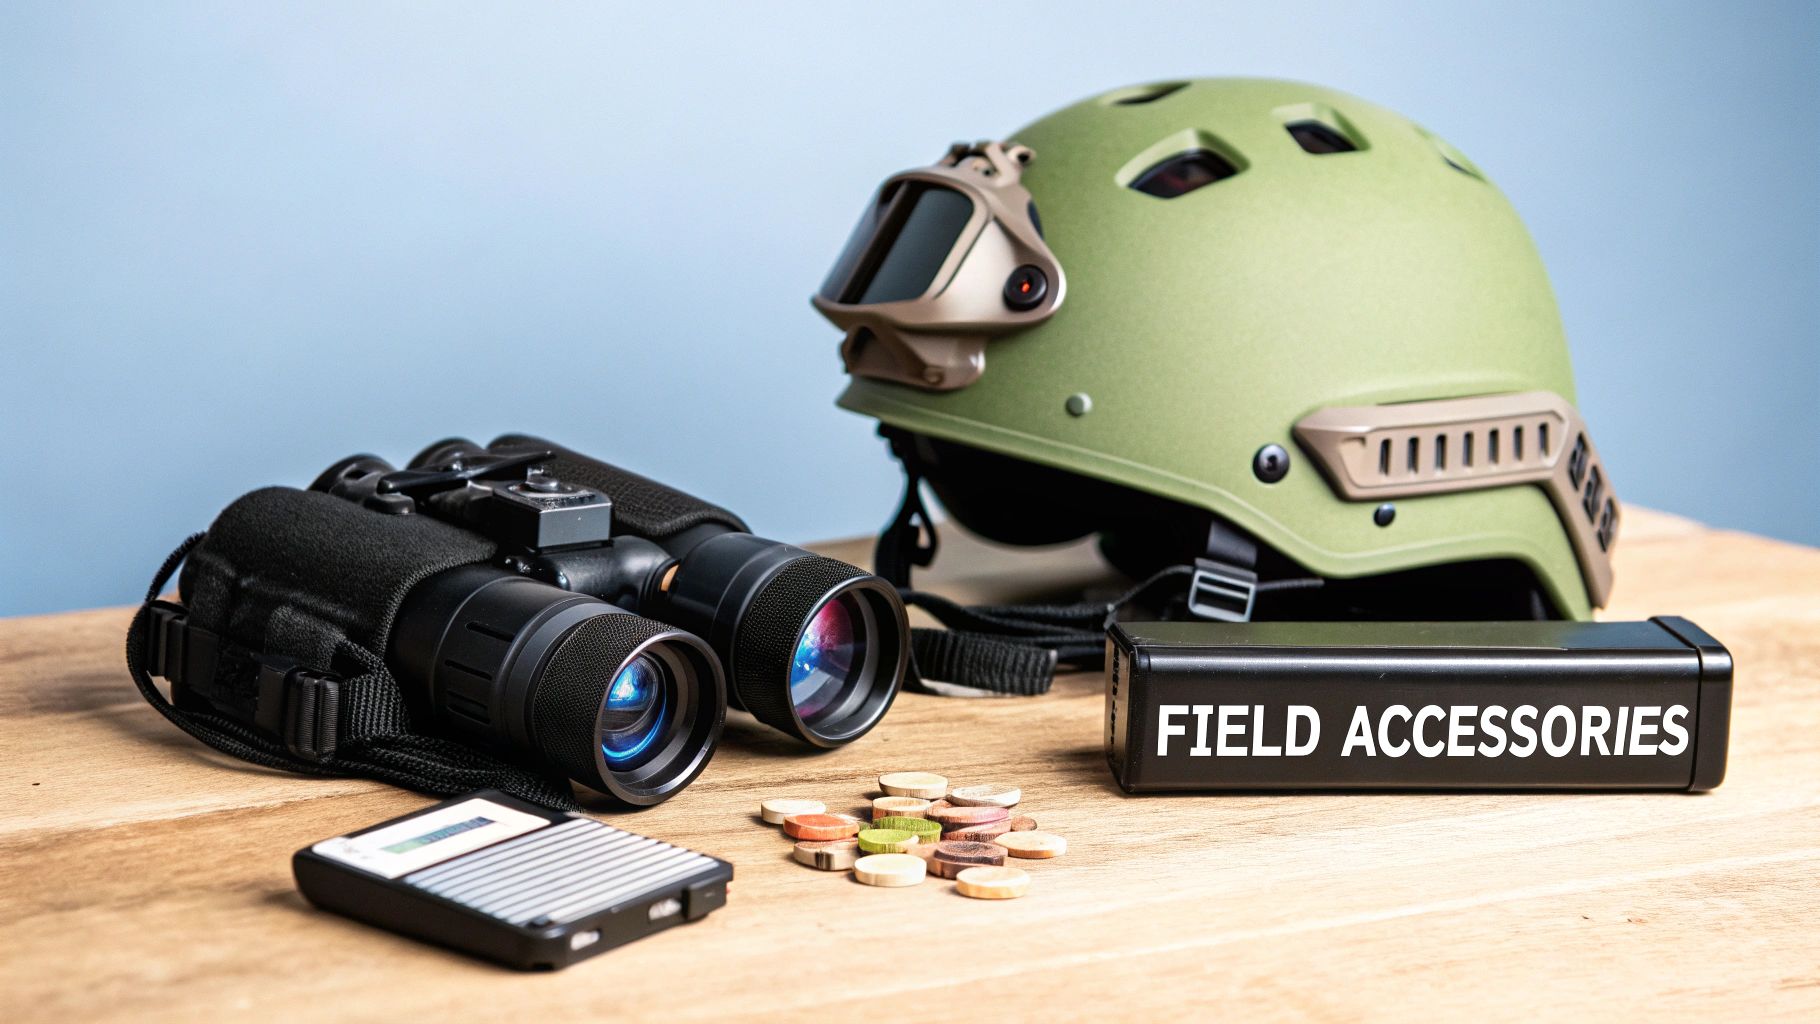
Think of your high-end night vision binoculars as the heart of your low-light setup. But to make it a truly effective, field-ready system, you need the right accessories. This gear isn't just a collection of nice extras; it's what lets you get the most performance, durability, and tactical advantage out of your investment.
Even the most advanced optics can't perform at their peak without the right mounts, power supplies, and protective equipment. Building out your kit correctly means creating a system where every piece works in concert, letting you stay focused on your mission, not your gear.
Hands-Free Operation with Helmet Mounts
If you're doing anything more than standing still—whether that's hiking a trail or clearing a building—you need your hands free. That’s why a solid helmet and mounting system is arguably the single most important accessory you'll buy for your night vision binoculars. A stable mount keeps your optics exactly where you need them, ready in an instant.
The core of this setup is the shroud (the part bolted to the front of your helmet) and the mount arm that connects your binos to it. This duo lets you flip the device up and out of your line of sight, then snap it back down into position when you need it. For a deep dive into the top contenders, check out our guide on choosing the best night vision mount.
A proper helmet setup does more than just hold your gear. It correctly balances the weight with a counterweight system, drastically reducing neck strain and fatigue during long periods of use.
Augmenting Your Vision and Protecting Your Gear
Even a top-tier Gen 3 device can't make light where there is none. In those pitch-black situations, you’ll need some help. You also need to make sure your sensitive (and expensive) optics are shielded from the elements.
- IR Illuminators and Lasers: An IR illuminator is like an invisible flashlight. It throws a beam of infrared light that is completely unseen by the naked eye but brightly illuminates the scene through your NVGs. Similarly, an IR laser gives you a precise aiming point that only you can see.
- Sacrificial Lenses and Lens Caps: These are cheap insurance. They’re simple, clear shields that pop on over your main objective lenses to protect them from scratches, dirt, and impacts. Replacing a cracked sacrificial lens costs a few bucks; replacing a gouged objective lens is a whole different story.
Powering Through the Night
Your multi-thousand-dollar optics are just dead weight without power. Having a smart battery strategy is absolutely critical to make sure your night vision binoculars run as long as you do. Most units use standard CR123A batteries, but for long nights, you'll want a better plan.
This is where external battery packs come in. They often mount to the back of the helmet, conveniently doubling as a counterweight. These packs can massively extend your runtime, so you aren't stuck swapping tiny batteries in the dark when it matters most.
Keeping Your Gear in the Fight: Maintenance, Warranty, and Legal Know-How
A good set of night-vision binoculars is a serious investment. Like any mission-critical tool, it needs proper care, and you need to understand the rules of the road that come with owning it. Protecting your gear is about more than just being careful in the field—it’s about routine maintenance, knowing your warranty, and being smart about the legal side of things.
Long-term care is simple but absolutely essential. When you’re not using the device, keep the lens caps on. This protects the sensitive image intensifier tubes from bright light, which can cause permanent burn-in damage. After a mission or a hunt, wipe down the housing with a soft, damp cloth and use a proper lens pen or microfiber cloth on the optics to prevent scratches.
For storage, find a cool, dry place. If you're putting the binoculars away for a while, pull the batteries out. That little step prevents the nightmare of battery corrosion ruining your expensive electronics.
Understanding Your Warranty and Support
A solid warranty is your best friend. For example, here at Superior Tactical, we offer a 10-year warranty on our Gen 3 systems because we know they're built to last. Before you buy any piece of high-end gear, get crystal clear on the warranty—what it covers, for how long, and what the repair process looks like.
Peace of mind comes from knowing that if something goes wrong, you’ve got an expert team ready to help. Having access to services like free diagnostics and in-house repairs means your equipment can be brought back to 100% and your investment is protected for years to come.
The Rules of the Game: Legal and Regulatory Guidelines
Owning professional-grade night vision means you’re also a responsible operator. The biggest rule you need to know is ITAR (International Traffic in Arms Regulations). This is a set of U.S. federal laws that controls how defense-related equipment, including most high-performance night vision, can be exported.
ITAR Warning: You cannot take Gen 3 night vision binoculars outside of the United States without a specific license and official approval from the U.S. State Department. This includes everything from personal travel and shipping to selling the device to a non-U.S. citizen.
There's a reason these rules are in place. The demand for this tech is skyrocketing, with the global night vision market valued at USD 8.01 billion in 2024 and projected to reach USD 12.91 billion by 2030. This isn't just hobbyist gear; it's a critical military and law enforcement tool, highlighted by massive contracts like a recent USD 139 million order for advanced ENVG-B systems for the U.S. Army.
You can learn more about the growing night vision market at MarketsandMarkets. Understanding the regulations is key to using your gear effectively and legally, wherever your mission takes you.
Your Night Vision Questions Answered
Stepping into the world of night vision can feel a bit like learning a new language. You've got questions, and getting solid answers is the only way to make sure you're getting the right gear for the job.
Let's cut through the jargon and tackle the questions we hear most often. This is the stuff that really matters when you're out in the field.
What Is the Real Difference Between Gen 2 and Gen 3?
The leap from Gen 2 to Gen 3 is a big one, and it really boils down to two things: how well you can see and how long the device will last.
Gen 3 tubes use a different kind of photocathode made of gallium arsenide. In simple terms, this material is way more efficient at turning a few specks of light into a crisp, bright image. The difference is most obvious on a moonless night, where a Gen 3 unit will show you a clean picture while a Gen 2 might struggle with more electronic noise, or "static."
On top of the better performance, Gen 3 tubes are built to last, routinely running for over 10,000 hours. That’s a huge jump from the typical 2,500-5,000 hour lifespan of a Gen 2 tube. For anyone who depends on their gear, Gen 3 is the only real choice for that massive boost in capability and long-term reliability.
Can I Use Night Vision Binoculars During the Day?
With standard Image Intensifier (I²) night vision, the answer is an emphatic NO. Think of the tube inside as being extremely sensitive—like a vampire seeing the sun. Pointing it at a bright light source, especially daylight, can permanently burn the tube and land you with a very expensive repair bill. Always, always keep the objective lens caps on when you aren't actively using them in the dark.
Thermal imaging is a completely different ballgame. Since thermals see heat signatures, not light, you can use them 24/7. The sun won't hurt them one bit.
Why Choose Binoculars Instead of a Monocular?
It all comes down to one critical advantage: true stereoscopic vision. Having a tube for each eye gives you genuine depth perception, which is something you just can't fake. That ability to judge distance is crucial whether you're walking over rough ground, driving a vehicle, or trying to gauge the range to a target.
Sure, a monocular is usually lighter and costs less. But the incredible situational awareness and reduced eye strain you get from a binocular setup is why most pros and serious enthusiasts go that route. Being able to naturally see how far away things are is an absolute game-changer for staying safe and effective after sundown.
Ready to see what you've been missing? At Superior Tactical LLC, we provide the mission-ready gear and expert guidance you need to own the night. Explore our curated selection of high-performance night vision and thermal optics today.