Ballistic Helmet Accessories Your Ultimate Gear Guide
Let’s get one thing straight: your ballistic helmet isn’t just a piece of armor. It’s the command center for your entire tactical setup. The right accessories can take a standard-issue brain bucket and turn it into a high-performance system that amplifies your vision, communication, and overall awareness on the ground.
More Than Just Armor: Your Helmet as a Platform
Think of a modern ballistic helmet as a modular platform, ready to be customized for whatever the mission demands. We’re moving past the simple idea of just stopping threats and looking at the helmet as the very foundation of your operational capability. It’s about how you select and integrate the right components to build a system that makes you better, faster, and more effective.
This isn’t about just bolting on more gear. It’s about creating a cohesive, balanced system where every piece has a purpose and works together. The key areas we focus on are:
- Seeing in the Dark: Mounting night vision and thermal optics, or adding protective visors.
- Staying Connected: Integrating headsets for crystal-clear comms and crucial hearing protection.
- Owning Your Environment: Adding strobes for identification, lights for navigation, and cameras to record vital intelligence.
The demand for this kind of integrated gear is exploding. The global bulletproof helmet market, which includes all these accessories, was valued at USD 1.12 billion in 2024. It’s expected to hit nearly USD 1.73 billion by 2033. That tells you just how critical these advanced, adaptable systems have become. You can dig deeper into the bulletproof helmet market growth data on the IMARC Group’s website.
Here’s a good way to think about it: A bare helmet is like the chassis of a race car. It’s the essential, protective frame. But it’s the engine, suspension, and electronics—the accessories—that actually win the race.
Understanding Your Helmet’s Mounting System
Before you can even think about tricking out your ballistic helmet, you need to get familiar with its foundation: the mounting system. This is the hardware that lets you attach all the mission-critical gear you rely on. Think of it like the motherboard in a computer—it determines what components you can plug in and how they all work together.
Getting this right from the start is non-negotiable. Trying to force an accessory onto the wrong mount is a recipe for disaster. It won’t be secure, and you risk damaging expensive equipment or, worse, having it fail when you need it most. Knowing your helmet’s mounting system ensures you buy gear that fits perfectly the first time.
The infographic below gives you a great visual breakdown of how different accessories connect to the core helmet platform.
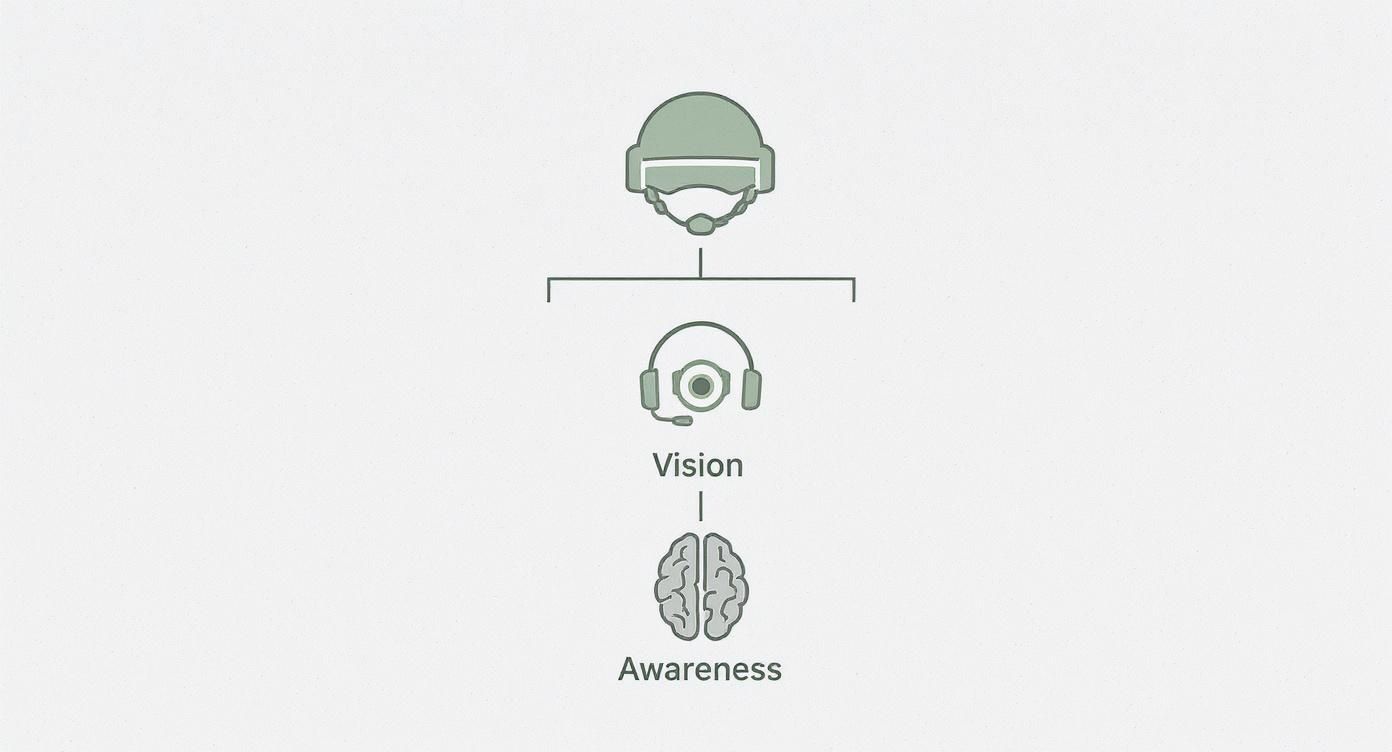
As you can see, everything branches out from the helmet itself, with vision and communication systems often being the first and most important layers you’ll add.
The Front Shroud for Vision Systems
Look at the front and center of any modern tactical helmet, and you’ll find the front shroud. This is prime real estate, reserved almost exclusively for mounting your most vital optic: Night Vision Goggles (NVGs) or thermal devices. Its entire purpose is to provide an unshakably stable platform for your vision-enhancing gear.
Thankfully, most helmets today come with a standardized shroud, often referred to as a “universal” or “Wilcox-style” design. This allows them to accept a huge variety of NVG mounts, which are the articulating arms that connect your optic to the shroud. If you want to dive deeper into how these work, our in-depth guide comparing the Wilcox G24 vs Argus A4 is a great place to start.
Side Rails for Modular Accessories
The real magic of customization happens on the sides. The rail systems running along the helmet’s edges are the workhorses that let you build out your ideal setup. This is where you’ll attach the bulk of your ballistic helmet accessories, from comms to illumination. The two systems you’ll run into most often are ARC and M-LOK.
- ARC (Accessory Rail Connector) Rails: This is the de facto industry standard. ARC rails use a signature dovetail shape that allows for quick, secure, and repeatable attachment of a massive range of gear—think headsets, strobes, cameras, and even face shields.
- M-LOK Rails: A design ported over from the firearms world, M-LOK uses a system of slots rather than a continuous rail. It’s a more streamlined, lower-profile option that can reduce weight and potential snag points by letting you attach accessories directly to the helmet.
Different missions call for different loadouts, and the rail system is what makes that modularity possible. The table below breaks down the most common mounting systems and what they’re best used for.
Helmet Rail System Compatibility Overview
| Mounting System | Primary Use | Common Accessories | Key Advantage |
|---|---|---|---|
| ARC Rails | General-purpose modularity | Headsets, Lights, Cameras, Strobes | Speed and Versatility. The vast ecosystem and quick-detach capability make it the industry standard. |
| M-LOK Rails | Low-profile, direct attachment | Lights, Small Cameras, Cable Management | Streamlined Profile. Reduces snag hazards and weight by eliminating the need for Picatinny adapters. |
| Team Wendy Rails | Brand-specific modularity | Proprietary adapters, Headsets, Visors | Integrated System. Designed to work seamlessly with Team Wendy’s own line of accessories. |
| Front Shroud | Night Vision/Thermal mounting | NVG Mounts, Thermal Optics | Stability. Provides a rock-solid, dedicated interface for critical optical equipment. |
Ultimately, your helmet’s specific mounting hardware is the gatekeeper for all your future accessory choices. Figuring out exactly what you have—ARC, M-LOK, or something else—is the essential first move before you spend a dime on any new gear.
Essential Gear For Enhanced Vision
When darkness falls, your ability to operate effectively comes down to one critical advantage: seeing what others can’t. This is where your helmet stops being just a piece of armor and becomes a sophisticated platform for advanced optics. Setting it up correctly is about more than just slapping on a pair of Night Vision Goggles (NVGs); it’s about creating a balanced, integrated system that boosts your visual capabilities without sacrificing comfort or awareness.

The push to integrate this kind of technology is what’s driving modern helmet design forward. In fact, the market for advanced combat helmets, valued at roughly USD 2.5 billion in 2024, is expected to climb steadily. This growth is almost entirely fueled by the demand for helmets that can easily support night vision, cameras, and protective visors. You can dig into the numbers yourself in this growth of the military helmet market at Fortune Business Insights report.
This trend makes it clear: we’ve moved past simple protection. The goal now is a fully integrated system where the operator is the central component.
The Foundation: NVGs and Mounts
The heart of any low-light helmet setup is, of course, the night vision device. It doesn’t matter if you’re running a single PVS-14 monocular or a high-end dual-tube system; its connection to your helmet has to be absolutely solid. That’s the job of the NVG mount—the articulating arm that links the shroud on your helmet to the optic itself. A good mount gives you precise alignment, locks up tight with no wobble, and lets you flip the NVGs up and out of the way in an instant.
If you’re still figuring out what kind of optics you need, it pays to understand the differences in technology. Our guide on digital binoculars and night vision is a great place to start exploring the options.
Think of your NVG as the engine and the mount as the transmission. A high-performance engine is useless if the transmission can’t reliably transfer its power to the wheels. Likewise, a top-tier night vision device is ineffective without a dependable mount keeping it stable and properly positioned.
Achieving Perfect Balance With Counterweights
Try hanging a pound or more of gear off the front of your helmet and you’ll immediately run into a physics problem. All that weight creates leverage that constantly pulls the helmet forward, leading to serious neck strain and fatigue, especially over long missions. This is where counterweights become one of the most critical helmet accessories you can own.
These systems attach to the back of the helmet, usually with Velcro or by sliding onto the rails, to offset the weight of your NVGs. They come in a few common forms:
- Lead Weight Pouches: Simple, effective pouches filled with small lead weights. You can add or remove them to dial in the perfect balance for your specific setup.
- Battery Packs: A smart two-for-one solution. These pouches are designed to hold the spare batteries for your NVGs or other electronics, serving as a functional counterweight at the same time.
- Integrated Systems: Some high-end helmets have dedicated counterweight solutions designed to blend right in with the helmet’s shell.
Getting the balance right is an absolute game-changer for comfort and endurance. The goal is for the helmet to feel completely neutral on your head, with no pull forward or backward.
Identification and Protection: Strobes and Visors
Beyond simply seeing in the dark, your helmet setup needs to help others see you—but only when you want them to. IFF (Identify Friend or Foe) strobes are small beacons that emit a powerful pulse of infrared light, which is invisible to the naked eye but flares brightly through night vision. A quick flash from a strobe is all it takes to confirm your position to friendly forces and prevent devastating friendly fire incidents.
For protecting your face, ballistic visors and mandibles provide an essential layer of coverage. While not needed for every situation, they are invaluable when facing threats from shrapnel, flying debris, or in close-quarters environments. These accessories hook directly onto the helmet’s rail system, creating a shield that protects your face without interfering with the helmet’s primary job of protecting your head.
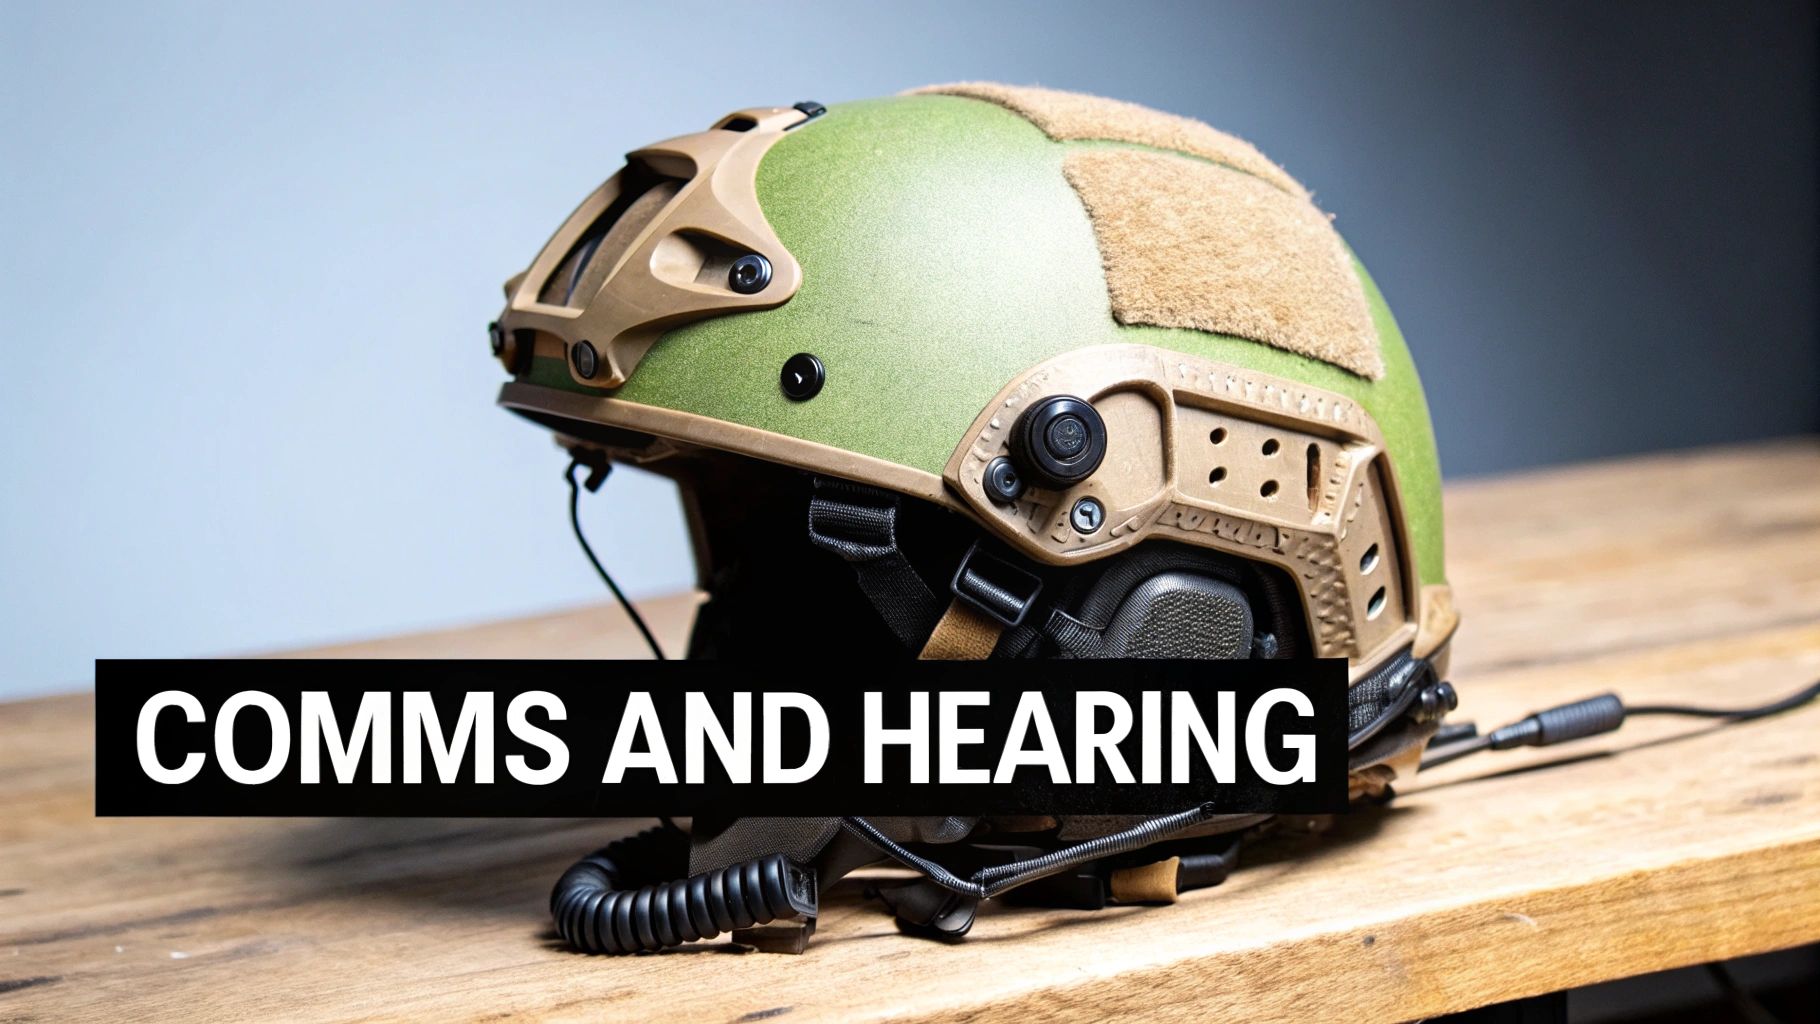
Integrating Communications and Audio Protection
In the field, communication is everything. A missed callout or the inability to hear a subtle environmental cue can be the difference between success and failure. That’s why your helmet’s audio system isn’t just an add-on; it’s one of the most critical ballistic helmet accessories you can own. Modern systems are engineered to perform two essential jobs at once: safeguarding your hearing from the concussive blast of gunfire while amplifying quiet, ambient sounds to keep you tuned into your surroundings.
This dual-role capability is exactly why the demand for advanced protective gear is soaring. The global market for ballistic protective equipment, including these integrated helmet systems, was estimated at a massive USD 4.99 billion in 2024. This growth is all about giving operators gear that boosts both safety and performance, with North America alone accounting for roughly 38.6% of that market. You can dig deeper into the ballistic protective equipment market trends on grandviewresearch.com.
Choosing Your Headset Integration Method
When it’s time to add a headset to your lid, you’ve basically got two paths to take. The right one for you really boils down to your helmet’s cut, your mission profile, and personal preference.
1. Rail-Mounted Headsets: This is the most integrated approach. These headsets use special adapters to clip directly onto your helmet’s ARC or M-LOK rails, making the headset a physical part of the helmet system. The big win here is stability. The headset stays put, pressure is distributed evenly, and there’s no shifting around.
2. Internal Systems (Under-the-Helmet): The classic method involves simply wearing a standard headband-style headset underneath your helmet. It’s flexible—you can easily ditch the helmet and keep your comms—but it can also lead to uncomfortable hot spots where the headband presses against your skull or messes with your helmet’s padding.
Think of it this way: A rail-mounted system is like a custom-installed car stereo, perfectly melded with the dashboard. An internal system is more like bringing a high-end portable speaker into the car. It gets the job done well, but it isn’t quite as seamless.
The Power of Audio Pass-Through Technology
The real genius behind modern tactical headsets is their electronic hearing protection. They use tiny, sophisticated microphones on the outside of the earcups to pick up ambient sounds and replay them inside at a safe volume. This feature is known as audio pass-through or talk-through.
This tech is a game-changer. It means you can hear conversations, footsteps, or a twig snapping with near-perfect, 360-degree directional clarity. But the instant a dangerously loud noise happens—like a gunshot or explosion—the system’s circuitry slams the gate shut, cutting off the sound and protecting your eardrums. It’s the best of both worlds: total situational awareness and instant hearing protection. If you’re looking for more ways to build out your kit, take a look at our guide on the top tactical gear and accessories you can easily buy online today.
Taming the Wires with Cable Management
Adding a comms system introduces wires for your radio, push-to-talk (PTT) unit, and the headset itself. Just letting them dangle is asking for trouble. A loose cable is a snag hazard that can catch on a tree branch, gear, or a vehicle door, ripping your comms out at the worst possible moment.
Good cable management isn’t just for looks; it’s a professional necessity. The goal is to route every wire tightly and cleanly along the helmet shell.
- Helmet Covers: Many fabric helmet covers are designed with this in mind, featuring built-in Velcro loops and channels perfect for tucking away cables.
- Adhesive Clips and Velcro: You can place small, adhesive-backed clips or Velcro straps strategically on your helmet to lock down wires.
- Ranger Bands: These are just simple, heavy-duty rubber bands, but they are incredibly effective for strapping cables and other items flush against the helmet.
By taking a few minutes to plan out your cable routing, you create a snag-free setup that keeps your comms link reliable and secure when it matters most.
Building Your Mission-Driven Helmet Setup
Now that you know the building blocks—the essential ballistic helmet accessories—it’s time for the fun part: putting together your own system. The best way to approach this is to be completely mission-driven. Every single piece of gear you attach to your helmet needs to directly support what you’re trying to accomplish.
It’s easy to fall into the trap of adding accessories just because they look cool. We’ve all seen it. But that’s the fastest way to end up with a helmet that’s too heavy, poorly balanced, and ultimately works against you.
Start by asking yourself some basic questions. Where will you be using this? Is it a low-light environment, a cramped urban setting, or wide-open country? Your answers will immediately point you toward the right gear.
For instance, a SWAT officer’s priorities will lean heavily toward integrated comms and maybe a visor for facial protection. A hunter out after dark, on the other hand, is going to be almost entirely focused on a rock-solid night vision mount and a good counterweight to make it comfortable.
The Balancing Act: Weight Versus Capability
Here’s the thing: every accessory adds weight. A single piece might not feel like much, but it all adds up. Before you know it, you’re dealing with serious neck strain and fatigue, especially after wearing it for hours. A helmet that’s too heavy isn’t an asset; it’s a liability that slows you down and breaks your focus.
The goal is to build a system that’s as light as it can possibly be while still giving you everything you need for the job. Never add a piece of gear without a clear, justifiable reason.
For every accessory you consider, do a quick cost-benefit analysis. Is the capability it offers worth the physical toll of carrying it on your head? This simple gut-check helps you avoid “helmet creep”—that slow accumulation of non-essential gear that ends up bogging you down.
A Practical Checklist for Your Build
Before you start clicking “add to cart,” run through this quick framework. It’ll help guide your choices and make sure all your expensive new toys actually play well together.
- Define Your Primary Mission: What’s the number one thing you’ll be doing? Night ops, breaching, recon, or something else? Nail this down first.
- Assess Your Environment: Think about light conditions, potential threats like flying debris or impacts, and whether you need to talk to a team.
- Confirm Compatibility: This is a big one. Double-check that every accessory you buy actually fits your helmet’s specific rails and shroud.
- Prioritize Your Purchases: Get the most critical gear first. For most people, that’s going to be something for vision (like NODs) or communications.
- Build and Balance as You Go: Don’t just slap everything on at the end. Add components one at a time and constantly check the balance. Use counterweights to offset anything heavy on the front.
By sticking to this mission-first mindset, you’re no longer just collecting gear. You’re building a personalized, high-performance tool where every component has a purpose and contributes directly to your safety and effectiveness.
Common Questions About Helmet Accessories
Even with a solid plan, jumping into the world of ballistic helmet accessories can feel a bit overwhelming. You’re bound to have questions. Getting straight answers is the best way to build out your system with confidence, making sure every piece of kit you buy is the right one for the job.
Let’s run through some of the most common questions guys have when they’re putting their gear together. Think of this as a final sanity check before you click “buy” – it’ll help you sidestep common blunders like mismatched parts or a helmet so front-heavy it’s impossible to wear.
What Is the Most Important Accessory to Get First?
This is a classic question, and the answer almost always comes down to your primary mission. You need to buy the accessory that solves your single biggest problem first.
For anyone operating after dark, the answer is a no-brainer: a quality NVG mount and shroud. This is the absolute bedrock of your night vision setup, and everything else builds from there. Without it, you’re literally in the dark.
But what if you’re constantly working in a team, especially in loud environments like a range or a shoot house? In that case, an integrated communications headset with electronic hearing protection is your top priority. It lets you talk to your team while saving your hearing from permanent damage.
Key Takeaway: Your first purchase should be dictated by your primary function. Prioritize either vision or communication based on your most common operational environment. This approach ensures your initial investment delivers the biggest immediate impact on your effectiveness.
How Do I Balance My Helmet Correctly?
Proper balance is the secret sauce to wearing a fully kitted-out helmet for hours without feeling like your neck is going to snap. The magic here is a good counterweight system. These are simply pouches or dedicated weights that you attach to the back of the helmet, offsetting the gear you’ve mounted up front, like your NVGs.
The process is pretty simple. Figure out the weight of your forward device (your night vision monocular, for instance) and start adding counterweights to the back until the helmet feels neutral on your head. It shouldn’t want to tip forward or backward when you look around. The goal is to make it feel almost weightless, which makes a world of difference in reducing neck strain.
Remember, a huge part of good balance is being disciplined about what you mount. If you don’t absolutely need it, leave it off to keep the total weight down.
Are All Helmet Accessories Universally Compatible?
Not a chance. And this is probably the most common—and expensive—mistake people make when they’re starting out. There’s no single universal standard. Accessories are specifically designed for certain mounting platforms, like ARC rails, M-LOK rails, or a particular brand’s front shroud.
Before you buy anything, you have to double-check that it’s made for your helmet’s exact mounting system. If the components don’t match, they either won’t mount securely or won’t mount at all. That leaves you with a very expensive piece of gear that’s completely useless and, frankly, unsafe.
At Superior Tactical LLC, we provide the mission-critical gear you need to build a complete, balanced, and effective helmet system. From NVG mounts and shrouds to lights and headsets, we stock the components that will keep you ready for any condition. Explore our full range of tactical accessories and get expert advice at https://superiortac.com.