A Guide to Army Night Vision Binoculars
Army night vision binoculars are more than just a tool for seeing in the dark; they are sophisticated optical instruments built to a standard that professionals trust with their lives. At their heart, these devices use Generation 3 (Gen 3) image intensifier tubes to gather and multiply tiny amounts of available light, turning a pitch-black night into a visible, detailed landscape.
This isn't the same technology you'd find in a consumer-grade gadget. Military-grade equipment is engineered to meet tough requirements for image quality, ruggedness, and consistent performance. It's the gold standard for a reason.
What Makes Night Vision Military Grade
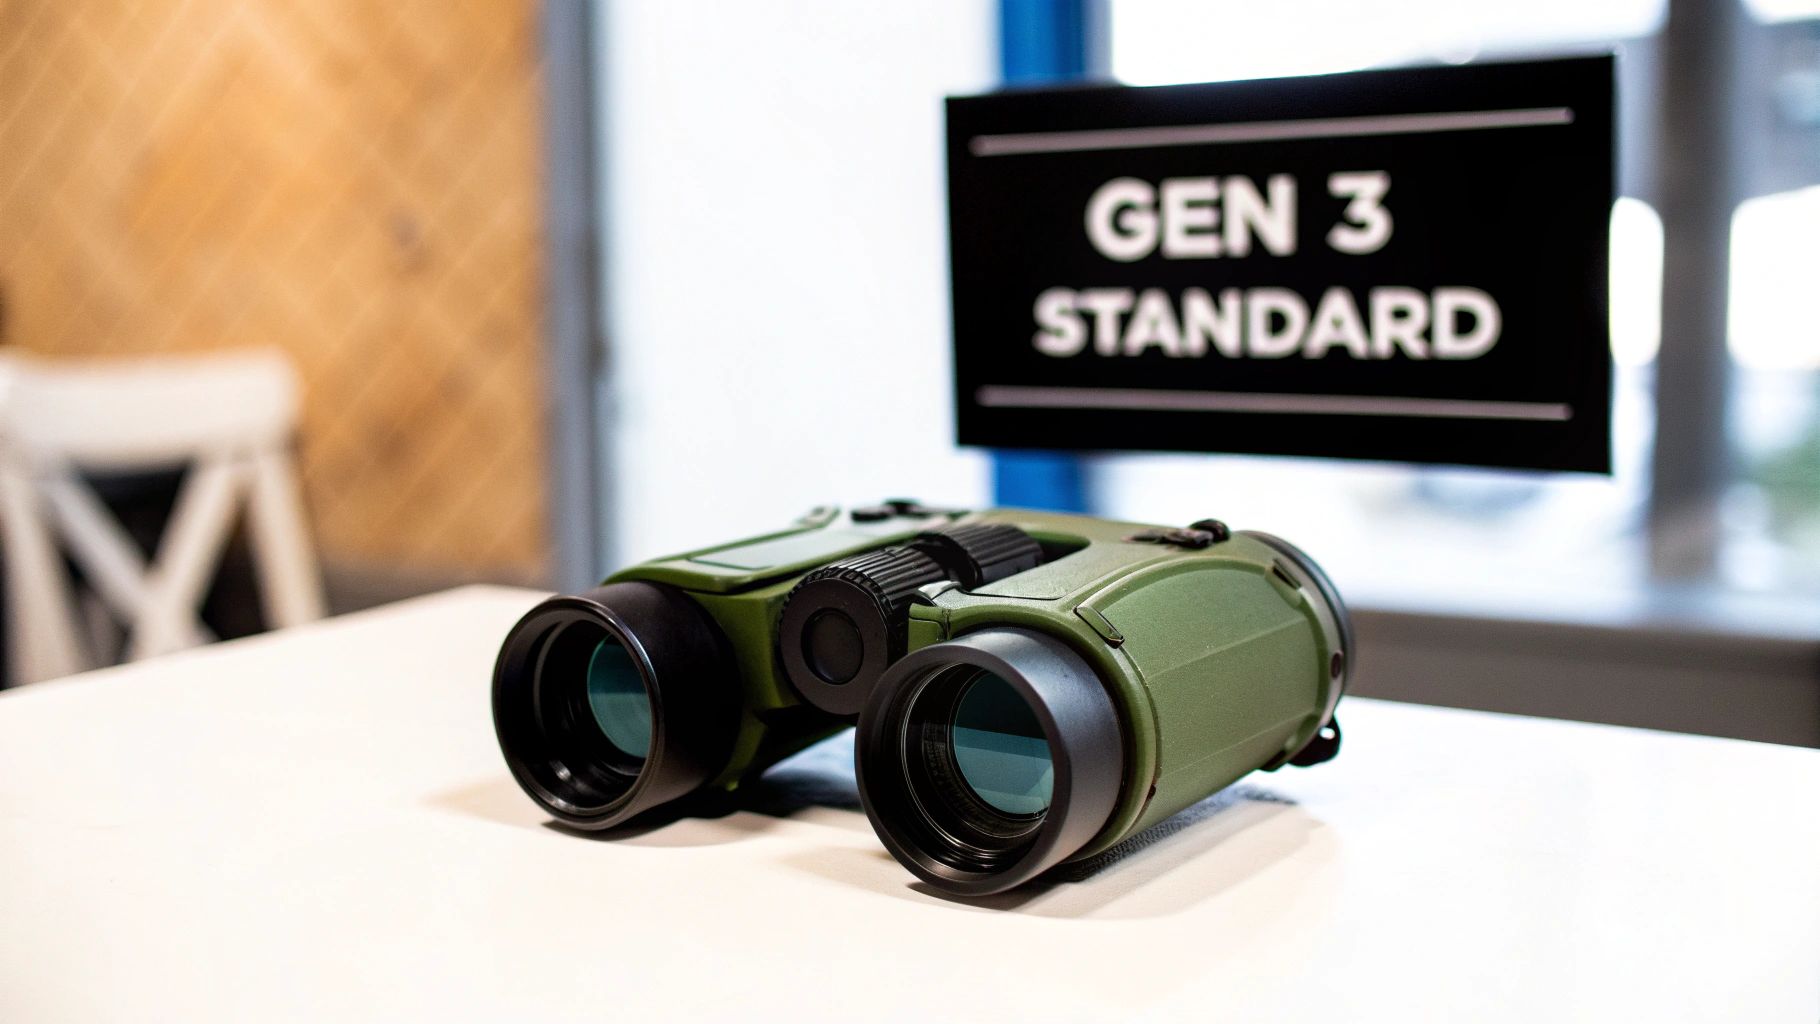
When we say "military-grade," we're not just throwing around a cool-sounding marketing term. It points to a specific level of technology built for absolute reliability when it matters most. For night vision, that standard is built around Gen 3 image intensifier tubes, which deliver a night-and-day difference in performance compared to older or commercial tech.
Think of it like the jump from an old flip phone camera to the one on a modern smartphone. That grainy, pixelated photo from 2005 just can't compete with the stunningly clear, bright images today's phones capture in a dimly lit room. Each night vision generation represents a similar leap forward in its ability to collect light and create a sharp picture.
In the night vision world, Gen 3 is that flagship model. It's the established benchmark for military units, law enforcement officers, and serious civilian users who need a clean, bright image without having to broadcast their position with an infrared (IR) illuminator.
At Superior Tactical, our entire focus is on this professional-tier equipment. We help people cut through the jargon and find the right gear for their specific mission. Making a smart investment starts with understanding these generational differences. For a deeper dive into the hardware itself, our guide on what PVS-14 housing is is a great place to learn about the protective body that holds these sensitive optics.
A Clear Generational Divide
The real magic—and the key difference between generations—happens inside the image intensifier tube. It's the engine of the device. Gen 3 tubes feature a gallium arsenide photocathode, a material that is incredibly good at converting the faintest traces of light (photons) into electrical energy (electrons).
This efficiency boost gives Gen 3 devices a massive edge:
- Superior Low-Light Performance: They can operate effectively in much darker conditions, relying only on starlight or moonlight.
- Greater Image Clarity: The picture is sharper, with higher resolution and less of the "static" or electronic noise seen in older units.
- Longer Tube Life: A professional-grade tube is built to last, typically rated for 10,000+ hours of operation.
This is what elevates a device from a simple gadget to a true professional instrument.
Night Vision Generation Quick Comparison
To put it all in perspective, here’s a quick breakdown of how the different night vision generations stack up against each other. It clearly shows the progression from basic light amplification to the high-fidelity imaging used by professionals today.
| Generation | Primary Technology | Typical Performance | Common Use Cases |
|---|---|---|---|
| Gen 1 | Basic Image Intensification | Grainy, needs an IR illuminator in low light. | Casual wildlife observation, airsoft. |
| Gen 2 | Micro-Channel Plate (MCP) | Clearer than Gen 1, better low-light ability. | Prosumer hunting, property security. |
| Gen 3 | Gallium Arsenide Photocathode | Crisp, bright images even in starlight. | Military, law enforcement, professional tactical. |
As you can see, while earlier generations have their place, only Gen 3 provides the clarity and passive operational capability—seeing without being seen—that professionals demand.
The Technological Leap to Seeing in the Dark
To really get a handle on today's army night vision binoculars, you have to look back at where they came from. This tech wasn't a sudden invention; it was hammered out in the heat of combat, with every new generation marking a hard-fought win against the dark. The evolution from the clunky, primitive scopes of the past to the slick gear we have now is a story of battlefield needs pushing science forward.
The first attempts at night vision, which popped up during World War II, were a far cry from what you see today. These early "sniperscopes" were huge, heavy, and depended on active infrared (IR). Think of it like a flashlight, but one that projects a beam of infrared light that's invisible to the human eye.
The problem? It was a massive tactical giveaway. While the user could see their target, anyone else with a night vision device could easily spot that bright IR beam pointing right back at the source. It was like screaming your location in a dead-quiet forest—a fatal flaw that made it a risky tool to use.
The Shift to Passive Observation
The real game-changer was figuring out how to get away from active IR. The new mission was to build a device that could work passively by taking the tiny bit of ambient light available—from the moon, stars, or even the glow from a distant city—and cranking it up. This idea of "seeing without being seen" became the holy grail for nighttime ops.
This critical shift got a massive boost during the Vietnam War with the first truly usable passive systems. The Starlight scope, powered by very early image intensifier tubes, completely changed how soldiers fought at night. For the first time, they could watch enemy movements using only natural light, no IR beam needed. By the war's end, second-generation tech had arrived, adding microchannel plates that made the image way brighter and clearer, pushing IR illuminators into an optional, backup role. You can dive deeper into the evolution of U.S. night vision and its history.
That jump to passive observation was monumental. It turned soldiers from glowing targets into invisible observers, handing them an advantage that was previously unimaginable.
Key Takeaway: Moving from active IR (shooting out a beam of light) to passive image intensification (cranking up existing light) was the single most important moment in night vision history. It let operators stay completely hidden while still owning the dark.
Battlefield Innovation Drives Progress
This history lesson matters because it shows that today's Gen 3 devices are the result of decades of engineering driven by one thing: battlefield reality. The problems soldiers ran into in past conflicts directly shaped the priorities for the gear we have now.
These priorities were crystal clear:
- Increased Light Sensitivity: The need to see in near-total darkness without flipping on an IR illuminator.
- Improved Image Clarity: The demand for sharper resolution to tell friend from foe at a safe distance.
- Enhanced Durability: The non-negotiable requirement for gear that could take a beating in the worst possible conditions.
Every single spec on a modern data sheet, from the type of photocathode to the tube's signal-to-noise ratio, is a direct solution to a problem faced on a real battlefield. This constant cycle of operational need and technological innovation is what gave us the incredible army night vision binoculars professionals rely on today.
How Image Intensifier Generations Work
When you hear people talk about "generations" in night vision, they aren't just using marketing fluff. Each generation represents a massive leap forward in the core technology that turns a pitch-black night into a visible landscape.
Think of it like a camera sensor trying to take a picture in a nearly dark room. A Gen 1 device is like an old flip phone camera—it might see something, but it’ll be grainy and dim. A modern Gen 3 device is like a professional DSLR, capturing a crisp, bright image from the tiniest amount of available light.
This magic happens inside the image intensifier (I²) tube. It's the heart of any night vision device. When photons (particles of light) hit the front of the tube, they're converted into electrons. These electrons are then multiplied thousands of times before they hit a phosphor screen at the back, which creates the green-glowing image you see through the eyepiece. The efficiency of that process is what separates the generations.
The Rise of Gen 3 Technology
While older Gen 1 and Gen 2 systems paved the way, Generation 3 (Gen 3) is the undisputed gold standard for professional use today. The key breakthrough was the use of a gallium arsenide (GaAs) photocathode. This material is incredibly sensitive, especially to the infrared light that’s abundant even on what we’d call a dark night.
This advantage isn't just theoretical; it was proven decisively. During the 1991 Gulf War, Gen 3 night vision was called the "single greatest mismatch" of the conflict, giving U.S. forces an almost unfair advantage. That edge was built on the incredible clarity and sensitivity of Gen 3 tubes, which allowed soldiers to own the night.
The timeline below really puts this evolution into perspective, showing the shift from clunky, active systems to the passive, high-performance gear we rely on now.
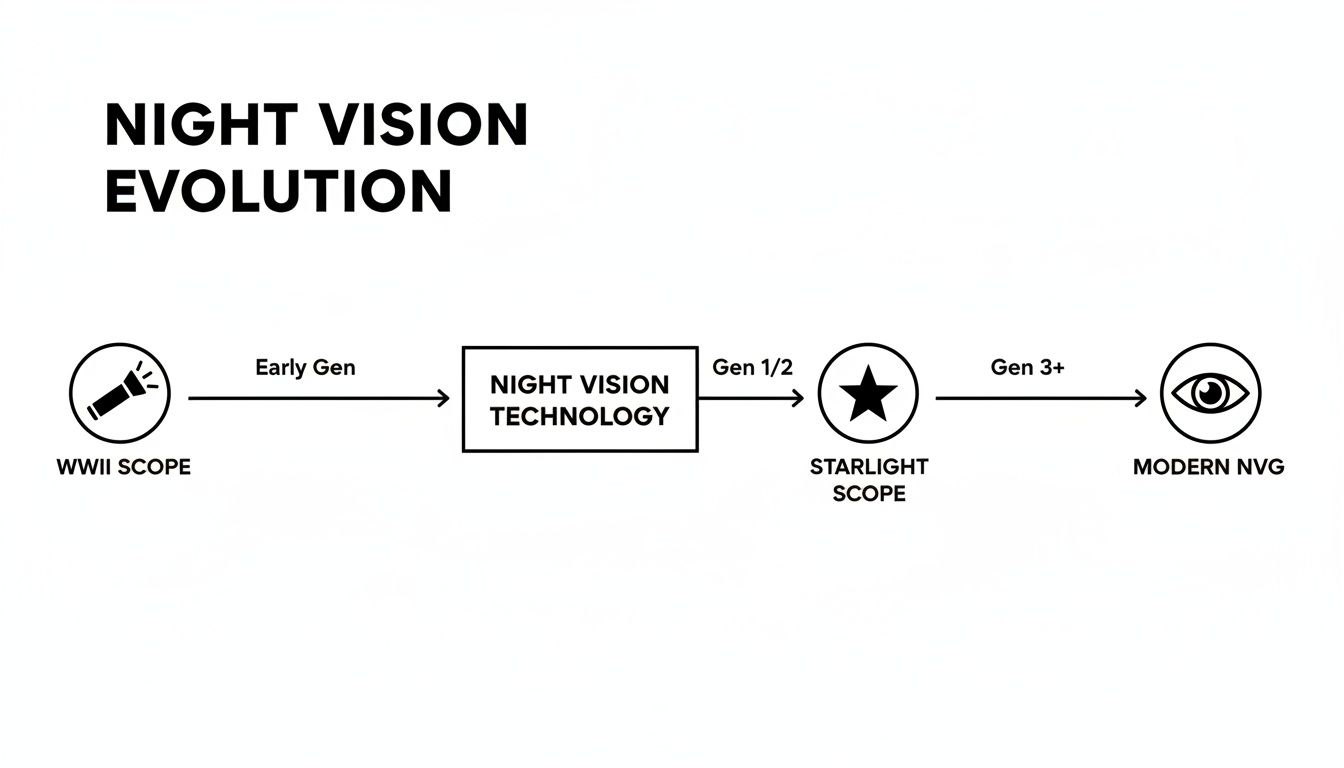
As you can see, the goal has always been to move away from devices that need their own IR light source (active systems) and toward gear that can amplify the faintest ambient light (passive systems).
Why Gallium Arsenide is a Game-Changer: The photocathode is like the retina of the night vision device. Using gallium arsenide is like giving that retina superhuman sensitivity, allowing it to pick up on details that older tech would completely miss. It’s the secret sauce behind Gen 3's stunning performance.
This is exactly why true army night vision binoculars are almost exclusively Gen 3. The ability to see without projecting an IR beam—which is like turning on a flashlight that only your enemy can see—is a critical tactical requirement.
Filmed vs. Unfilmed Tubes
Digging deeper into Gen 3, you'll run into terms like "thin-filmed" and "unfilmed." This all has to do with a tiny protective layer, the ion barrier film, that sits inside the tube. Originally, this film was added to drastically increase the tube's lifespan, which was a huge deal for military logistics.
- Thin-Filmed Tubes: This is the classic, battle-proven Gen 3 design. The film protects the tube from degrading too quickly, giving it an operational life of 10,000+ hours. It's the trusted workhorse of the U.S. military for a reason.
- Unfilmed Tubes: As manufacturing got more advanced, engineers found a way to get rid of the film. The result is a slightly brighter, clearer image with less "noise" or static. These tubes offer some of the most breathtaking performance you can get.
So, what’s the catch? It's really a trade-off between proven, rugged longevity and the absolute peak of image quality. Both are incredible technologies. If you want to get into the nitty-gritty, this in-depth comparison of thin-filmed and unfilmed tubes is a great resource.
Here at Superior Tactical, we focus entirely on high-spec Gen 3 systems because we know that’s what serious professionals demand. Every device we carry is chosen for its clarity, durability, and reliability under pressure. We stand behind our gear with a 10-year warranty, so you can be confident your investment is protected and ready for whatever mission you have in mind—whether it's on patrol, on a hunt, or in a tactical operation.
Reading the Spec Sheet Like a Pro
Once you get past the "Gen 3" label, you start to see what really makes one set of army night vision binoculars different from another. The spec sheet can feel like you're reading a foreign language at first, but every number tells a critical part of the story. Think of it less like a technical manual and more like the spec sheet for a high-performance engine—it tells you the real horsepower, torque, and redline.
This is where you make a smart investment. It’s how you can look at two different Gen 3 units side-by-side and understand exactly why one costs more than the other. At Superior Tactical, we believe in walking you through this, so you know precisely what you’re getting for your money.
The Holy Trinity of Tube Performance
A spec sheet is full of data, but three numbers truly define the quality of the image you’ll see: Signal-to-Noise Ratio (SNR), Resolution, and the resulting Figure of Merit (FOM).
-
Signal-to-Noise Ratio (SNR): Honestly, this might be the most important number on the sheet. Imagine trying to tune in a distant radio station. The "signal" is the music you want, and the "noise" is that annoying static. A high SNR means crystal-clear music with almost no static. For night vision, a high SNR (look for 25 or higher) gives you a clean, sharp image with very little of that electronic "snow," especially when it gets really dark.
-
Resolution (lp/mm): Measured in line pairs per millimeter, this is all about detail. It's the night vision equivalent of pixels on a TV screen. A higher number, typically 64-72 lp/mm on top-tier tubes, means you can distinguish fine details from a distance. It's the difference between seeing a blob in the woods and clearly identifying it as a deer.
Figure of Merit (FOM): Think of FOM as the ultimate at-a-glance performance score. It’s calculated by simply multiplying SNR by Resolution (lp/mm). If SNR is the image's cleanliness and Resolution is its sharpness, FOM is the tube’s overall horsepower rating. A high FOM (anything over 1800 is solid) is a great sign, but don't stop there. You still need to look at the individual SNR and Resolution specs to get the whole story.
Why does that matter? A tube with insane resolution but a low SNR might look sharp under a half-moon, but it will turn into a grainy, unusable mess in the deep woods. On the flip side, a tube with a great SNR but low resolution will give you a clean but soft, almost blurry image. The magic is in finding a tube that balances both.
Before we dive into the optical side of things, let's break down these core performance metrics and a few others into a simple table. It’s a handy cheat sheet for translating the technical jargon into real-world performance.
Key Night Vision Specifications Explained
This table breaks down the essential performance metrics you'll find on any spec sheet and explains what they actually mean for you out in the field.
| Metric | What It Measures | Why It Matters | Analogy |
|---|---|---|---|
| Figure of Merit (FOM) | Overall tube performance (SNR x Resolution) | A quick-glance rating of the tube's quality. Higher is better. | The horsepower rating of a car's engine. |
| Resolution (lp/mm) | Image sharpness and detail | Determines how clearly you can distinguish small objects at a distance. | The pixel count (4K vs 1080p) on a television screen. |
| Signal-to-Noise Ratio (SNR) | Image clarity vs. electronic "snow" | Dictates how clean the image is, especially in very low light. | The amount of static on a radio signal. |
| EBI (Equiv. Background Illumination) | How much light the tube generates on its own | A lower EBI means darker blacks and better performance in extreme darkness. | The "black level" on a high-end TV; you want it as dark as possible. |
| Photocathode Sensitivity | How efficiently the tube converts photons (light) to electrons | A higher sensitivity means the tube can "see" better with less available light. | How well a solar panel works on a cloudy day. |
| Halo | The size of the bright ring around intense light sources | A smaller halo value (e.g., under 1.0) reduces bloom around streetlights. | The glare you see around oncoming headlights at night. |
Understanding these specs is the first step, but they don't tell the whole story. The "glass" and the housing that holds the tube are just as important.
Understanding Key Optical Specs
Beyond the image intensifier tube, the physical design of the binoculars—the optics—dictates how you actually experience that image.
-
Magnification: Nearly all professional, head-mounted night vision devices are 1x magnification. There's a very good reason for this. A true 1x view matches what your eyes see naturally, which is crucial for maintaining balance and spatial awareness when you're walking, driving, or interacting with your surroundings. Anything else would be disorienting and dangerous.
-
Field of View (FOV): This is the width of your viewing window, measured in degrees. The industry standard is a 40-degree FOV. While that’s narrower than your natural peripheral vision, it’s a time-tested sweet spot that balances situational awareness with image clarity and low distortion. It’s why you see experienced users constantly scanning, moving their head to paint a complete picture of their environment.
-
Detection, Recognition, & Identification (DRI): You'll see these terms a lot. They aren't exact distances but more like performance estimates. Detection means you can see something is out there. Recognition means you can tell what it is (a person, a car, an animal). Identification means you can see specific details (that person is holding a rifle). These ranges are massively affected by ambient light, weather, and the quality of your tube.
With this knowledge, a confusing spec sheet transforms into a powerful tool. You can now look at a list of numbers and visualize exactly how a device will perform when the lights go out, whether you're navigating a dark trail or holding a security position.
Choosing Between One Tube or Two: Monoculars vs. Binoculars
So, you’re ready to invest in serious night vision. One of the first, and biggest, forks in the road you'll hit is the choice between a single-tube monocular and a dual-tube binocular setup. This isn't just about how many tubes you have; it’s a fundamental decision that dictates how you move, navigate, and perceive the world in the dark.
The whole debate really boils down to one thing: depth perception.
Try this: close one eye and walk around the room. You can see just fine, but judging how far away the chair is or grabbing that doorknob feels a little…off. That’s a monocular. Now, open both eyes. The world instantly snaps back into 3D. That immediate, intuitive sense of distance is what you get with binoculars.
For anyone driving a vehicle or navigating rocky, uneven ground in the pitch black, that natural depth perception isn't a luxury—it's a critical advantage for both safety and speed.
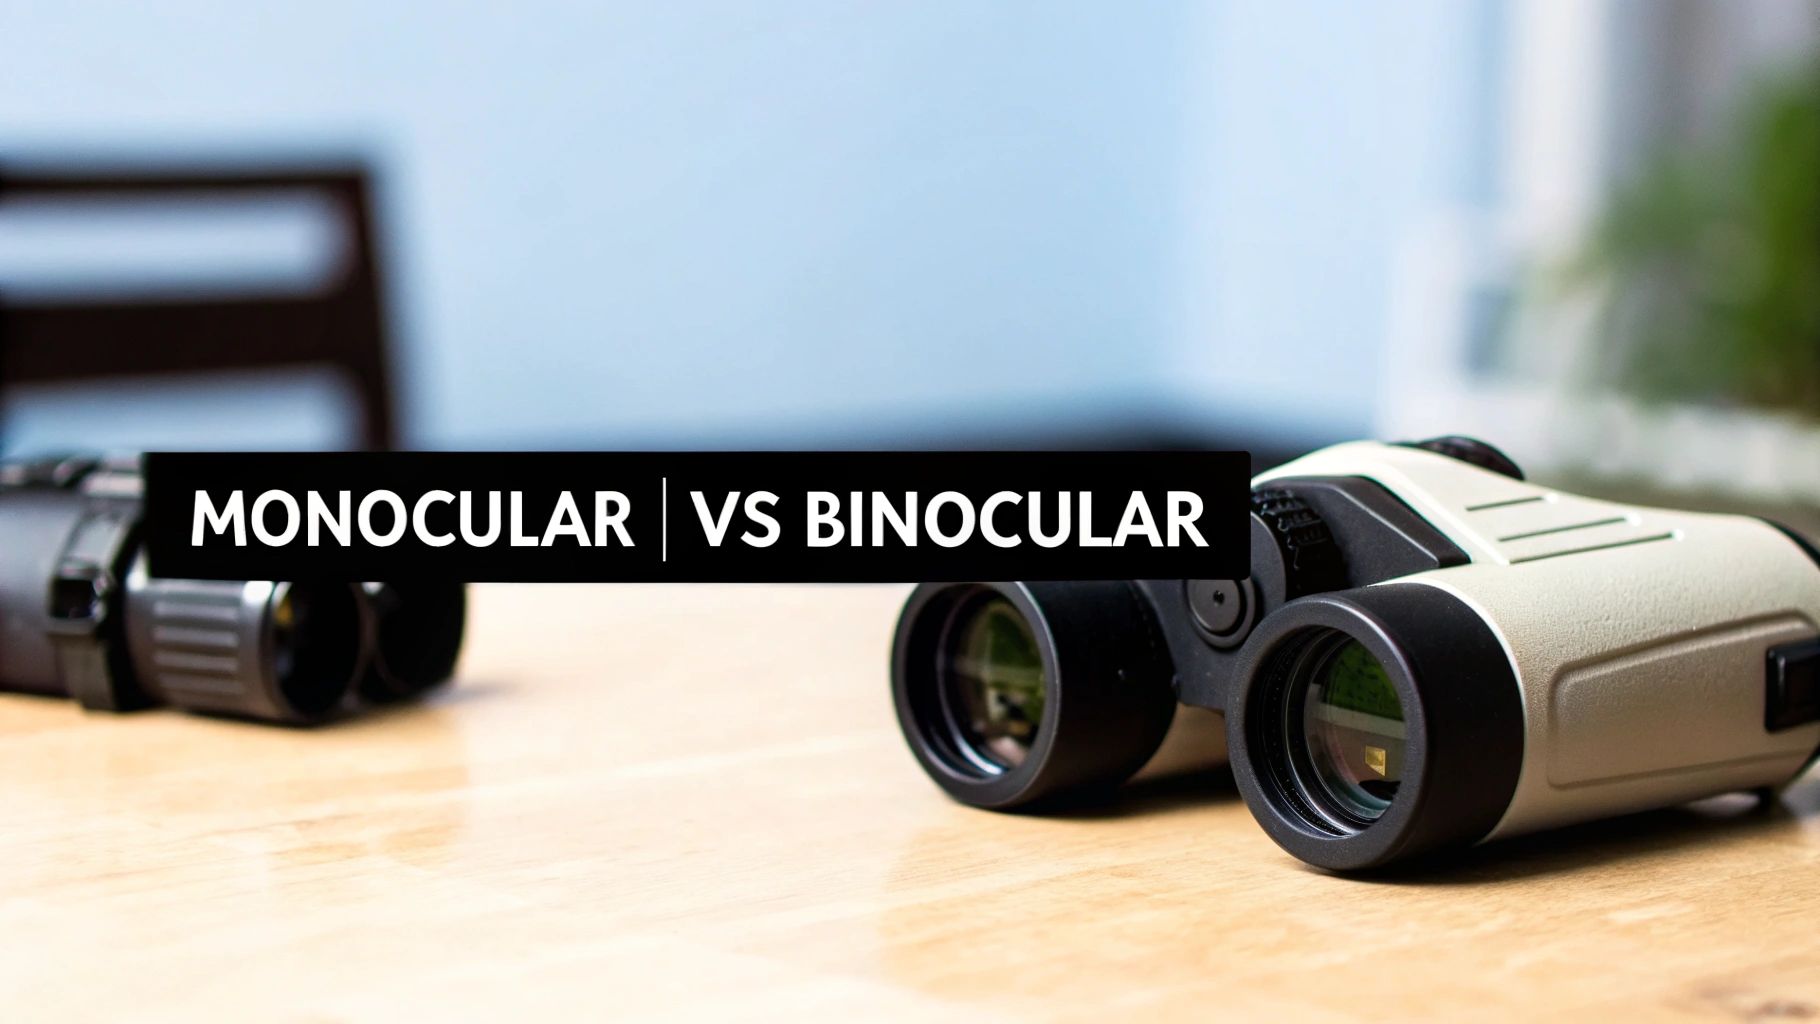
The Case for Monoculars
Even with the clear advantage of binocular vision, there's a reason the single-tube monocular, like the legendary PVS-14, is still so popular. It’s all about versatility and practicality.
- Situational Awareness: With a monocular over one eye, your other eye is free. It can stay adapted to the ambient light, which is a huge help when you're moving between a dark alley and a lit street. You also keep your natural peripheral vision on that side.
- Jack-of-All-Trades: You can wear a PVS-14 on a helmet, mount it on a rifle behind a red dot, or just use it as a handheld scanner. It’s the Swiss Army knife of night vision.
- Weight & Cost: Let's be honest, this is a big one. Monoculars are much lighter, putting less strain on your neck over long hours. They're also significantly more affordable than a comparable dual-tube system.
For a police officer who needs to quickly shoulder their rifle or a hunter who wants a flexible tool, the monocular is often the smartest choice.
The Unmatched Performance of Binoculars
When performance is everything and budget is a secondary concern, there’s no contest. Dual-tube army night vision binoculars are the gold standard. And the benefits go way beyond just seeing in 3D.
It's not just about seeing more with two tubes; it's about understanding what you're seeing with less effort. Your brain is wired for binocular vision. Feeding it information from both eyes is more natural, drastically cutting down on mental strain and fatigue during long nights.
This is exactly why you see elite military units running dual-tubes. When you have to live in the dark for hours on end, reducing fatigue is a massive performance multiplier.
How to Make the Right Call
To figure out what's right for you, think hard about your primary mission.
Are you a hog hunter who spends most of the night scanning fields but then needs to use a weapon-mounted scope for the shot? A monocular is probably your best bet.
Are you leading a team through dense woods or driving a vehicle in total blackout conditions? The safety and efficiency you gain from a binocular system will be worth every penny.
Here’s a quick breakdown to help you weigh the options:
| Factor | Monocular (e.g., PVS-14) | Binocular (Dual-Tube) |
|---|---|---|
| Depth Perception | Limited. It takes practice to judge distance. | Excellent. Completely natural and intuitive. |
| Situational Awareness | Good. One eye stays adapted to ambient light. | Superior. A fully immersive view of your surroundings. |
| Weight | Lighter. Minimal neck strain. | Heavier. Often requires a helmet counterweight. |
| Cost | More affordable and accessible. | A significant, top-tier investment. |
| Best For | General use, weapon mounting, versatility. | Navigation, driving, extended observation. |
Here at Superior Tactical, we stock an elite selection of both monocular and binocular systems. Understanding these core trade-offs is the first real step in equipping yourself with the right tool for the job.
Gear Up: Accessories and Long-Term Care
Dropping serious cash on a set of army night vision binoculars is just the first step. To get the most out of them—and make sure they last—you need to build out your kit with the right supporting gear. Think of it like buying a race car engine; it's incredibly powerful, but you still need the car itself to actually win a race.
For any hands-free work, a solid helmet and mounting setup is the absolute foundation. It's what lets you move, drive, or aim your weapon without having to hold the unit up to your eyes. A good mount locks the device in place, eliminating the kind of wobble and drift that leads to a nasty headache and eye strain after a few hours.
Building Your Loadout
Once you have the helmet, a few other pieces of gear are essential for boosting performance and just plain protecting your investment.
- Supplemental IR Illuminator: Your Gen 3 tubes are amazing at amplifying tiny amounts of light, but they can't make something out of nothing. In a pitch-black basement or a cave with zero ambient light, you're blind. A good IR illuminator is like an invisible flashlight, bathing the area in infrared light that only your NVGs can see.
- Sacrificial Lenses: These are simple, clear covers that screw onto the front of your main lenses. They’re a cheap insurance policy against scratches, dust, and mud. It’s a lot easier to replace a $20 piece of glass than a $1,000 objective lens assembly.
- External Battery Packs: For anything longer than a short jaunt, an external battery pack is a game-changer. Usually mounted on the back of your helmet, it dramatically extends your runtime and acts as a perfect counterweight, making the whole setup more balanced and comfortable to wear for hours on end.
These aren't just add-ons; they're the components that turn a pair of night vision goggles into a complete, mission-ready system.
Protecting Your Investment
The guts of your night vision device are delicate. Taking care of them isn't optional if you want them to perform reliably for years to come. Skipping basic maintenance is a surefire way to end up with permanent damage and a very expensive repair bill.
Little things make a huge difference, like always keeping the lens caps on during the day and only using proper lens cloths for cleaning. You'd be surprised how many people forget the basics. For a more detailed guide, check out our article on the maintenance and care for a PVS-14 monocular, as the principles apply to most modern devices.
At Superior Tactical, we know the sale is just the beginning of our relationship with you. We offer in-house repair services and free diagnostics for everything we sell. We’re here to be your partner for the entire life of your gear, not just the day you buy it.
Your Night Vision Questions, Answered
Diving into the world of high-performance night vision can feel a bit overwhelming, especially with all the technical jargon out there. Let's clear up some of the most common questions we hear from folks looking to buy their first set of army night vision binoculars.
Can a Civilian Legally Own Military-Grade Night Vision?
Absolutely. In the United States, any U.S. citizen can legally own top-tier Gen 3 night vision.
The main thing to know is that this equipment falls under the International Traffic in Arms Regulations (ITAR). Think of ITAR as a "no-export" rule for sensitive defense technology. This means you can't take or ship your Gen 3 device out of the country without getting a specific license from the State Department. When you buy from a trusted U.S. dealer like us, you're getting a fully compliant unit that's perfectly legal for you to own and use right here at home.
Green vs. White Phosphor: What's the Real Difference?
The color you see through the tube—green or white—is determined by the phosphor screen inside. It’s more than just aesthetics; it affects how you interpret what you see.
- Green Phosphor: This is the classic "night vision green" everyone recognizes from movies. Our eyes are naturally very good at distinguishing shades of green, which makes it excellent for picking up on movement and detail in the dark.
- White Phosphor: This newer tech gives you a crisp black-and-white image. A lot of experienced users feel white phosphor provides better contrast and depth perception, making it easier to identify a target versus a shadow. It also tends to be easier on the eyes over long hours of use.
Ultimately, it often boils down to personal preference. White phosphor is a premium feature and usually comes with a higher price tag, but we carry both so you can find the right fit for your eyes and your budget.
For many seasoned users, the enhanced contrast and reduced eye fatigue of white phosphor make it a worthwhile investment for long-duration missions where visual clarity is paramount.
What Kind of Budget Do I Need for Quality Night Vision?
Let's be upfront: true military-grade night vision is a serious piece of gear, and the price reflects that. You're investing in incredibly complex technology, from the image intensifier tubes themselves to the rugged, precisely built housings.
For a professional-grade Gen 3 monocular like a PVS-14, you should expect to be in the $3,000 to $4,500 ballpark. When you step up to dual-tube army night vision binoculars, the price can run anywhere from $7,000 to over $13,000, depending on the specs of the tubes and the housing features. We're always transparent with our pricing and provide full spec sheets so you know exactly what you’re getting.
Will I Need an IR Illuminator for a Gen 3 Device?
Most of the time, no. A good Gen 3 unit is so sensitive that it can work wonders with just a sliver of moonlight or starlight. That ability to run completely "passive" without emitting any light of your own is a massive tactical advantage.
But there are situations where you'll hit a wall of absolute darkness—think a windowless basement, a deep cave, or a building with the power cut. In those zero-light environments, your night vision has nothing to amplify. That's when an IR illuminator becomes your best friend. It acts like an invisible flashlight, bathing the area in infrared light that only your device can see.
At Superior Tactical, we don't just sell gear; we provide the expert guidance to make sure you get the right tool for the job. Take a look at our complete collection of night vision devices and accessories to find the perfect setup for your mission.