How to Measure Scope Height for Perfect Accuracy
Measuring scope height is all about finding the distance from the center of your rifle's bore to the center of your optic. The most straightforward way to do this is to measure three things: half the bolt's diameter, half the scope tube's diameter, and the gap between the top of the bolt and the bottom of the scope tube. Add those three numbers up, and you've got your measurement.
This isn't just a number to plug into a spreadsheet; it's a critical input for any ballistic calculator and absolutely essential for getting your rounds on target at distance.
Why Scope Height Is a Critical Ballistic Variable

Before you even reach for your calipers, let's talk about why this measurement is a cornerstone of long-range accuracy. Knowing how to measure scope height correctly isn't just a technical exercise—it's the first step toward predictable, repeatable performance downrange. Think of it as the foundation for every calculation your ballistic software is about to make.
This measurement, which you'll often see called "height over bore" or "sight height," directly impacts your trajectory calculations. Your ballistic calculator, whether it's an app on your phone like Strelok Pro or built into your rangefinder, needs this value to accurately predict your bullet's flight path.
The Impact on Long-Range Shots
Sure, at 50 yards, a small error in your scope height probably won't matter much. But stretch that out, and the problem gets magnified with every foot of distance. An error of just 0.1 inches in your initial measurement can easily cause a miss of several inches at 800 yards. For a competitive shooter or a hunter, that's the difference between a clean hit and total frustration.
When you feed your ballistic software an accurate scope height, it can give you a reliable firing solution. If that number is off, you’re just feeding it bad data, which leads to incorrect holdovers or dialing the wrong elevation. Every calculation for wind and drop hinges on getting this one number right from the start.
Beyond Ballistics: Personal Fit and Function
A precise measurement isn't just for the computer, though. It's also the key to getting a solid, consistent cheek weld. When your scope is mounted at the correct height for you, your eye naturally aligns with the optic, and you can get on target quickly and comfortably every single time. This repeatability is what helps you eliminate parallax—that annoying illusion of reticle movement—which is another huge factor in missed shots.
A proper cheek weld isn't just about comfort; it's about creating a repeatable shooting platform. Your eye must align with the optical center of the scope the same way for every shot, and correct scope height makes this possible.
This becomes even more critical with specialized gear. If you're running night vision or thermal optics, which often sit on taller mounts, getting an exact height-over-bore measurement is non-negotiable. It’s what you need to get that crucial first-round hit when the lights are out.
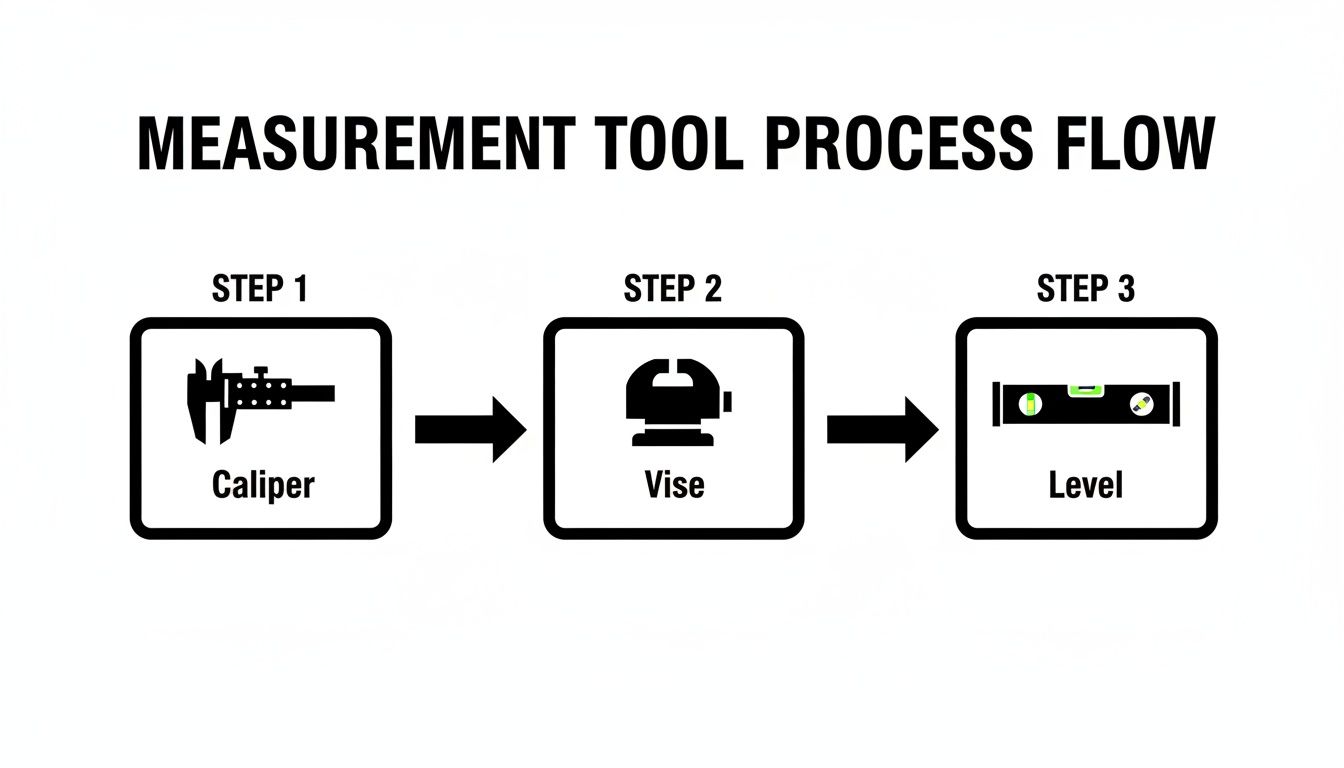
Gathering the Right Tools for a Precise Measurement
To get a reliable scope height measurement, you have to move beyond simple guesswork. Eyeballing the distance or using a flimsy tape measure just invites too much error, which will sabotage your ballistic calculations before you even fire a shot. Real accuracy starts with having the right equipment for the job.
The single most important tool in your kit is going to be a quality caliper. It doesn't matter if you prefer a digital or a classic dial model; a caliper gives you the precision needed to measure down to the thousandth of an inch. This isn't just for show—it's what separates a "close enough" number from one you can actually trust for long-range work.
Relying on a standard ruler can easily throw your measurement off by 0.05 inches or more. That might not sound like much, but it translates to significant point-of-impact shifts downrange. A caliper simply eliminates that variable, ensuring your starting data is as clean as it gets.
Essential Supporting Equipment
While the caliper does the heavy lifting, a few other items will make the whole process smoother and far more repeatable. Think of them as the supporting cast that ensures a professional result.
- A Stable Gun Vise: Trying to hold a rifle perfectly still by hand while fiddling with a caliper is a recipe for frustration and inaccurate readings. A solid gun vise or a secure rest locks the firearm in place, letting you focus on the measurement without any wobble.
- A Level Surface: Make sure your entire setup—the workbench and the vise itself—is perfectly level. This gives you a consistent, true horizontal reference, which is critical for preventing skewed measurements.
Pro Tip: Before you start, take a second to wipe down your rifle's bolt and the scope tube. A tiny piece of debris or a bit of excess oil can throw off a caliper reading just enough to matter.
Specialized Tools for Advanced Setups
For more complex rifle systems, especially those running specialized optics, a couple of extra tools can be a huge help. If you're working with night vision or other advanced accessories, you know that ensuring every component is perfectly aligned is non-negotiable. You can find detailed guides on choosing the best night vision mount that really drive home why this level of precision is so critical for tactical applications.
Finally, keep a small calculator and a notepad (or just your phone) handy. You’ll be taking a few different measurements and doing some simple math. Writing everything down as you go prevents confusion and saves you from having to start over if you get interrupted. With these tools assembled, you’re ready to get a truly accurate measurement.
Two Proven Methods for Measuring Scope Height
Alright, you've got your tools, so let's get to work. Knowing how to measure scope height isn't just about theory; it's about a practical approach that gives you a number you can actually trust for your ballistic calculator. I'm going to walk you through two reliable methods that I've used on everything from classic bolt-actions to modern sporting rifles.
The absolute key to getting a good number is consistency. No matter which method you choose, the basic process remains the same.
Keeping your rifle stable in a vise, using a level, and taking careful caliper readings is the foundation for a precise, repeatable measurement.
Method One: The Additive Measurement
This is often the easiest and most common way to get it done. The idea is to take three simple measurements and add them all up. I love this approach because it breaks a tricky job into bite-sized pieces and avoids the headache of trying to eyeball the exact center of your bore or scope.
Here’s how it works:
- First, measure your bolt's diameter and cut that number in half to get the radius.
- Next, do the same for your scope's main tube diameter—measure it and divide by two.
- Finally, measure the empty space, or gap, between the top of your bolt and the bottom of your scope tube.
Once you have those three numbers, just add them together: (Bolt Radius + Scope Radius + Gap) = Total Scope Height.
Let's run through a quick example. Say you have a standard bolt with a 0.700-inch diameter (that's a 0.350" radius) and a 30mm scope tube (1.181" diameter, so a 0.590" radius). If the gap you measured between them is 0.800 inches, your math looks like this:
0.350" + 0.590" + 0.800" = 1.74 inches.
This method is so reliable because you're measuring solid surfaces and outside diameters. It takes the guesswork out of finding a perfect center, which is where a lot of people make mistakes.
This technique is incredibly versatile and my personal go-to, especially for bolt-action hunting rigs where simplicity and accuracy are paramount.
Method Two: The Center-to-Center Approach
The second method is more direct, but it can be a little trickier to nail down. The goal is to measure the distance straight from the center of the bore to the center of the scope. While it sounds simple, trying to find those exact center points with calipers is tough without some specialized jigs.
Luckily, there's a much smarter way to do it. Instead of going center-to-center, you can measure from the top of the bolt to the top of the scope turret, then just subtract the radii of both.
Here’s the process:
- Measure the distance from the very top of your bolt to the top of your scope's elevation turret cap.
- Subtract half of your bolt's diameter.
- Subtract half of your scope tube's diameter.
This can give you a really precise number, and I find it works particularly well on AR platforms where you often have a more direct line for measuring. Getting this right is absolutely critical if you're running night vision or other clip-on devices, as any error will throw off your ballistic calculations.
As the team at Riton Optics points out in their excellent guide, a meticulous measurement on an AR can give you a precise height like 2.805 inches—exactly the kind of data you need for an app like Strelok Pro.
Comparing Scope Height Measurement Methods
So, which method should you use? It really depends on your rifle, your tools, and what you feel most comfortable with. Here’s a quick breakdown to help you decide.
| Method | Pros | Cons | Best For |
|---|---|---|---|
| Additive Measurement | Very easy and intuitive. Minimizes error by measuring solid surfaces. Highly repeatable. | Requires three separate measurements, introducing more chances for small math errors. | Bolt-action rifles, traditional hunting setups, and anyone new to measuring scope height. |
| Center-to-Center | More direct. Can be extremely precise with good technique and tools. | Can be difficult to find true centers without specialized equipment. | AR-style rifles, precision rigs with monolithic rails, and experienced shooters. |
Ultimately, both roads lead to the same destination. The best method is the one you can perform consistently and accurately with the tools you have on hand. Pick one, take your time, and double-check your math.
How to Calculate the Ideal Scope Ring Height

Alright, so you’ve got your scope height measurements down. What now? The next piece of the puzzle is finding the perfect set of scope rings. This isn’t just about brand loyalty; the height of those rings is every bit as important as the measurements you just took.
If you go too low, you'll hear that awful sound of your scope's objective bell scraping against the barrel. Go too high, and your cheek weld goes right out the window, forcing you into an uncomfortable, inconsistent head position. Neither is good for accuracy.
Fortunately, there's a simple formula that gives you a solid starting point. It calculates the absolute minimum height you need for your objective lens to clear the barrel, giving you a baseline to build from.
The Baseline Ring Height Formula
To get this baseline, you only need two key numbers from your scope: the diameter of the objective bell (the big lens at the front) and the diameter of the main scope tube. Got those? The math is pretty simple.
(Objective Bell Diameter / 2) - (Scope Tube Diameter / 2) = Minimum Ring Height
Let’s run through a quick example. Say you’re mounting a scope with a popular 50mm objective bell and a standard 30mm main tube. First, we need to convert to inches (1.969" and 1.181", respectively) and then cut those numbers in half to find the radius.
- Objective Bell Radius: 1.969" / 2 = 0.9845 inches
- Scope Tube Radius: 1.181" / 2 = 0.5905 inches
Now, just plug those into the formula: 0.9845" – 0.5905" = 0.394 inches. This is the absolute rock-bottom height you need. Since most ring manufacturers offer standard sizes like Low (0.25"), Medium (0.50"), and High (0.75"), you'd be looking at a set of Medium rings as your starting point.
Fine-Tuning for Your Specific Rifle
That formula is a fantastic starting point, but it's just that—a start. It gives you the bare minimum for clearance in a perfect world, but your specific rifle setup will almost always demand a bit more height.
Here are a few things you need to think about:
- Barrel Profile: A heavy or bull barrel is much thicker than a sporter contour. That extra steel means you'll need taller rings to get the same clearance.
- Canted Rails: If you're shooting long range, you probably have a canted base, like a 20 MOA rail. This rail tilts your scope downward, which can cause a large objective bell to crash into the barrel unless you use slightly taller rings.
- Lens Caps: Don’t forget about your accessories. If you run flip-up lens caps, like the classic Butler Creeks, you'll need to account for an extra millimeter or two of space.
For law enforcement professionals, getting this perfect is non-negotiable. An incorrect scope height can throw off ballistic apps by as much as 7%, a potentially mission-critical error on shots past 500 yards. As the experts at Warne Scope Mounts explain, every component has to be factored in for a truly dialed-in rifle.
Your cheek weld is your anchor point. If you have to crane your neck or squash your face into the stock to see through the scope, your mount height is wrong. The goal is a natural, repeatable position.
On modern platforms, especially AR-style rifles, shooters often need even more height. This is particularly true when running headsets or passive aiming with night vision. For these setups, a purpose-built accessory like the Unity Tactical FAST Optic Riser is often the best solution for getting the optic high enough for a clear, heads-up sight picture.
Common Measurement Mistakes to Avoid
Precision shooting starts way before you ever send a round downrange. It begins with your setup, and even with the best gear, a few simple slip-ups can throw your scope height measurement completely off. Knowing what to watch out for is the key to getting a number that’s not just close, but dead-on.
One of the biggest culprits I see is tilting the calipers. It's a subtle mistake, but if the jaws of your caliper aren't perfectly parallel to the bore when you take that measurement, you're in trouble. Even a tiny angle can add or subtract a few crucial thousandths of an inch, creating an error that only gets worse the farther out you shoot.
Another classic mistake is measuring from the wrong reference points. You need to find the true centerlines of both the bore and the scope tube. Just measuring from the top of the Picatinny rail to the bottom of the scope turret housing won't cut it. You have to get to the bolt or bore axis itself to find a true height-over-bore value.
Ensuring Your Math is Spot On
It sounds basic, but you’d be surprised how often simple math errors trip people up. After you’ve carefully taken your three separate measurements for the additive method (bolt radius, scope radius, and the gap), it's all too easy to fumble the addition. Always run the calculation twice before you even think about plugging that number into your ballistics app.
This gets even more important when you're working with a canted base, like a 20 MOA rail. You can't just take one measurement and call it a day. Since the scope is tilted down relative to the bore, the height is actually different at the front ring compared to the back one.
With a canted base, you have to average it out. Measure the height-over-bore at both the front and rear rings, add those two numbers together, and then divide by two. This average is the only number your ballistic calculator will care about.
Skipping this step with a canted rail is a surefire way to bake significant errors into your firing solutions, especially when you start stretching the distance.
The Value of a Steady Hand
Getting good with a set of calipers is non-negotiable. In some setups, especially in the tactical world with dual-tube night vision systems that need perfect alignment, the ring height can account for 60-70% of the total scope height. A precise measurement here has a direct impact on your cheek weld and overall comfort behind the rifle.
Think about it this way: a ruler might get you within 10-15% of the real number, but a proper technique with calipers can get you to 99% precision. If you want to see what that looks like in practice, check out James Eagleman’s tutorial on his Barbour Creek YouTube channel. He absolutely nails the technique for getting a perfect measurement.
Still Have Questions About Scope Height?
Even with the best instructions, a few questions always pop up when you're dialing in your rifle. Precision is a game of inches—or fractions of an inch, really—and a few common scenarios can throw a wrench in the works. Let's tackle some of the most common questions I hear from shooters.
What’s a Good Scope Height for an AR-15?
For an AR-15, you're almost always looking at a taller scope height than you would on a bolt-action rifle. Most setups land somewhere between 2.5 and 2.8 inches.
This isn't by accident. The AR's inline stock and buffer tube design forces your head into a higher position. To get a comfortable and consistent sight picture without straining your neck, the optic needs to come up to meet your eye.
You'll also see a lot of modern mounts, especially for red dots and LPVOs, pushing that height even further. Taller mounts make it easier to shoot while wearing hearing protection or to aim passively with night vision. So, while you should always measure your own rifle, don't be surprised if your AR's scope height is on the taller side.
The real test is a natural head position. If you have to crane your neck or squash your cheek down onto the stock, something's wrong. Your mount should bring the scope to your eye, not force your eye to the scope.
How Do I Measure Scope Height With a Canted Base?
A canted base, like a 20 MOA rail, is a fantastic tool for long-range shooting. It tilts your scope slightly downward to give you more internal elevation adjustment. But that angle means the scope isn't parallel to the bore, so a single height measurement won't cut it for your ballistic calculator.
The solution is to find the average height. It's a simple, two-step process:
- First, measure the height from the center of the bore to the center of the scope, right above your front scope ring.
- Then, take a second measurement from the center of the bore to the center of the scope, this time directly over the rear scope ring.
Add those two measurements together and divide by two. That final number is the average height and the one you should plug into your ballistic software. It’s a small extra step that pays huge dividends in accuracy downrange.
Does Scope Height Actually Matter for Short-Range Shooting?
Honestly, if you’re just plinking inside 100 yards, a small error in your scope height measurement probably won't be noticeable. The bullet's deviation will be so tiny that it gets lost in the normal spread of your groups.
But here’s the catch: that small error grows exponentially the farther out you shoot.
For any kind of precision work, especially beyond 200 yards, getting an accurate scope height is non-negotiable. It’s a foundational number that your entire ballistic profile is built on. Get it wrong, and all your other calculations will be off. This is especially true when pairing optics, like when you learn more, check out our guide on the benefits of red dot magnifiers.
It's just good practice to measure it correctly from the start.
At Superior Tactical LLC, we're all about providing the mission-ready gear and no-nonsense advice you need to get your rifle dialed in. From rock-solid mounts to crystal-clear optics, find what you need at https://superiortac.com.