Seeing in Color After Dark A Guide to Color Night Vision
If you've spent any time behind night vision, you know the world turns into a landscape of glowing green or stark white and black. It's effective, but it's not the whole picture. Now, a new breed of technology is changing the game by bringing a critical element back into the dark: color.
This guide is all about color night vision—what it is, how it works, and why it might be the biggest leap in low-light capability we've seen in years.
Beyond The Green Glow: Introducing Color Night Vision
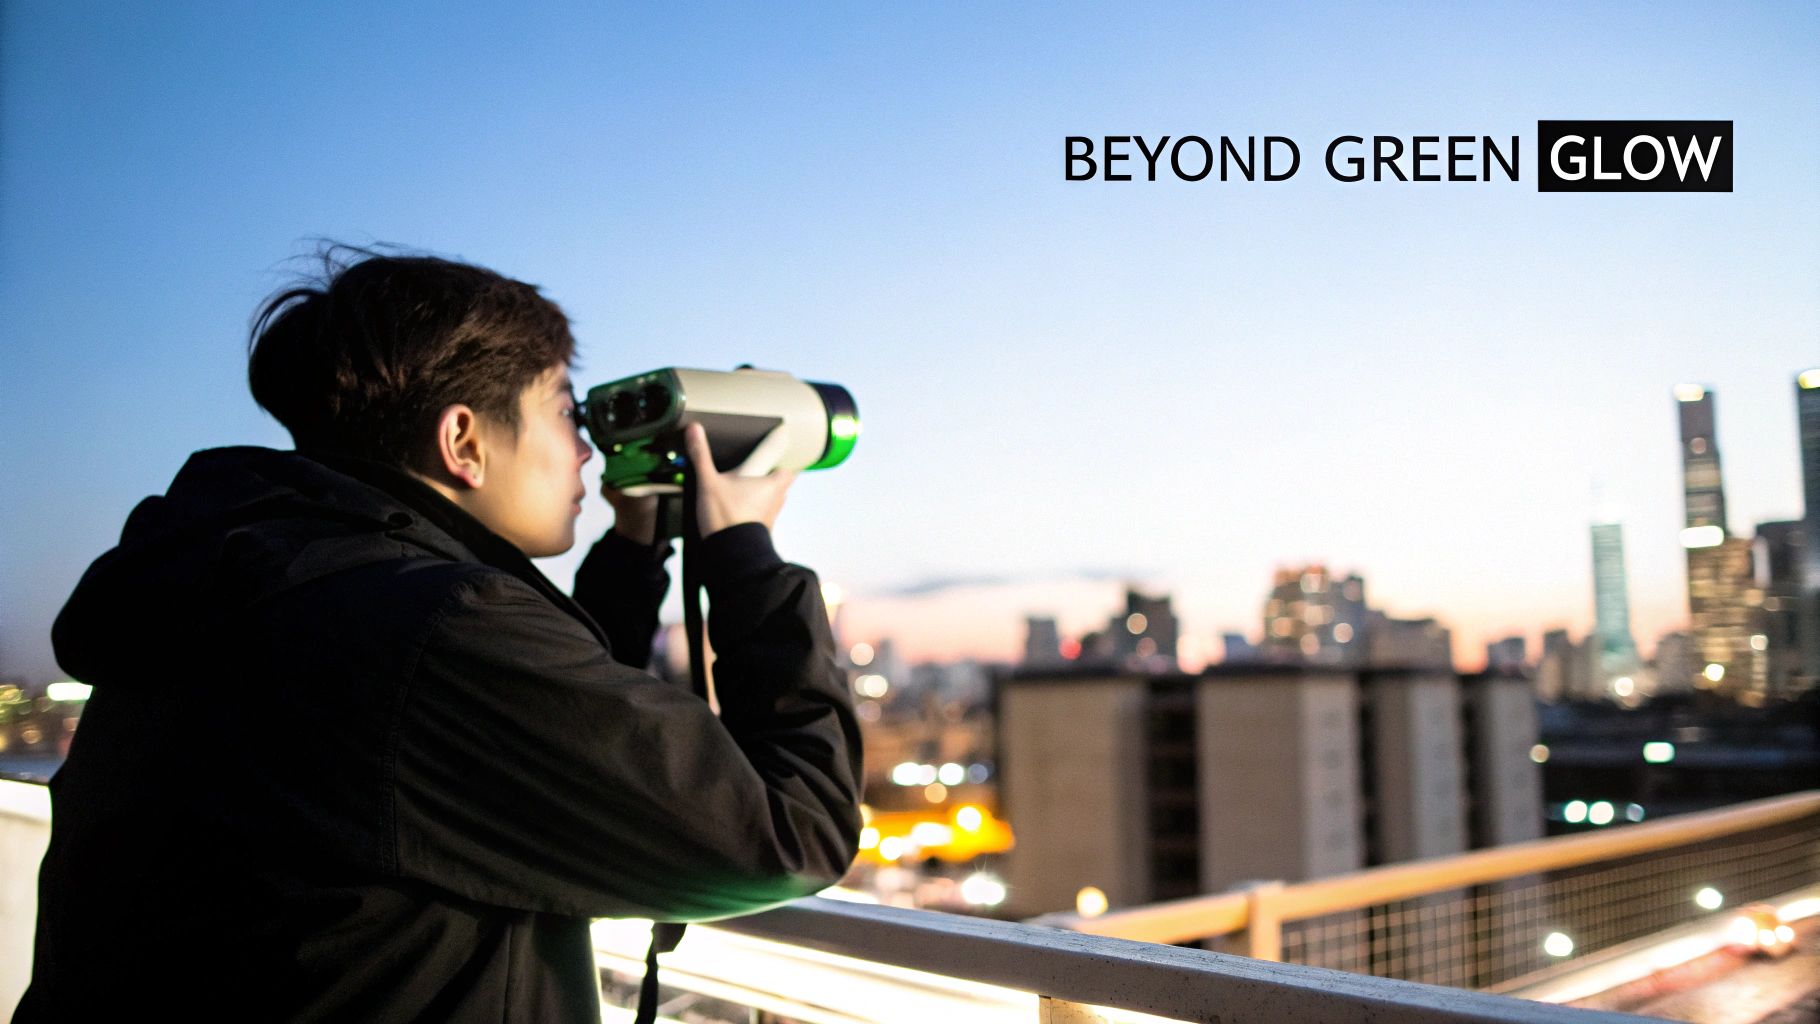
For decades, the iconic green hue of image intensifier tubes was the gold standard. While it definitely gets the job done, that monochrome view strips away vital details. Think about it: how do you identify a suspect's vehicle when the only description you have is its color? With traditional gear, it's a frustrating, often impossible task. Color night vision bridges that gap.
This isn't just about making the night look prettier; it's a genuine evolution in situational awareness. By showing you a scene in a more natural palette, it eases the mental gymnastics. Your brain doesn't have to work as hard to interpret shades of green, which means you can process what you're seeing almost instantly. In high-stress situations, that translates to faster, better decisions.
Why Color Is a Game-Changer
Bringing color back to a low-light scene gives you some serious advantages over the old-school systems. You get a much richer, more intuitive understanding of your surroundings, which is crucial for positive identification and accurate assessment.
Here's what that looks like in the real world:
- Faster Target Identification: Telling the difference between a brown jacket and a black bag, or a red car and a blue one, becomes second nature.
- Enhanced Situational Awareness: Color adds context. You can pick out terrain features, identify landmarks, and build a more complete mental map of an area in the dark.
- Reduced Eye Strain: Staring at a natural color image for hours is often less fatiguing than looking at a high-contrast green or white phosphor screen. You can learn more about the advantages of white phosphor night vision in our other guide.
This technology delivers a powerful tactical edge by adding a layer of crucial intelligence—color—that traditional monochrome systems simply cannot capture. It allows for more confident threat assessment and faster decision-making when seconds count.
In the end, color night vision fills a critical information void left by legacy technology. For anyone who needs to own the night, it's a tool that provides a clear and undeniable advantage.
How Color Night Vision Actually Works
To really get what a big deal color night vision is, we first have to look at what came before it. You know the classic green-glowing image from movies and video games? That’s traditional night vision, and it works using a process called image intensification.
Think of it like a light amplifier turned up to eleven. Faint particles of light, called photons, stream into the device and hit a special surface that turns them into electrons. Those electrons are then multiplied thousands of times over before they slam into a phosphor screen, which lights up to create that familiar, bright green picture. Why green? Simple: our eyes are incredibly sensitive to shades of green, so it helps us see more detail with less eye fatigue over long periods.
This method is fantastic for seeing in the dark, but it has one major drawback: it strips out all color information. It can only tell you how much light there is, not what kind of light. Color night vision had to take a completely different route to crack that problem, moving from analog tubes to the digital world.
The Digital Sensor Revolution
Instead of just amplifying light, modern color night vision systems use incredibly sensitive digital sensors, similar to what you'd find in a professional-grade digital camera. The secret sauce is their amazing ability to function in near-total darkness, conditions where a regular camera would just give you a black screen.
These aren't your average phone camera sensors. We're talking about advanced CMOS (Complementary Metal-Oxide-Semiconductor) or CCD (Charge-Coupled Device) sensors built with bigger pixels and much more powerful processing. They’re designed to soak up every last drop of ambient light, whether it’s from a sliver of moon, distant starlight, or the faint glow from a city over the horizon.
It's this digital backbone that finally makes color possible. The sensor doesn't just register brightness; it can actually distinguish between the different wavelengths of light that our eyes perceive as color.
From Faint Light to a Full-Color Picture
Just capturing that light is only half the battle. The real wizardry happens inside the device’s processor. Once the sensor gathers the low-light data, a powerful software engine kicks in to make sense of it all.
Here’s a breakdown of how it works:
- Sensing Wavelengths: The sensor picks up on the subtle differences in the light's wavelengths, which tell it whether it's looking at reds, greens, or blues.
- Assigning Color with Algorithms: Sophisticated algorithms then take that raw data and intelligently assign the correct colors to every part of the image.
- Cleaning Up the Image: Digital images taken in the dark can get "noisy" or grainy. The onboard processor runs noise reduction filters to clean this up, resulting in a sharper, more color-accurate picture.
You can almost think of it like a master artist colorizing an old black-and-white photo, except it’s happening instantly, 30 times a second. The system is essentially reconstructing the scene’s true colors based on the limited information it can gather.
It's crucial to remember that color night vision isn't creating a perfect, daylight-quality image. It's a highly advanced technological interpretation of the world, using cutting-edge sensors and software to recreate color from almost nothing.
This is a key distinction. The richness and accuracy of the color you see directly depend on how much ambient light is available. When things get pitch-black, these systems often use a built-in infrared (IR) illuminator to throw out light that's invisible to our eyes but perfectly visible to the sensor. The processor then uses that IR light to build out a detailed, and often surprisingly colorful, image. What you get is a powerful fusion of hardware and software that turns a dark, monochrome world into an environment filled with vibrant, actionable detail.
Analog vs. Digital: A Head-to-Head Comparison
When you're looking for a tool to own the night, you’ll quickly find yourself at a major fork in the road: do you go with a battle-proven analog image intensifier or one of the newer digital color night vision systems? It's not just a simple preference; each technology works on entirely different principles, and that means a distinct set of trade-offs. Getting this choice right is mission-critical.
Analog night vision, whether it's the classic green phosphor or the more modern white phosphor, is still the undisputed king of raw light amplification. It works by taking the few photons that are available and multiplying them thousands of times. Think of it like a sound system that can grab a barely audible whisper from across a field and make it crystal clear. It's incredibly sensitive, even in what seems like total darkness.
Digital color night vision, on the other hand, is a whole different beast. It’s essentially a highly specialized low-light digital camera. It uses a CMOS sensor to capture light and a powerful processor to interpret that data, adding color information back into the scene in real time. This process needs a bit more ambient light to really shine, but it gives you a layer of contextual detail that analog systems just can't touch.
This chart gives you a quick visual on how these two paths diverge after capturing light.
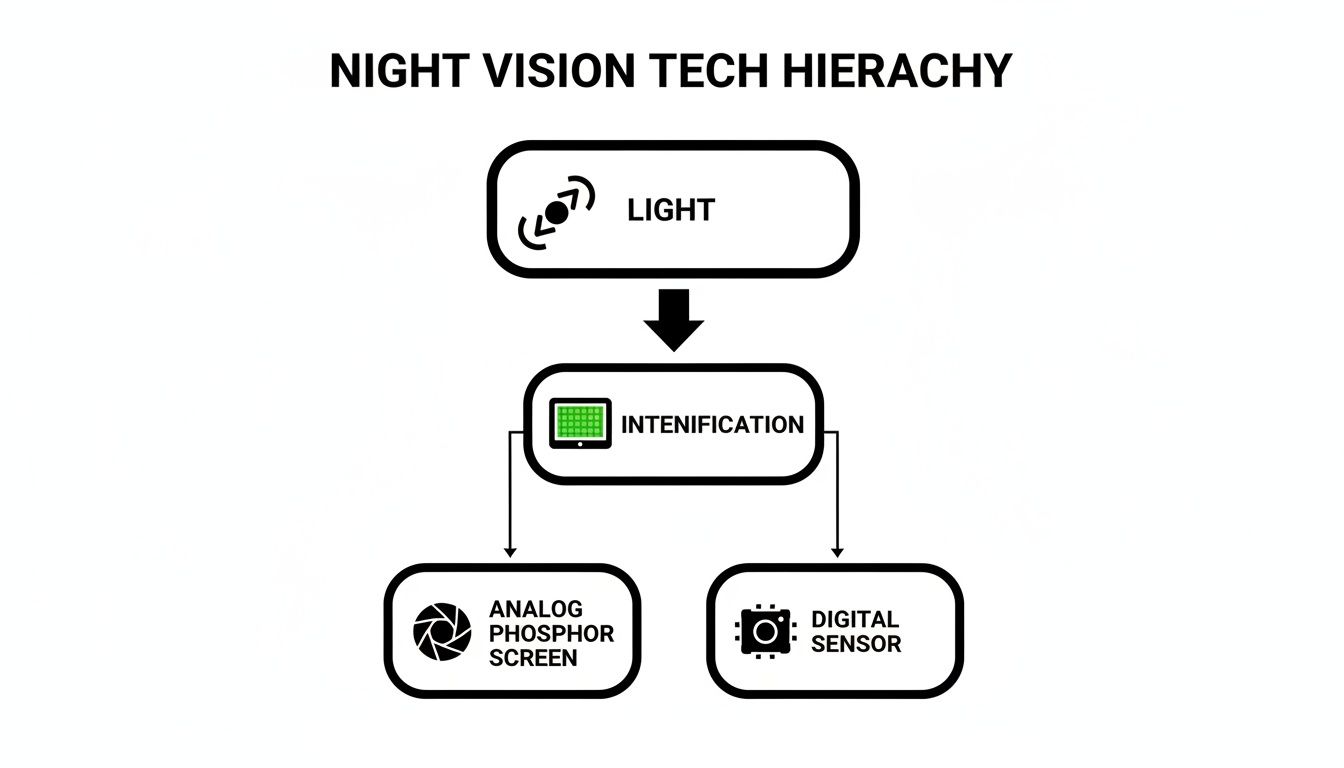
As you can see, both start with light, but the "how" of creating a usable image is worlds apart.
Night Vision Technology Comparison
Let's break down the practical differences. The best way to see where each technology shines is to put them side-by-side.
| Feature | Green Phosphor (Gen 3) | White Phosphor (Gen 3) | Digital Color Night Vision |
|---|---|---|---|
| Image | Monochrome (green & black) | Monochrome (black & white) | Full color |
| Extreme Low-Light | Excellent; highly sensitive | Superior; best-in-class sensitivity and contrast | Good, but often requires supplemental IR illumination |
| Target ID Speed | Good, but requires interpreting shades | Very Good; high contrast helps distinguish shapes | Excellent; color provides immediate context |
| Eye Fatigue | Can cause strain for some users during prolonged use | Generally more comfortable and less fatiguing than green | Least fatiguing due to natural, full-color view |
| Signature | Passive (undetectable) | Passive (undetectable) | Can be active (detectable) when using an IR illuminator |
| Best For | General-purpose tactical use, budget-conscious analog | High-end tactical operations, serious professionals | Surveillance, search & rescue, evidence gathering |
This table makes it clear: the choice isn't about which is "better" overall, but which is the right tool for a specific job.
Raw Performance in Extreme Darkness
When the lights really go out—think a moonless, overcast night deep in the woods—a high-quality Gen 3 analog tube still reigns supreme. Its sheer ability to multiply those few, precious photons gives it a reach and clarity that most digital systems just can't match yet. The image is monochrome, sure, but it’s a bright and usable image from seemingly nothing.
For a Tier 1 operator clearing a pitch-black building, that raw sensitivity from a white phosphor tube is non-negotiable. It delivers a crisp, high-contrast image that makes spotting subtle movements possible without ever flipping on an IR illuminator—a move that would instantly give away their position.
The core trade-off is sensitivity versus information. Analog excels at maximizing minimal light, while digital excels at interpreting available light to provide richer detail.
This is the Achilles' heel for many digital systems. To get a good image in zero-light conditions, they often need the help of an active infrared (IR) illuminator. It works, but it’s like turning on a flashlight that only other people with night vision can see. You’re no longer passive.
Image Clarity and Identification Speed
Here’s where the tables turn. While an analog tube gives you a sharp image, the lack of color puts a heavier cognitive load on your brain. You have to constantly interpret shapes, shadows, and shades of gray to figure out what you’re looking at, which takes precious time.
A digital color night vision system completely changes the game. Being able to instantly distinguish the color of a vehicle, a person's jacket, or a specific trail marker is a massive tactical advantage.
Think about these real-world scenarios:
- Law Enforcement: An officer on a stakeout can instantly confirm a suspect getting into a red sedan, not just a generic "dark-colored vehicle."
- Search and Rescue: A team member can spot a hiker's brightly colored backpack from hundreds of yards away, something that would just be another gray blob on an analog device.
- Hunting: A hunter can more easily pick out a deer's brown coat from the brown and gray brush or track a blood trail with far more confidence.
The context you get from color dramatically cuts down the time it takes to process a scene and make a call. When seconds count, that speed is everything. For a deeper dive, you can learn more about the differences between thermal, digital, and analog night vision in our detailed guide.
User Experience and Eye Fatigue
Don't overlook how a device feels to use for hours on end. The classic "Predator green" phosphor was chosen for a reason—the human eye is most sensitive to that shade of green—but staring at it for hours can still cause significant eye strain.
White phosphor tubes were a huge step forward, offering a more natural black-and-white image that most users find far more comfortable over long stretches. Digital color takes it to the next level by presenting the world as you expect to see it. It’s easily the least fatiguing option, as long as there's enough light for the colors to render properly.
Ultimately, the choice comes down to your mission profile. If your life depends on having the absolute best performance in the darkest environments and staying completely passive, a high-end analog system is still the top of the food chain. But if your work relies on rapid identification, evidence gathering, or surveillance where color provides critical, decision-making context, a digital color system offers an undeniable edge.
Tactical Advantages in Real-World Scenarios
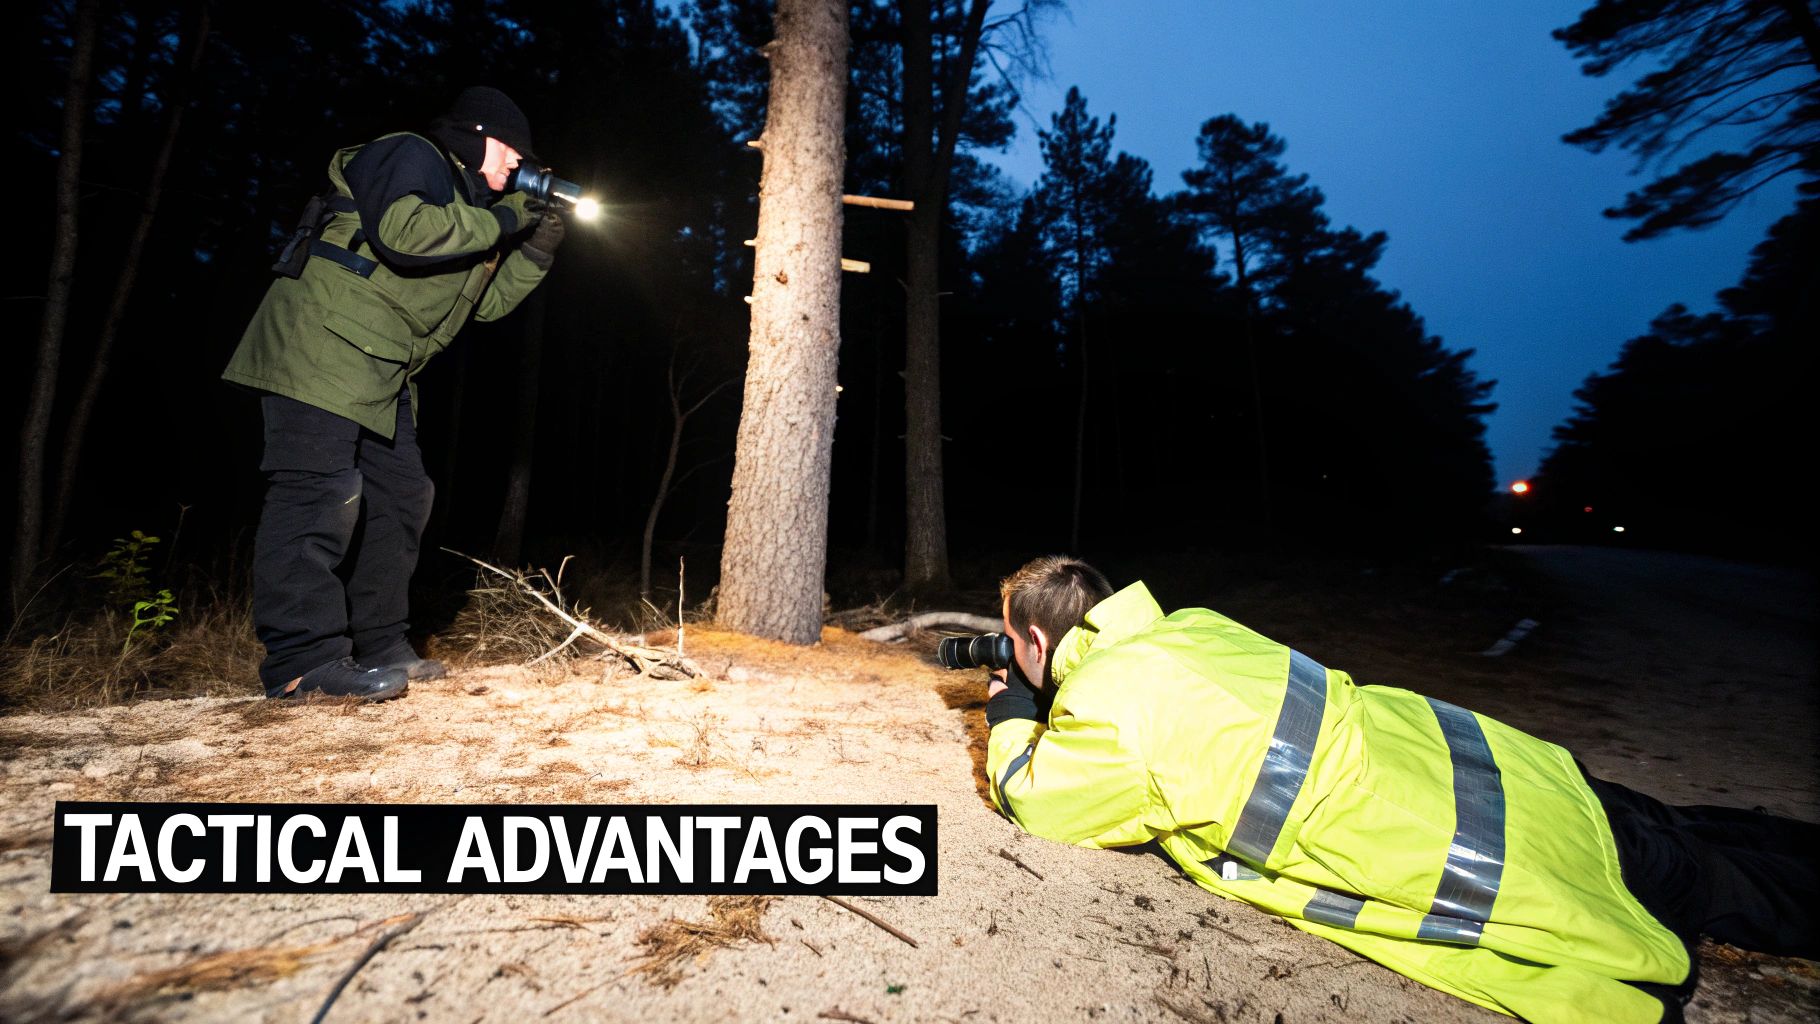
Specs on a page are one thing, but the real test of any gear is how it performs when everything’s on the line. This is where color night vision stops being an interesting piece of tech and becomes a real-deal operational advantage. Seeing color when it’s pitch-black fundamentally changes how you gather intel, size up a threat, and make a call when seconds count.
By adding a layer of color information to the scene, these systems take a huge cognitive load off your brain. You’re no longer fighting to interpret weird shades of green or gray. Instead, you're seeing a more natural picture, which frees up your focus for what really matters: strategy and reaction time.
It's not about making things look pretty. It's about getting faster, more accurate results in the field.
Law Enforcement and Surveillance Operations
For cops, positive identification is everything. Traditional green-screen night vision can leave you guessing about critical details, and that hesitation can be dangerous. Color night vision gives you the clarity to act with confidence.
Picture a surveillance team watching a target. With a standard green phosphor unit, the radio call might be a vague, "dark vehicle just pulled up." With a color system, that call becomes, "blue hatchback with a white stripe." That's actionable intel you can give to responding units.
This kind of detail is a game-changer across the board:
- Suspect ID: Telling the difference between a red hoodie and a black one could be the key to identifying the right person.
- Evidence Gathering: Capturing video or photos in color is far more powerful for investigations and in the courtroom.
- Vehicle Pursuits: An officer can nail down the color of a getaway car—often one of the first things broadcasted in a BOLO.
The addition of color transforms observation into intelligence. It closes the information gap that monochrome systems leave open, leading to clearer communication and tighter teamwork.
This is especially true in urban settings, where color is a primary identifier for just about everything—cars, clothes, and buildings.
Search and Rescue Missions
In a search and rescue (SAR) operation, the clock is your biggest enemy. Teams are often out in nasty terrain after dark, where finding someone is like searching for a needle in a haystack. Color night vision seriously tips the odds in their favor.
Think about scanning a dense forest at night. With a monochrome device, a brightly colored piece of gear—like a yellow rain jacket or an orange pack—just becomes another shade of gray. It’s incredibly easy to miss.
A color night vision system, however, makes that same jacket pop against the natural browns and greens of the woods. A searcher can cover ground faster and with a much higher chance of spotting something. The tech helps teams pick up on clues that would otherwise be completely invisible.
Hunting and Wildlife Observation
For the modern hunter, a clean, ethical harvest all comes down to positive identification and good shot placement. Color gives you a massive leg up, helping you distinguish game from its surroundings and be absolutely sure of your target.
A deer's brown coat, for example, can easily melt into a background of deadfall and brush through a green phosphor tube. Color night vision keeps that coat looking natural, making the animal stand out much more clearly.
And when it comes to tracking, it's a whole different ball game. Following a blood trail on a dark forest floor is notoriously tough with monochrome vision. But with color, the distinct red of the trail is immediately obvious against the dark earth and leaves, making for a much quicker and more successful recovery. That’s a critical advantage that ensures a more humane hunt.
Choosing the Right Color Night Vision System
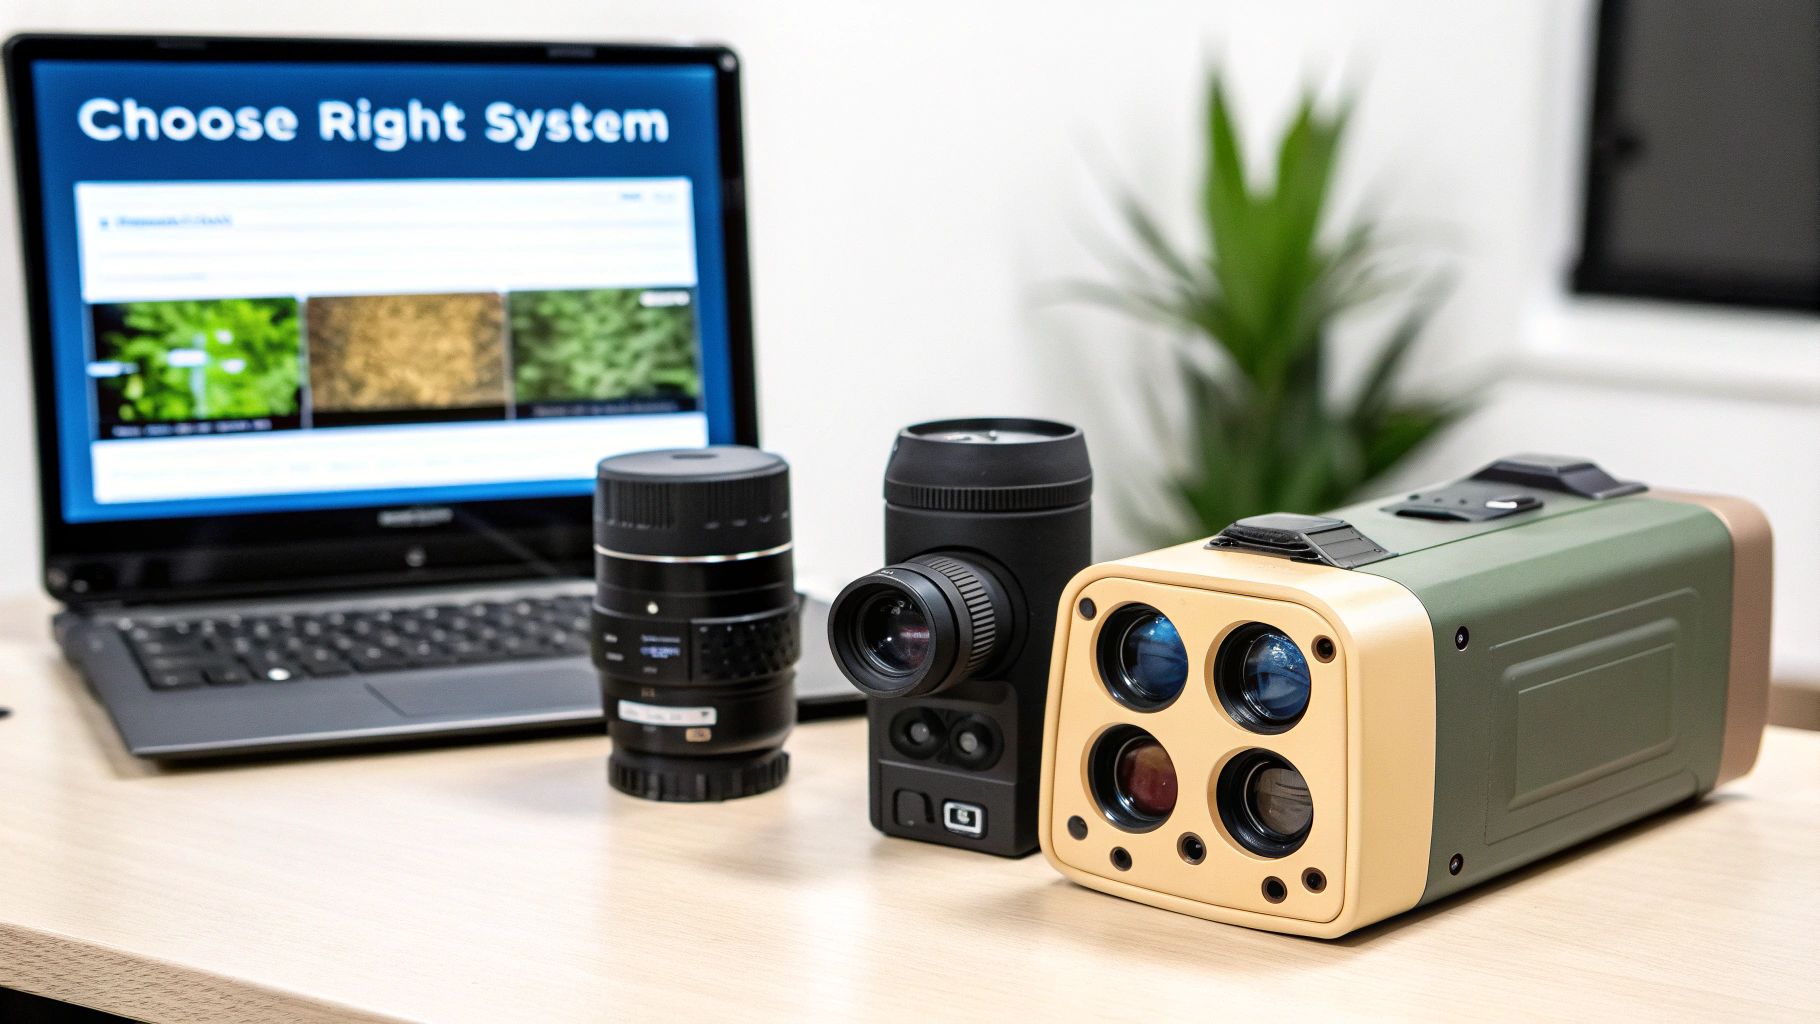
Shopping for a color night vision system isn't like buying traditional analog gear. With old-school tubes, it was all about light amplification. Now, you’ve got to think like you're buying a high-performance digital camera that’s also built for the field. You're balancing digital camera specs with hardcore tactical features.
Get this balance right, and you'll have a tool that performs exactly how you need it to when the lights go out. It's about more than just finding the highest resolution; it’s about how the entire package—the sensor, processor, illuminator, and housing—works as a single, cohesive unit. You have to look past the marketing hype and get into the numbers that really matter.
Decoding Key Performance Specs
When you start comparing models, the spec sheet can look like a foreign language. Let’s cut through the noise and focus on what actually translates to a clear, useful image in low light.
These four pillars are what separate a high-performing unit from a dud:
-
Sensor Resolution and Size: This is the bedrock of your image quality. A higher resolution, like 1080p or even 4K, packs more pixels into the image, giving you a sharper picture. But don't stop there. The physical size of the sensor and its individual pixels is just as important. Bigger sensors and pixels soak up more light, which is absolutely critical for cutting down that grainy "noise" in the darkest environments.
-
Frame Rate (fps): Measured in frames per second, this tells you how smooth the video feed will be. You want a minimum of 30 fps for a fluid, real-time view that feels natural. Anything less, and you’ll get a choppy, lagging image that’s completely useless for tracking anything that moves.
-
IR Illuminator Performance: Digital sensors are hungry for infrared light, so the power and quality of the illuminator—whether it’s built-in or a separate unit—are a massive deal. Look for specs on its effective range and beam pattern. A solid IR illuminator can paint a pitch-black scene with enough light to make it look like dusk, full of color and detail.
-
Battery Life and Power Options: Let's be real: digital systems chew through batteries. Pay close attention to the expected run time and what kind of batteries it takes. Even better are units that can be powered by an external USB battery pack, giving you way more flexibility for long nights on the job.
The biggest trade-off with current digital color night vision is often raw sensitivity versus contextual detail. A high-end analog tube may pierce deeper into extreme darkness, but a quality digital system provides the irreplaceable advantage of color for positive identification.
Understanding that trade-off is everything. You're choosing a tool for a specific job, and knowing its inherent compromises will help you make a much smarter decision.
Integration and Mounting Considerations
The best optics in the world are just an expensive paperweight if they don't integrate with your existing kit. Before you even think about buying, you have to confirm that the device will play nice with the helmet, rifle, and accessories you already own and trust.
Think through these non-negotiable integration points:
- Helmet Mounting: Does the unit use a standard interface like a dovetail or a bayonet? You want something that works with common mounts from Wilcox or Norotos, so you aren't locked into some weird, proprietary setup.
- Weapon Mounting: If you're planning to run it on a rifle, make sure it’s rated for recoil and compatible with a standard Picatinny rail. You need to know it will hold zero.
- Accessory Rails: Check if the housing has its own rails. The ability to bolt on your own IR illuminators, lasers, or other gear is a huge plus.
Figuring this stuff out beforehand will save you a world of frustration and money. The goal is to plug a new capability into your current system, not to be forced into a complete overhaul. A unit built around standard interfaces is a versatile tool that will serve you well for years to come.
Keeping Your Gear Mission-Ready
Let's be clear: your investment in top-tier optics is worthless if the gear isn't ready to go when you are. A high-performance color night vision system isn't a set-it-and-forget-it piece of kit. It needs consistent care to deliver when the lights go out. Unlike the old-school analog tubes that are basically sealed units, these digital devices have firmware, sensors, and complex power systems that need a little more attention to stay in peak fighting shape.
Proper maintenance isn't rocket science, but it is absolutely critical. It’s all about building smart habits to protect the sensitive electronics and precision optics from the grit, moisture, and power fluctuations you'll inevitably face in the field. This isn't just about cleaning; it's about making sure your gear is an asset, not a liability.
The Non-Negotiables: Basic Care and Upkeep
The two fastest ways to sideline any advanced optic are a dirty lens and a dead battery. It’s that simple. A clear sight picture and a charged power source are the bedrock of low-light dominance. If you drop the ball on either one, that expensive device becomes dead weight at the worst possible moment.
Here’s where you need to focus your efforts:
- Lens and Sensor Cleaning: Never, ever use your t-shirt. Always reach for a proper lens pen, an air blower, or a microfiber cloth specifically made for high-end optics to clean the objective lens. Even tiny bits of debris can scratch delicate coatings and permanently degrade your image quality. On digital systems, keeping the sensor dust-free is just as vital.
- Battery Management: Digital night vision is thirsty for power—way more than analog. Stick with high-quality batteries and always pack spares. If your unit has the option, an external battery pack is a game-changer for long nights. Crucially, never store the device with batteries inside for extended periods. Leaks and corrosion will kill it.
- Firmware Updates: The software is the brain of your digital NVG. Manufacturers are constantly pushing out updates to fix bugs, sharpen image processing algorithms, and sometimes even add new features. Make it a habit to check their website every so often.
A well-maintained device is a dependable one. Spending just a few minutes on upkeep after each use can prevent 90% of common field failures, from a fuzzy picture to the unit dying on you mid-operation.
Troubleshooting on the Fly
Even with meticulous care, things can go wrong. When they do, a methodical approach to troubleshooting will get you back in the fight fast.
If you’re dealing with a flickering screen, a grainy image, or a unit that just won't turn on, run through this quick checklist before you panic:
- Check Your Power: The first and most common culprit. Swap in a fresh set of batteries that you know are good. Weak batteries are the number one cause of weird digital device behavior.
- Inspect Connections: Make sure the battery cap is screwed on tight and the contacts are clean. If you're running an external pack, double-check that the cable is firmly seated at both ends.
- Clean Your Glass: Is the image blurry or full of spots? It's probably just dirt, dust, or a fingerprint on the objective lens or the eyepiece. Give them a careful cleaning.
- Reset the Device: When all else fails, a factory reset can often clear up software glitches. Check your manual for the specific instructions on how to do this.
And for those of you still running traditional green phosphor units, many of these principles still hold true. We've put together a more detailed guide on that subject in our article on the maintenance and care for a PVS-14 monocular, which dives into the best practices for keeping that classic gear in top form.
Color Night Vision Frequently Asked Questions
Even after you get the hang of how this tech works, a few key questions always seem to pop up. Let's tackle the most common ones we hear, so you can get straight answers and make a confident decision.
Is Digital Color Night Vision As Good As Gen 3?
If you're talking about pure, raw light amplification in almost zero light, a high-end Gen 3 green phosphor tube still reigns supreme. Analog technology is just incredibly efficient at gathering the absolute faintest bits of starlight and turning them into a usable image.
But that's not the whole story. Where color night vision pulls ahead is in providing crucial environmental detail when there's some ambient or IR light to work with. That extra contextual information—distinguishing a brown jacket from a green one, for example—can make all the difference in positive target identification. The "best" choice really comes down to where you'll be operating most often.
It's a classic trade-off: sensitivity versus information. High-end analog is king at maximizing minimal light, while digital color uses available light to paint a richer, more detailed picture.
Do I Need a Special IR Illuminator?
Good news here. Most digital color night vision systems play extremely well with the standard infrared (IR) illuminators you're probably already familiar with. Since they're built on digital sensors, they are very sensitive to IR light, which basically works like an invisible flashlight for your device.
Tossing an external IR illuminator onto your setup can give a digital system a massive boost in range, clarity, and even color accuracy, especially when you're in true no-light situations. Just be sure to check the manufacturer's specs for the ideal IR wavelength—like 850nm versus the more covert 940nm—to get the best performance out of your specific unit.
Can Color Night Vision See Through Fog or Smoke?
Nope, it can't. Just like your own eyes or traditional night vision, color systems rely on light from the visible and near-infrared spectrum. That means they get completely shut down by thick fog, heavy smoke, or dense dust.
For those kinds of conditions, you need to switch tools entirely.
- Thermal Imaging: This technology doesn't see light at all; it sees heat signatures.
- Superior Performance: It's the only reliable way to cut through environmental obscurants.
- Fused Systems: This is why you see many pros running both. They'll fuse thermal and night vision to get maximum situational awareness, no matter the conditions.
Understanding this limitation is critical. Color night vision is a massive step up for seeing in the dark, but it doesn't give you Superman's x-ray vision. When the air gets thick, thermal is the only game in town.
Ready to gain a tactical advantage with superior optics? Explore the curated selection of night vision and thermal imaging solutions at Superior Tactical LLC. Our expert team is ready to help you find the perfect gear for your mission. https://superiortac.com