A Guide to Infrared Illuminator Night Vision
Think of an IR illuminator as a stealth flashlight. It throws out a beam of light that’s completely invisible to the human eye, but to your night vision gear, it’s like flipping on a high-powered floodlight.
Night vision devices work by taking tiny amounts of existing light—from the moon, the stars—and amplifying them thousands of times. But what happens when there’s no light to amplify? In a deep forest with a heavy canopy, or inside a building with no windows, even the best gear can’t make something out of nothing. That’s where an IR illuminator comes in.
What Is an Infrared Illuminator?
An infrared illuminator is a purpose-built device that emits light in the infrared (IR) spectrum. While we can’t see it, night vision equipment is specifically designed to pick up these wavelengths.
When you turn on an illuminator, it bathes the area in IR light. This light bounces off everything in its path—trees, a target, the side of a building—and reflects back to your night vision device. The unit then takes that reflected IR energy and converts it into the greenish-glowing (or black and white) image you see, turning a pitch-black scene into a visible landscape.
It’s the exact same principle as using a regular flashlight, with one huge advantage: the light is totally covert. To anyone not equipped with night vision, you’re still completely hidden in the darkness. This isn’t just a neat accessory; it’s the tool that lets you operate effectively in true zero-light environments. An IR illuminator creates its own artificial moonlight, right when you need it.
The Foundation of Modern Night Vision
The link between illuminators and night vision goes way back to the beginning. The earliest night vision systems, developed back in the 1960s, absolutely depended on external IR illuminators to work in the dark. These Gen 1 devices had a luminance gain of around 20,000 to 45,000, which was impressive for the time and allowed operators to see targets over 200 yards away on a moonless night. You can find some fascinating details on this early tech in historical reports on night vision development.
An infrared illuminator doesn’t just help you see in the dark; it creates the conditions for sight where none exist. It is the active component that transforms passive observation into active environmental control.
Why It Is a Critical Upgrade
If you’re serious about using night vision for tactical, hunting, or security purposes, a good external IR illuminator is non-negotiable. Many night vision units come with a small, built-in “onboard” illuminator, but these are often underpowered and only useful for close-up tasks. A dedicated, high-quality illuminator is a massive leap in capability.
- Drastically Extended Range: A powerful external illuminator can throw a clean beam of IR light hundreds of yards downrange, pushing your effective identification distance far beyond what the device alone can manage.
- Cleaner, Sharper Image: More IR light hitting the sensor means a brighter, crisper image for you. It reduces that grainy “scintillation” or digital noise you see when your device is starved for light.
- True “No-Light” Performance: It unlocks the ability to see clearly in places with absolutely zero ambient light—think deep caves, underground structures, or rooms sealed off from any outside light source.
At the end of the day, adding a quality IR illuminator to your setup gives you control. It turns darkness from an obstacle into a decisive advantage.
How IR Illuminators Work with Night Vision
An infrared illuminator and a night vision device are really two halves of a whole. While both can do their jobs separately to some extent, you only get their full, game-changing potential when they work together. How they team up, though, depends entirely on the kind of night vision gear you’re running.
Here’s a simple way to think about it: your night vision device is a super-sensitive camera, and the IR illuminator is its personal, invisible spotlight. That camera can see pretty well in dim conditions, but when it’s truly pitch black, it needs that spotlight to paint a picture. Getting this partnership right is the secret to owning the night.
Image Intensifier Tubes: The Light Amplifiers
Traditional analog night vision, whether it’s old-school Gen 1 or modern Gen 3+ tubes, works by amplifying light. The image intensifier tube inside the unit grabs whatever tiny bits of ambient light it can find—starlight, distant city glow—and multiplies it thousands of times to create that familiar green-tinted view.
But there’s a catch. These systems need some light to work with. Put one in a place with zero ambient light, like a windowless basement or a cave, and it has nothing to amplify. It’s completely blind.
This is exactly where an IR illuminator becomes mission-critical. It floods the area with invisible infrared light, giving the intensifier tube the photons it needs to do its job. Suddenly, that blind device can see perfectly.
This diagram breaks down that simple but powerful idea—turning absolute darkness into a crystal-clear image.
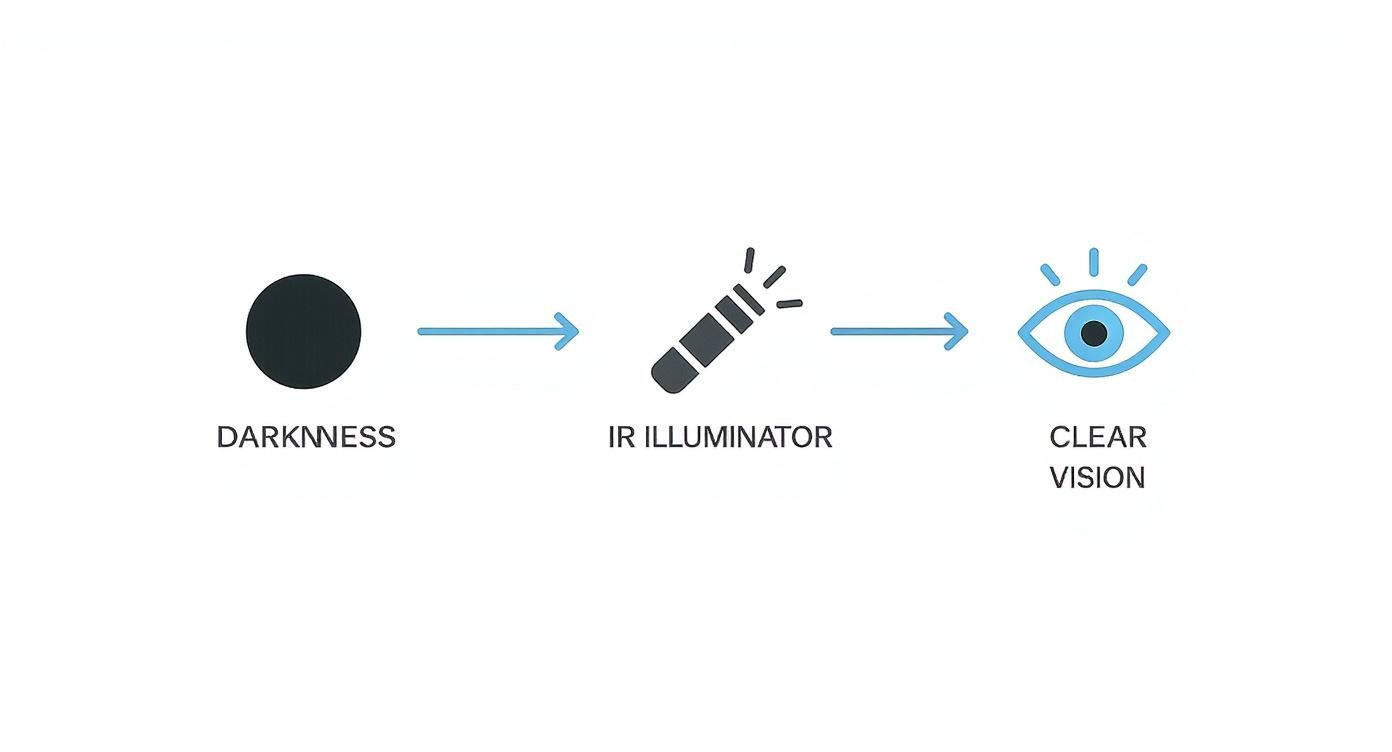
As you can see, the IR illuminator acts like a bridge, projecting energy that’s invisible to the naked eye but perfectly visible to your night vision gear.
Digital Night Vision: The Perfect Partner
Modern digital night vision works on a totally different principle. Instead of a glass tube, it uses a digital sensor—a CCD or CMOS sensor, much like the one in your phone’s camera.
What’s cool is that these sensors are naturally sensitive to infrared light. In fact, most regular cameras have a filter installed specifically to block IR light so daytime photos look normal. Digital night vision units just get rid of that filter, letting them see deep into the IR spectrum.
Because of this built-in sensitivity, digital NVDs and IR illuminators are a natural fit. A good illuminator can dramatically boost the range and image quality of a digital scope, feeding its sensor the exact kind of light it’s designed to see. It’s no surprise that the infrared night vision market, valued at $2.5 billion in 2025, keeps growing.
Here’s the key difference: Image intensifier tubes need IR in total darkness to function at all. Digital sensors are naturally tuned to thrive on it, making the combo of a digital scope and a good illuminator incredibly effective.
Thermal Imaging: The Big Exception
Now for the most common point of confusion: thermal imaging. A lot of folks assume that because thermal lets you see in the dark, it must work with an IR illuminator. This is completely wrong.
Thermal imaging doesn’t see reflected light at all—it detects heat. A thermal optic builds an image from the tiny temperature differences between objects. It sees the heat coming off a person, a coyote, or a warm truck engine. It’s a different technology operating on a different part of the electromagnetic spectrum.
Because an IR illuminator emits light, not heat, a thermal scope can’t see it. Period. Trying to use an IR illuminator with a thermal optic will do absolutely nothing. It’s like trying to use a flashlight to see sound waves.
If you want to go deeper on this, you can explore our comprehensive guide to night vision technology at https://superiortac.com/night-vision-technology-explained-thermal-imaging-vs-digital-night-vision-vs-analog-night-vision/.
Infrared Illuminator Compatibility with Night Vision Technologies
To make it perfectly clear, here’s a quick breakdown of how these different technologies play with IR illuminators. This table sums up what works, what doesn’t, and why.
| Night Vision Type | How It Works with IR Illuminators | Primary Benefit | Key Limitation |
|---|---|---|---|
| Image Intensifier (Gen 1-3+) | Amplifies the reflected IR light when no ambient light is available. | Enables operation in absolute, zero-light conditions. | Performance is directly tied to the amount of light available. |
| Digital Night Vision | The digital sensor directly processes the reflected IR light. | Greatly enhances image clarity, brightness, and effective range. | Can have a slight image lag compared to analog systems. |
| Thermal Imaging | Does not interact with or detect the light from an IR illuminator. | Detects heat signatures through visual obscurants like smoke or fog. | Cannot see IR light, making illuminators completely incompatible. |
Understanding these fundamental differences is the first step in building a night vision system that truly works for you and your specific needs.
Understanding IR Illuminator Specifications

Choosing an IR illuminator can feel like learning a new language. You’re hit with a wall of numbers and terms—nanometers, milliwatts, beam patterns—that can be intimidating at first. But here’s the good news: once you get a handle on what these specs mean, you can predict exactly how a unit will perform in the field.
These numbers aren’t just for show; they’re the DNA of the illuminator. They define its power, its stealth, and its reach. Learning to read this DNA is what allows you to pick the perfect tool for your mission, whether you’re scanning a dark field for coyotes or securing a property with zero ambient light.
Wavelength: The Power Versus Stealth Tradeoff
The first number you’ll probably see is the wavelength, measured in nanometers (nm). This spec dictates the “color” of the invisible light being produced and forces you to make the single most important decision: Do you need raw power or total stealth?
Your choice will almost always come down to two options:
- 850nm Illuminators: These are the workhorses. They pump out an incredibly bright beam of infrared light that most night vision devices are highly sensitive to. This translates directly to longer range and a clearer, more detailed image. The trade-off? 850nm diodes emit a faint, dull red glow at the source. It’s not much, but it can be seen by the naked eye up close and is definitely visible to animals with sharp night vision.
- 940nm Illuminators: Think of these as the “stealth” option. Their light is pushed further into the infrared spectrum, making them completely invisible to human and most animal eyes. The catch is that night vision sensors are less sensitive to this wavelength. As a result, you’ll sacrifice about 30-40% of the effective range compared to an 850nm unit with the same power output.
This choice is all about the mission. A hunter trying to stay hidden from wary game will likely lean toward a 940nm unit. On the other hand, a search and rescue team that needs to light up a huge area would grab an 850nm illuminator without a second thought.
Power Output: Measuring Raw Illumination
Next up is power output, which is measured in milliwatts (mW). Simply put, this is the horsepower of your illuminator’s engine. A higher mW rating means the device is pushing out more infrared energy, giving you a greater illumination range and a brighter picture through your optic.
A tiny, built-in illuminator might only put out 5-10mW—just enough to read a map or navigate a small room. In stark contrast, a serious external illuminator can boast outputs of 600mW or more, capable of lighting up targets hundreds of yards away.
Your illuminator’s power output is the single biggest factor in determining its effective range. While other specs matter, a low-power illuminator will never have the reach of a high-power one, regardless of beam pattern or wavelength.
It’s crucial to match the power to your needs. Blasting too much power at close range causes “splashback” or “white-out,” where the intense IR light reflects off nearby objects and completely overwhelms your night vision. This is why many quality illuminators feature adjustable power settings, letting you dial it down when you don’t need full blast.
Beam Pattern: Focusing Your Light
Finally, you need to think about the beam pattern. This describes how the illuminator shapes and throws its light downrange. Most good illuminators offer an adjustable beam, allowing you to seamlessly switch between two main patterns.
- Flood Beam: This creates a wide, soft circle of light, much like a standard flashlight. It’s perfect for illuminating a broad area, keeping your situational awareness high, and navigating on foot. You can see everything in your immediate vicinity clearly.
- Spot Beam: With a quick twist of the illuminator’s head, you can focus that light into a tight, intense spotlight. This concentrates all the IR energy into a much smaller area, dramatically increasing its effective range so you can positively identify distant targets.
The ability to switch between flood and spot is non-negotiable for serious use. You might use a flood beam while scanning a field, then instantly tighten it to a spot beam to get a better look at something you saw in the distance. This versatility is what separates a basic illuminator from a professional-grade tool.
To help you get started, this table outlines some solid spec targets for common uses. Think of it as a cheat sheet to narrow down your options.
Recommended IR Illuminator Specs for Common Applications
| Application | Recommended Wavelength | Ideal Power Output (mW) | Optimal Beam Pattern |
|---|---|---|---|
| Close-Quarters/Home Security | 850nm (indoors), 940nm (outdoors) | 50 – 200mW | Adjustable (Wide Flood) |
| Predator Hunting (Coyotes, etc.) | 940nm (stealth is key) | 300 – 600mW | Adjustable (Flood-to-Spot) |
| Hog Hunting | 850nm (hogs are less sensitive) | 400 – 800mW+ | Adjustable (Flood-to-Spot) |
| Tactical/Law Enforcement | 850nm (maximum range/power) | 500 – 1000mW | Adjustable (Flood-to-Spot) |
| General Observation/Security | 850nm (for clarity and distance) | 250 – 500mW | Adjustable (Flood-to-Spot) |
Remember, these are just starting points. The perfect illuminator for you will always depend on your specific night vision device, your typical engagement distances, and what you’re trying to accomplish in the dark.
Choosing and Mounting Your Illuminator
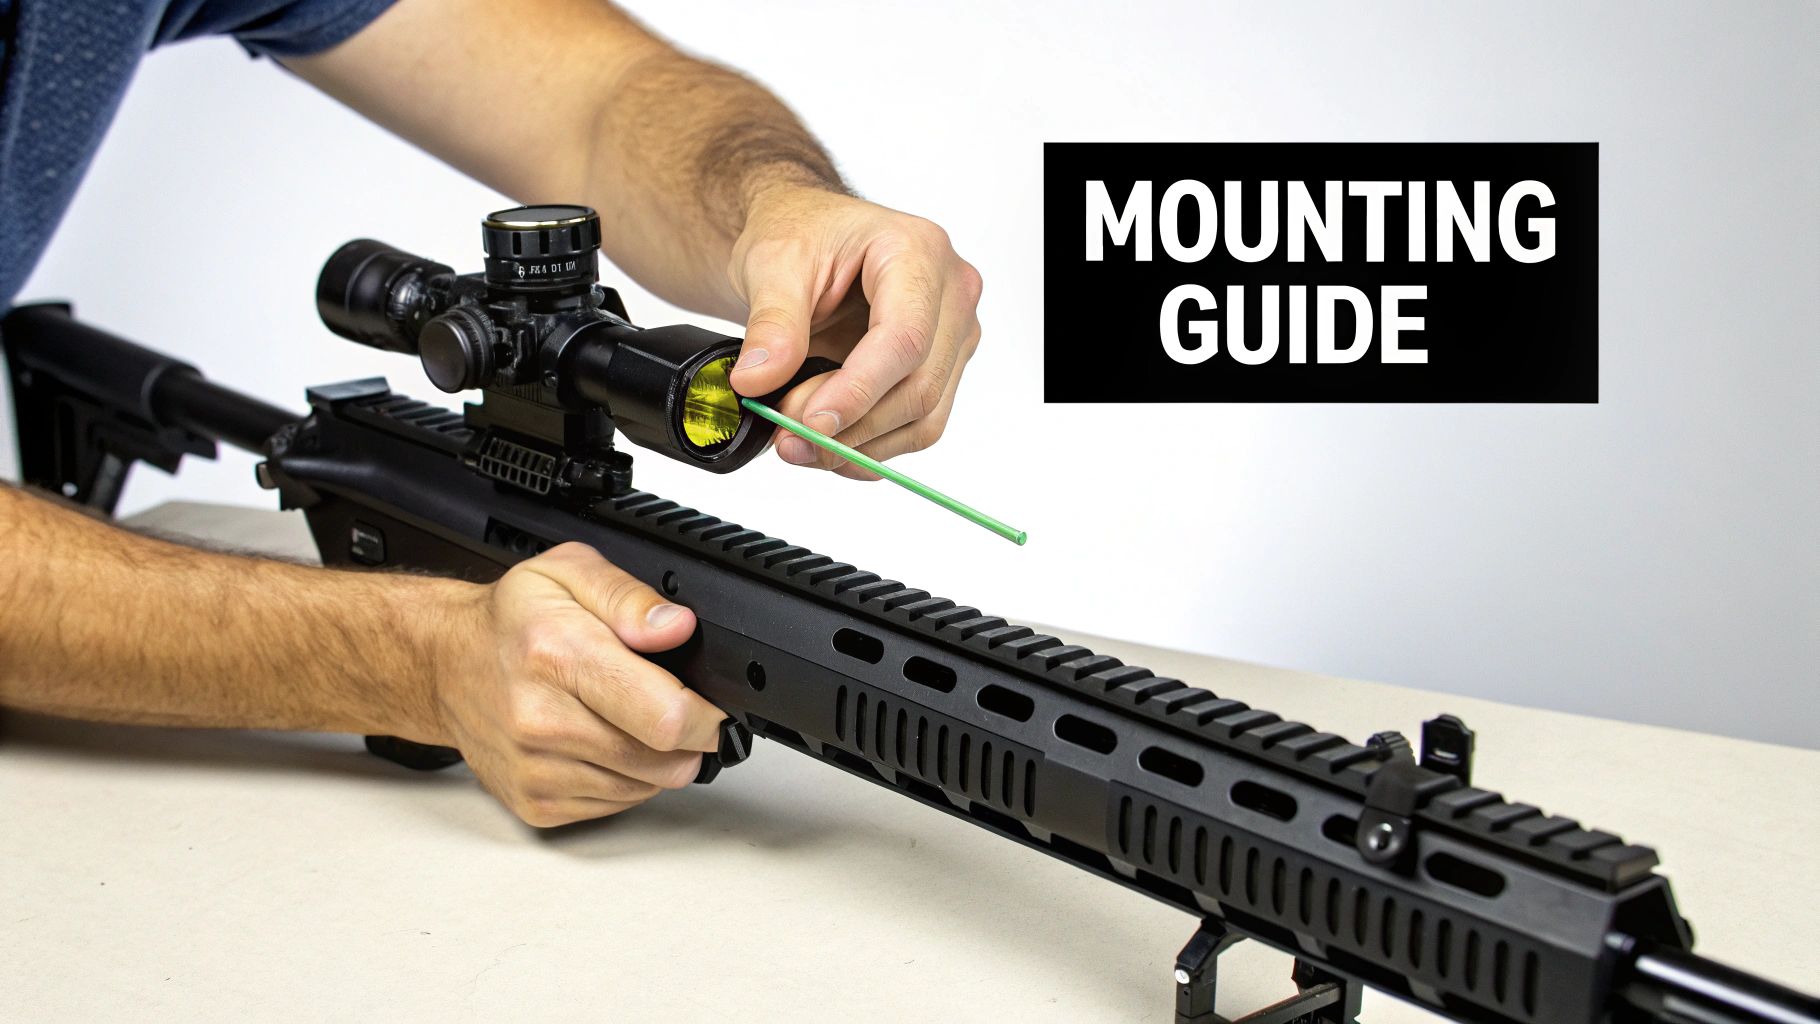
Picking out the right infrared illuminator is just the start. The real magic happens when you mount and position it correctly, because that’s what truly unlocks its potential.
A well-placed illuminator ensures your IR beam works with your night vision device, not against it. It prevents frustrating problems like getting blinded by your own light or having annoying dark spots in your view. Getting this hands-on part right is what separates a setup that just “works” from one that’s genuinely effective out in the field.
The whole point is to make your illuminator and your optic feel like a single, cohesive unit. You have to think about your specific rifle or helmet, what you’re using it for, and how it all feels in your hands. This isn’t just about bolting on another accessory; it’s about smart integration.
Finding the Right Mounting Solution
How you attach your illuminator really comes down to the gear you’re running. Each mounting method has its own pros and cons when it comes to stability, weight, and how easy it is to tweak on the fly.
- Picatinny Rails: This is the go-to for most people, especially on modern rifles. A Picatinny rail gives you a rock-solid foundation and tons of options for placement—top, sides, or even underneath. You can put the illuminator exactly where it won’t get in the way of your grip or other gear.
- Scope Rings: If you’re a hunter running a dedicated night vision scope, a scope ring mount is a really clean solution. It clamps right onto the body of your scope, keeping the illuminator perfectly in line with your optic and cutting down on clutter.
- Tripods: For surveillance or any kind of static observation, putting the illuminator on its own tripod is a game-changer. This separates the IR source from your optic, letting you “paint” a target area from an offset position. It’s a great way to avoid giving away your location and manage reflections.
For helmet setups, the same principles apply. A secure fit is everything. If you’re looking to dial in your head-mounted gear, check out our guide on dovetail mounts for night vision goggles and their compatibility.
Critical Placement Tips to Avoid Problems
Where you put the illuminator is just as important as how you attach it. Get the placement wrong, and you can create some serious image quality headaches that make it impossible to see clearly.
The biggest issue you’ll run into is IR splashback, often called “white-out.” This is what happens when the infrared beam bounces off something close to you—like the end of your rifle barrel, a suppressor, or even thick fog—and floods your NVD with way too much light. It can completely wash out whatever you’re trying to look at.
The golden rule of illuminator placement is to mount it as far forward as possible. This one simple step moves the source of the IR beam ahead of anything on your rifle that it could reflect off, giving you a much cleaner view downrange.
For example, positioning the illuminator on the side of your handguard can push the beam’s cone of light away from the barrel and suppressor. Every setup is a little different, so don’t be afraid to experiment to see what works best for you.
Aligning the Beam with Your Optic
Once your illuminator is mounted, the final step is to get it properly aligned with what you’re seeing through your night vision. Most good illuminators let you adjust the beam from a wide “flood” to a tight “spot.” The goal here is to center that beam perfectly in your field of view.
It’s an easy process. Just find a dark spot and aim at something 50–100 yards away. Now, adjust the illuminator in its mount until the brightest part of the beam—the “hot spot”—is dead center in your optic. This ensures that when you tighten the beam for maximum distance, all that IR energy is going exactly where you’re looking.
This synergy between illuminators and cameras isn’t just for tactical users; it’s a huge deal in professional security. The analog-based security camera segment, which relies heavily on IR, accounted for 42.90% of total market revenue in 2025. This is driven by things like advanced PTZ (pan-tilt-zoom) cameras that use IR to actively monitor sensitive areas. You can learn more about the evolution of the security camera market and its technologies.
Field Tips and Troubleshooting
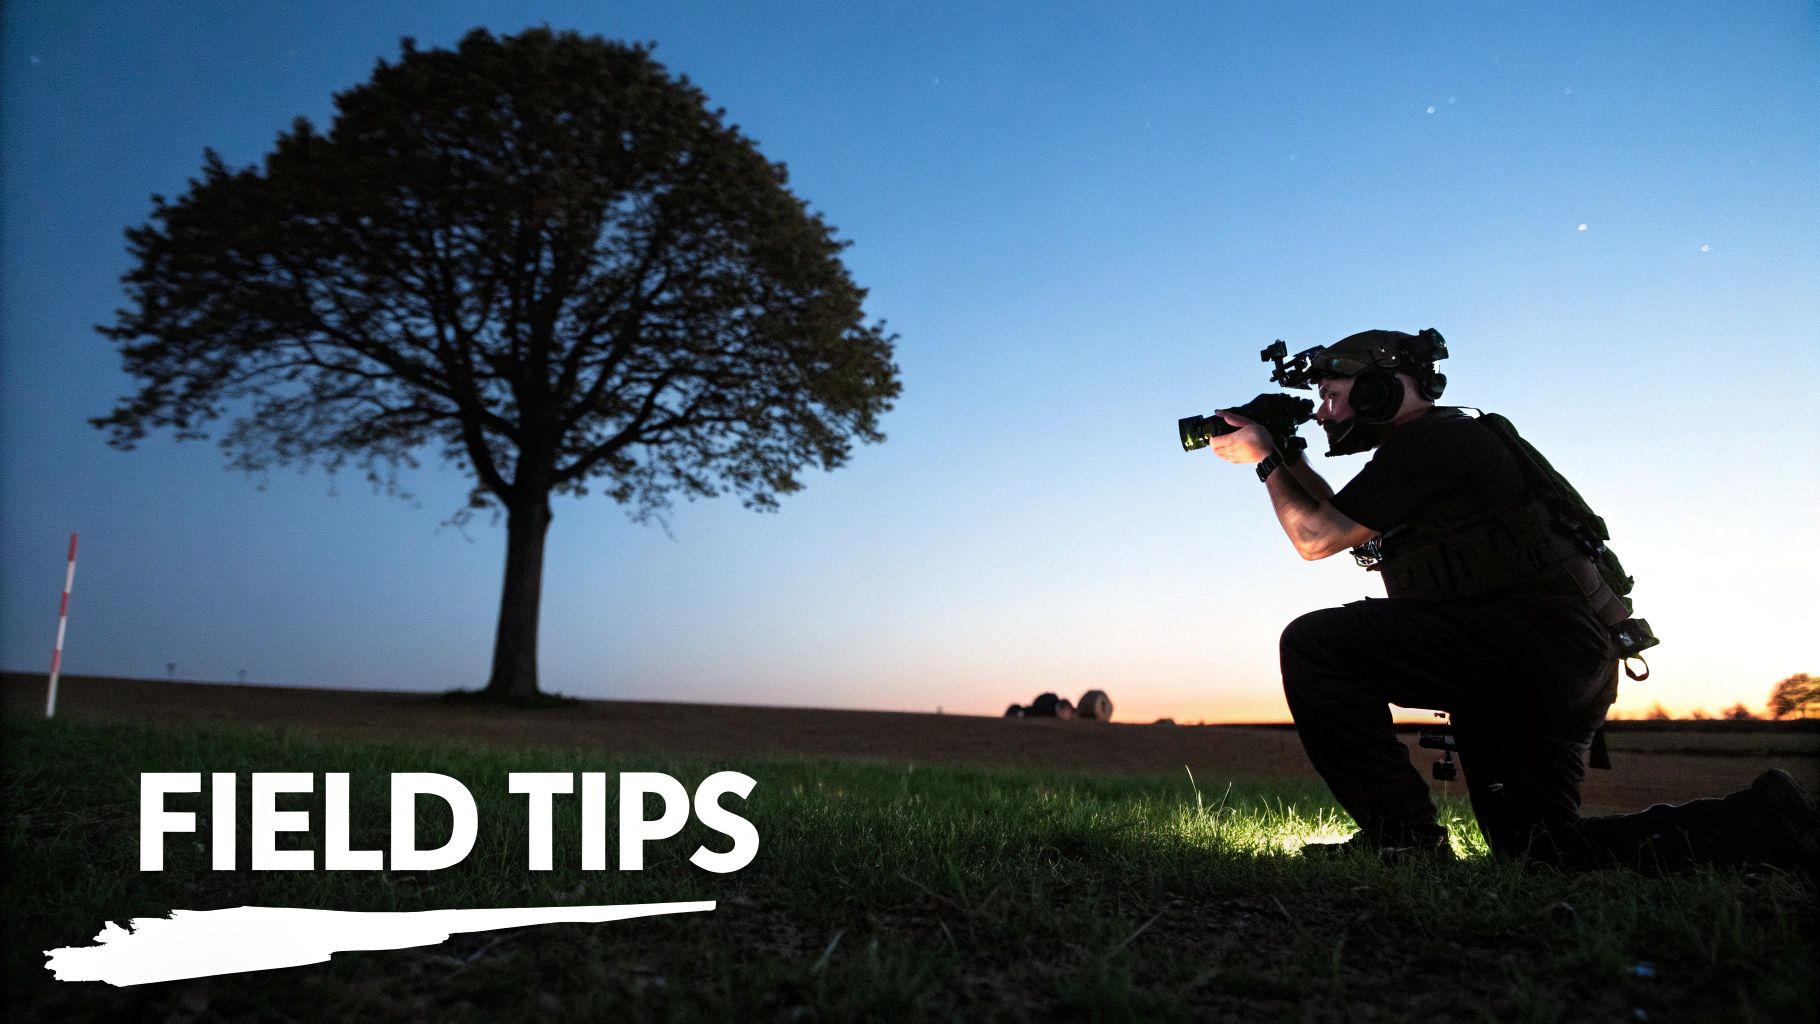
Knowing the specs on a sheet of paper is one thing. Getting that gear to work for you when the pressure is on is something else entirely. True mastery of your infrared illuminator and night vision setup comes from time in the field and knowing how to troubleshoot problems as they happen.
Think of these tips as lessons learned the hard way, so you don’t have to. They’re designed to help you get your gear running like a well-oiled machine when it counts.
Advanced Field Techniques
There’s more to using an IR illuminator than just flipping a switch. A few simple techniques can dramatically improve your effectiveness, whether you’re hunting hogs or securing a perimeter.
One of the best is “painting” the area. Instead of blasting a tight, focused beam directly at what you’re looking at, switch to a wide flood setting. Use it to gently “paint” an entire field, treeline, or building face with soft, even IR light. This reduces the harsh hot spots and deep shadows you get with a focused beam, making it far easier to detect subtle movements across the entire area.
Battery discipline is another game-changer. An IR illuminator, especially on its highest setting, is thirsty for power.
- Be Stingy with Power: Don’t run your illuminator just because it’s dark. Use it only when the ambient light is too low for your NVD to produce a usable image on its own.
- Always Carry Spares: This is non-negotiable. Have at least one, preferably two, fresh sets of high-quality batteries. And remember, cold weather kills battery life—keep your spares warm in a pocket close to your body.
- Use the Lowest Setting Necessary: If your illuminator has variable power, start low. Only dial it up until you can see what you need to see. You’ll be surprised how rarely you actually need the full-power “sun mode.”
Troubleshooting Common Illuminator Issues
No matter how expensive your gear is, things can and do go wrong. Most of the time, the fix is surprisingly simple if you know what you’re looking for.
If you’re getting a dim or flickering beam, the first suspect is always the batteries. Pop in a fresh set. If the problem persists, check the battery contacts for dirt or corrosion. A quick wipe with a clean, dry cloth can often restore a solid connection.
Ever focused your beam down to a tight spot and seen a dark “doughnut hole” in the middle? This is a common quirk caused by the LED not being perfectly centered with the lens. The easy fix is to just back off the focus slightly. Widening the beam just a little bit almost always makes the doughnut disappear, and you’ll barely lose any effective range.
The most common headache by far is IR splashback. This is when your powerful infrared beam reflects off nearby objects—like fog, heavy rain, dust in the air, or even the front of your own suppressor—blinding your night vision. To fix this, move the illuminator as far forward on your weapon or helmet as possible. Getting it past those obstructions is key.
If you’ve tried all these tricks and your gear is still acting up, it might be a sign of an internal problem. Before giving up, it’s worth learning about common night vision gear issues and how repairs can help. Knowing when to fix it yourself and when to call a pro can save you a lot of frustration and keep your setup running for the long haul.
Safety and Legal Considerations
When you add a powerful infrared illuminator to your night vision setup, you’re taking on some serious responsibilities. It’s easy to forget that just because you can’t see the light, it doesn’t mean it’s harmless. High-output IR devices can be a genuine risk if you get careless, and the legal side of things requires just as much attention.
Think of a high-power IR illuminator like a laser. You can’t see the beam, so your natural blink reflex—your eye’s built-in safety feature—won’t kick in to protect you. That invisible energy, if pointed directly at an eye, can still cause real damage.
Practicing Safe Operation
Fortunately, safe handling is simple. It just means treating your illuminator with the same respect you’d give any other piece of critical gear. The golden rule is to avoid direct exposure, period.
- Never Look Directly Into the Emitter: This is non-negotiable. Don’t stare into the business end of the illuminator while it’s on, not even on its lowest setting.
- Watch for Reflections: Be mindful of where you’re pointing that beam. At close range, reflective surfaces like glass or mirrors can bounce that concentrated energy right back at you.
- Keep It Away From Children: Store the device securely where it can’t be grabbed or accidentally turned on by anyone who doesn’t know how to handle it.
Understanding the Legal Landscape
Now for the paperwork side of things. The legality of running an infrared illuminator night vision rig can change dramatically depending on where you are and what you’re doing, especially when it comes to hunting. Many states have ironclad laws against using any artificial light to hunt certain game animals.
Disclaimer: This is purely for educational purposes and isn’t legal advice. It’s on you to research and follow all federal, state, and local laws that apply to you.
Before you ever head out, you have to do your homework. Find out the specific regulations for your area. Are there rules against using artificial light for hunting? Does your state consider a high-power IR illuminator a prohibited device for hunting at night? Some places might give you the green light for nuisance animals like feral hogs but not for deer.
Trust me, “I didn’t know” won’t get you out of trouble. Do the research and stay on the right side of the law.
Got Questions? We’ve Got Answers.
Even after you get the hang of your new infrared illuminator night vision setup, a few real-world questions always pop up. Here are some of the most common things we get asked by folks running their gear in the field.
Can Animals See the Faint Red Glow from an 850nm IR Light?
You bet they can. That 850nm illuminator has a tell-tale, dull red glow at the source. While it might look dim to you, animals with sharp night vision—especially predators like coyotes or foxes—can spot that glow from a surprisingly long way off. It’s often enough to give you away.
This is exactly why 940nm illuminators are the go-to for hunting pressure-sensitive game. You lose a bit of range compared to an 850nm light, but the total invisibility is a massive tactical advantage when stealth is everything.
What’s the Real-World Range of My IR Illuminator?
That’s the million-dollar question, and it really comes down to three things: your illuminator’s power output (in mW), your night vision device’s sensitivity, and the weather. A powerful illuminator paired with a high-end Gen 3 tube can light things up for several hundred yards.
Pro Tip: There’s a huge difference between detection and identification. You might see eye-shine at 500 yards, but you won’t be able to tell what it is. Positive ID might only happen at 200 yards. Get out and test your specific setup to learn its true limits before it counts.
Can I Use My IR Illuminator Through a Window?
Nope, not really. Most glass, especially the double-pane, energy-efficient kind in modern homes, is highly reflective to infrared light. If you point your IR beam at a window from inside, it’s like pointing a flashlight into a mirror—you get a massive, blinding “splashback” that completely whites out your NVD.
You simply can’t see through that glare. If you need to monitor an area outside a window, the illuminator has to be on the outside, pointing away from the glass.
Why Is My Beam Suddenly Dim or Flickering?
Nine times out of ten, a dim or flickering beam means one thing: power problems. Before you do anything else, swap in a fresh set of high-quality batteries. Weak or cheap batteries are the #1 culprit for poor performance.
If that doesn’t fix it, take a look at the battery contacts. A little grime or corrosion can create a weak connection. A quick wipe with a clean cloth or even a pencil eraser can often get you back up and running with a strong, steady beam.
Ready to take full advantage of the dark? At Superior Tactical LLC, we stock the high-performance illuminators, mounts, and accessories you need to own the night. Find the right gear for your mission today at https://superiortac.com.