Best Night Vision for Hunting Uncovered
When it comes to picking the best night vision for hunting, you’re really looking at three main technologies: Digital, Image Intensifier (I²), and Thermal. There’s no single “best” option—the right choice for you will come down to your budget, where you’re hunting, and what you’re after.
Navigating the Night Hunting Landscape

Diving into nocturnal hunting gear can feel overwhelming at first. You’re suddenly faced with a barrage of technical jargon like “Gen 3,” “CMOS sensor,” and “detection range.” Before you can pull the trigger on a purchase, you have to get a handle on what makes these technologies tick. It’s not about finding the one that’s superior overall, but the one that gives you the edge for how and where you hunt.
This gear is more popular than ever. The hunting and wildlife observation segment is actually the fastest-growing part of the entire night vision industry, projected to climb at a compound annual growth rate of 12.8%. You can dig into the numbers on this trend over at Grand View Research. For hunters, this boom is great news—it means more innovation, better performance, and more options hitting the shelves every year.
The Three Pillars of Night Hunting Optics
To make a smart call, you need to understand how each of these systems works. They all let you see in the dark, but they get there in fundamentally different ways, which has a huge impact on what you experience in the field.
- Image Intensifier (I²): This is the classic “green screen” night vision you’ve seen in movies. It takes what little ambient light is available—from the moon, stars, or even distant city glow—and amplifies it thousands of times. The result is a remarkably detailed and recognizable image.
- Digital Night Vision: Think of this as a supercharged digital camera. A highly sensitive sensor captures light and converts it into a digital image you see on a small screen. This tech allows for cool features like video recording and different color palettes, and the performance has gotten incredibly good lately.
- Thermal Imaging: This one is completely different. It doesn’t see light at all; it sees heat. Thermal optics build an image based on the tiny temperature differences between objects. A warm-blooded animal glows against a cooler background, making this technology the undisputed king of detection, no matter how dark it is.
Choosing the right technology is the most critical first step. A thermal scope might be perfect for spotting hogs in a foggy field, while a high-quality digital or I² scope provides the detail needed to identify a coyote at 200 yards.
To help you sort through the options, here’s a quick breakdown of how these technologies stack up for hunting applications.
Night Vision Hunting Technology at a Glance
| Technology Type | Best For | Pros | Cons |
|---|---|---|---|
| Image Intensifier (I²) | Identification at range, navigating terrain. | – Extremely detailed, natural-looking images | |
| – Excels in very low light | |||
| – No lag or screen refresh | – Expensive (especially Gen 3+) | ||
| – Can be damaged by bright light | |||
| – Needs some ambient light | |||
| Digital Night Vision | Versatility, recording hunts, budget-conscious users. | – Affordable entry point | |
| – Can be used day or night | |||
| – Features like video & Wi-Fi | – Performance depends heavily on IR illuminator | ||
| – Can have screen lag | |||
| – Image quality trails I² | |||
| Thermal Imaging | Detection, hunting in foliage or poor weather. | – Unbeatable for spotting heat signatures | |
| – Works in total darkness | |||
| – Cuts through fog, smoke, and brush | – Poor for identification (lacks detail) | ||
| – Doesn’t show terrain well | |||
| – Can be very expensive |
As you can see, each has clear trade-offs. Thinking through how they perform in real-world situations is the key to getting it right.
Comparing Your Options in the Field
Imagine you’re set up on a field edge. With an image intensifier or digital scope, you’ll need a bit of moonlight to see clearly, and a sudden fog bank could shut you down. A thermal, on the other hand, would slice right through that fog, but you might struggle to see the branches and rocks between you and your target.
Your choice here will define your entire strategy after the sun goes down. Do you prioritize spotting an animal from a half-mile away, or do you need to positively identify its features at 200 yards? The answer will point you to the right gear.
Getting to Grips with Night Vision Generations and Tech
When you first jump into the world of night vision, you’ll hear the term “Generations” thrown around a lot. This isn’t just clever marketing—it’s the bedrock classification system that tells you exactly what kind of performance you can expect in the field. Nailing down the differences between these technologies is the single most important part of choosing the right gear for hunting. It dictates everything from image clarity to how much moonlight you’ll need to see anything at all.
The demand for this equipment is absolutely exploding, largely because hunters want that nocturnal edge. In fact, the night vision device market was valued at USD 7.66 billion in 2023 and is on track to hit USD 18.03 billion by 2032. That massive growth means more companies are jumping in, which is great for us—it drives innovation and gives us more options than ever before.
The Classic Green Glow: Image Intensifier Generations
Traditional night vision—the kind with that iconic green-hued view—relies on what’s called an image intensifier (I²) tube. This tube gathers and amplifies tiny amounts of ambient light, like starlight or moonlight, to create a visible image. The “Gen” number simply tells you how advanced, and therefore how effective, that tube is.
- Generation 1 (Gen 1): This is your entry point. Gen 1 devices are the most affordable and work by amplifying existing light a few thousand times. They’re perfectly fine for short-range tasks, like seeing what’s making noise in your backyard, but they often have noticeable distortion around the edges. In truly dark conditions, you’ll absolutely need a built-in infrared (IR) illuminator to make them useful.
- Generation 2 (Gen 2): Here’s where things get serious. Gen 2 represents a massive leap forward by adding a micro-channel plate (MCP), which boosts light amplification to around 20,000 times. The result is a much brighter, clearer image with way less distortion. A quality Gen 2+ or Gen 2 HD unit is a fantastic sweet spot for most hunters, giving you solid performance for predator hunting out to a couple hundred yards without the Gen 3 price tag.
- Generation 3 (Gen 3): This is the gold standard of I² technology. By incorporating a gallium arsenide photocathode, Gen 3 tubes can amplify light by 30,000 to 50,000 times or even more. What you get is an incredibly crisp, bright picture that performs beautifully even on moonless, overcast nights. For serious hunters who need to positively identify a target at longer ranges, Gen 3 is often considered a must-have investment.
Picture this: You’re scanning a dark field. With a Gen 1 scope, a coyote at 100 yards is just a blurry shape. With a Gen 2+, it becomes a clear target. With a Gen 3, you can not only identify it as a coyote but actually see fine details, giving you the complete confidence you need to take a clean, ethical shot.
The Modern Contender: Digital Night Vision
Separate from the traditional “Generations” are digital night vision devices. Instead of an analog tube, these systems use a super-sensitive CMOS sensor—much like what’s in a digital camera—to capture light and display the image on a tiny screen inside the eyepiece.
Going digital brings its own set of perks to the table. It’s completely immune to damage from bright light, can be used in the daytime without issue, and usually comes loaded with features like video recording and different color palettes. The performance of high-end digital scopes has improved by leaps and bounds, with some 4K sensors now offering incredible clarity that can rival a Gen 2 system, especially when you fire up a good IR illuminator.
For a hog hunter on a budget who wants to record their hunts, a quality digital scope is an almost perfect fit. On the other hand, a predator caller who needs the best possible performance without an IR light will still find that Gen 3 I² is king. To really get into the weeds on this, you can check out our full guide on thermal, digital, and analog night vision to see how they all stack up.
Real-World Performance: How They Compare
Let’s put this into a real-world hunting scenario. A smart old coyote hangs up at 200 yards on a pitch-black, moonless night.
- A Gen 2+ Scope: You’ll have a usable image. You can definitely identify the animal and make the shot, but the view might have some electronic noise or “sparkles” in it.
- A High-End Digital Scope: With its IR illuminator on, this will produce a very clean, high-resolution black-and-white image. The detail will be outstanding, making target ID a breeze.
- A Gen 3 Scope: This device will give you the brightest, cleanest view with the least amount of noise. You probably won’t even need an IR illuminator, which keeps you stealthier and gives you the most natural-looking scene.
Ultimately, your choice boils down to your specific hunting needs and what you’re willing to spend. Just know that every step up in generation or technology offers a real, tangible advantage out in the field.
Matching the Optic to Your Hunting Style
Knowing the tech inside your optic is only half the story. How a piece of gear actually performs in the field has just as much to do with its form factor—how you carry it, look through it, and attach it to your rifle. Choosing the best night vision for hunting is all about finding a system that feels like a natural extension of how you already operate.
The physical design of a device really dictates its best use. A dedicated scope is the definition of simplicity, while a clip-on offers incredible versatility. A handheld monocular is the undisputed king of scanning, but you’re not aiming with it. Nailing this choice is fundamental to your success after the sun goes down.
This decision tree gives you a quick visual on how to weigh budget against image quality and heat detection when you’re first starting out.
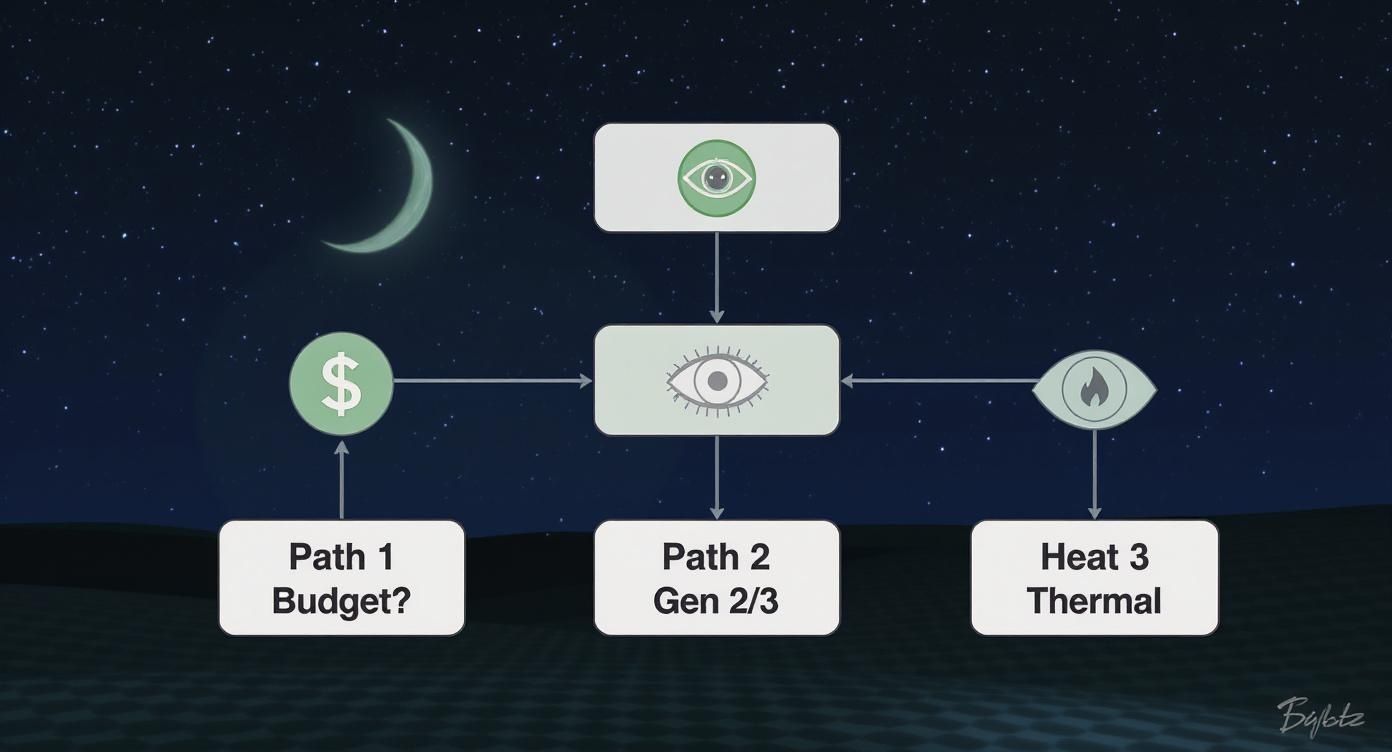
It’s a simple way to point yourself in the right direction based on what matters most to you, taking a lot of the guesswork out of that first big decision.
Dedicated Night Vision Scopes
For the hunter who just wants a straightforward, tough, and reliable setup, the dedicated scope is hard to beat. These optics are purpose-built for night hunting and mount directly to your rifle’s rail, just like any daytime scope.
There’s no messing around with adapters or worrying about your zero shifting. You mount it, sight it in, and you’re good to go. That simplicity is its biggest advantage, especially if you have a rifle set aside just for night duty. Think of a coyote hunter sitting over a bait pile—the rugged, set-it-and-forget-it nature of a dedicated scope is perfect for that job.
The Versatility of Clip-On Systems
But what if you love your current daytime scope and don’t want to mess with a good thing? That’s where a clip-on system really shines. These units mount in front of your favorite scope, using its glass and reticle for aiming while supplying the night vision or thermal image.
The main draw here is pure flexibility. You can hunt hogs one night, then pop the clip-on off and be ready for a deer hunt the next morning with the exact same rifle and scope you know and trust. No re-zeroing is needed. It’s an awesome option for the “one rifle” hunter, though you’ll often pay a bit more for the convenience and add some weight to your rig.
A key takeaway is that your environment dictates your gear. A hunter moving through thick woods after hogs needs a different setup than one glassing open ranch land for coyotes. There is no one-size-fits-all solution.
Handheld Monoculars and Binoculars
Remember, not every night vision device needs to be attached to a gun. In fact, some of the most successful hunters I know run a two-part system: a handheld for scanning and a rifle-mounted optic for shooting.
There’s a good reason the portable night vision market, valued at USD 7.5 billion in 2023, is projected to hit USD 11.2 billion by 2028. It’s just so much more comfortable and safe to scan a wide field with a handheld monocular or a pair of digital night vision binoculars than it is to sweep the area with your rifle. It keeps your muzzle pointed in a safe direction and saves your arms from fatigue.
Once you’ve located a target, then you can bring up your rifle for the shot. You can explore some great digital binoculars with night vision to get a feel for how they fill this role.
Helmet-Mounted Goggles for Mobility
When things get really dynamic, nothing beats a helmet-mounted setup. This is the go-to for hog hunters who are actively stalking through thick brush or anyone who has to navigate tricky terrain in total darkness.
With helmet-mounted goggles or a monocular, you get constant, hands-free awareness of your surroundings. You can walk, climb, and keep your rifle shouldered without ever losing your vision. Aiming is usually handled with a weapon-mounted infrared (IR) laser. You just look at the target through your goggles, “paint” it with the invisible laser dot, and take the shot. It’s an incredibly fast and intuitive system for closer engagements, making it the top choice for hunters on the move.
Key Features That Define a Successful Hunt
Okay, so you’ve figured out the type of technology and the style of optic you want. Now comes the hard part: sifting through the specs. Two scopes can look almost identical on paper, but a few key details will make all the difference when you’re out in the field.
Learning to read a spec sheet and understand what those numbers actually mean for your hunt is what separates a good purchase from a great one. These are the practical details that determine whether you can spot, identify, and take a clean shot after dark.
Decoding Resolution and Sensor Quality
Everyone gets hung up on resolution, but it’s not the whole story. A huge pixel count (like 3840×2160 for digital scopes) or high line pairs per millimeter (lp/mm) for traditional tubes doesn’t guarantee a great image. The quality of the sensor or tube is just as important, if not more so.
Think of it this way: a high-resolution number paired with a cheap sensor is like putting budget tires on a race car. You’ll get a noisy, grainy picture that’s tough to use. On the other hand, a top-tier sensor with a slightly lower resolution can produce an image that’s crisp, clean, and incredibly clear. The goal is to find a healthy balance, always leaning toward better sensor quality.
The Critical Ranges: Detection, Recognition, and Identification
Manufacturers love to throw around big range numbers, but you have to know how to read them. These figures are always broken down into three different categories, and for a hunter, only one of them really matters.
- Detection Range: This is the absolute maximum distance the optic can pick up a man-sized object or heat source. A thermal scope might detect a hog at 2,600 meters, but at that distance, it’s just a blurry, glowing pixel. It just tells you something is out there.
- Recognition Range: Now we’re getting closer. At this range, you can tell what you’re looking at in general terms—for example, you can distinguish a four-legged animal from a person. That tiny pixel from 2,600 meters might start to look like an animal at around 1,000 meters.
- Identification (ID) Range: This is the number that counts. It’s the distance at which you can positively identify your target and its specific features. That hog you spotted way out there might only be identifiable as a mature boar versus a sow at 300 meters.
An optic’s real value is its ID range, not its detection range. Seeing a heat blob at 1,500 yards is useless if you can’t confirm it’s a coyote until it’s inside 200 yards. Always base your purchase on the effective ID range for the animals you hunt.
To help you cut through the marketing jargon, here’s a quick-glance table of what to look for when you’re comparing spec sheets.
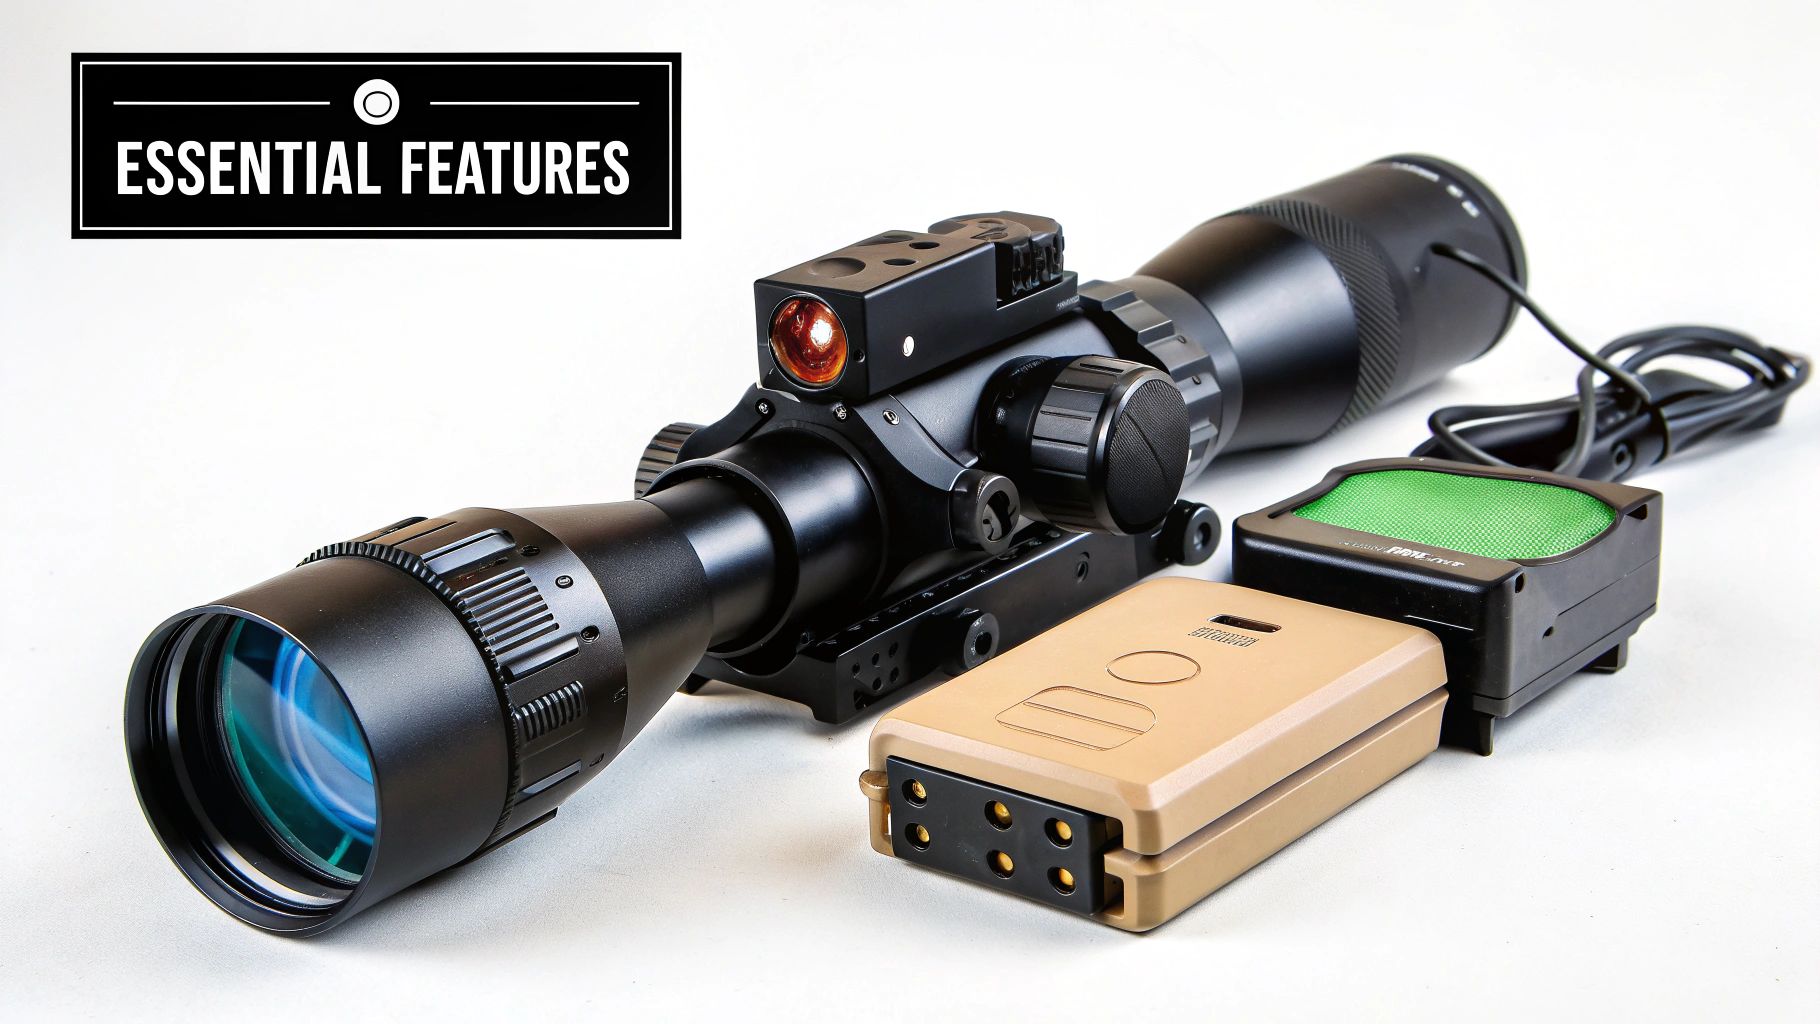
Essential Night Vision Feature Checklist
This table breaks down the most important technical specs and translates them into what they actually mean for you, the hunter, in the field.
| Feature | What It Means for a Hunter | High-Performance Indicator | Budget-Friendly Indicator |
|---|---|---|---|
| Resolution | The level of detail in the image. Higher resolution helps in identifying targets at longer distances. | 640×480 (Thermal) or 64+ lp/mm (I²) | 384×288 (Thermal) or 45-51 lp/mm (I²) |
| Sensor/Tube Quality | Determines image clarity, contrast, and performance in low light. A good sensor reduces “noise.” | Low NETD (<25 mK for thermal) or high SNR (30+ for I²) | Higher NETD (40-50 mK for thermal) or lower SNR (20-25 for I²) |
| ID Range | The maximum distance you can confidently identify your target (e.g., boar vs. sow). This is your effective hunting range. | 300+ yards for common game | 100-150 yards for common game |
| Battery Life | How long you can stay in the field. Cold weather will significantly reduce this. | 8+ hours, external power compatible | 4-6 hours, internal battery only |
| IR Illuminator | Your “invisible flashlight.” Crucial for digital and lower-gen I² units to see in total darkness. | External, focusable, 940nm (stealth) or 850nm (power) | Built-in, non-focusable, single-mode |
Use this checklist as your guide. It will help you quickly compare different models and make sure you’re getting the performance you need for the price you’re paying.
Powering Your Hunt: Battery Life and External Options
There’s nothing worse than having your optic die midway through a great hunt. Most scopes have internal batteries that last anywhere from 4 to 10 hours. While that sounds fine on paper, cold weather can easily cut that runtime in half, sometimes by even more than 50%.
This is why I never go out without a small, external USB power bank. Plugging one into your scope will keep you running all night long and ensures your internal battery stays charged. It’s a cheap piece of insurance that can save your hunt. You can find more tips like this by reading about the top features for a quality night vision monocular, as many of the core principles are the same for scopes.
Onboard Recording and IR Illuminators
While not a must-have for everyone, onboard video recording has become a standard feature for a reason. It’s fantastic for reviewing your shots to see exactly where you hit, sharing the excitement with buddies, or just capturing a great memory.
Finally, never underestimate the power of a good infrared (IR) illuminator. For digital and Gen 1 or Gen 2 devices, it’s an absolute game-changer. A quality IR works like a powerful flashlight that only your scope can see, cutting through the darkness and dramatically boosting your image clarity and range. Most scopes come with a basic built-in IR, but upgrading to a powerful, focusable aftermarket illuminator is one of the single best investments you can make to get more performance out of your optic.
Top Night Vision Picks for Your Hunt
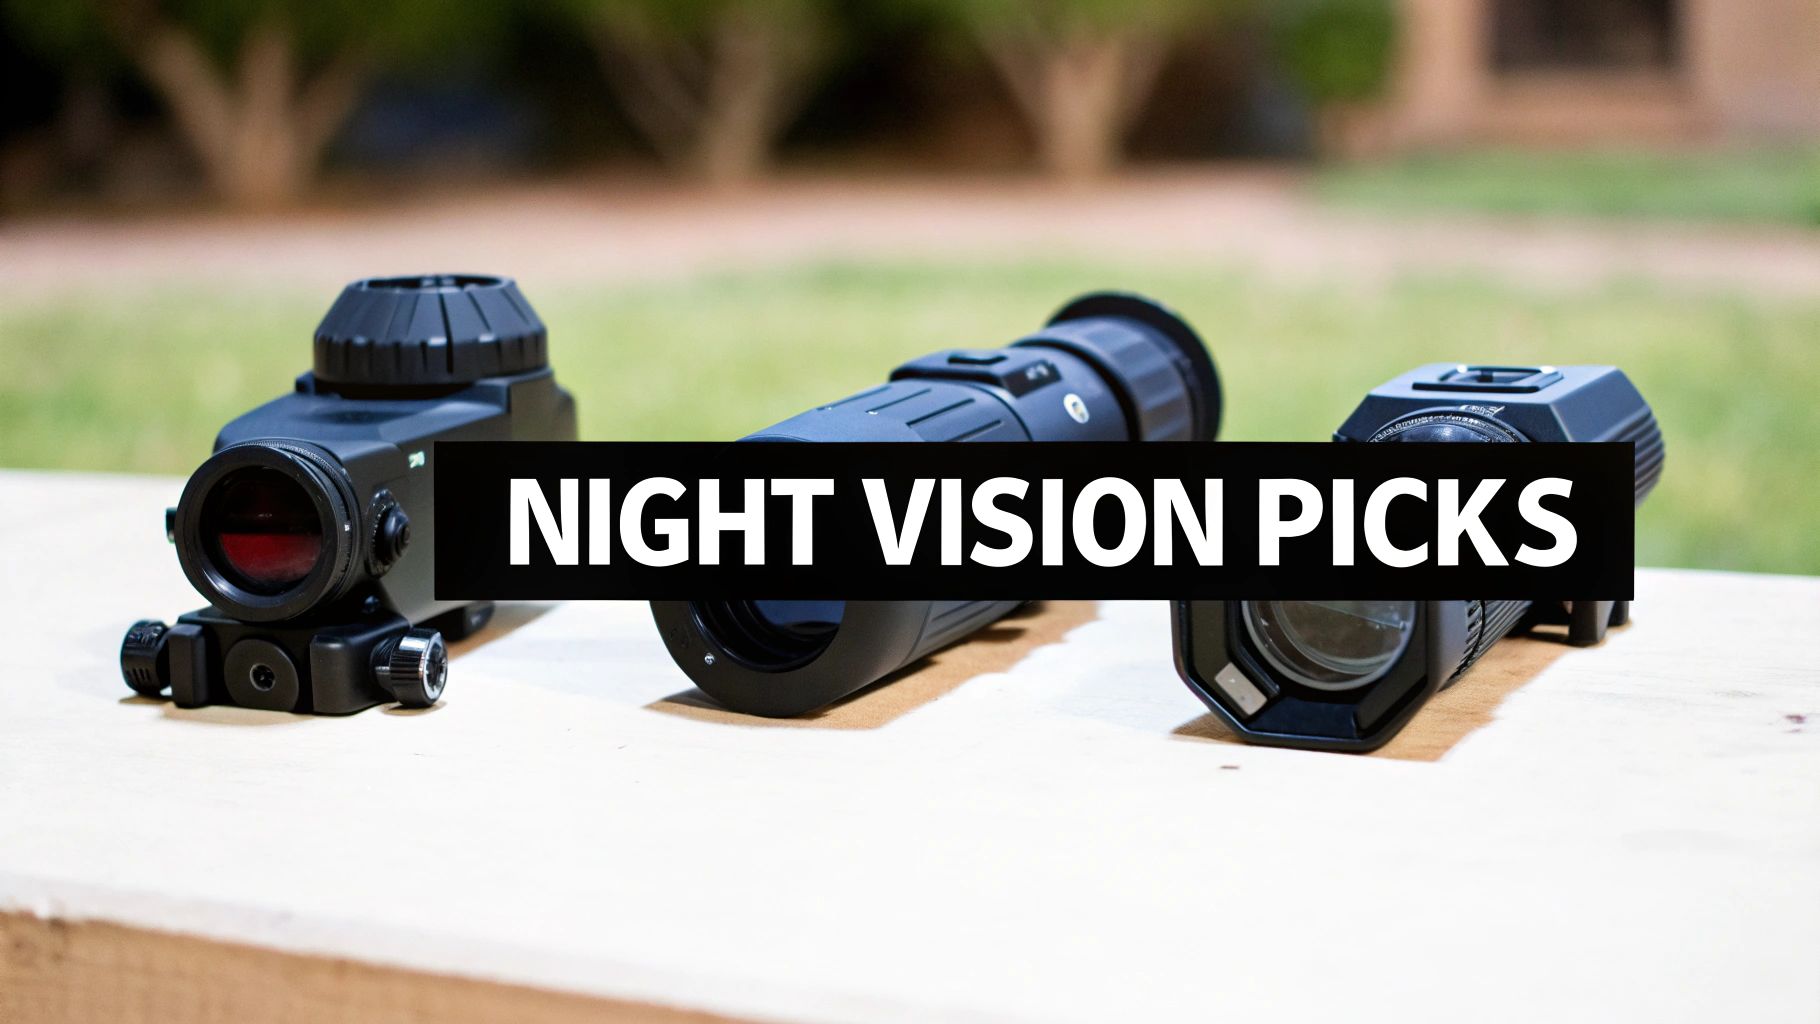
Alright, we’ve covered the tech, the different form factors, and the key specs. Now it’s time to put it all together and figure out what actually works in the field. The truth is, the best night vision for hunting isn’t one specific scope—it’s the system that’s perfectly matched to your hunting grounds, your target animal, and your wallet.
Let’s walk through a few real-world hunting scenarios. I’ll break down what gear I’d recommend for each and why. This should help turn all that technical jargon into a clear path for choosing your own setup.
The Open-Country Coyote Hunter
Think about a typical coyote stand: you’re overlooking a huge, dark field, trying to call in a wary predator from a long way off. Your biggest challenges here are spotting that coyote the second it breaks cover and having enough clarity to make a clean, ethical shot.
For this kind of hunting, a high-resolution thermal rifle scope is king. It’s not even a contest. Thermal lets you see an animal’s heat signature against the cold ground from incredible distances, often spotting them well over 1,000 yards out. That early detection is a game-changer.
Once you spot that heat blob, a quality scope with at least a 640×480 sensor will give you the detail you need to positively identify it as it creeps closer. You can watch its every move and get set for the shot long before it has any idea you’re there.
The Close-Quarters Hog Hunter
Now, let’s head into the thick stuff. Imagine you’re stalking feral hogs through dense woods or tangled brush. Things happen fast in there. Your priorities completely shift to situational awareness, getting on target quickly, and just being able to move through the terrain without tripping over every root.
The go-to setup here is a helmet-mounted PVS-14 monocular paired with a weapon-mounted IR laser. This leaves both your hands free and lets you keep your head up, scanning everything around you. You can navigate the woods naturally instead of being glued to your rifle scope.
When a hog pops out, you just bring up your rifle, hit the switch on your invisible IR laser, and put the dot on target. It is an incredibly fluid and fast way to hunt inside 100 yards. A good Gen 2+ or Gen 3 monocular will give you the sharp image you need to move with confidence.
Your budget is the single biggest factor here. A sub-$1000 digital scope can get you in the game for short-range pest control, but a premium thermal optic in the $3000+ range will fundamentally change what’s possible on a long-range predator hunt.
The All-Around Varmint Hunter
What if you’re a jack-of-all-trades? One night you might be shooting raccoons by the barn, and the next you’re set up on a pasture edge waiting for a fox. You need something versatile that works well without dedicating an entire rifle to night hunting.
This is where a high-quality digital night vision clip-on system really shines. These units mount on a rail in front of your favorite daytime scope, so you get to use the optic, reticle, and rifle you’ve trained with for years. There’s no need to re-zero or learn a new system.
Modern digital clip-ons with 4K sensors offer a surprisingly crisp image that can hang with Gen 2 gear, especially when you add a good IR illuminator. They also usually come with features like video recording, which is perfect for hunters who want solid performance across a wide range of distances and scenarios.
Setting Your Budget Expectations
It’s crucial to know what your money gets you, because in the world of night vision, price and performance are tightly linked.
- Under $1000: This is the entry-point for digital night vision scopes. They’re a fantastic way to get started and are perfectly effective for pest control or short-range hunting out to 100-150 yards. You’ll be relying on your IR illuminator, but they get the job done without breaking the bank.
- $1000 – $3000: This is the sweet spot for most serious hunters. In this bracket, you’ll find high-end digital scopes, excellent thermal optics (often with a 384×288 sensor), and really solid Gen 2+ image intensifier gear. You’re buying great performance for shots out to several hundred yards.
- $3000+: Welcome to the top tier. This is where you find the best thermal scopes with 640×480 sensors and true military-grade Gen 3 image intensifier tubes. The clarity, detection range, and ability to see in the darkest conditions are simply on another level.
Answering Your Night Vision Hunting Questions
After digging into all the tech specs and features, it’s completely normal to still have a few questions floating around. Getting into night hunting is a big commitment, and you want to be sure you’ve got all the facts before dropping money on new gear. Let’s tackle some of the most common questions we hear from hunters just like you.
My goal here is to clear up any lingering confusion so you can make your choice with total confidence.
Is Hunting at Night Even Legal?
This is, without a doubt, the first and most critical question you need to answer. The short answer is: it all comes down to where you are and what you’re hunting.
There’s no blanket federal law covering all night hunting. Every state makes its own rules, and they can be incredibly specific.
- Big Game: Forget about hunting animals like deer or elk at night. That’s almost universally illegal across the country.
- Predators & Varmints: This is where things open up. Many states are perfectly fine with, and some even encourage, hunting predators like coyotes or invasive species like feral hogs after dark.
- The Fine Print: Even in states where it’s legal, you’ll find strict regulations. These rules might specify what kind of tech you can use (thermal vs. IR light), which properties are open to night hunting, and the specific seasons.
Your first step, before you even browse for a scope, is to check your state’s most current hunting regulations. A quick trip to your state’s Department of Fish and Wildlife website is an absolute must. Getting this wrong can lead to huge fines, losing your hunting license, and having all your expensive gear confiscated.
What’s the Real Difference Between Thermal and Digital?
This one trips up a lot of people. Both technologies let you see in the dark, but how they do it is completely different, and that changes everything about how you’ll hunt with them.
Thermal imaging doesn’t see light at all—it sees heat. It creates an image by detecting tiny differences in temperature, which is why a warm-blooded animal practically glows against a cooler background. This makes thermal the undisputed king of detection. You can spot a coyote through fog, light brush, and in pitch-black conditions where your eyes see nothing.
Digital night vision, on the other hand, works like a high-powered digital camera that’s incredibly sensitive to light. It gathers whatever ambient light is available (from the moon or stars) or uses an infrared illuminator to light up the scene, displaying it on a screen. This gives you a much more detailed, recognizable image, making it superior for identification. You can actually see an animal’s features, not just its heat blob.
So, which is the best night vision for hunting? It really depends on your style. If you need to scan a massive field to find your target, thermal is your tool. If you need to positively identify that target before you shoot, digital gives you the detail to do it.
Do I Really Need to Spend Thousands of Dollars?
Absolutely not. The idea that you need a $5,000 scope just to get started is a total myth. Your budget should match your personal needs and what you realistically expect the gear to do.
You can find some incredibly capable, entry-level digital night vision scopes for under $1,000 these days. Are they going to compete with top-tier thermal? No. But for controlling pests around the farm or hunting hogs over a bait pile out to 150 yards, they work great.
When you start spending more, you’re paying for tangible performance upgrades. You get longer identification ranges, a cleaner image with less digital noise, and the ability to see clearly without blasting an IR illuminator everywhere. A high-end thermal or a true Gen 3 unit offers a massive advantage, but it’s definitely not the price of admission to get into the game.
Ready to find the right optic for your hunt? The team at Superior Tactical LLC has spent over a decade out in the field and behind the counter, helping hunters match the perfect night vision and thermal gear to their mission. Whether you need a top-of-the-line Gen 3 monocular or a solid digital scope that won’t break the bank, we’ve got the equipment and the real-world experience to help.
Check out our hand-picked collection of optics and accessories at https://superiortac.com.